I don’t know if it‘s a spray paint. But it was right above you
2 Likes
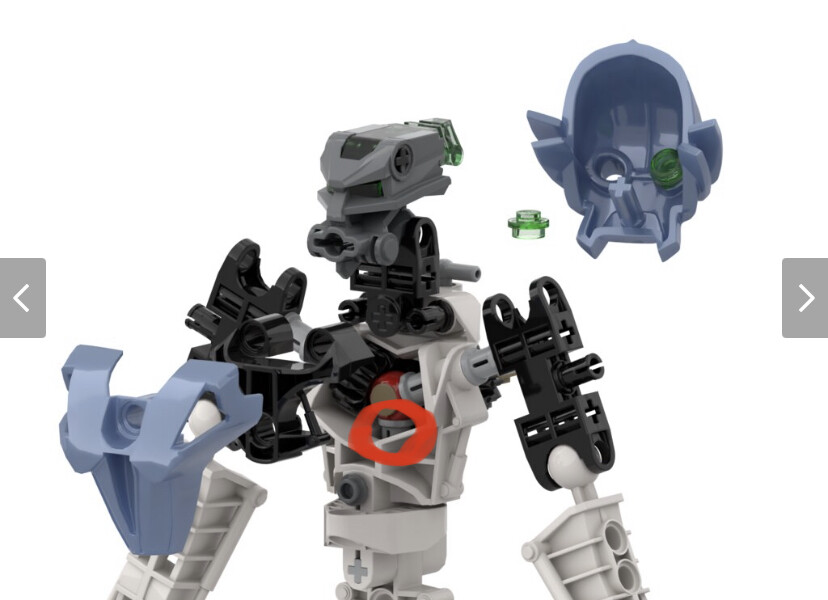
It’s not connected to anything, it just sits above the hip piece. Without it, the ball and center axle is pushed downwards, providing considerably less friction and resulting in the axle sticking out the back at a noticeable angle.
Bushings aren’t exactly sturdy parts so they’re likely to crack trying to force the parts in there in the wrong order. I’d reccomend doing the bushing arm first, then the ball, then the geared arm… then flip the torso upside down, drop the last bushing in there, and finally put the hips there to keep it in place.
I believe @Vahki6 is working on comprehensive instructions and will share them with the community when the winning artwork finalises the design. When they’re done, I’ll update the post and link them here.
1 Like
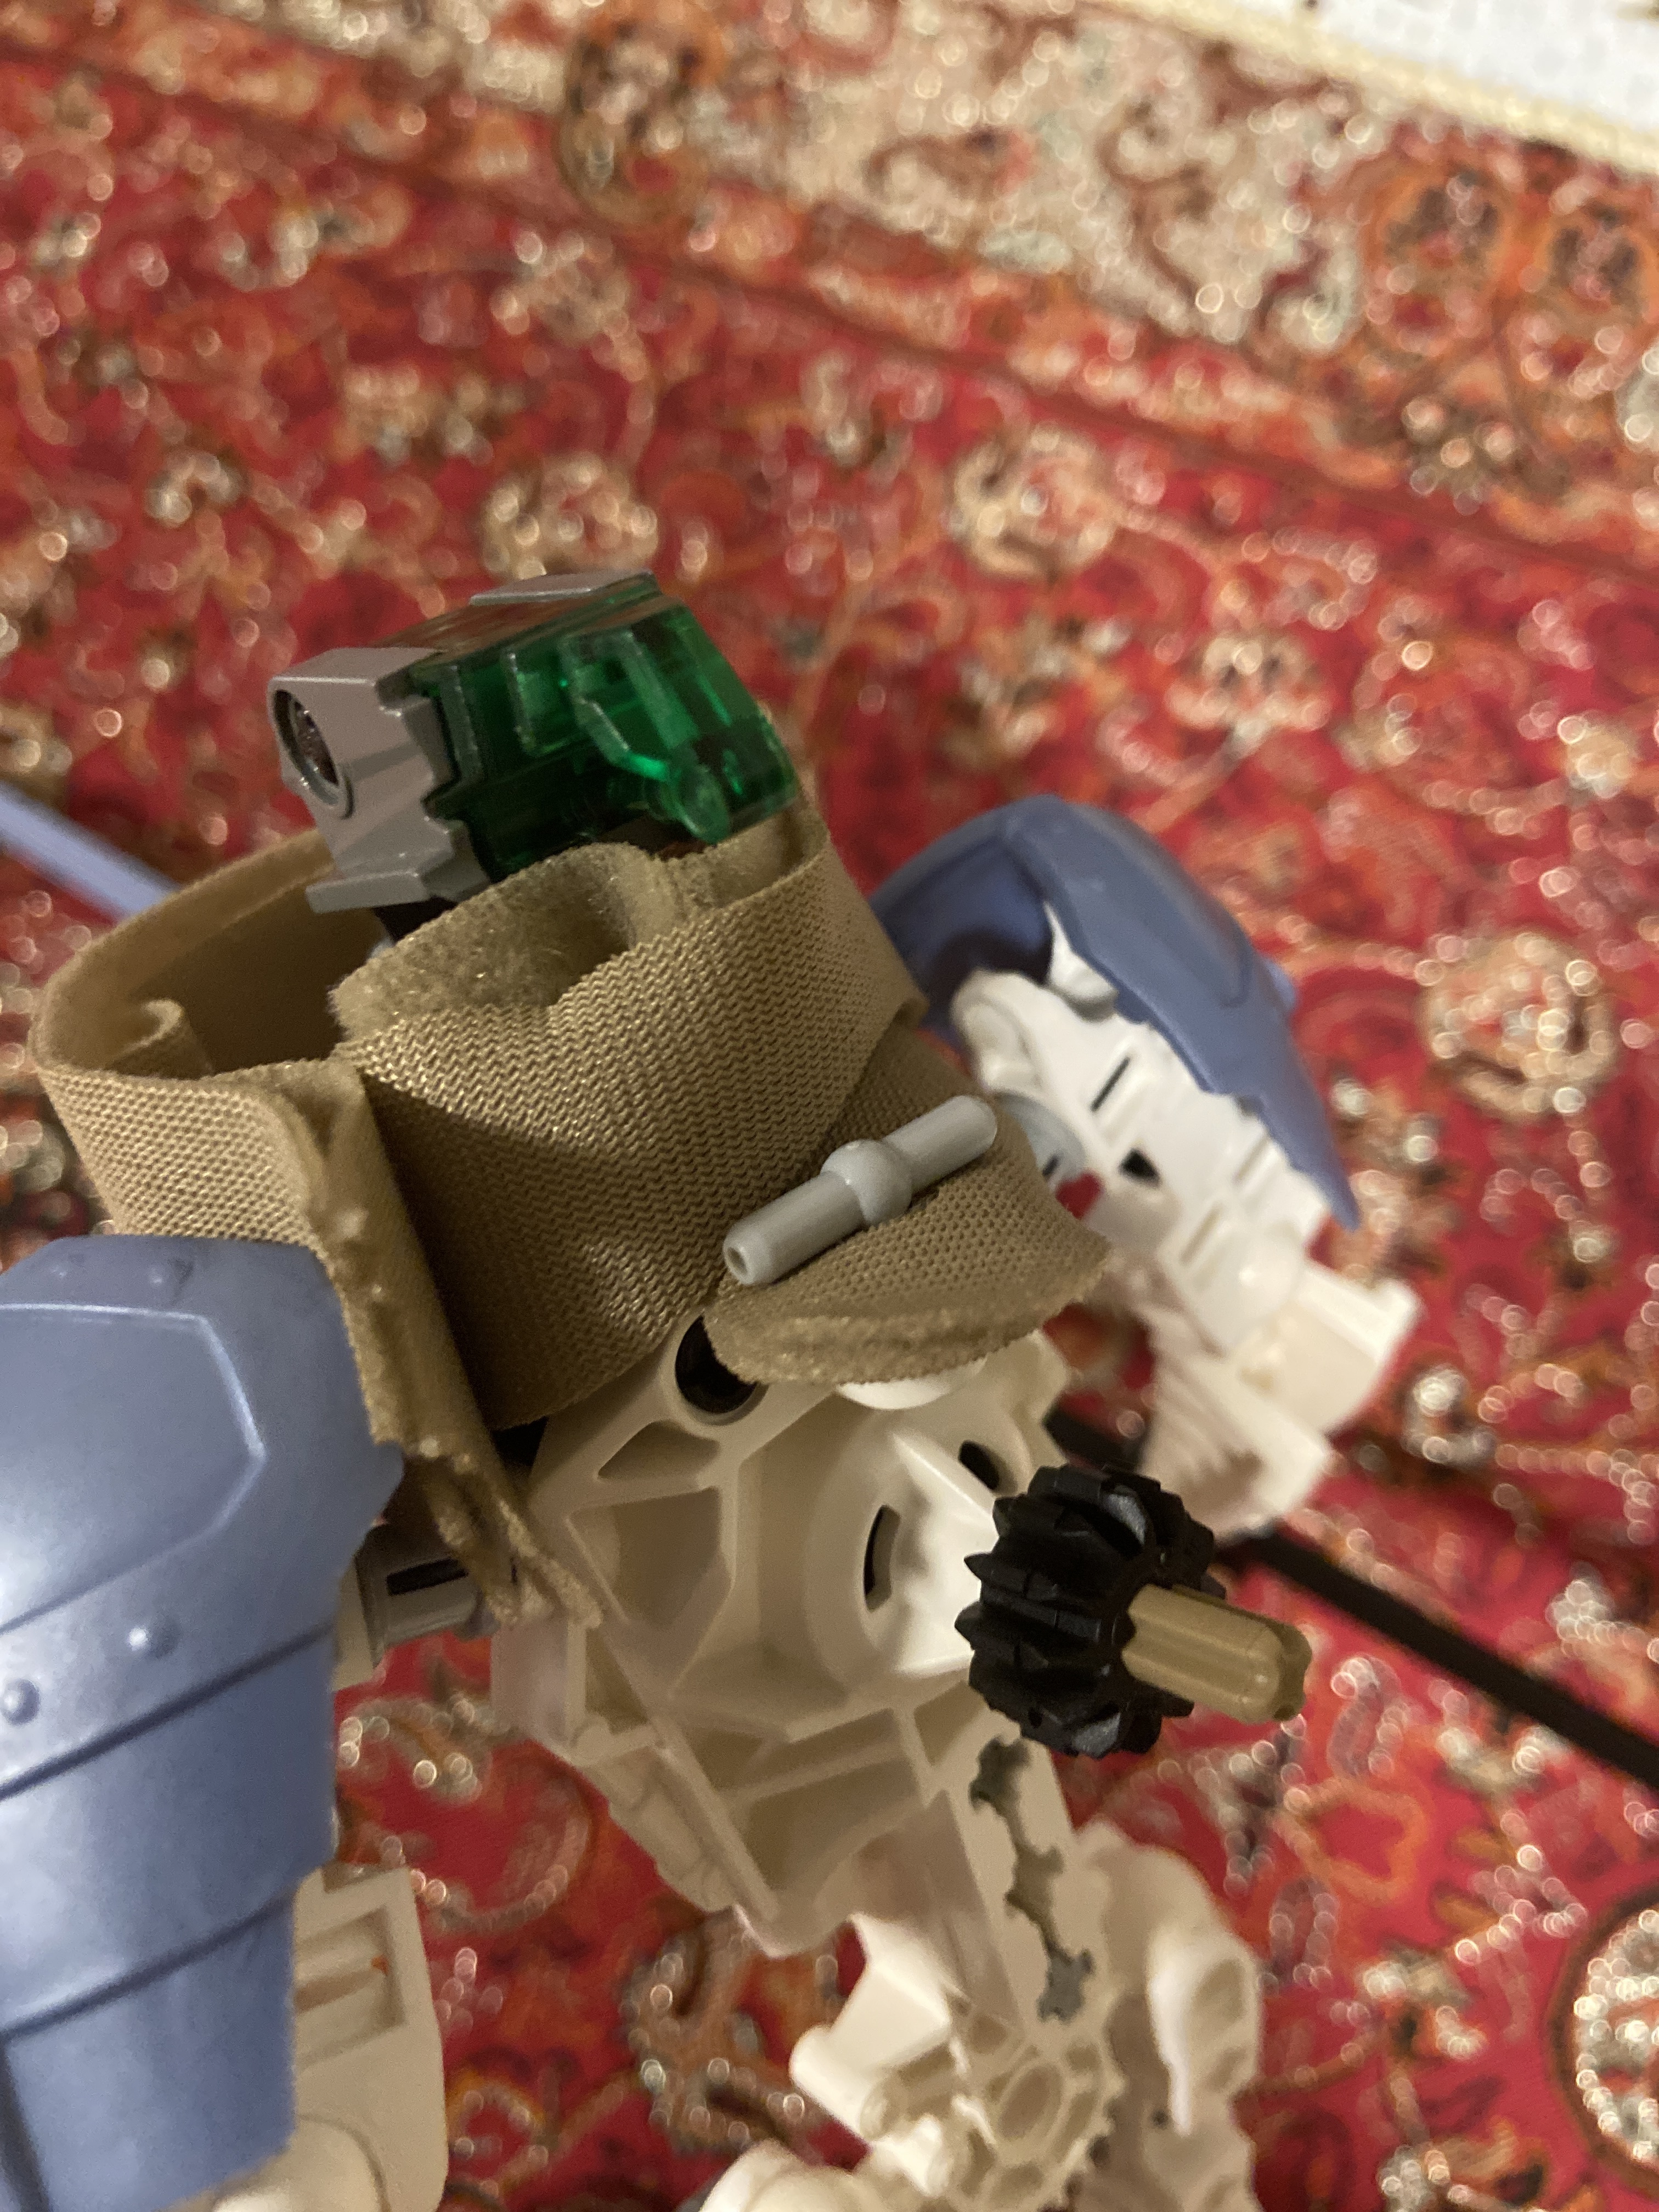
Does anyone figure out how to attach Kuals’s scarf ?
Is the scarf a Lego piece ?
Yes, it comes from the star wars ultra build set of Rey
1 Like
It seems to me like you just line up the holes, pin it down, and then wrap it around the face twice.
1 Like
Ooh nice thank you added to my want list. Do you know exactly what axel is being used for the chest gear as well
1 Like
It may take a few tries to fold it (if you want it to look neat). My steps for folding the scarf is (1) folding the scarf in half, (2) pinning it with the t-shaped piece, (3) wrap it firmly around Kualus’ mouth 2x. It won’t match the way it is wrapped in the original moc, but hope it gives some inspiration
I believe the original moc designer tied the scarf, but had no luck doing that without exposing the bottom half of Kualus’ face
The scarf is wrapped almost the exact same way @BionicMamba97 did it here, only it wraps around the neck first after pinning it at the back, then around the front of the mask.
Although I highly encourage trying other methods. Something tied a little more realistically would probably look a lot better than how I haphazardly slapped it on.
1 Like
While that would certainly lock the arms, you’d also be sacrificing the appearance of the back of the model.
Overall, I don’t see what the big deal is about “locking” the gear function; this isn’t the first Kualus gearbox mod I’ve seen, but it feels more like a general Metru build mod than something that needs to be perfected for Kualus specifically.
If people are concerned about the stresses on the parts, then why not just use the standard gearbox build?
1 Like
now wait a sec.
How did those feet connect?!
Appears to be 2 long lift arm between the foot and ankle. That would allow the joint to connect will still be able to be removed. Only a guess though.
It is a very interesting connection to say the least. There is a 2 long liftarm connected to the axel on the foot and what looks like a rod price that goes all the way through the ball joint from the back and connects into the liftarm.
You can just see the rod sticking out of the back of the ball joint so it’s not just stuck in there forever.
1 Like
Tis possible, but it takes some black magic.

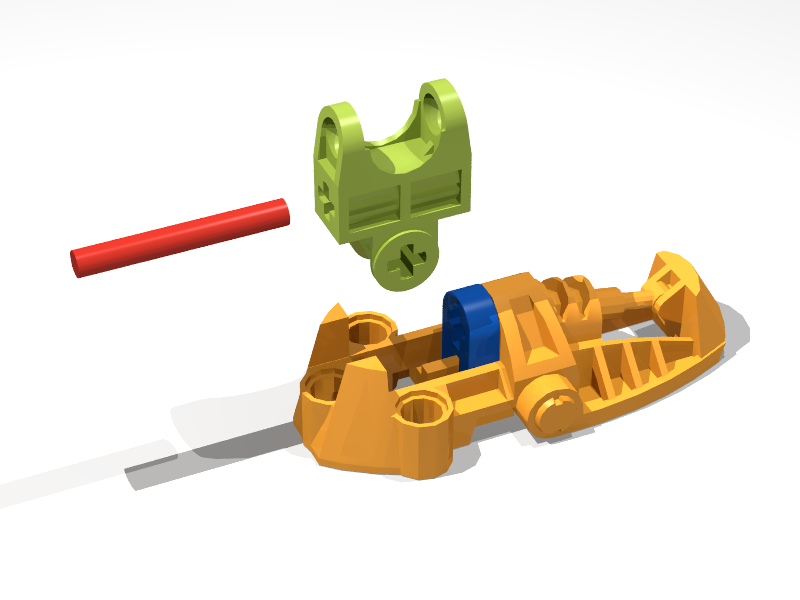
I literally provided a back view of the foot in the breakdown - all 4 parts used are visible - no guesswork required.
But yeah, this is exactly how it was done:
6 Likes