Alright, some people wanted to see my drawing process so here it is. I am going to use my latest Artakha drawing as a tutorial for ya, so let´s begin.

(This is just what I do, people have different styles and preferences)
First some general INFO:
I use a program called “AUTODESK SKECTHBOOK PRO” for my illustrations, but since everything I do is with a mouse (yes a mouse, I don´t have a tablet) I sketch on paper.
There are 6 steps:
Step 1: Concept and reference.
So first up is concept and reference this means coming up with an idea, since we are drawing Artakha, idea is already there, cool, next get some reference.
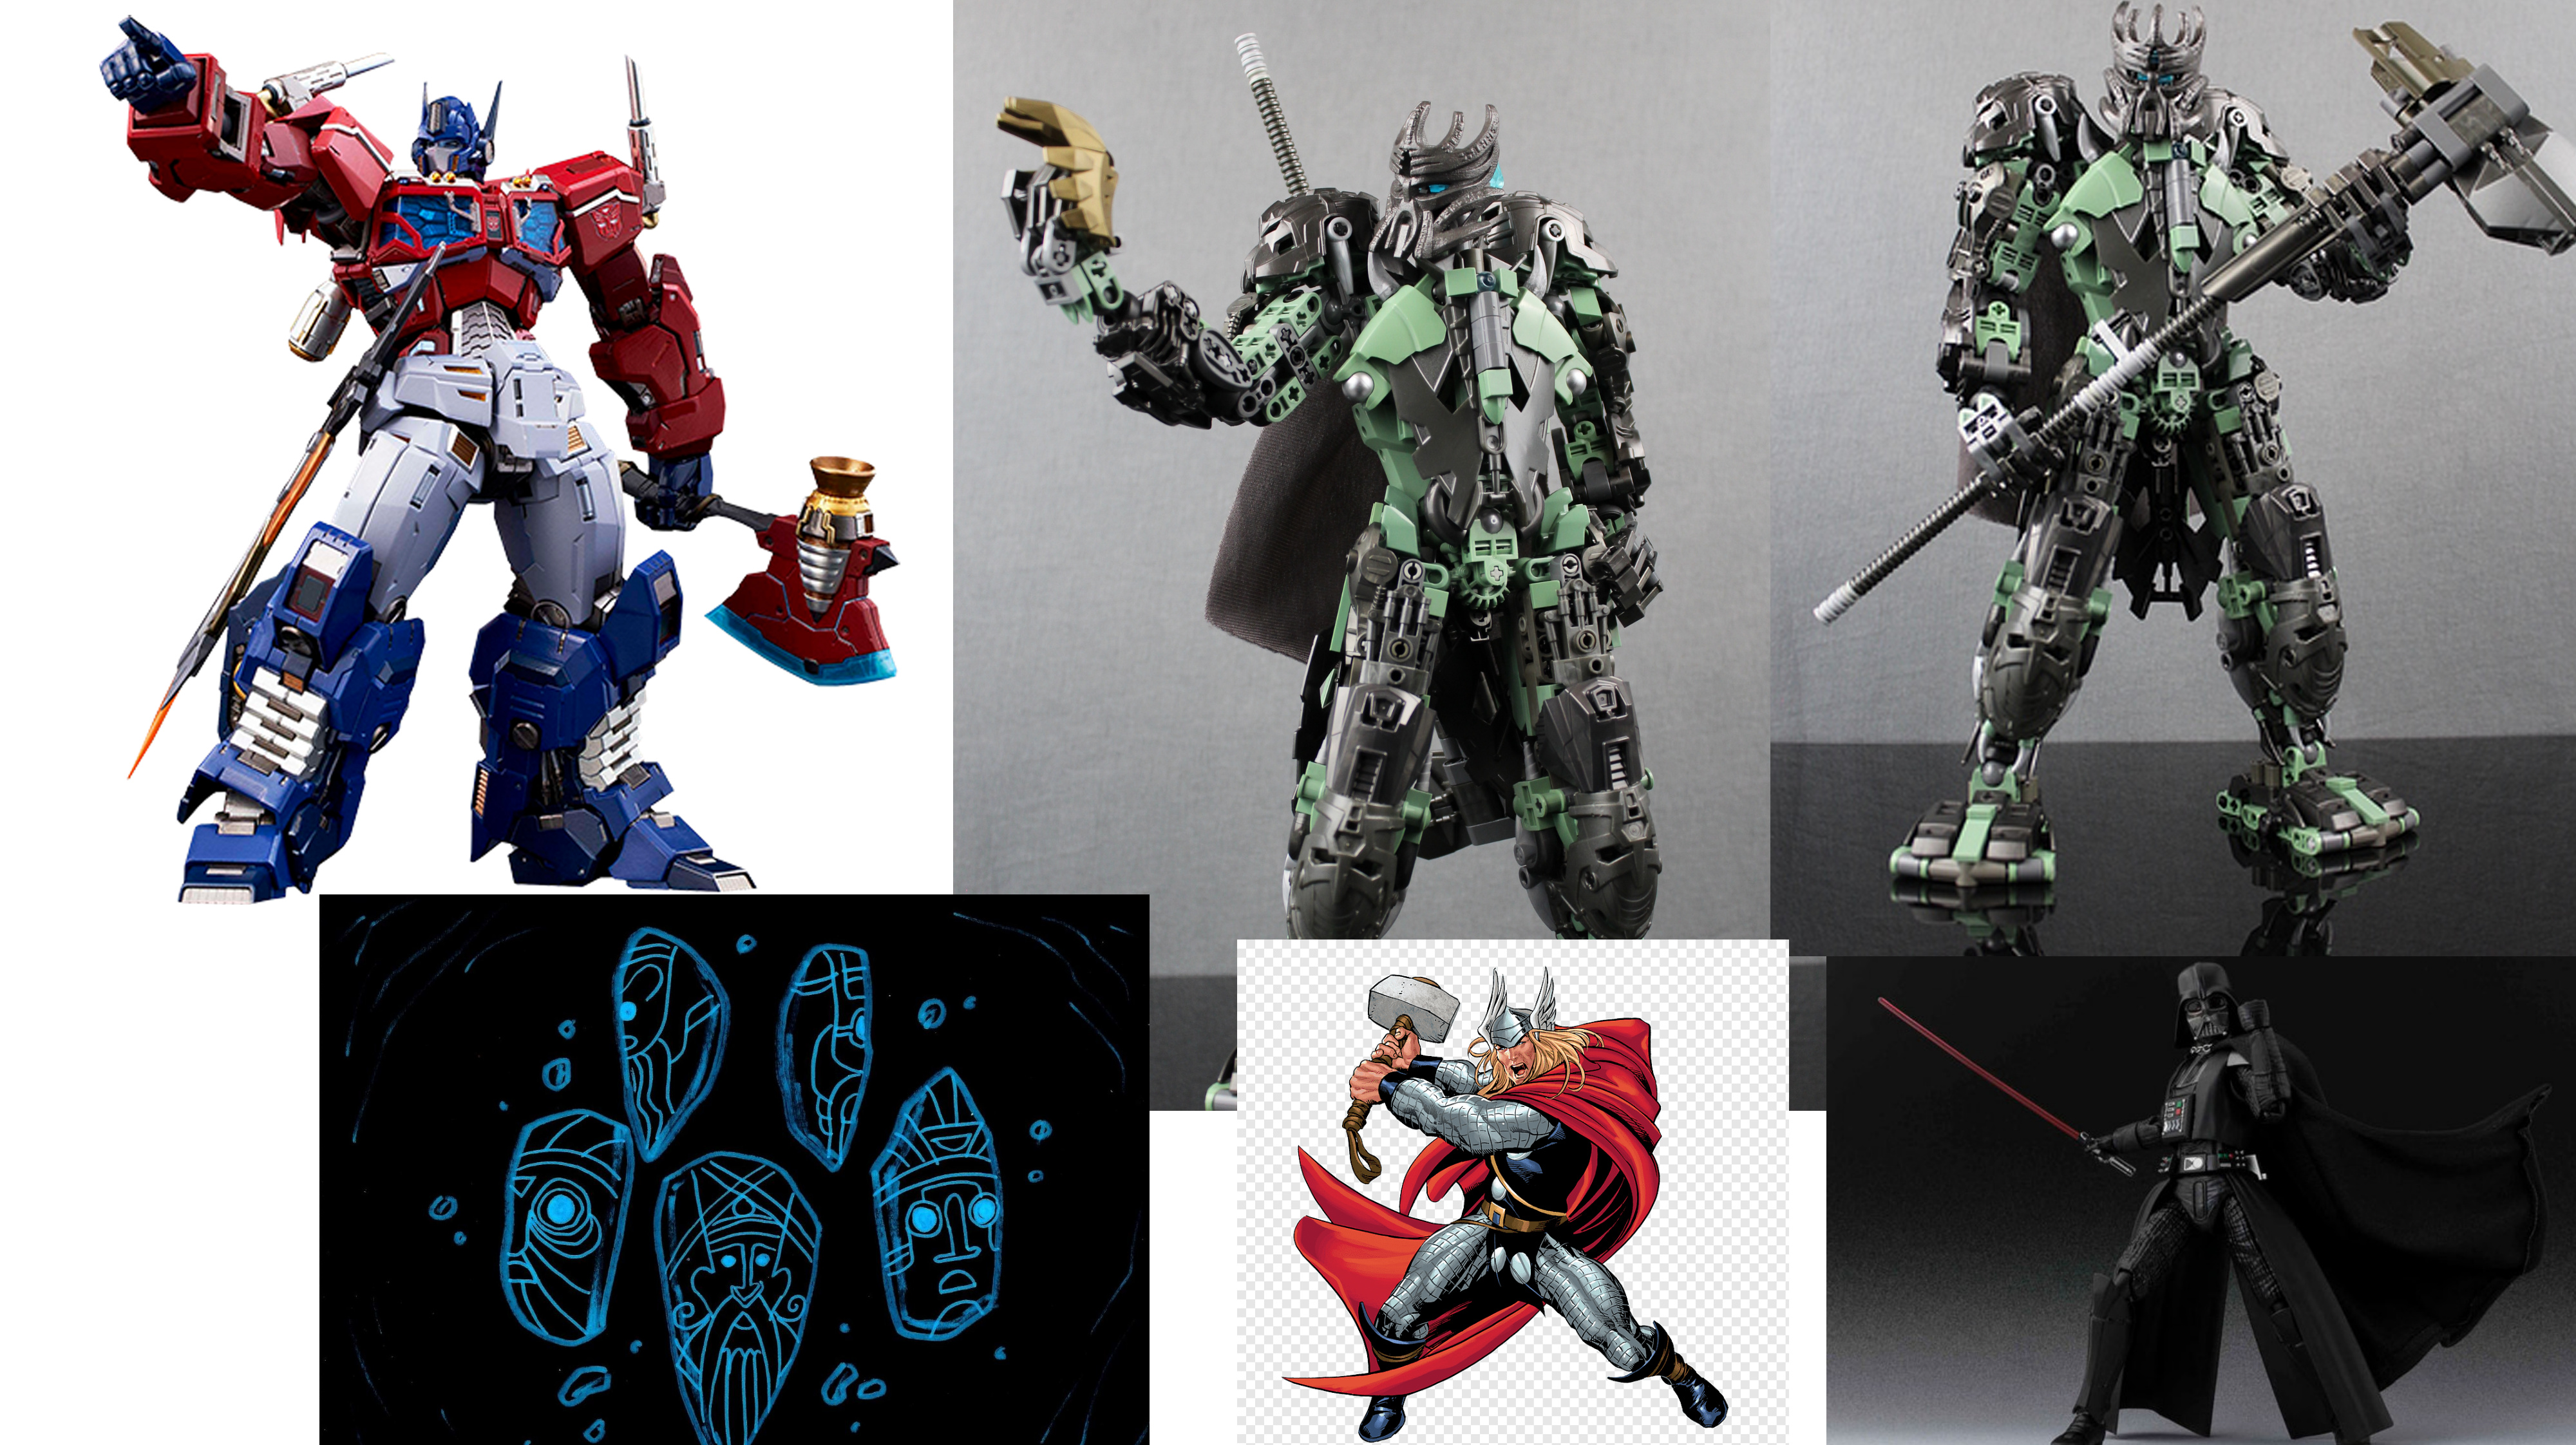
Of course some pictures of the winning MOC, then I chose some characters that share some features with Artakha for pose reference like Thor with his hammer, Optimus prime for his details, and Vader cause, well he is cool. For the runes, as I have said before, I use some pictures of the movie “ATLANTIS”
Step 2: Sketching.
Next step is sketching, which is one of the longest steps because I want to make sure that the design makes sense, so I try many different poses and ideas.
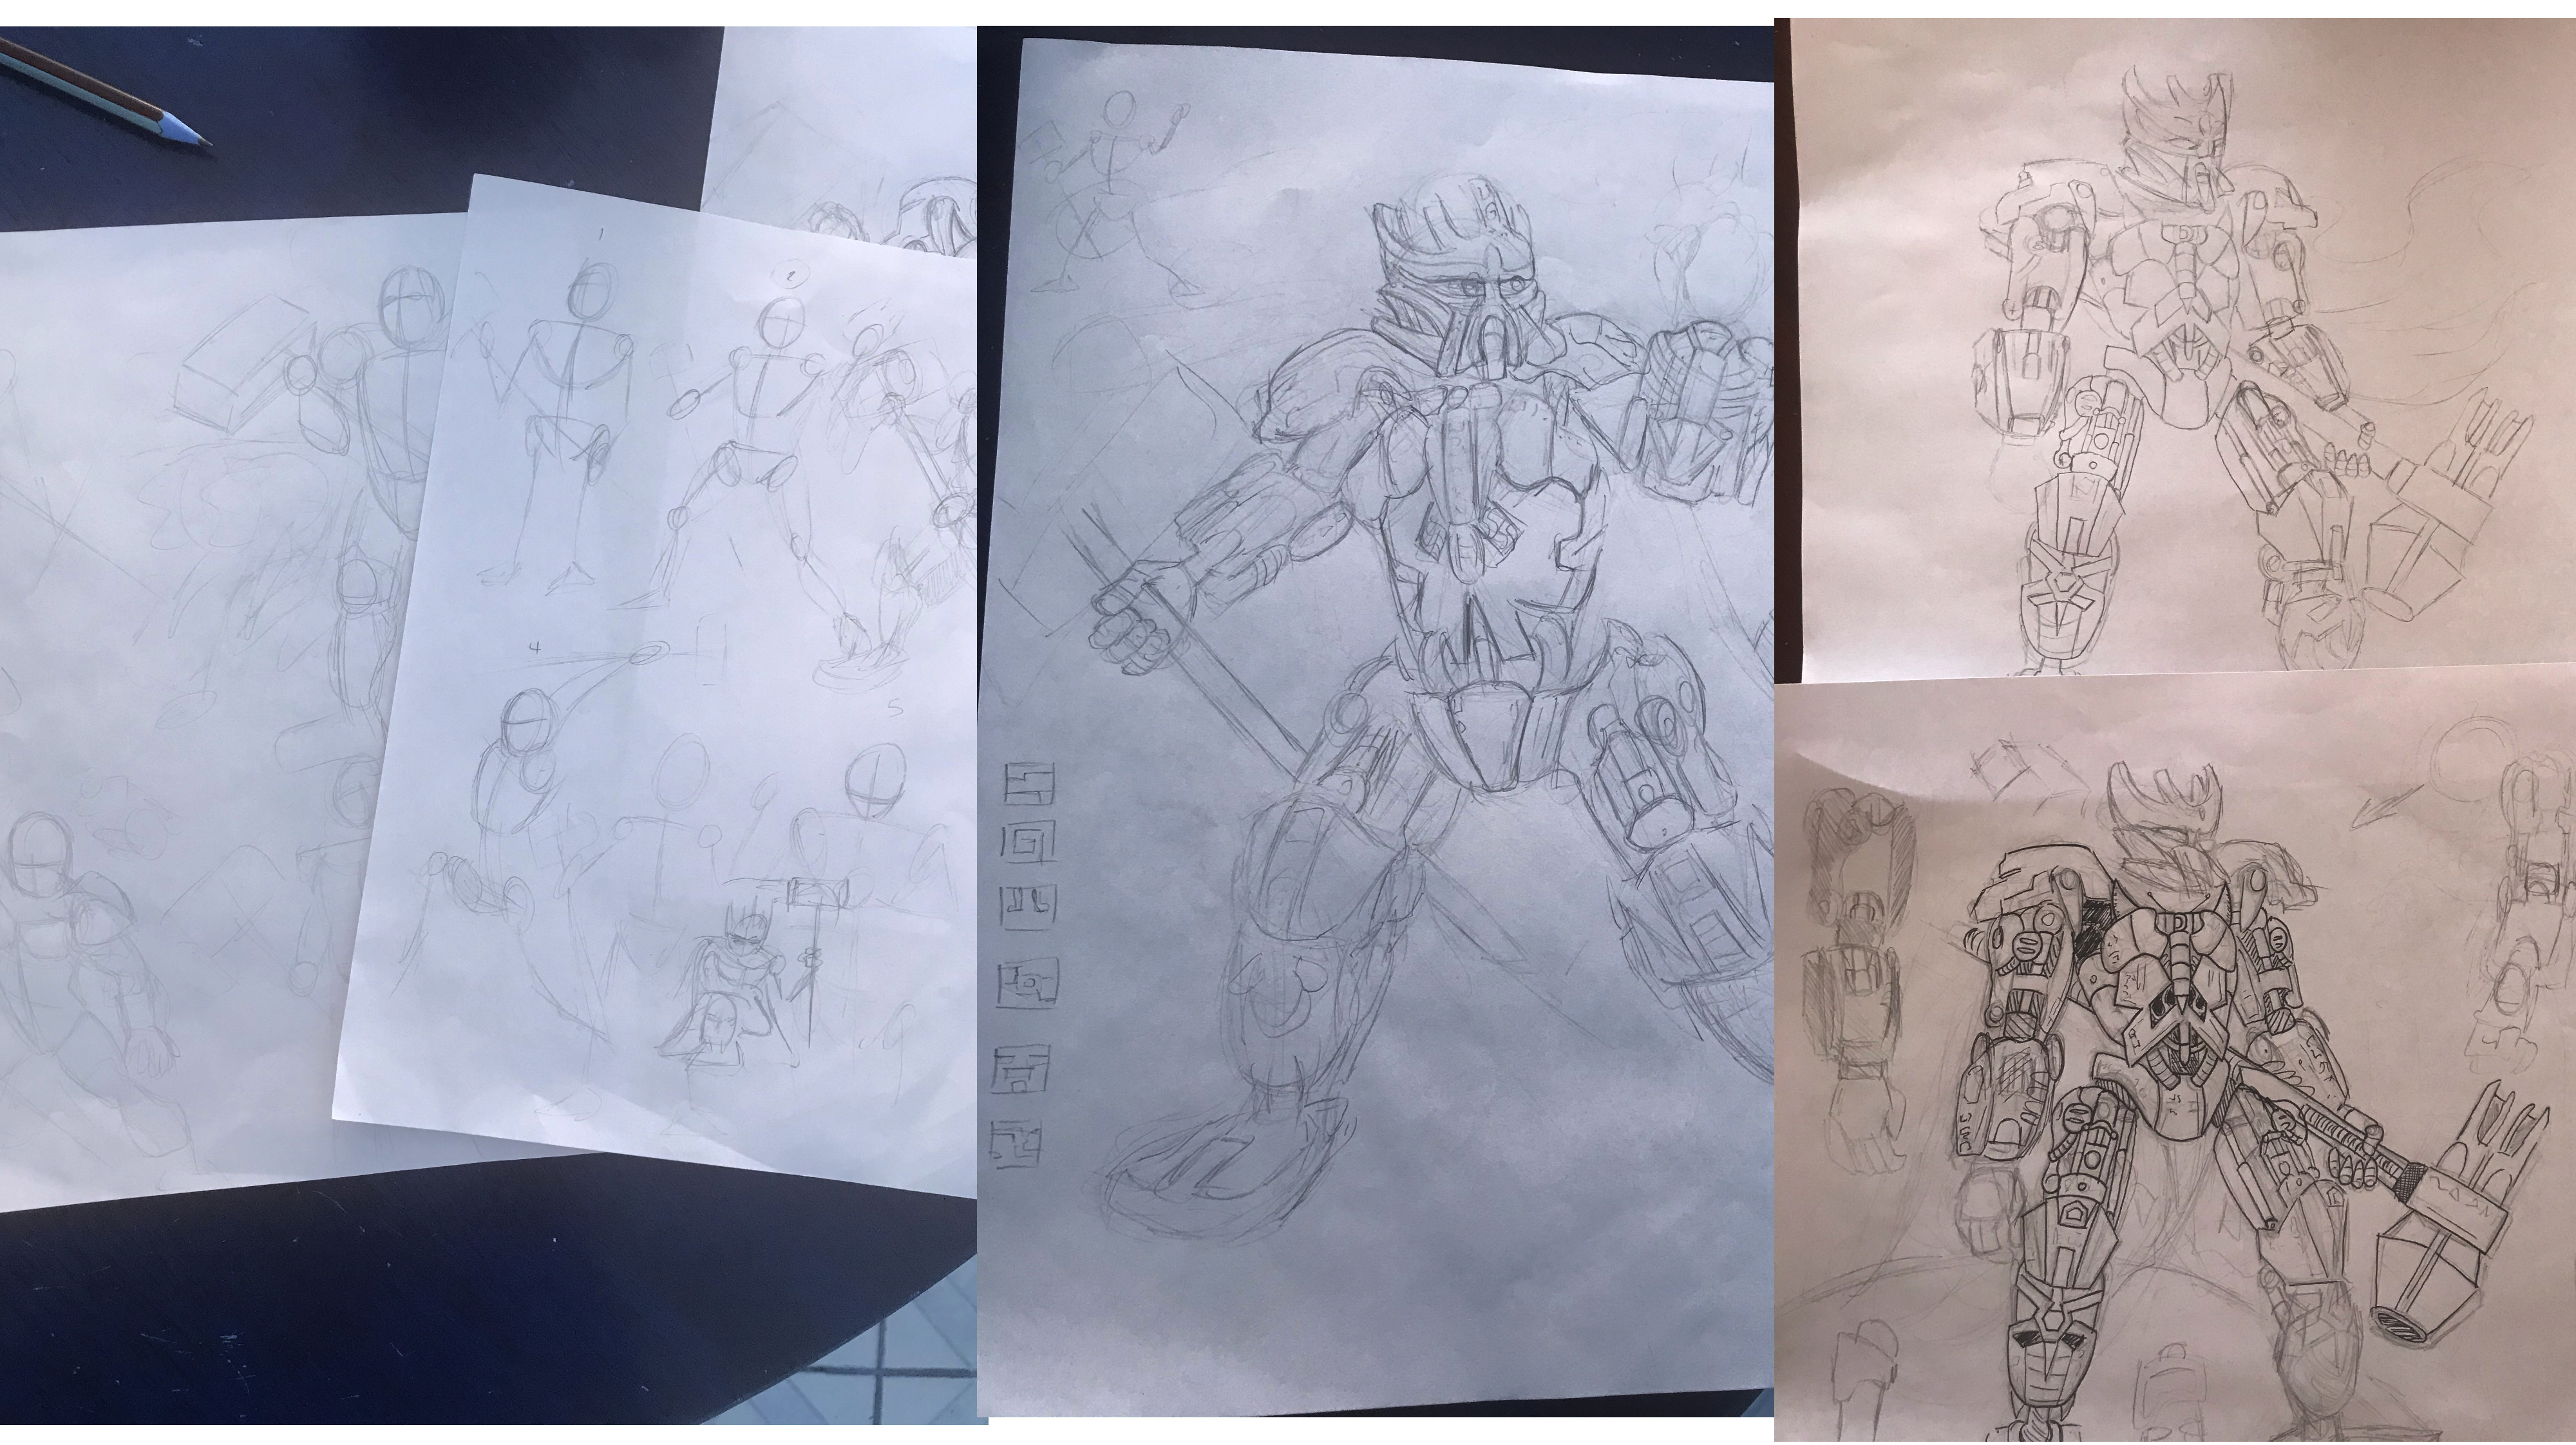
I don´t have all of the sketches here but this gives you an idea of the process, it took me like 2 days to come up with a pose that I liked. On the right side you can see the final sketch of the drawing.
Step 3: Linework.
Now that we have an sketch it is time to make the linework. This is the easiest part of the process, just trace the lines of the sketch in the computer.
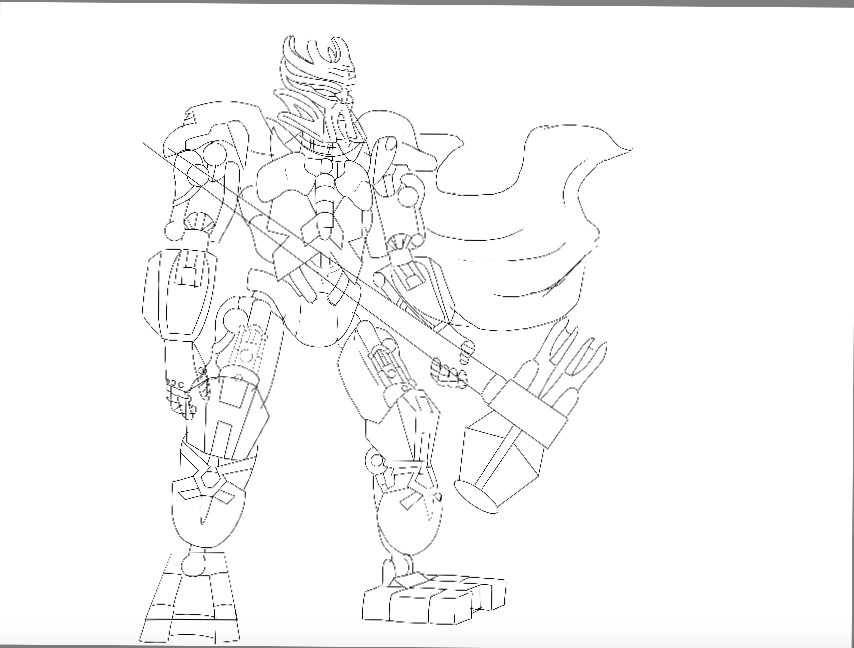
Of course the final drawing doesn´t have the lines, but i used them in the colouring part so I know where to put the colour.
Doing this with a mouse is very difficult, but thankfully the program has a special tool that makes my life easier.
With this steady stroke I can guide the line before doing it.
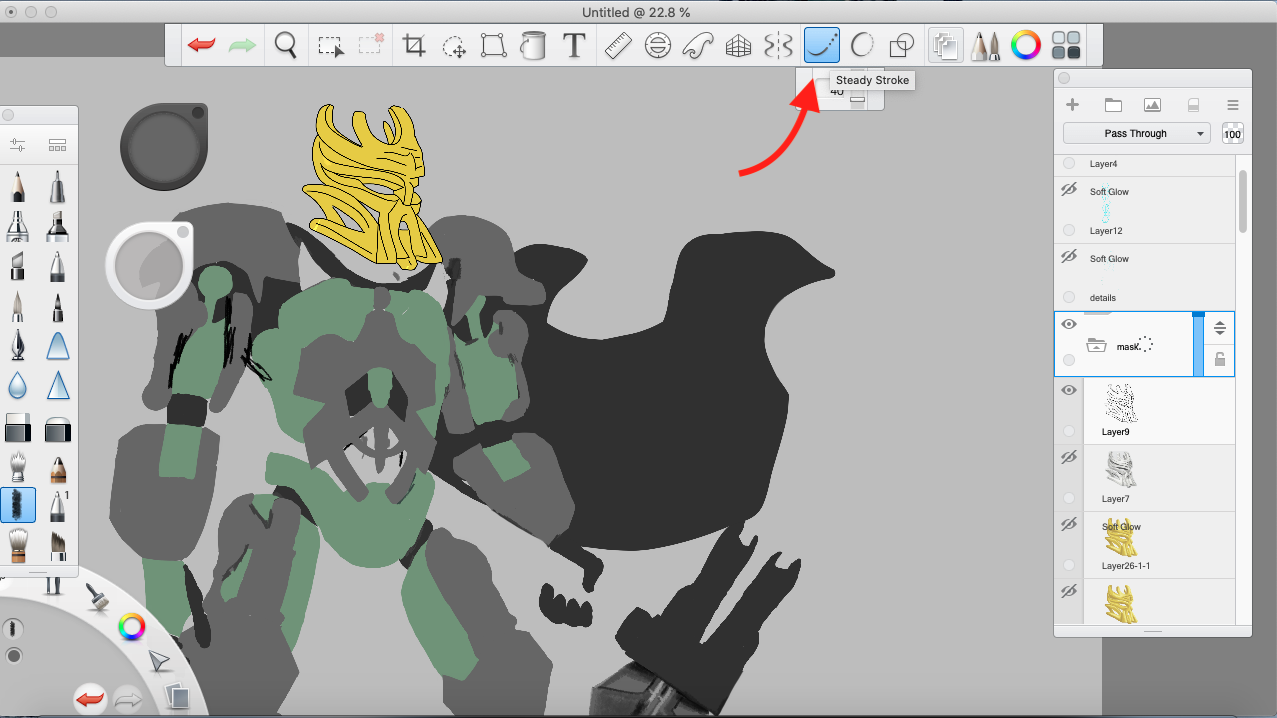
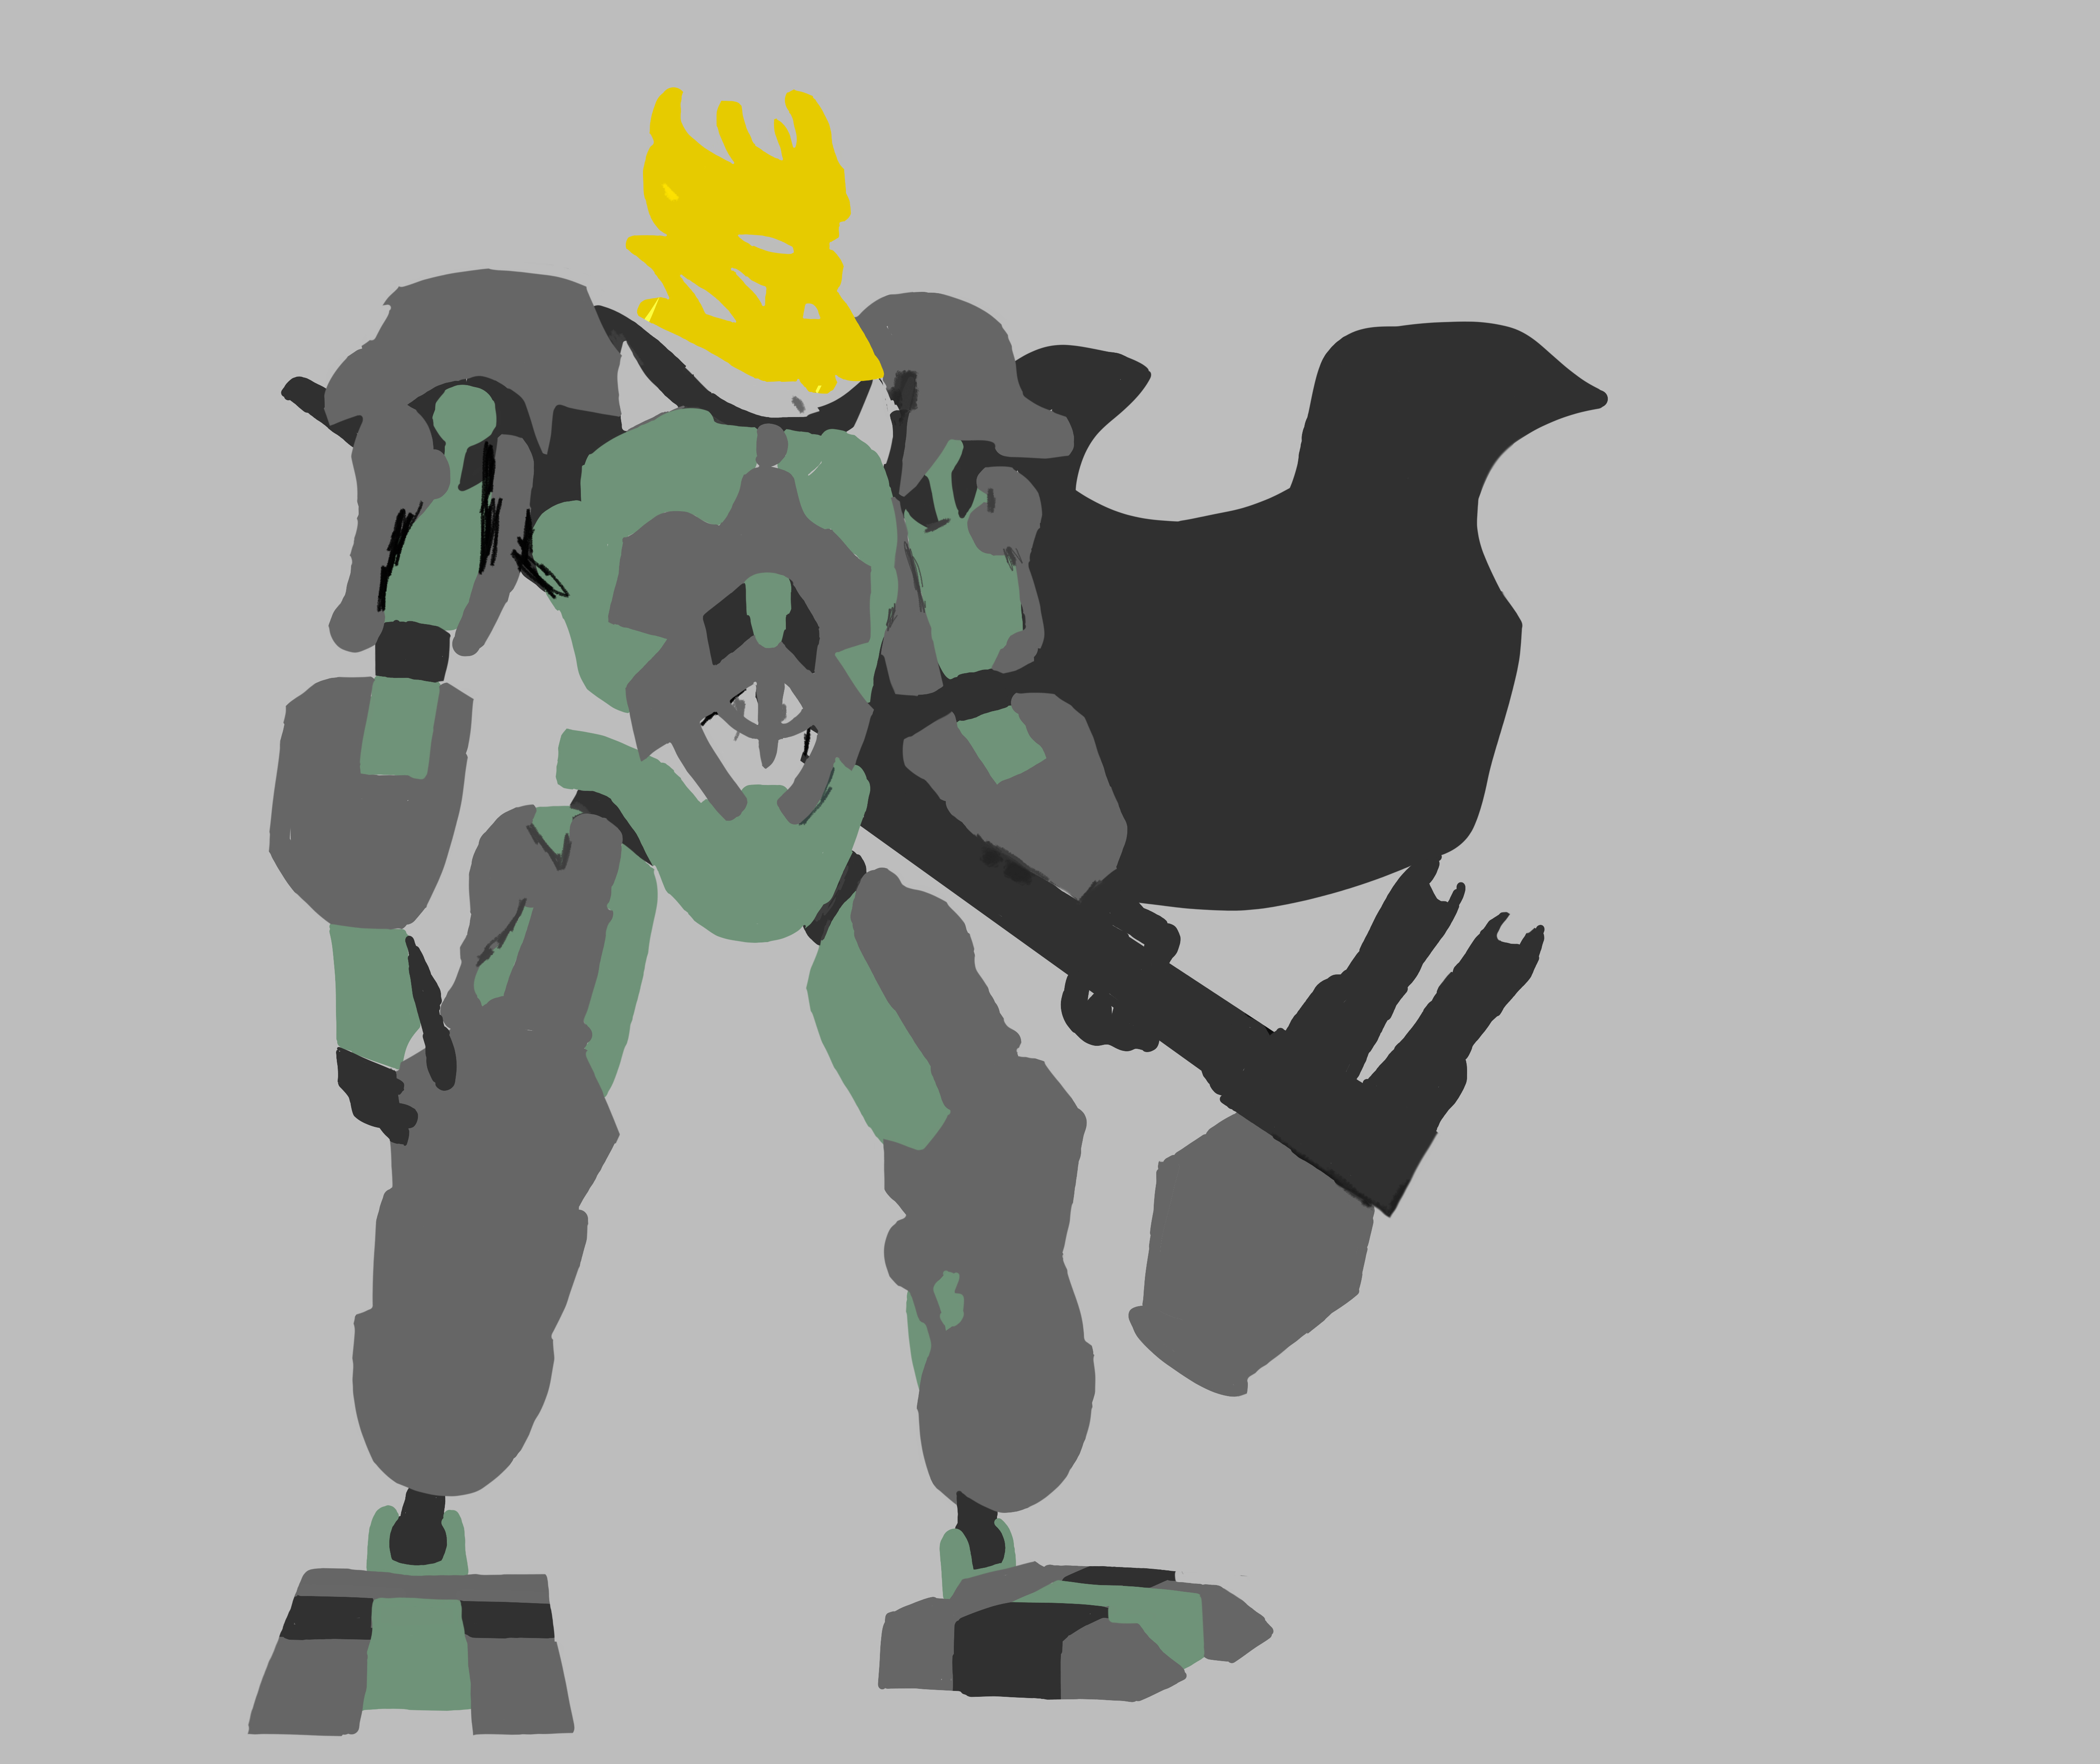
Step 4: Colour.
You already saw some of it so let´s explain. The next step is to colour, just pick the colours that you want to use (in this case gray and sand green, with gold for the mask) and paint the areas that are of that colour. Very important, paint using the base colour first like this.
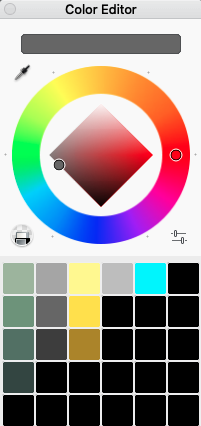
These are most of the colours that I used, as you can see I have neutral, light and dark, now it is time to use those other shades.
Step 5: Shading.
This one is the step that will make the most difference, just take a look.
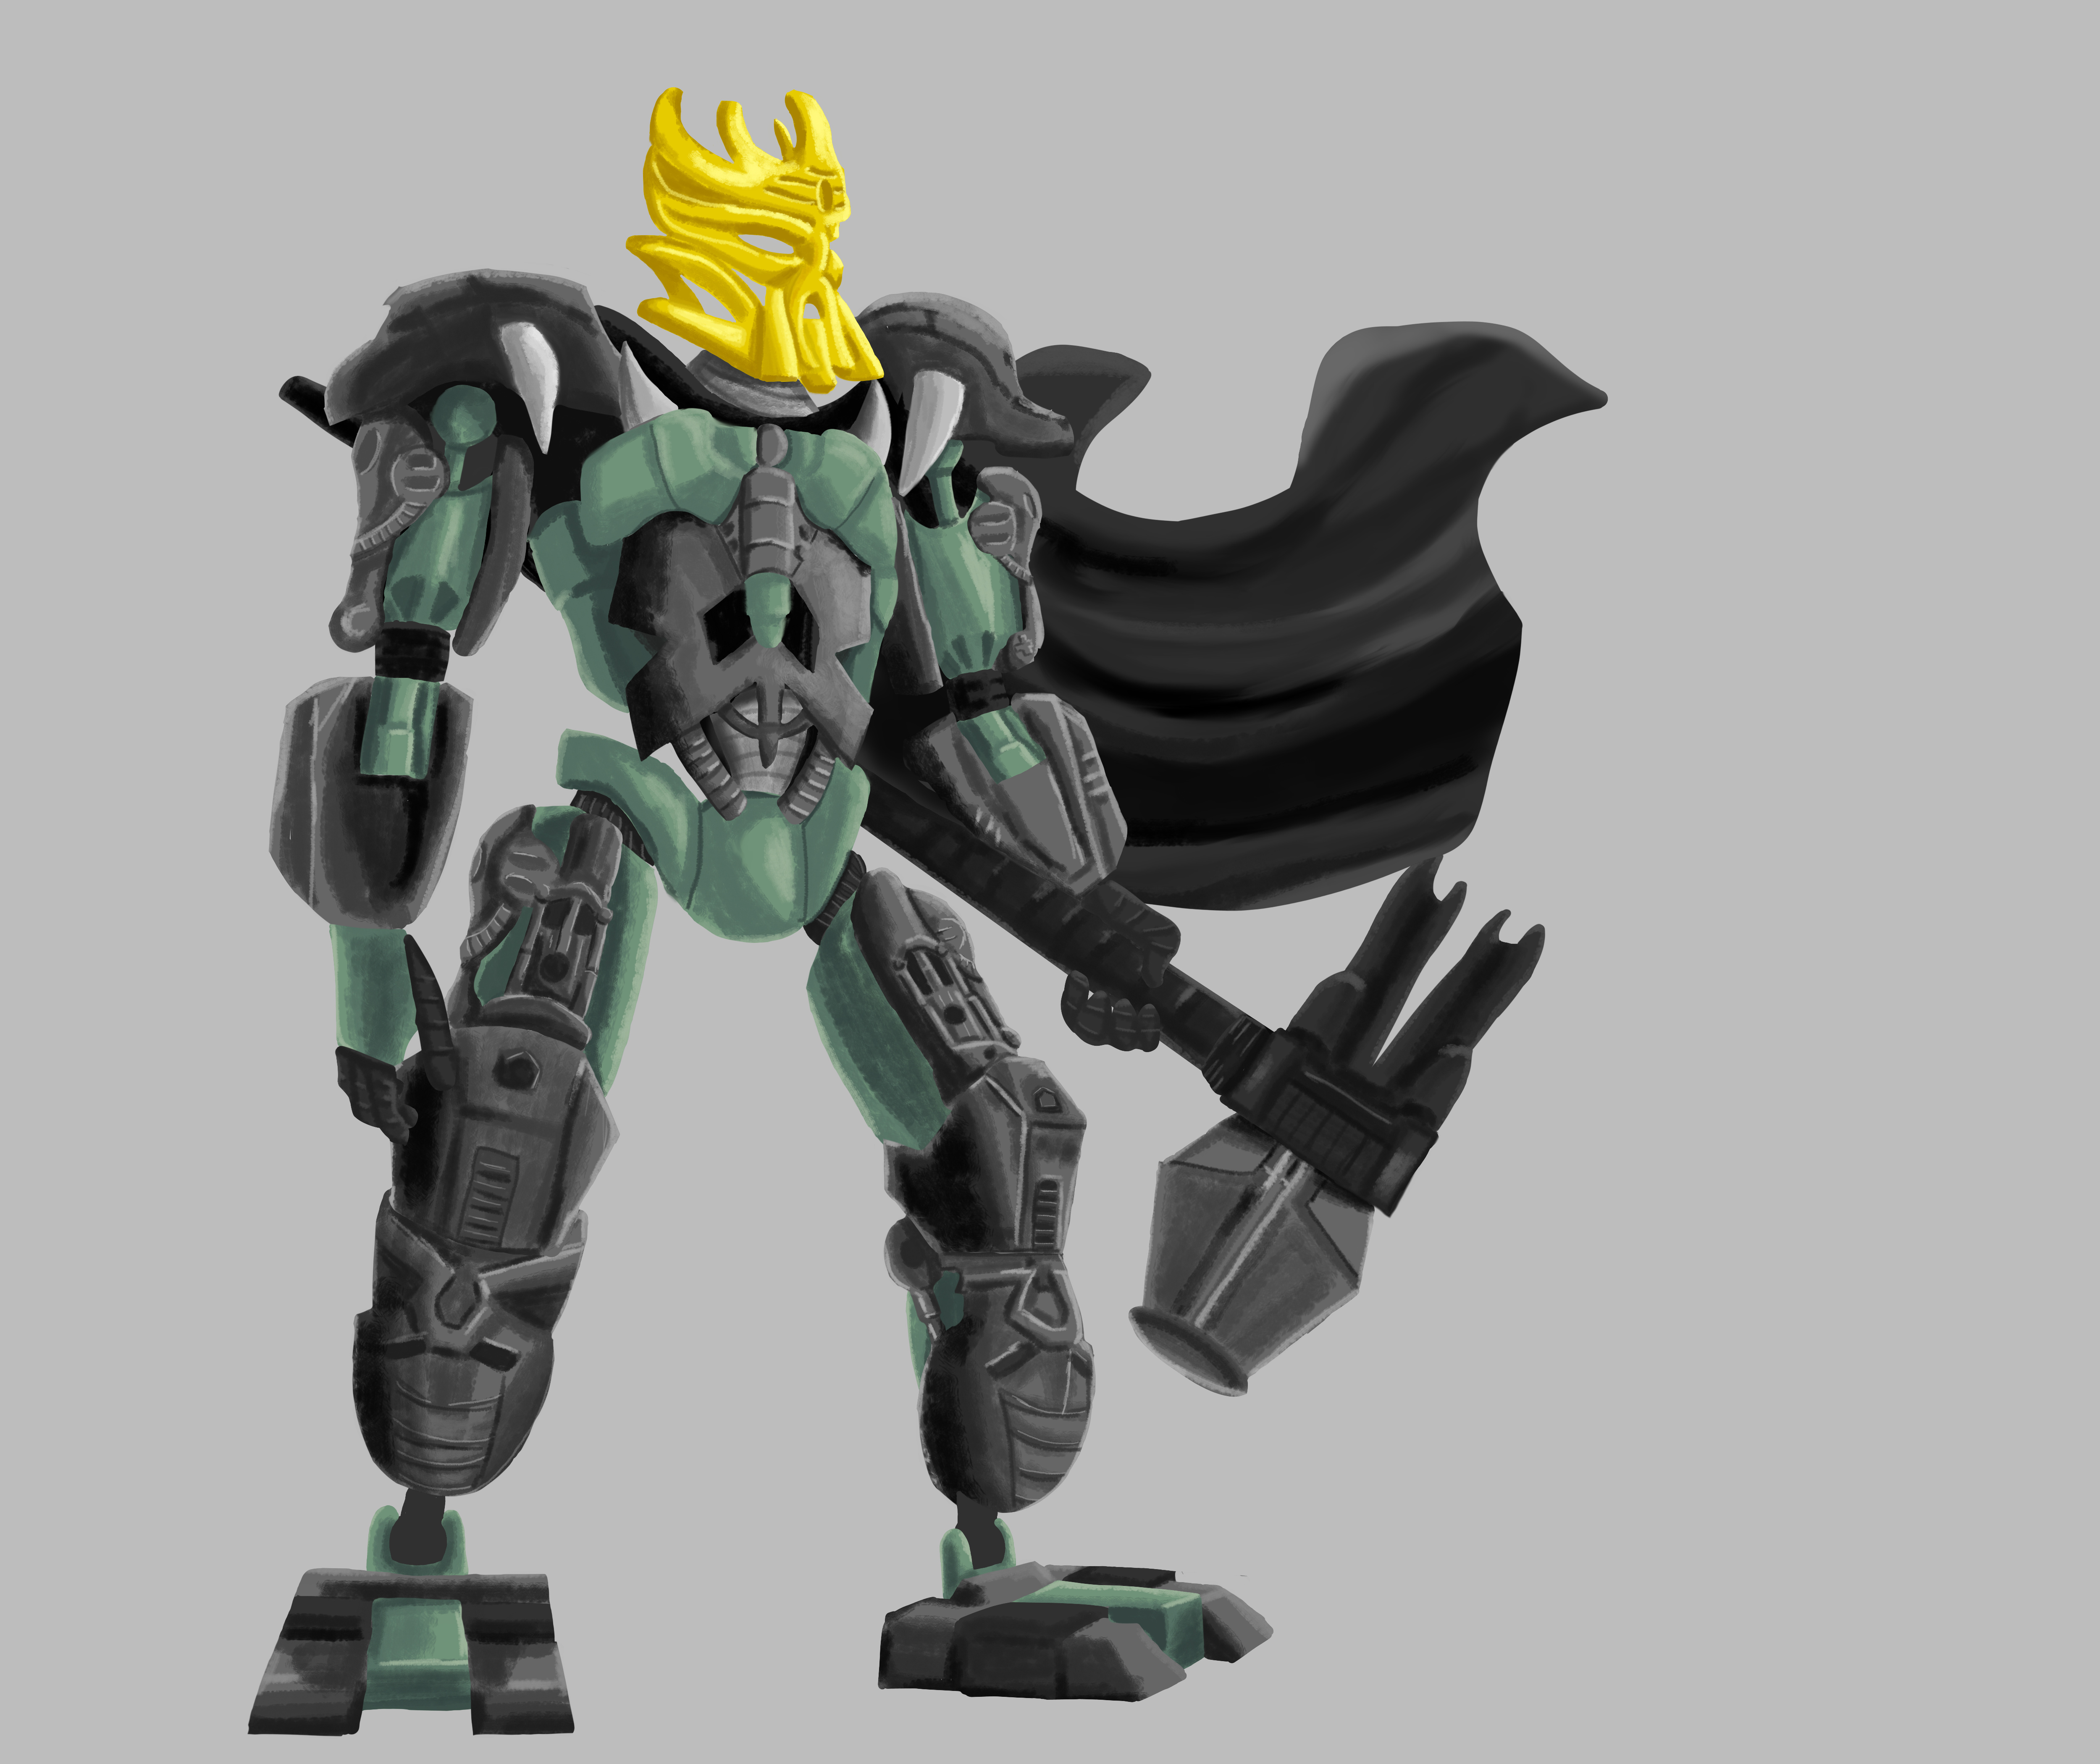
To make a good shading you first need to choose a light source, in this case it is on the top right, which means that our shadows are going to be on the left side, and the highlights will be facing the light source. Now pick a brush you like and using those colours I showed you before and start painting.
It is important to mention that every part of the drawing is divided in layers, so I can paint one area without interfering with a different area.
Step 6: Details.
Now for the final step, details. This is just cleaning up parts of the shading and adding the runes, eyes, background, etc. For the runes, add a new layer on top of everything and use a soft light blending mode for that glowing effect.
I had to download the bionicle alphabet font for my computer for the text, and the background was done with a spray paint brush and a blending tool, remember the light source is on the top right so I included that in the drawing.
Of course this is just a short version to give you an idea of the process. In total I spent like 5 days from start to finish, most of that was sketching and shading.
I hope this was useful and interesting and i´d love to hear your thoughts and if you do things different i would like to know as well.
Ok that is about it, have a good one 
