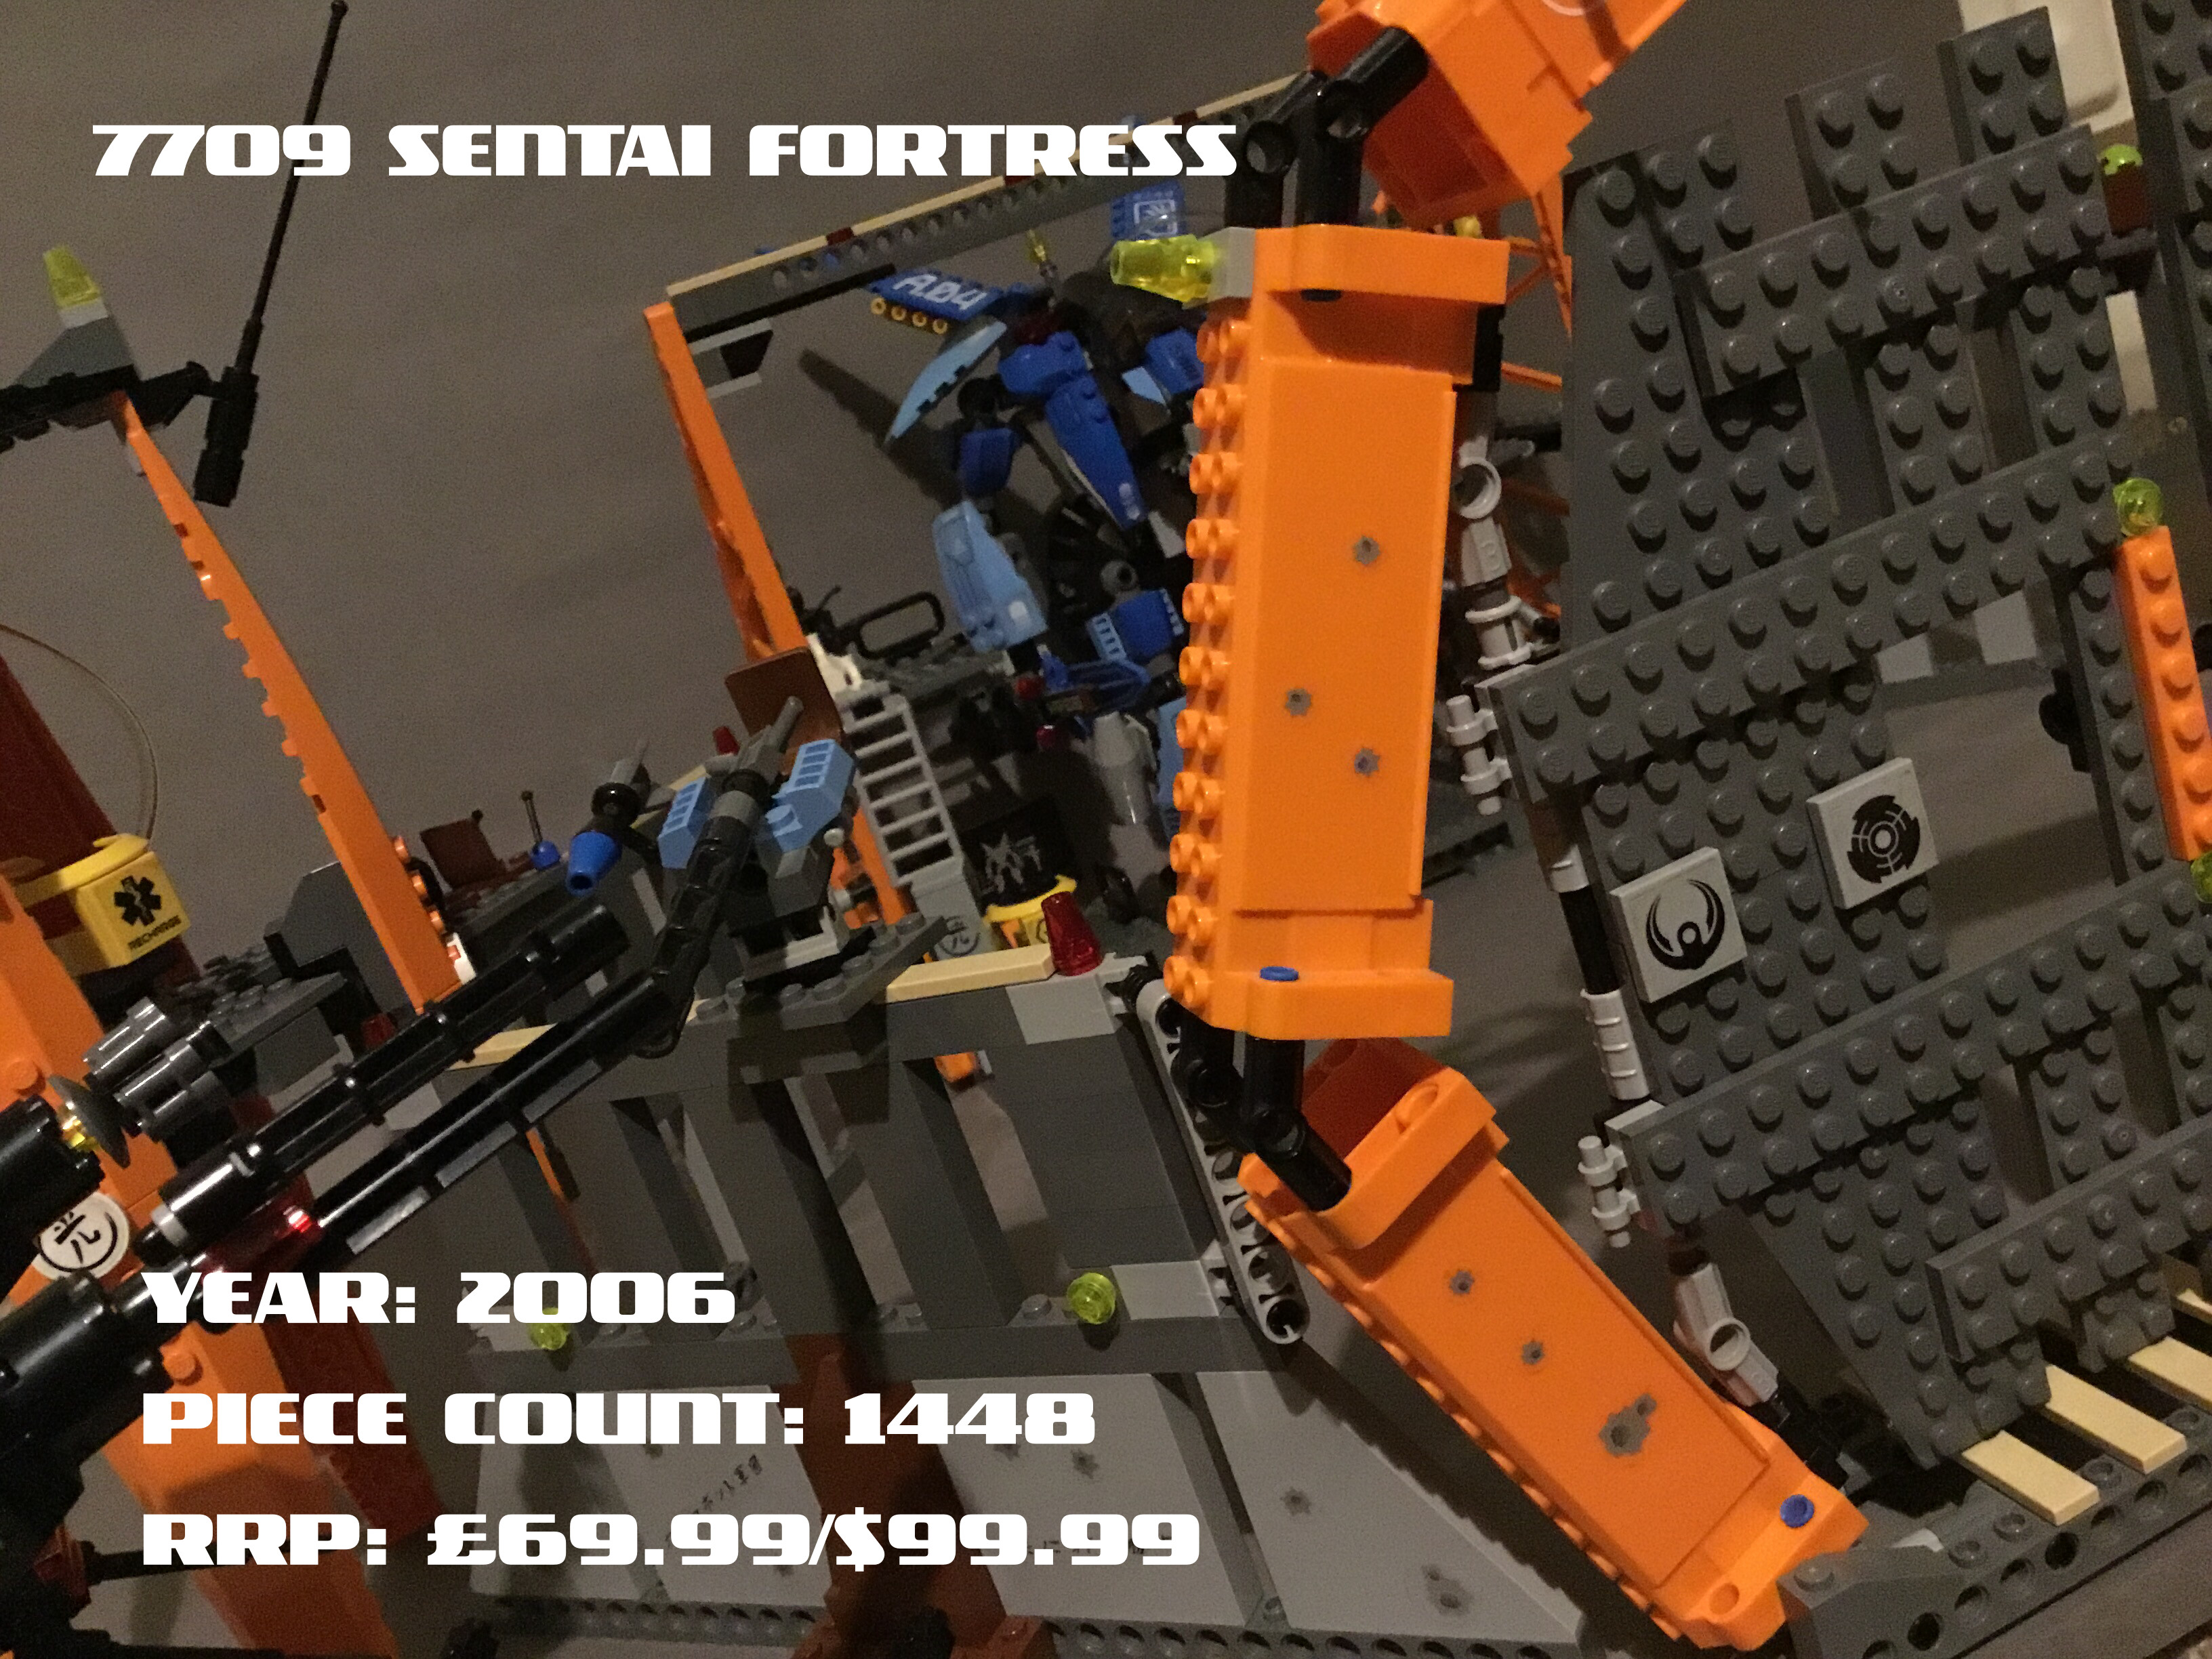
Time to finish off the first year of Exo-Force with a look at the largest set of the entire theme, Sentai Fortress.
As always, we’ll begin with a look at the included figures.
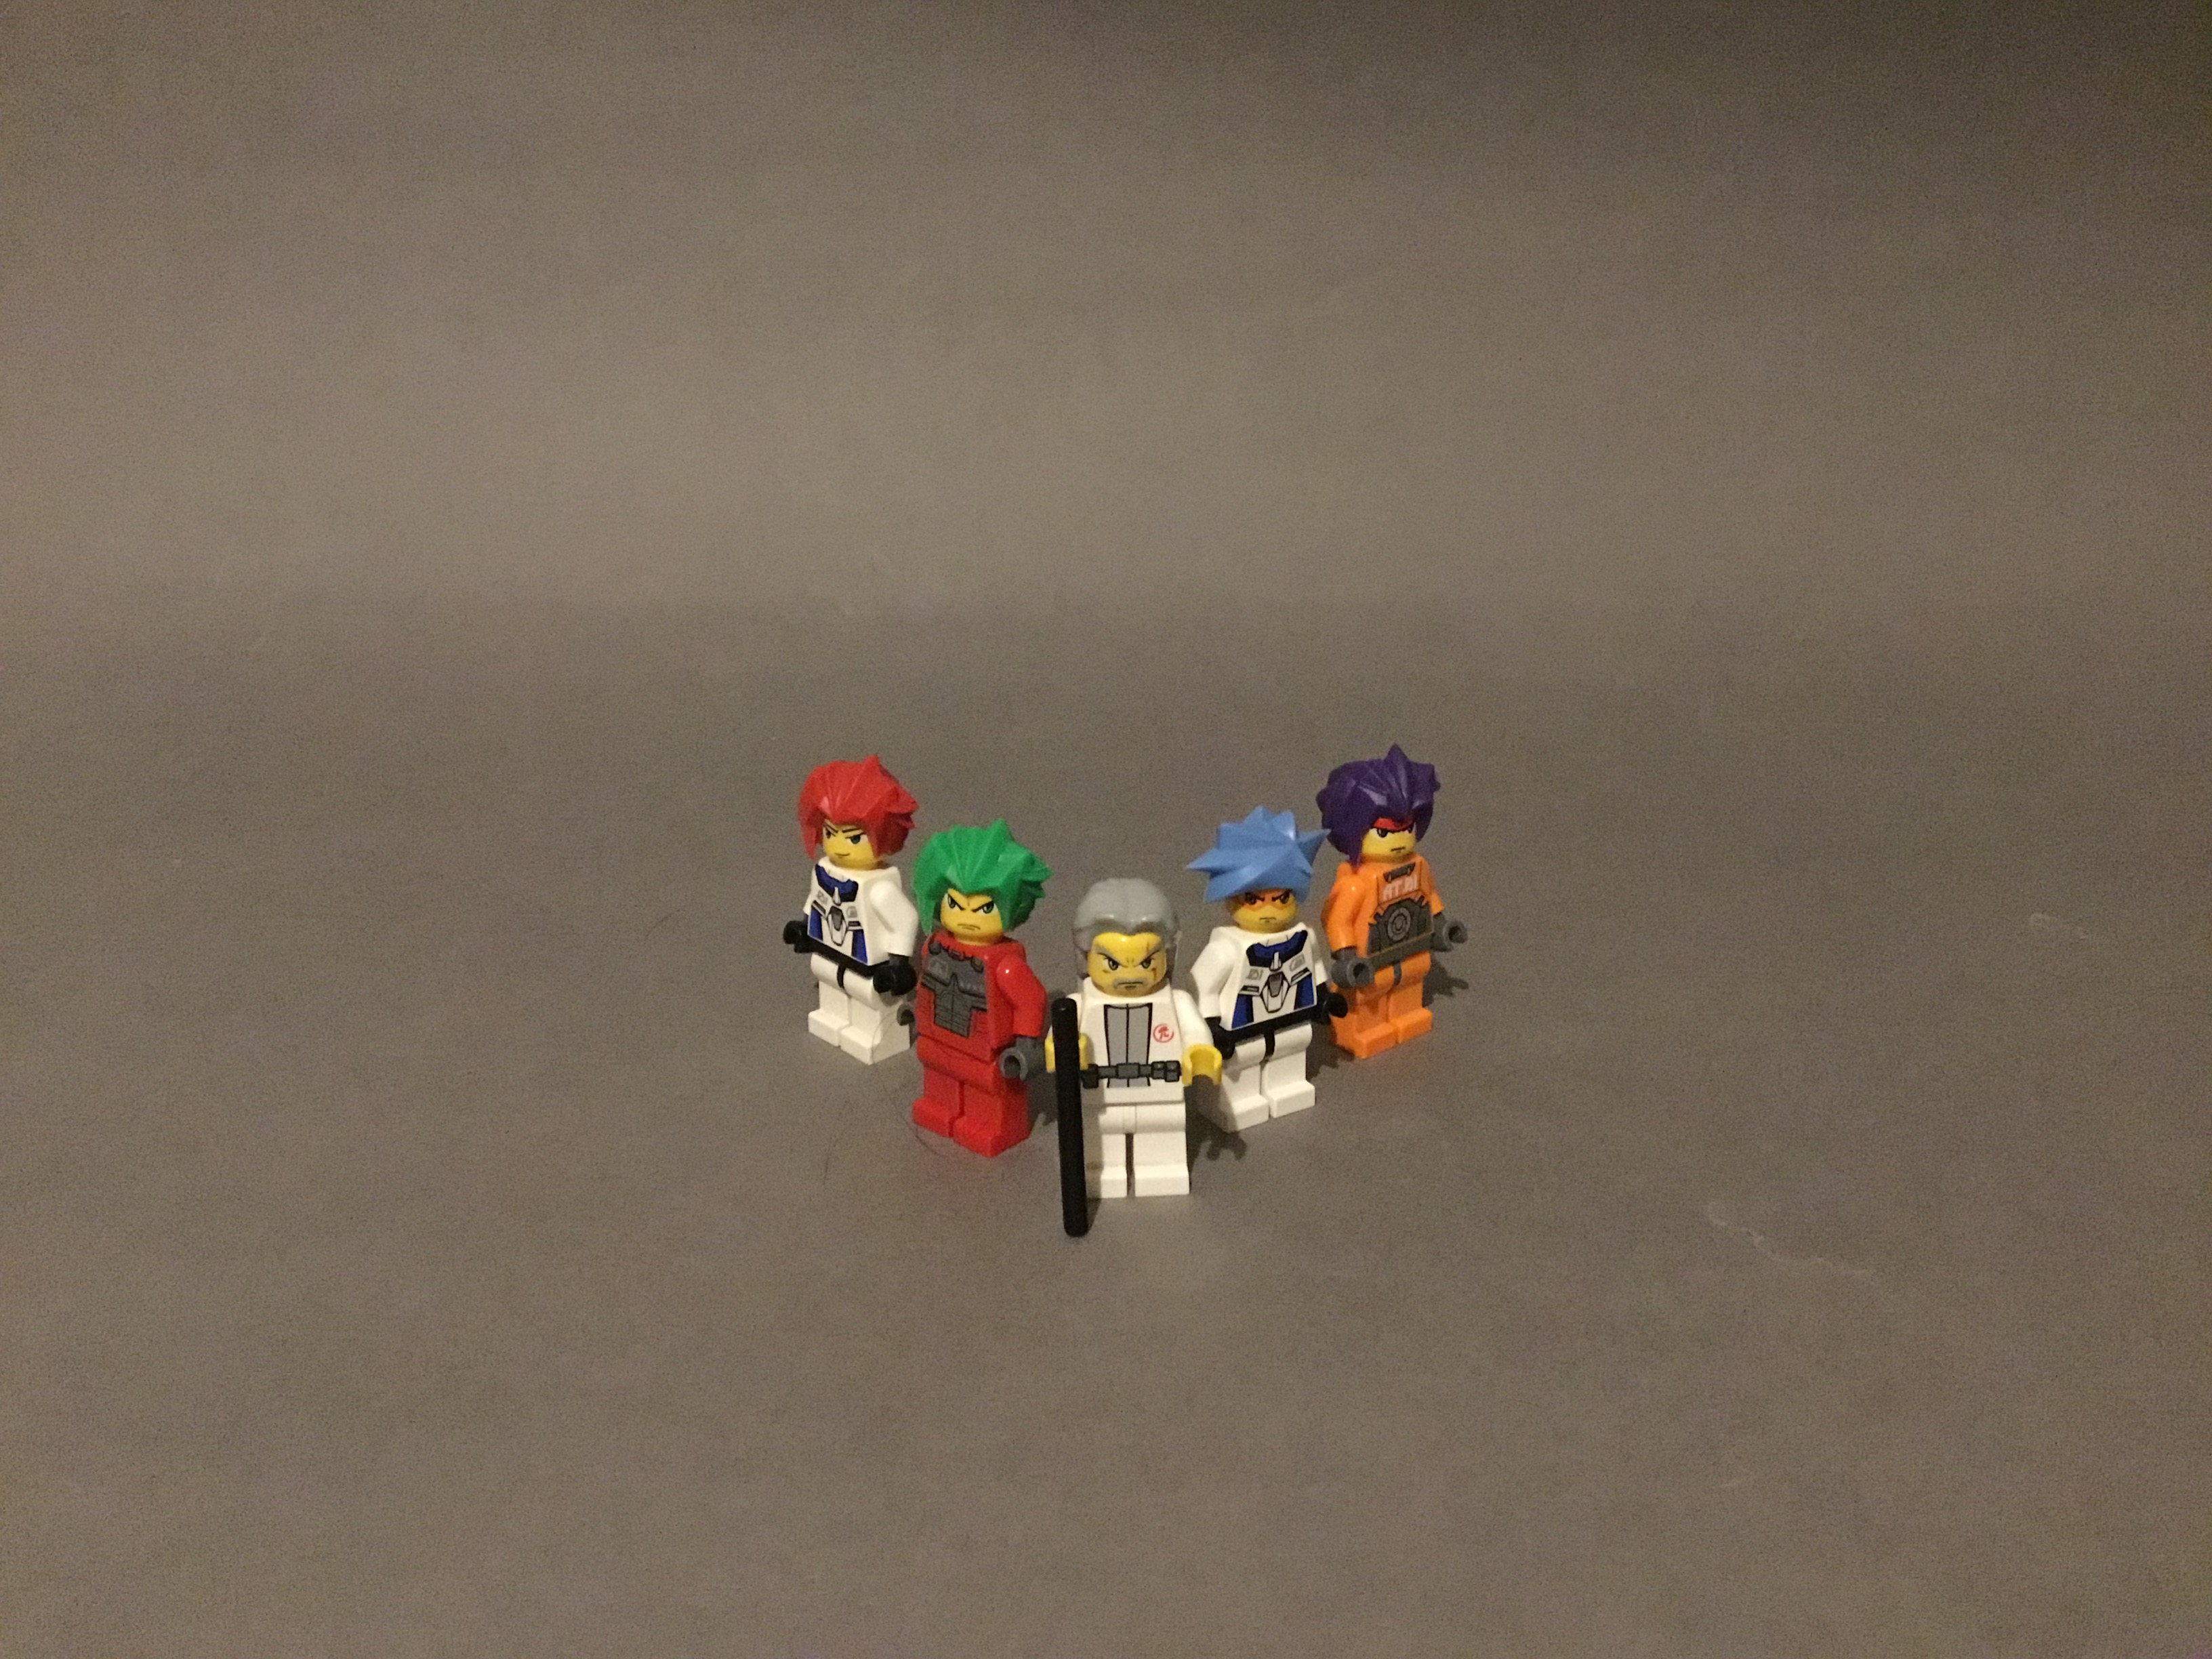
This set includes all four main Exo-Force pilots, allowing you to obtain the whole group without having to purchase any additional sets. This set also includes a new and originally exclusive figure, Sensei Keiken, Exo-Force’s founder and leader.

Keiken is a fairly simplistic figure, being the only character in all three years of the theme to bear no specialised parts. His torso printing is also rather simple, but his double-sided head more than makes up for it, appearing just as enraged as most of the others. He also includes a black pole used here as a walking stick.
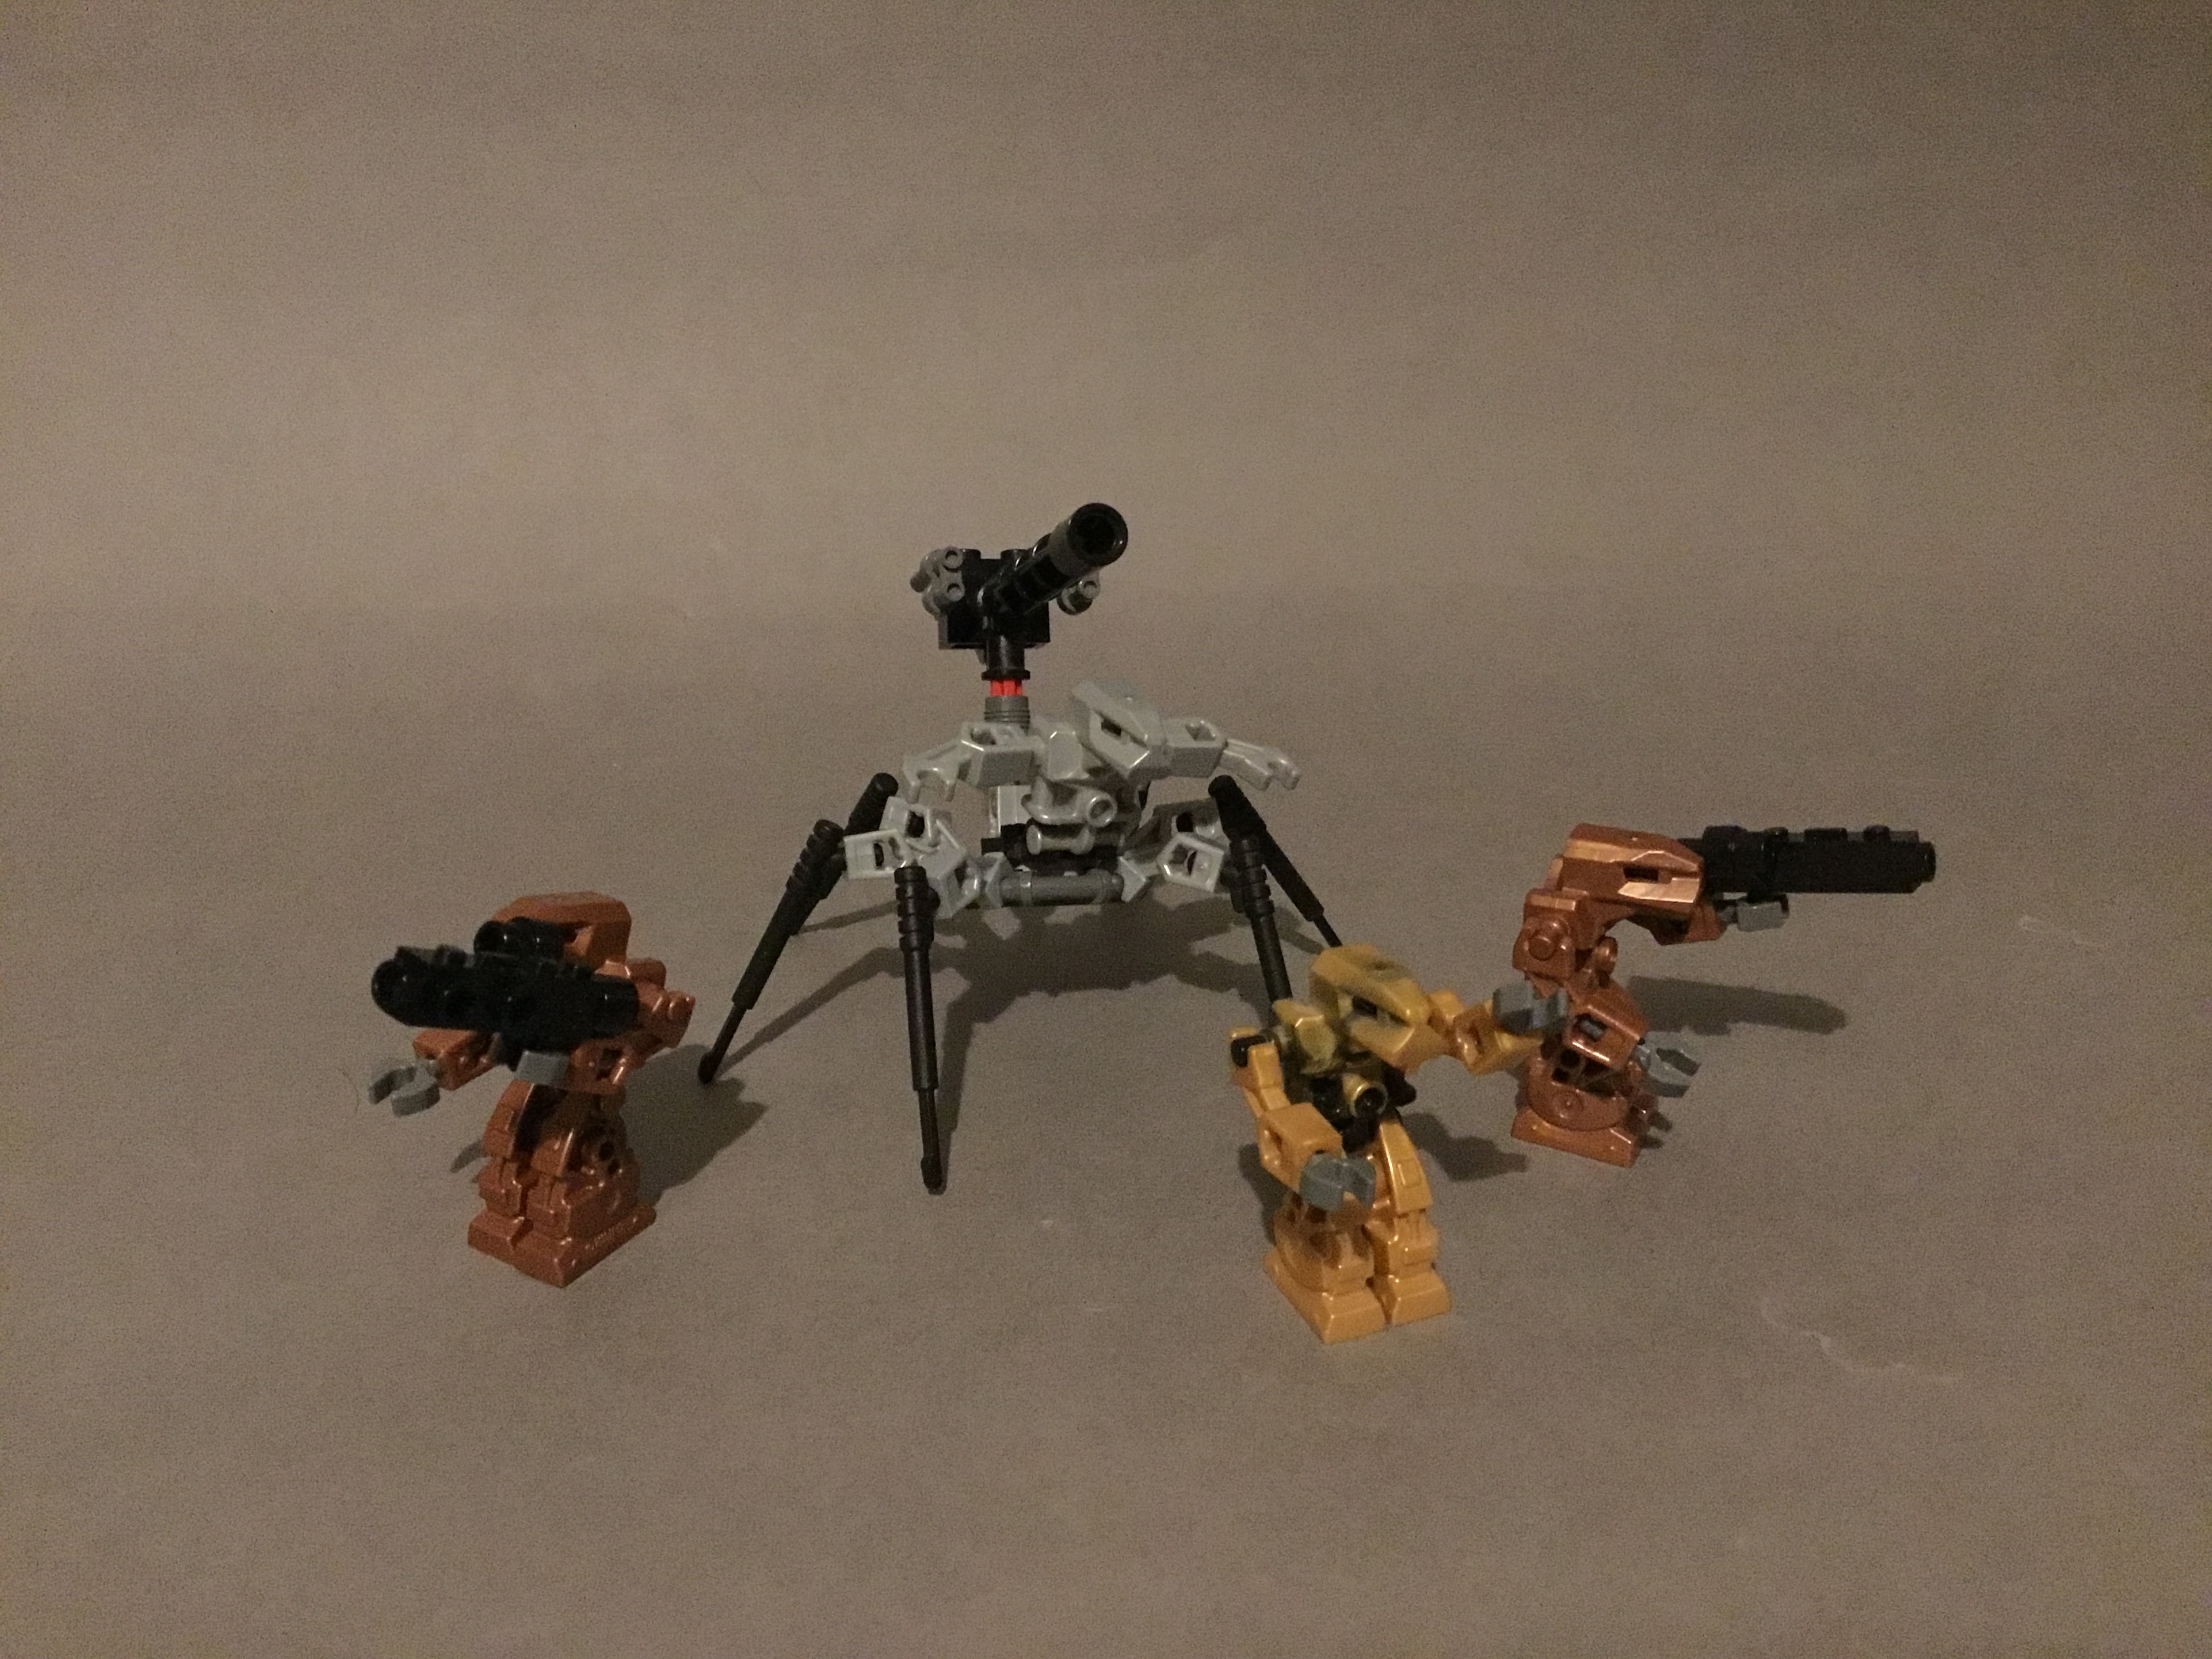
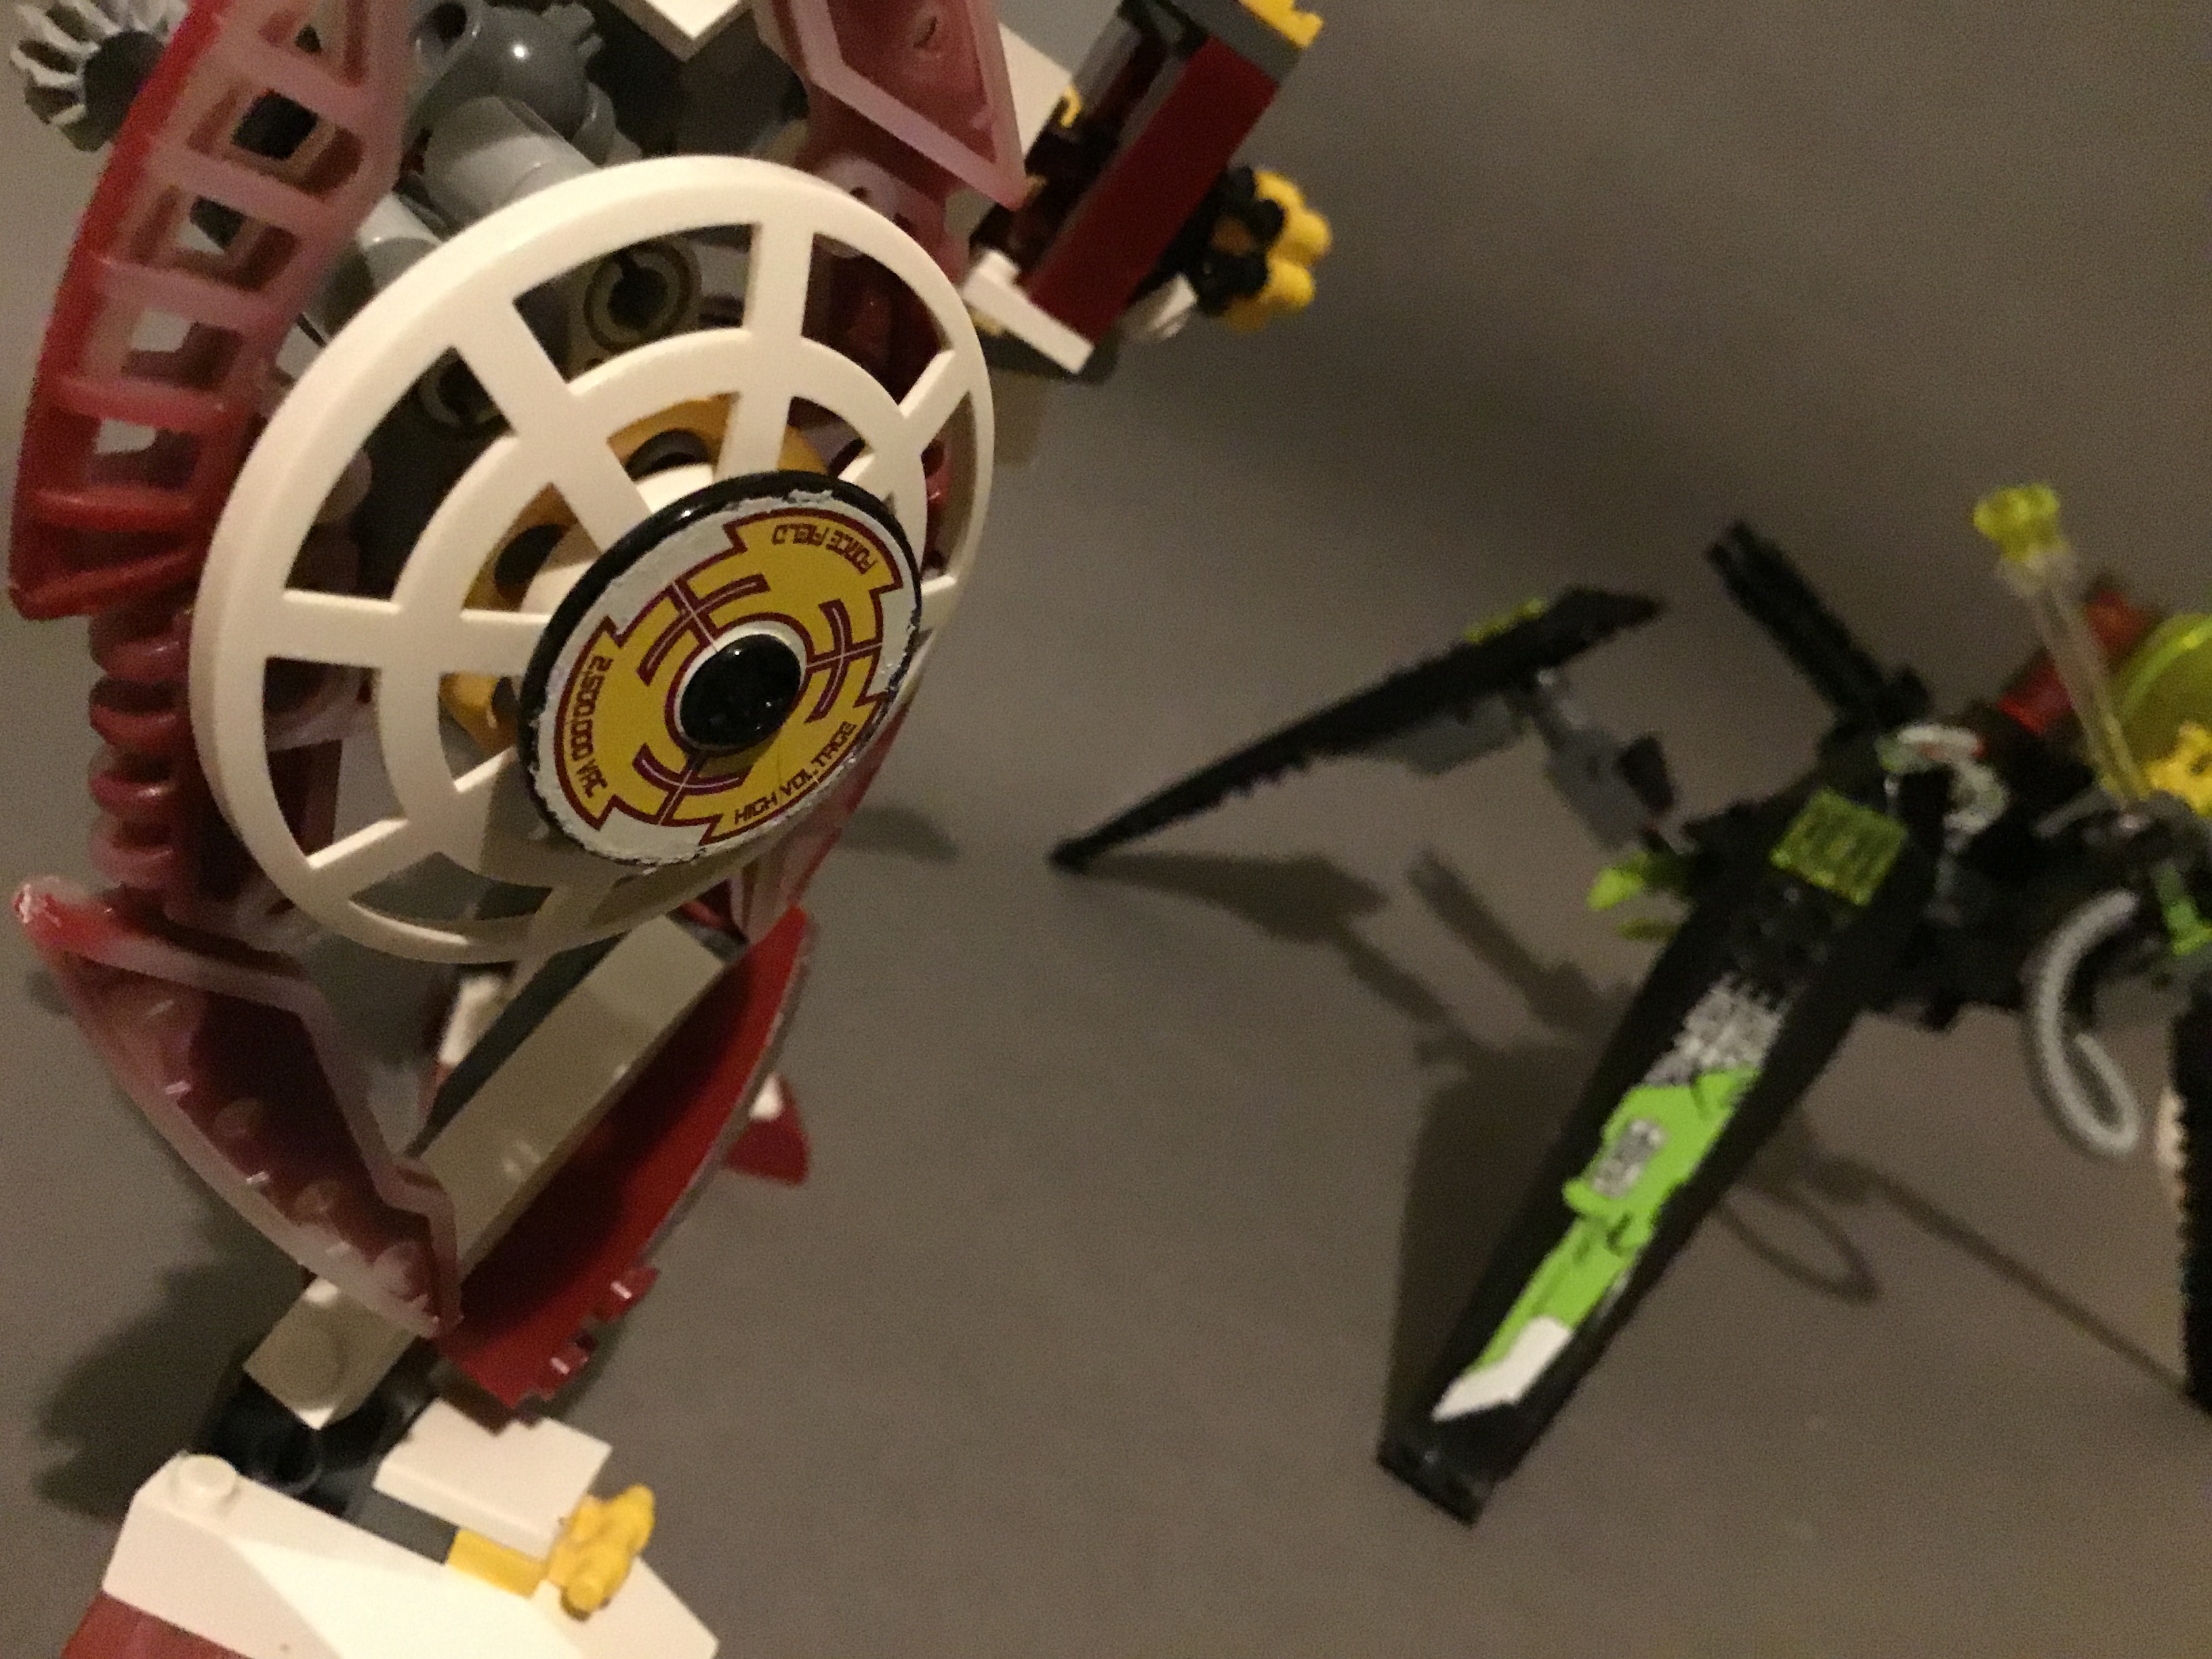
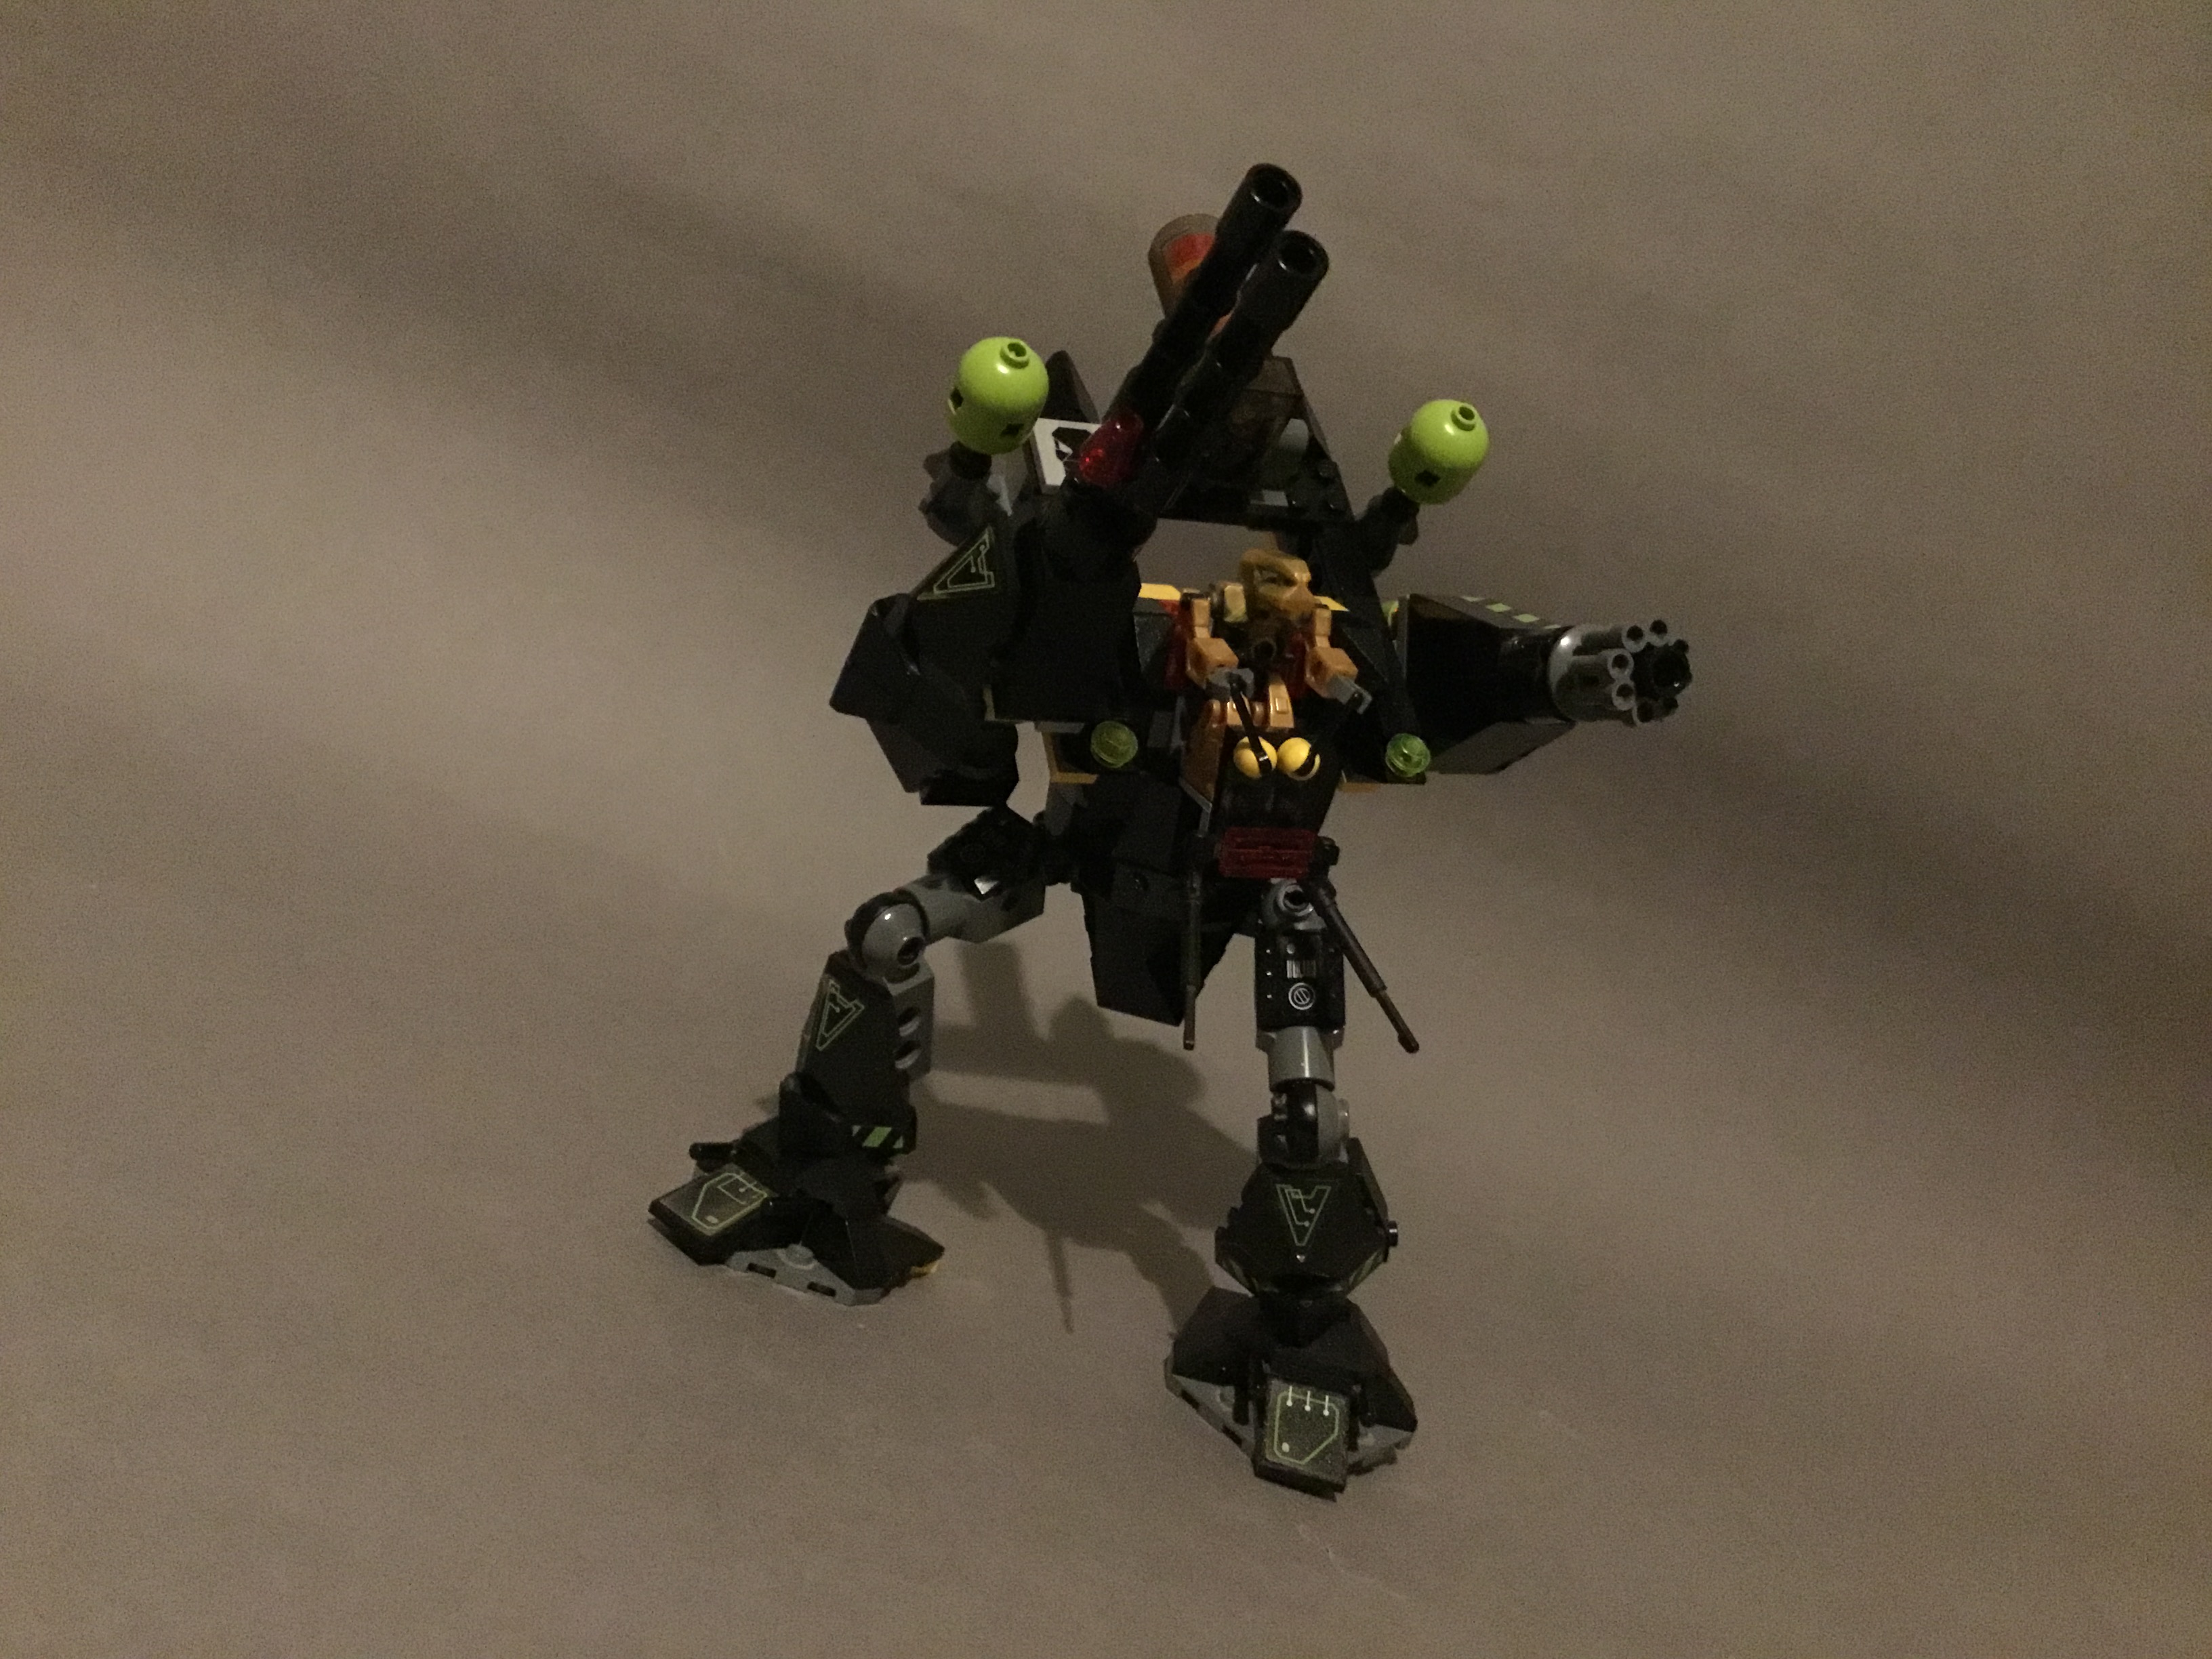
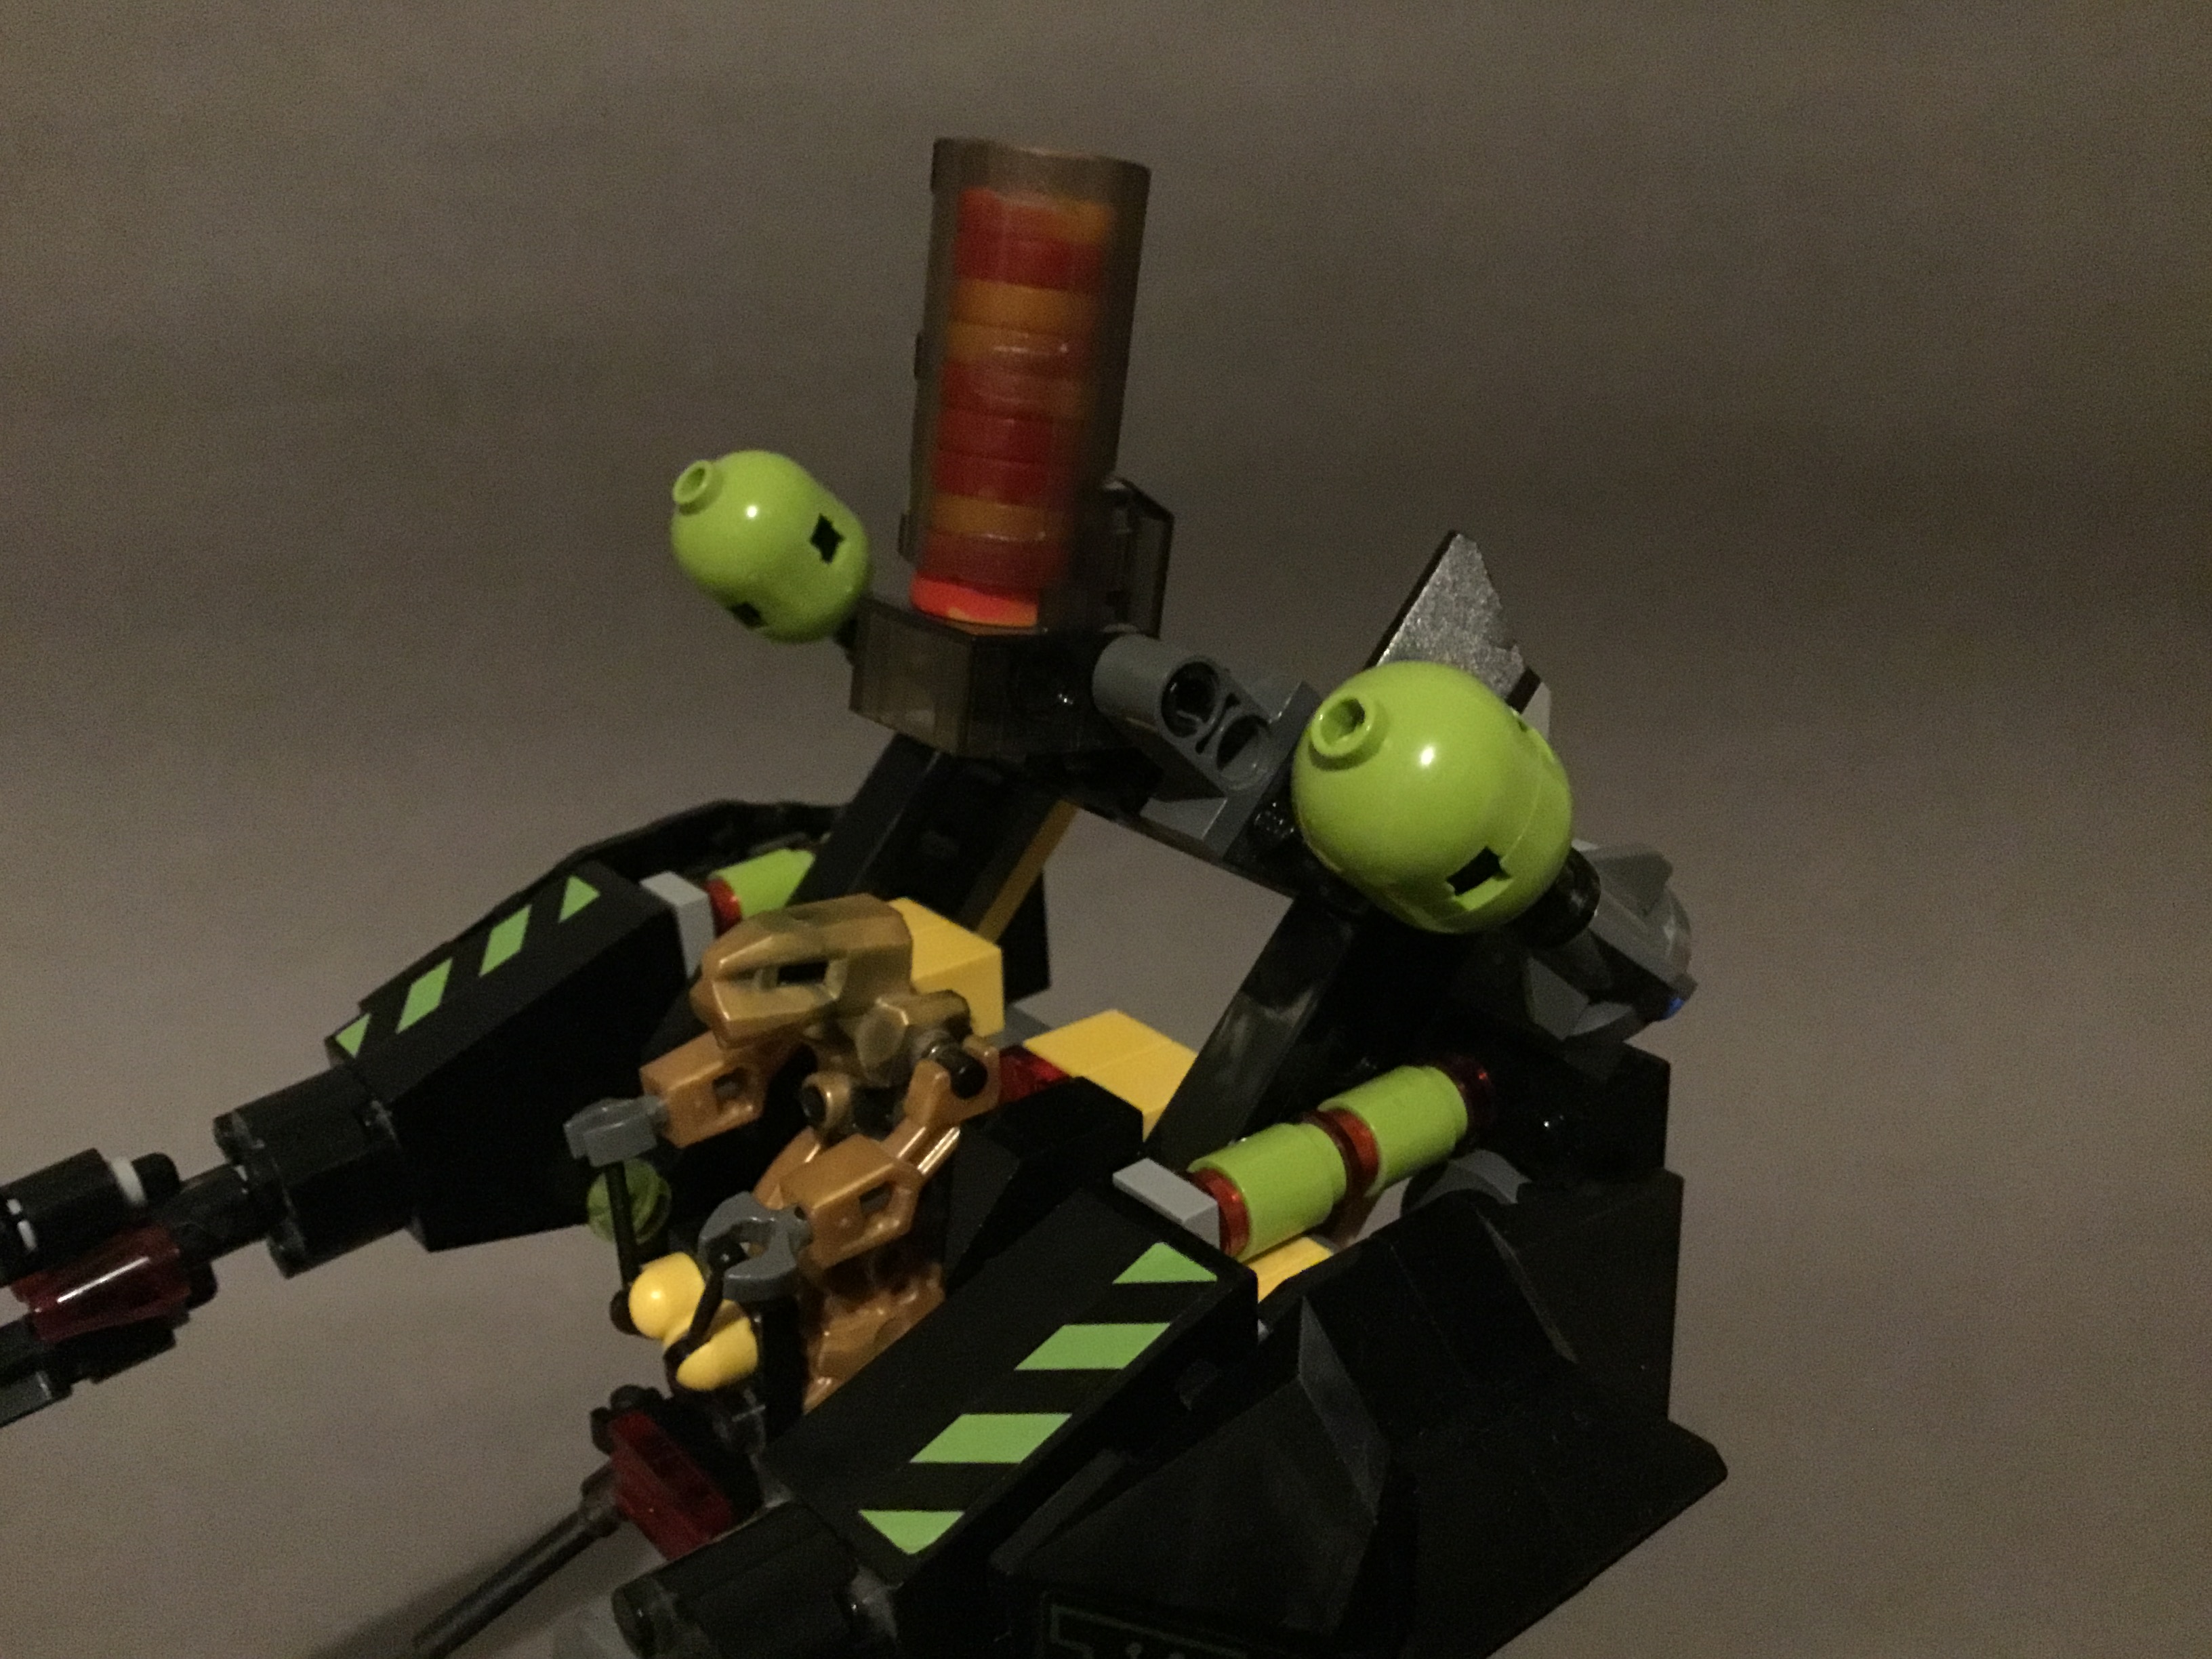
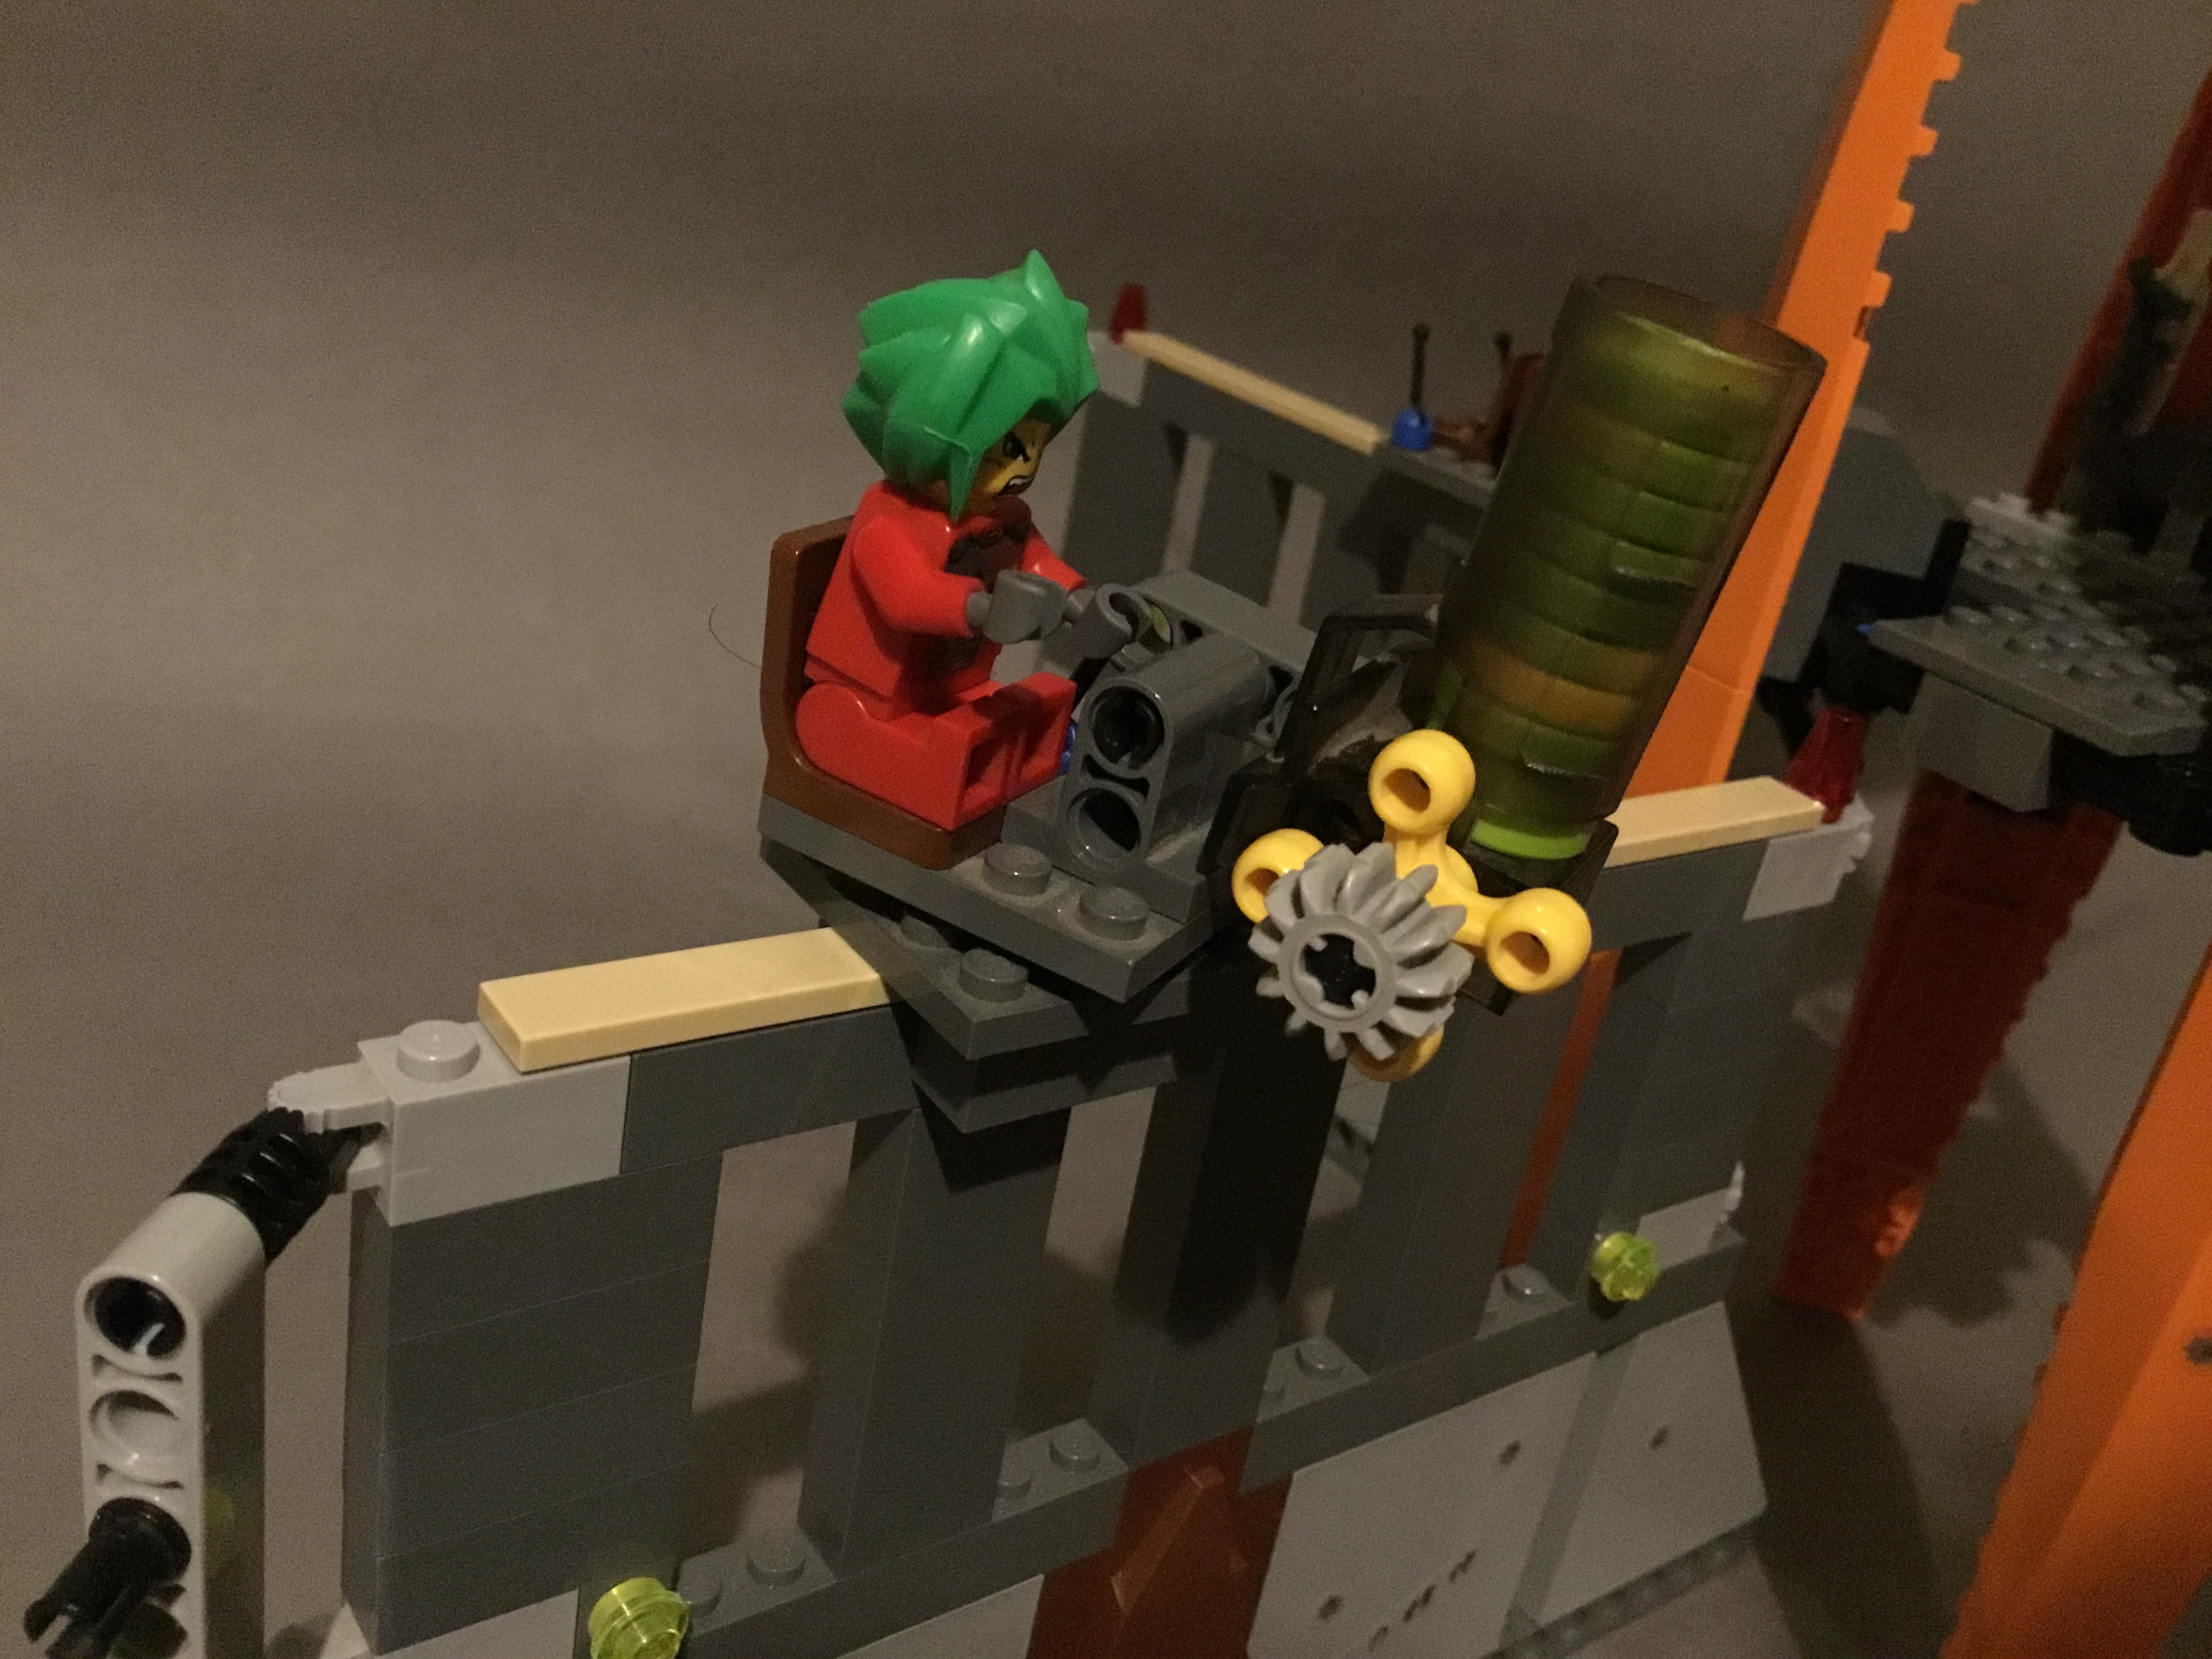
We get a pretty decent selection of robots as well. Meca One appears again, accompanied by a pair of Iron Drones with handheld blasters. However, the real stand-out figure here is definitely the intimidating Venom Walker, bearing the appearance of a mutilated Devastator integrated into a menacing insectoid leg assembly.
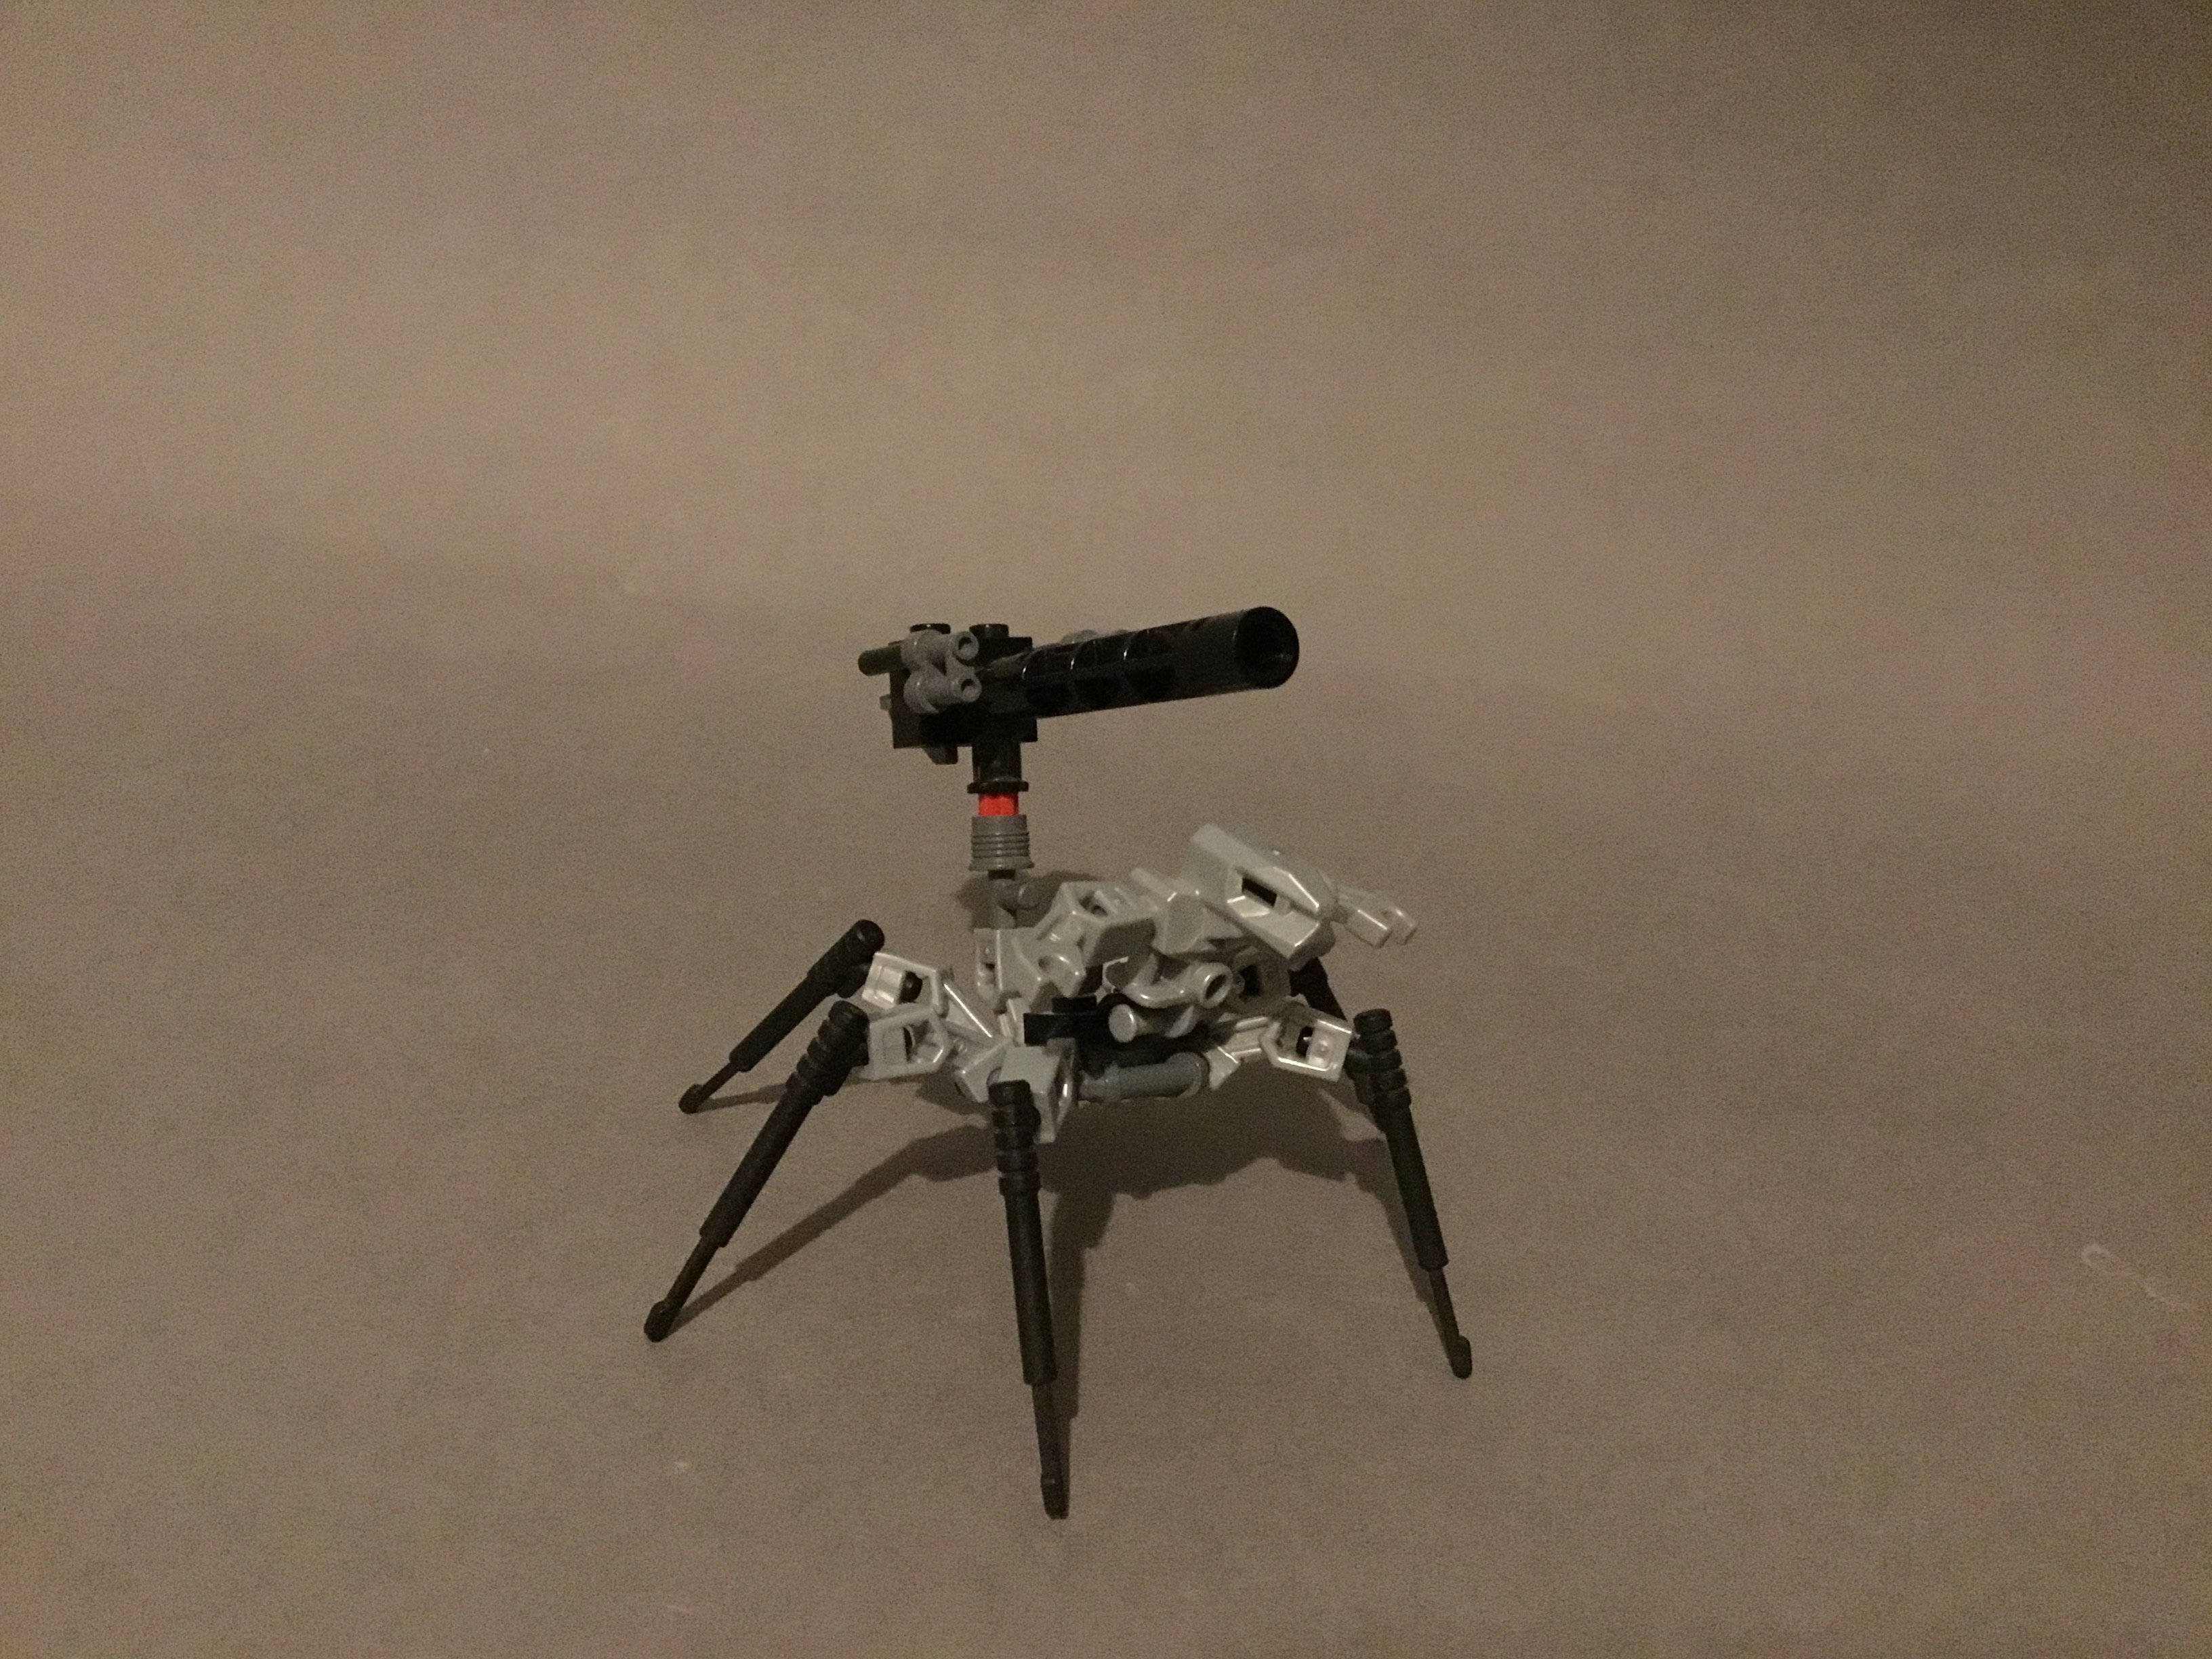
The figure’s arms have been attached backwards to how they normally are, giving the figure outstretched pincers for hands, while a huge cannon extends from a section on the robot’s thorax. This gives it a very scorpion-like appearance, complete with outstanding articulation, including individual leg movement, knee swivels, up and down movement at the tail, a swivel on the tail and even an ab crunch. While Keiken is an impressive figure, I find the Venom Walker to be a lot more creative. Even if you don’t want the rest of the set, I’d at least recommend trying to build one yourself if you have the right pieces.
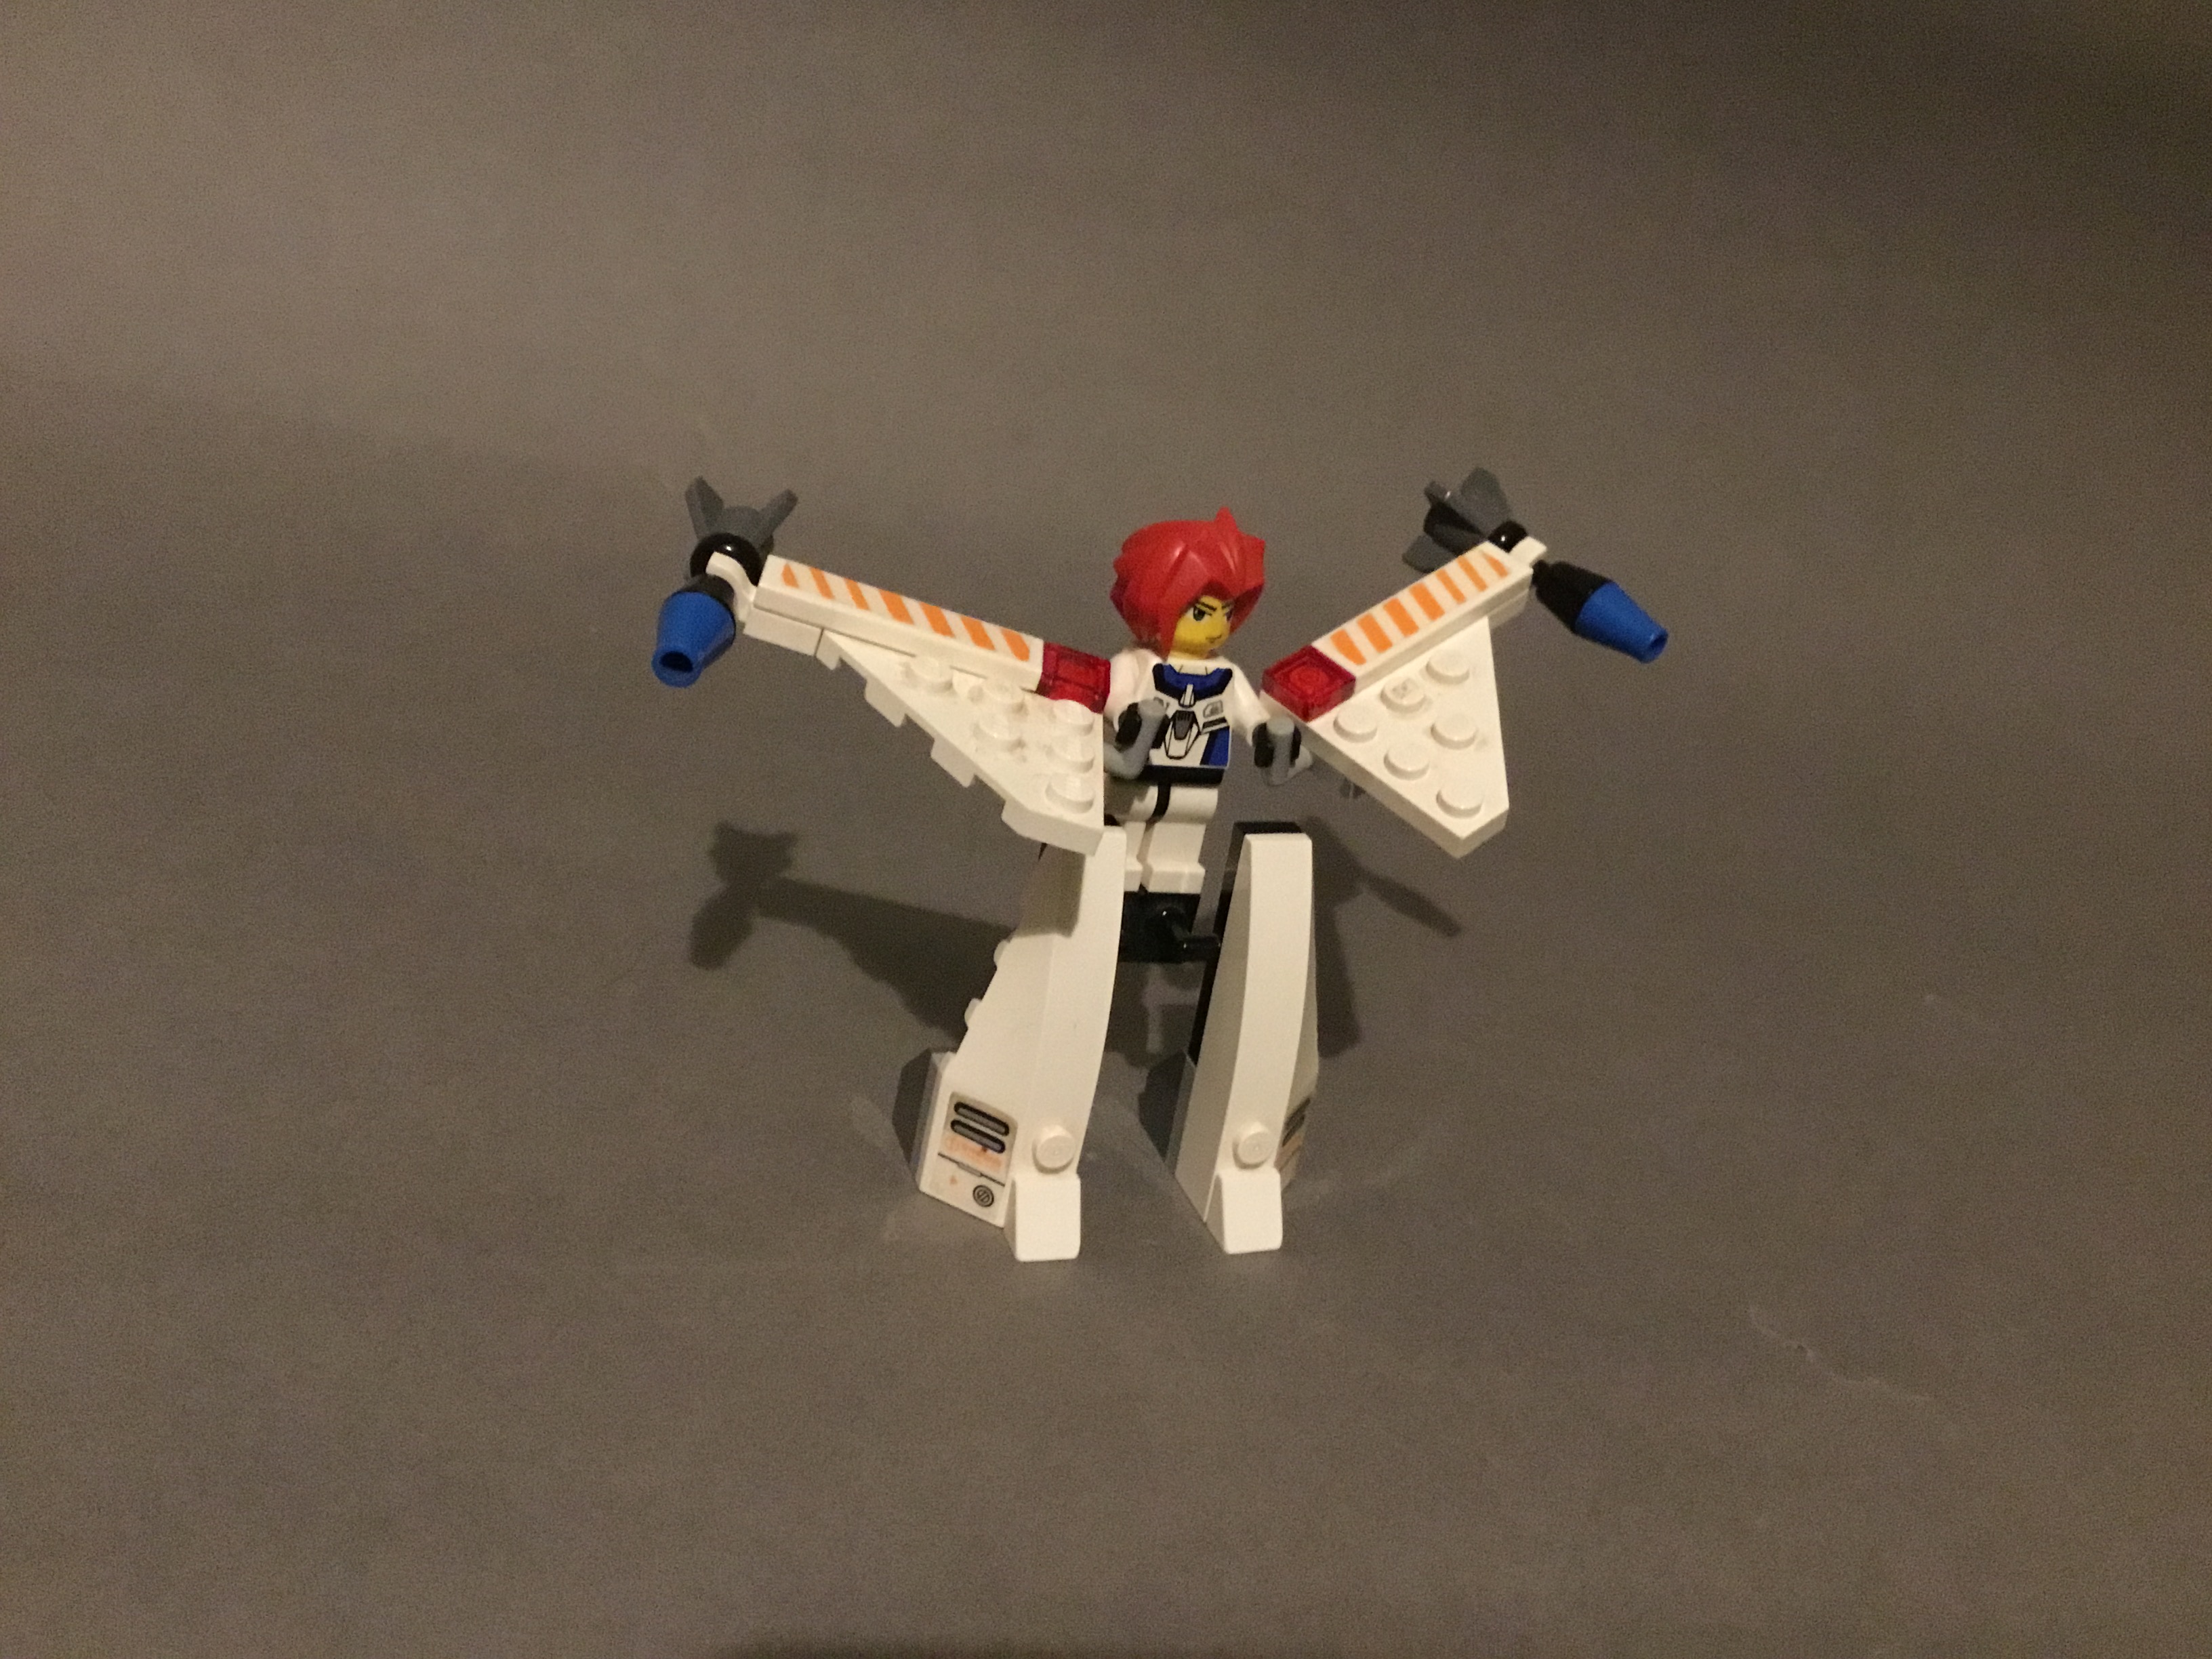
This set has a great number of side builds to get through before we reach the main course, so we’ll go from smallest to largest. Ha-Ya-To receives an almost comically small mech in this set, not unlike a hang-glider with legs. This is the Gate Guardian, Ha-Ya-To’s third machine after he realised how rubbish and fragile the White Lightning was. Interestingly, the build of the machine is based off the Exo-Force polybags available at the time, specifically 5966: White Good Guy.
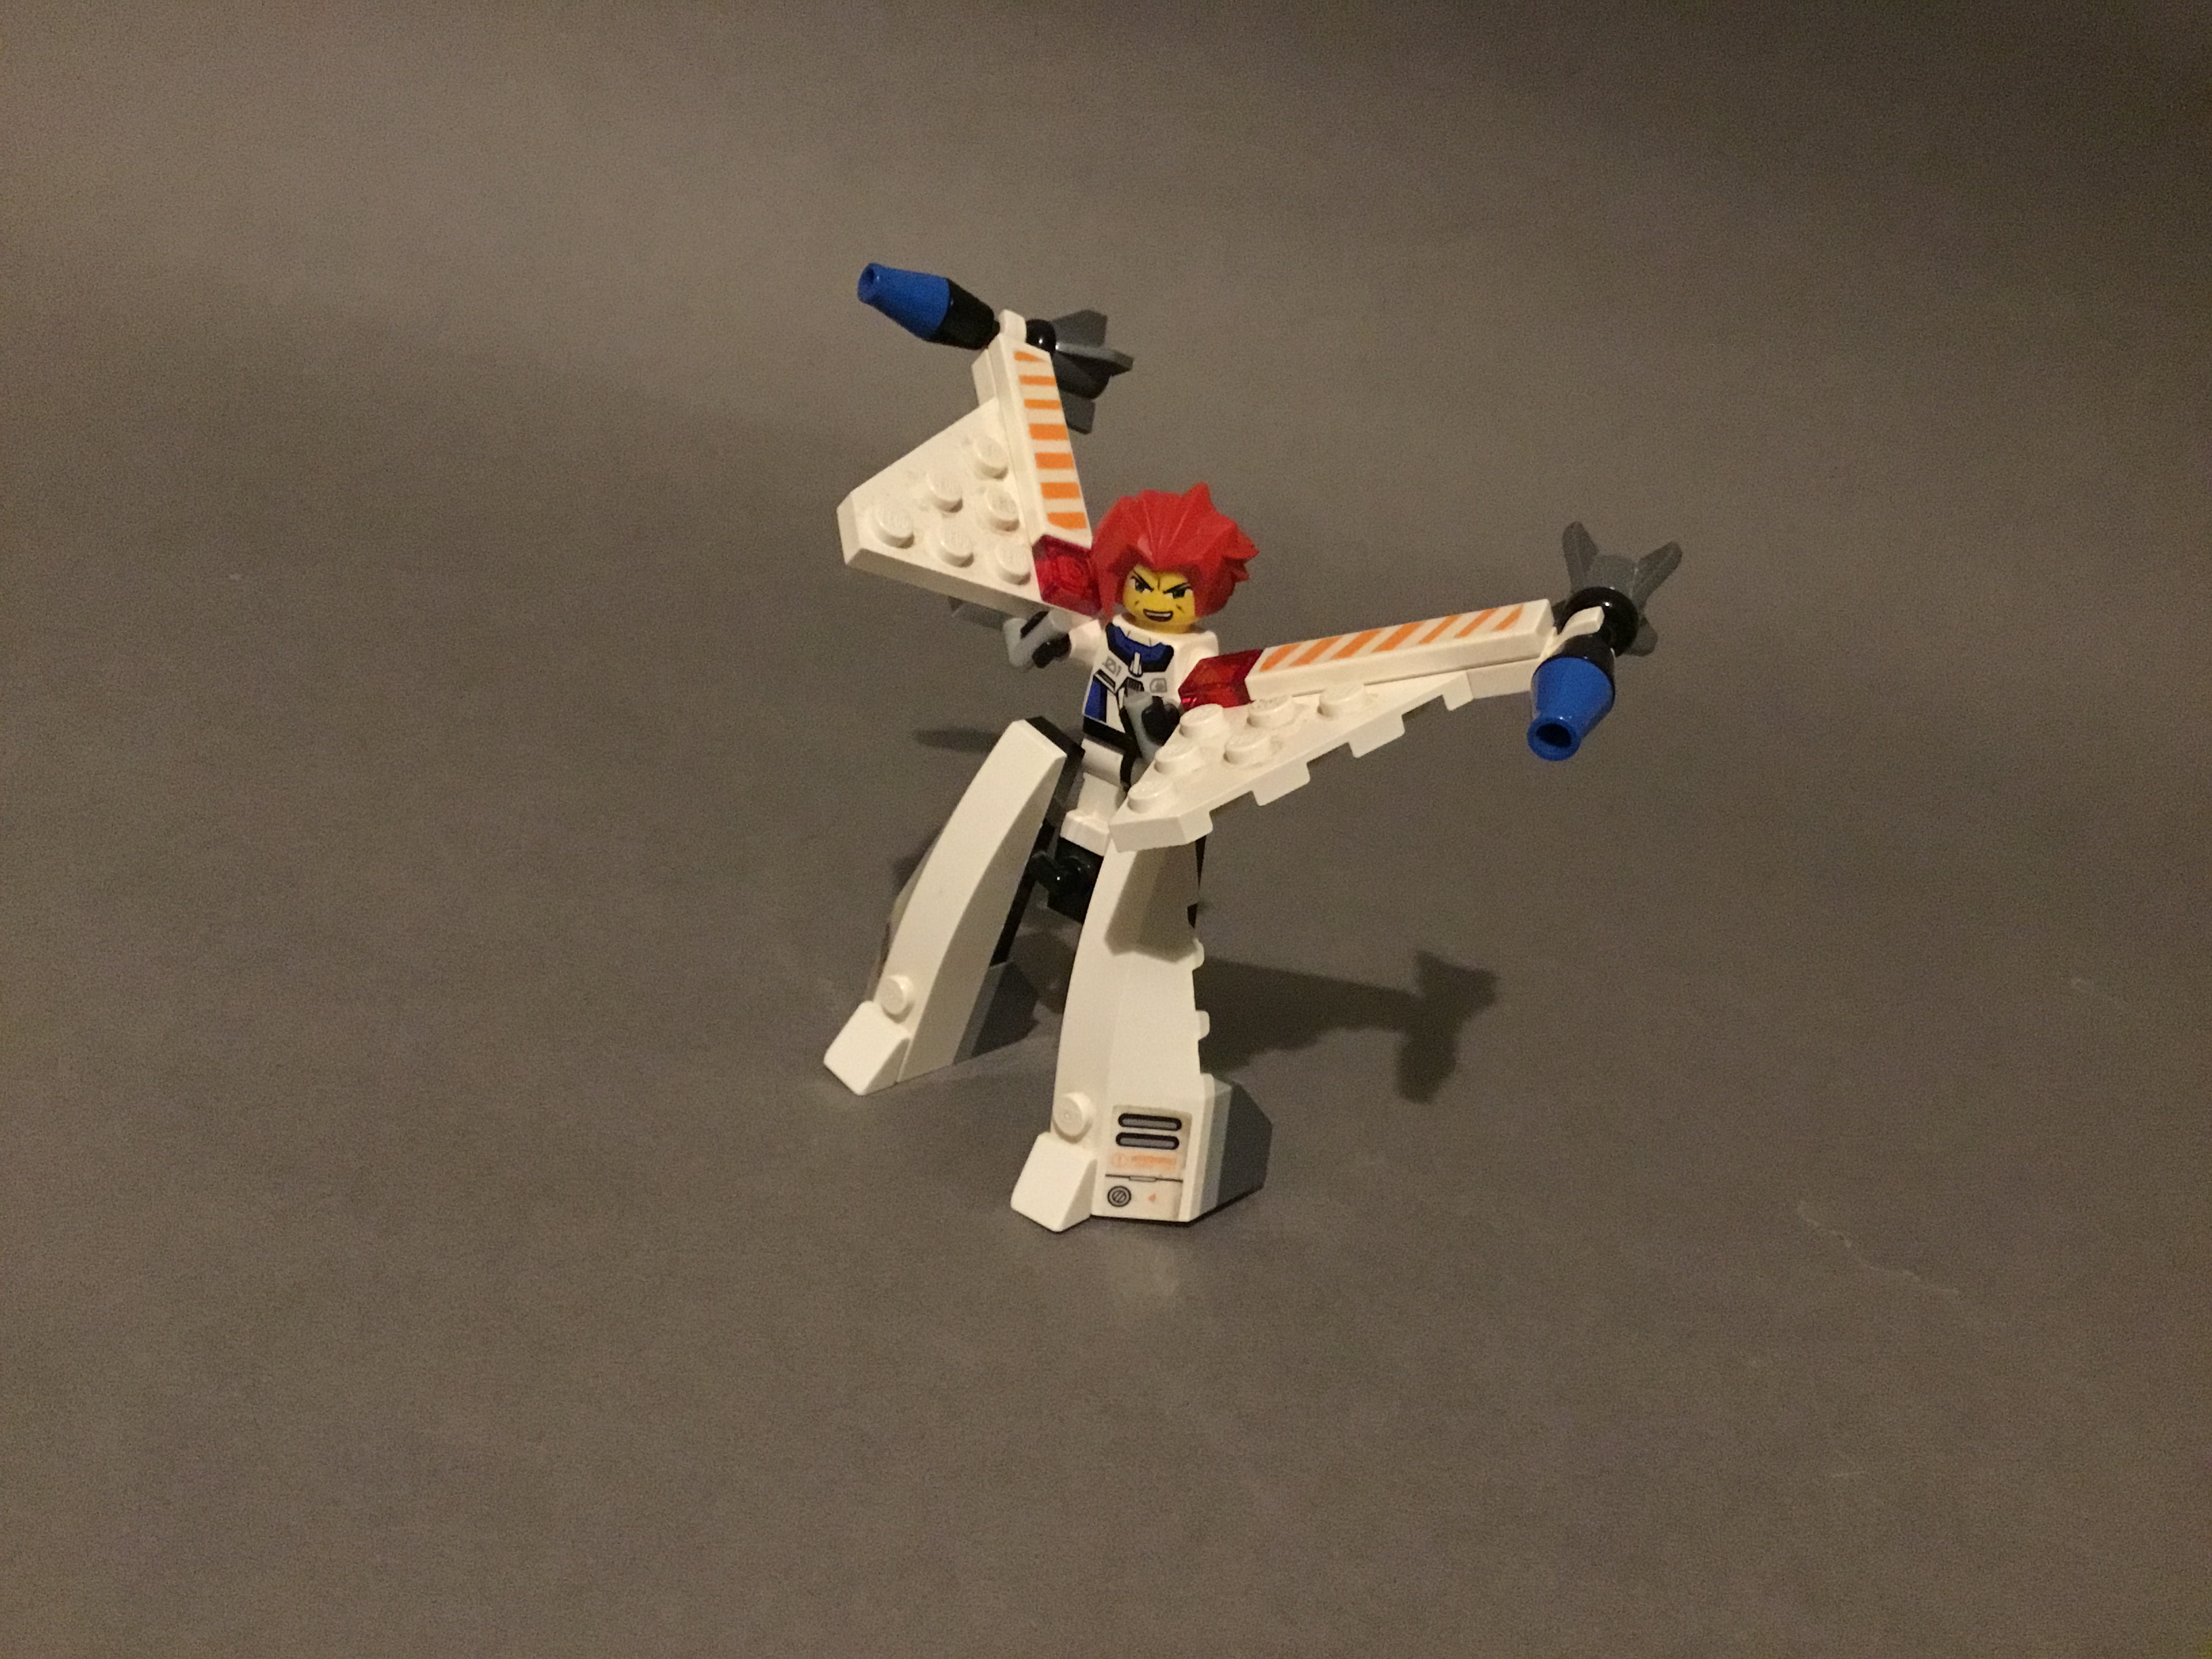
This vehicle looks more than a little ridiculous, especially the giant immobile legs. It’s not all bad, though. It does have a certain charm to it, and is well armed for such a tiny creation, equipped with two blue-tipped goblet missiles.
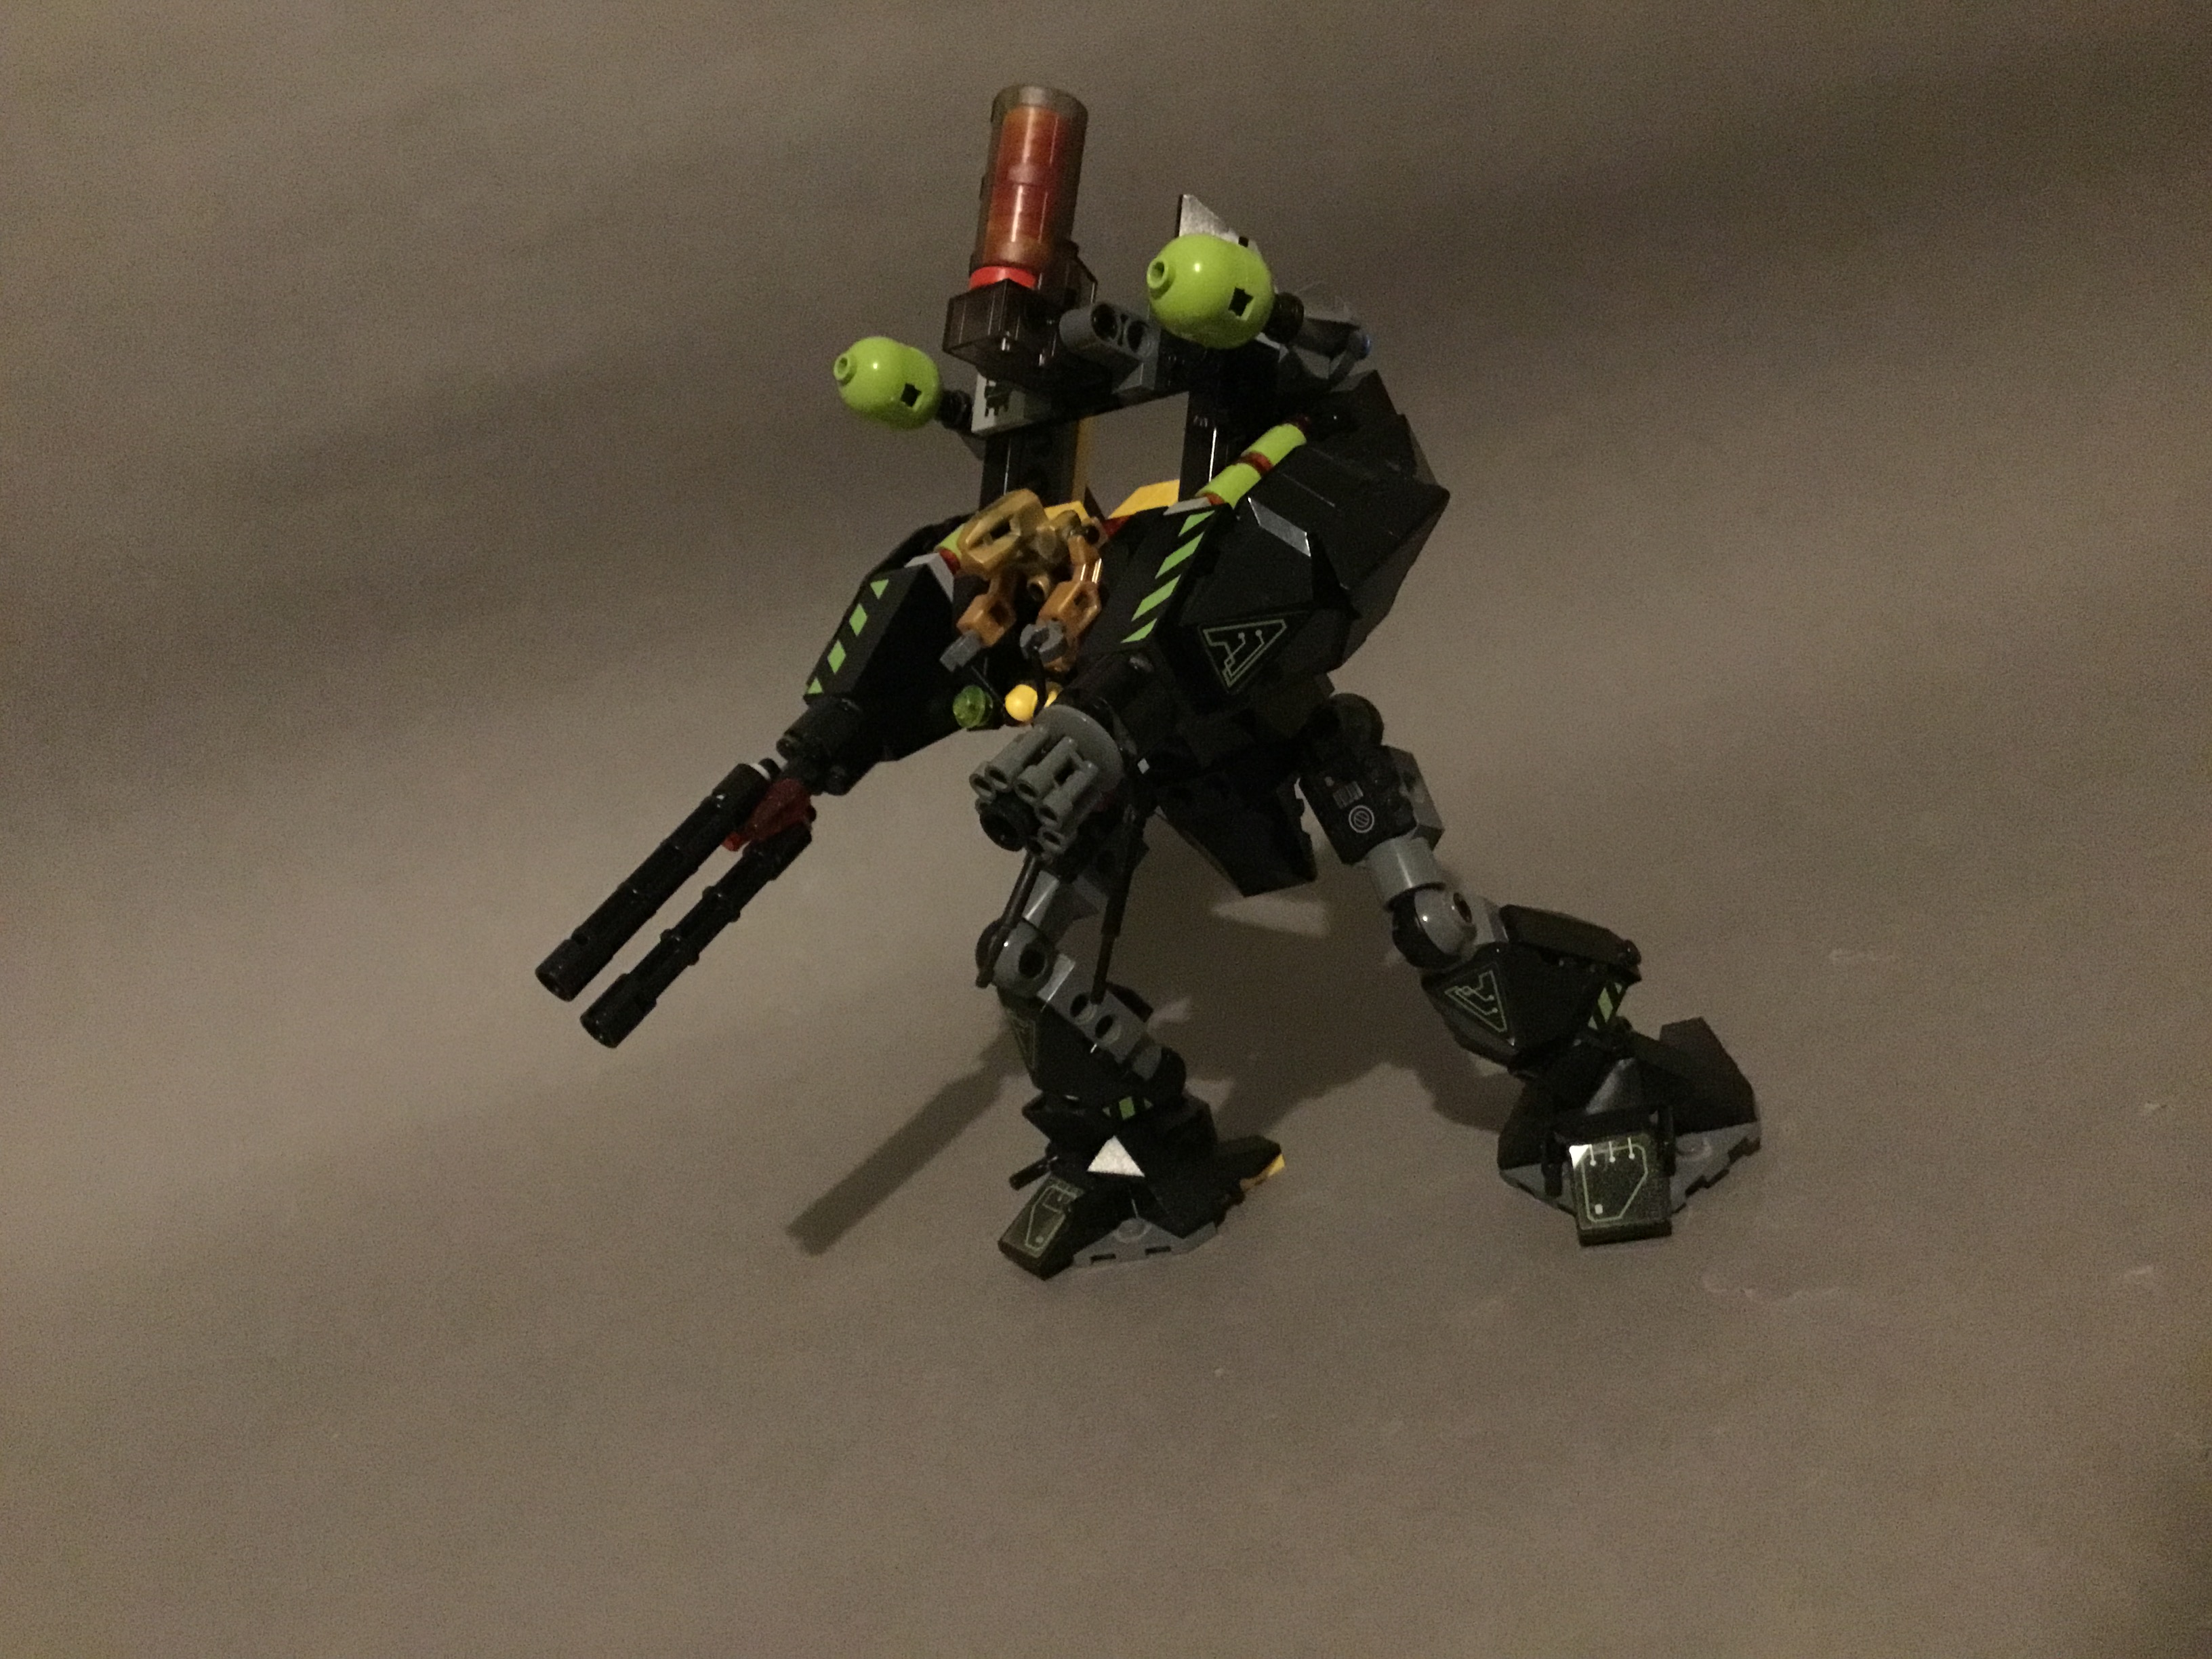
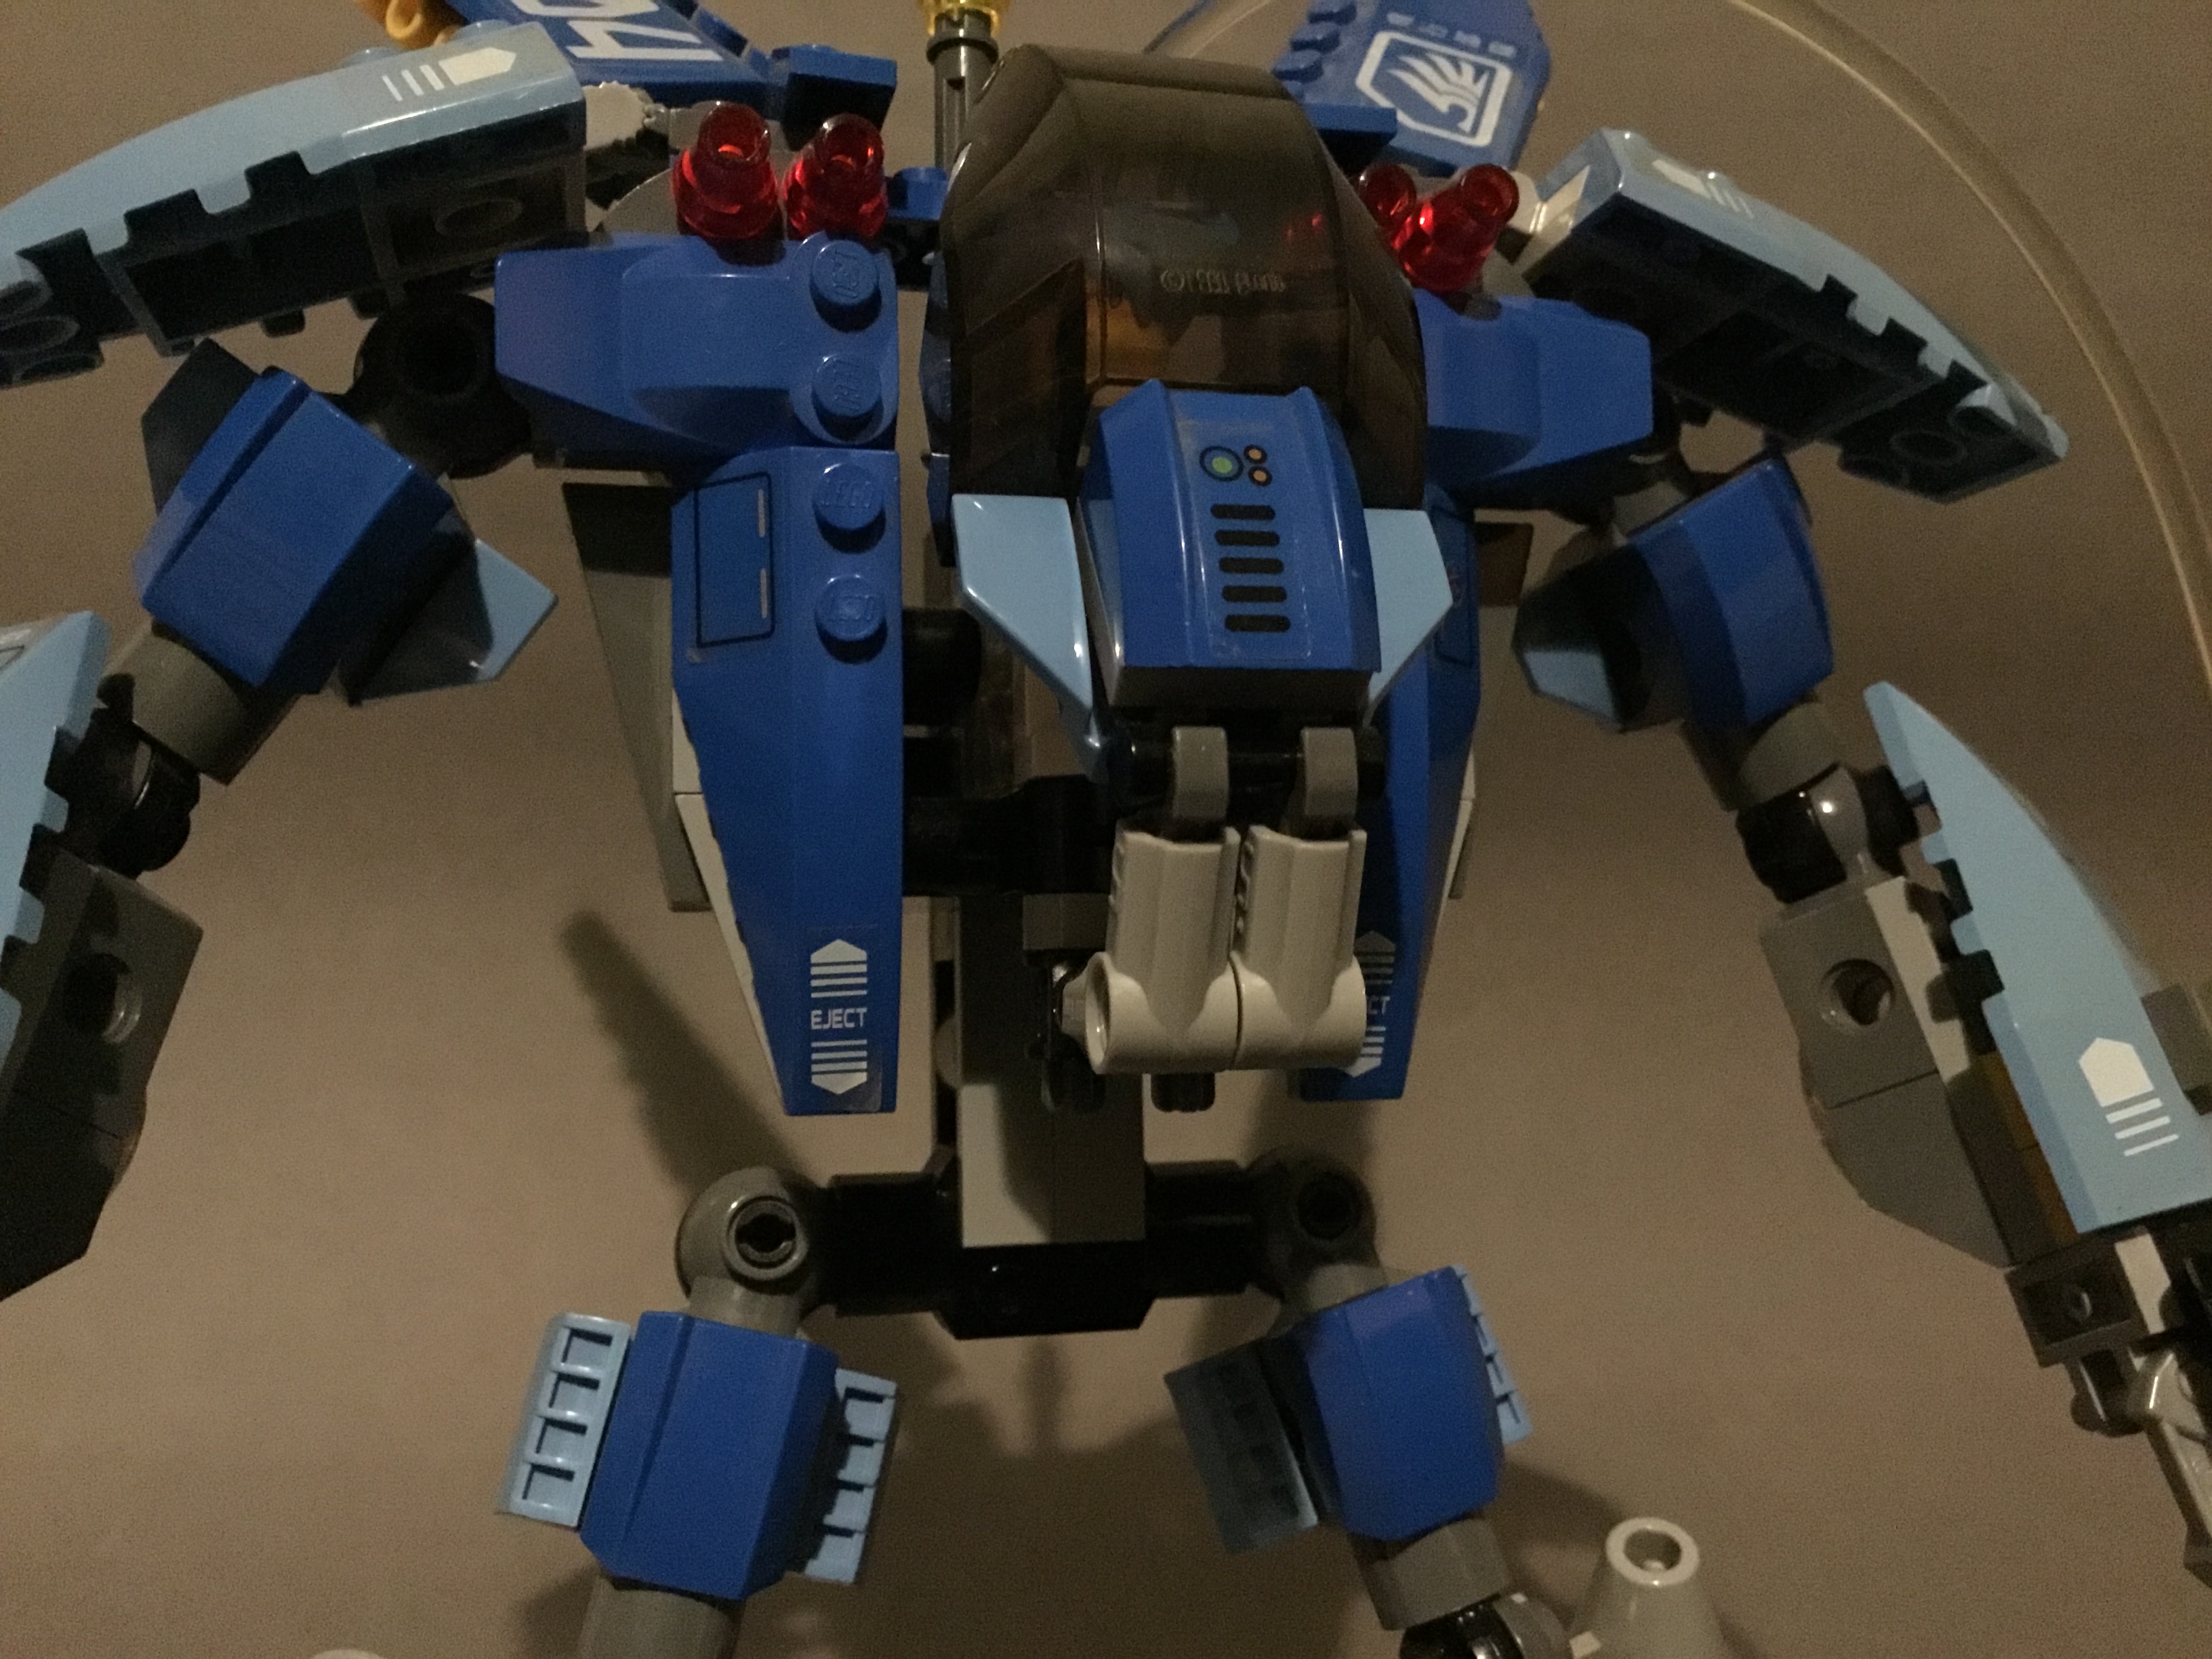
The robots have employed the Venom 1 to aid in their assault, essentially the robot version of the human’s White Lightning. It retains very similar features: waist swivel, guns for arms, disk launcher, and an altered torso compared to other mid-range offerings. Unlike the White Lightning, however, the Venom 1 is actually good.
This machine is essentially a walking artillery platform, loaded to the brim with all sorts of firearms for attacking the fortress.
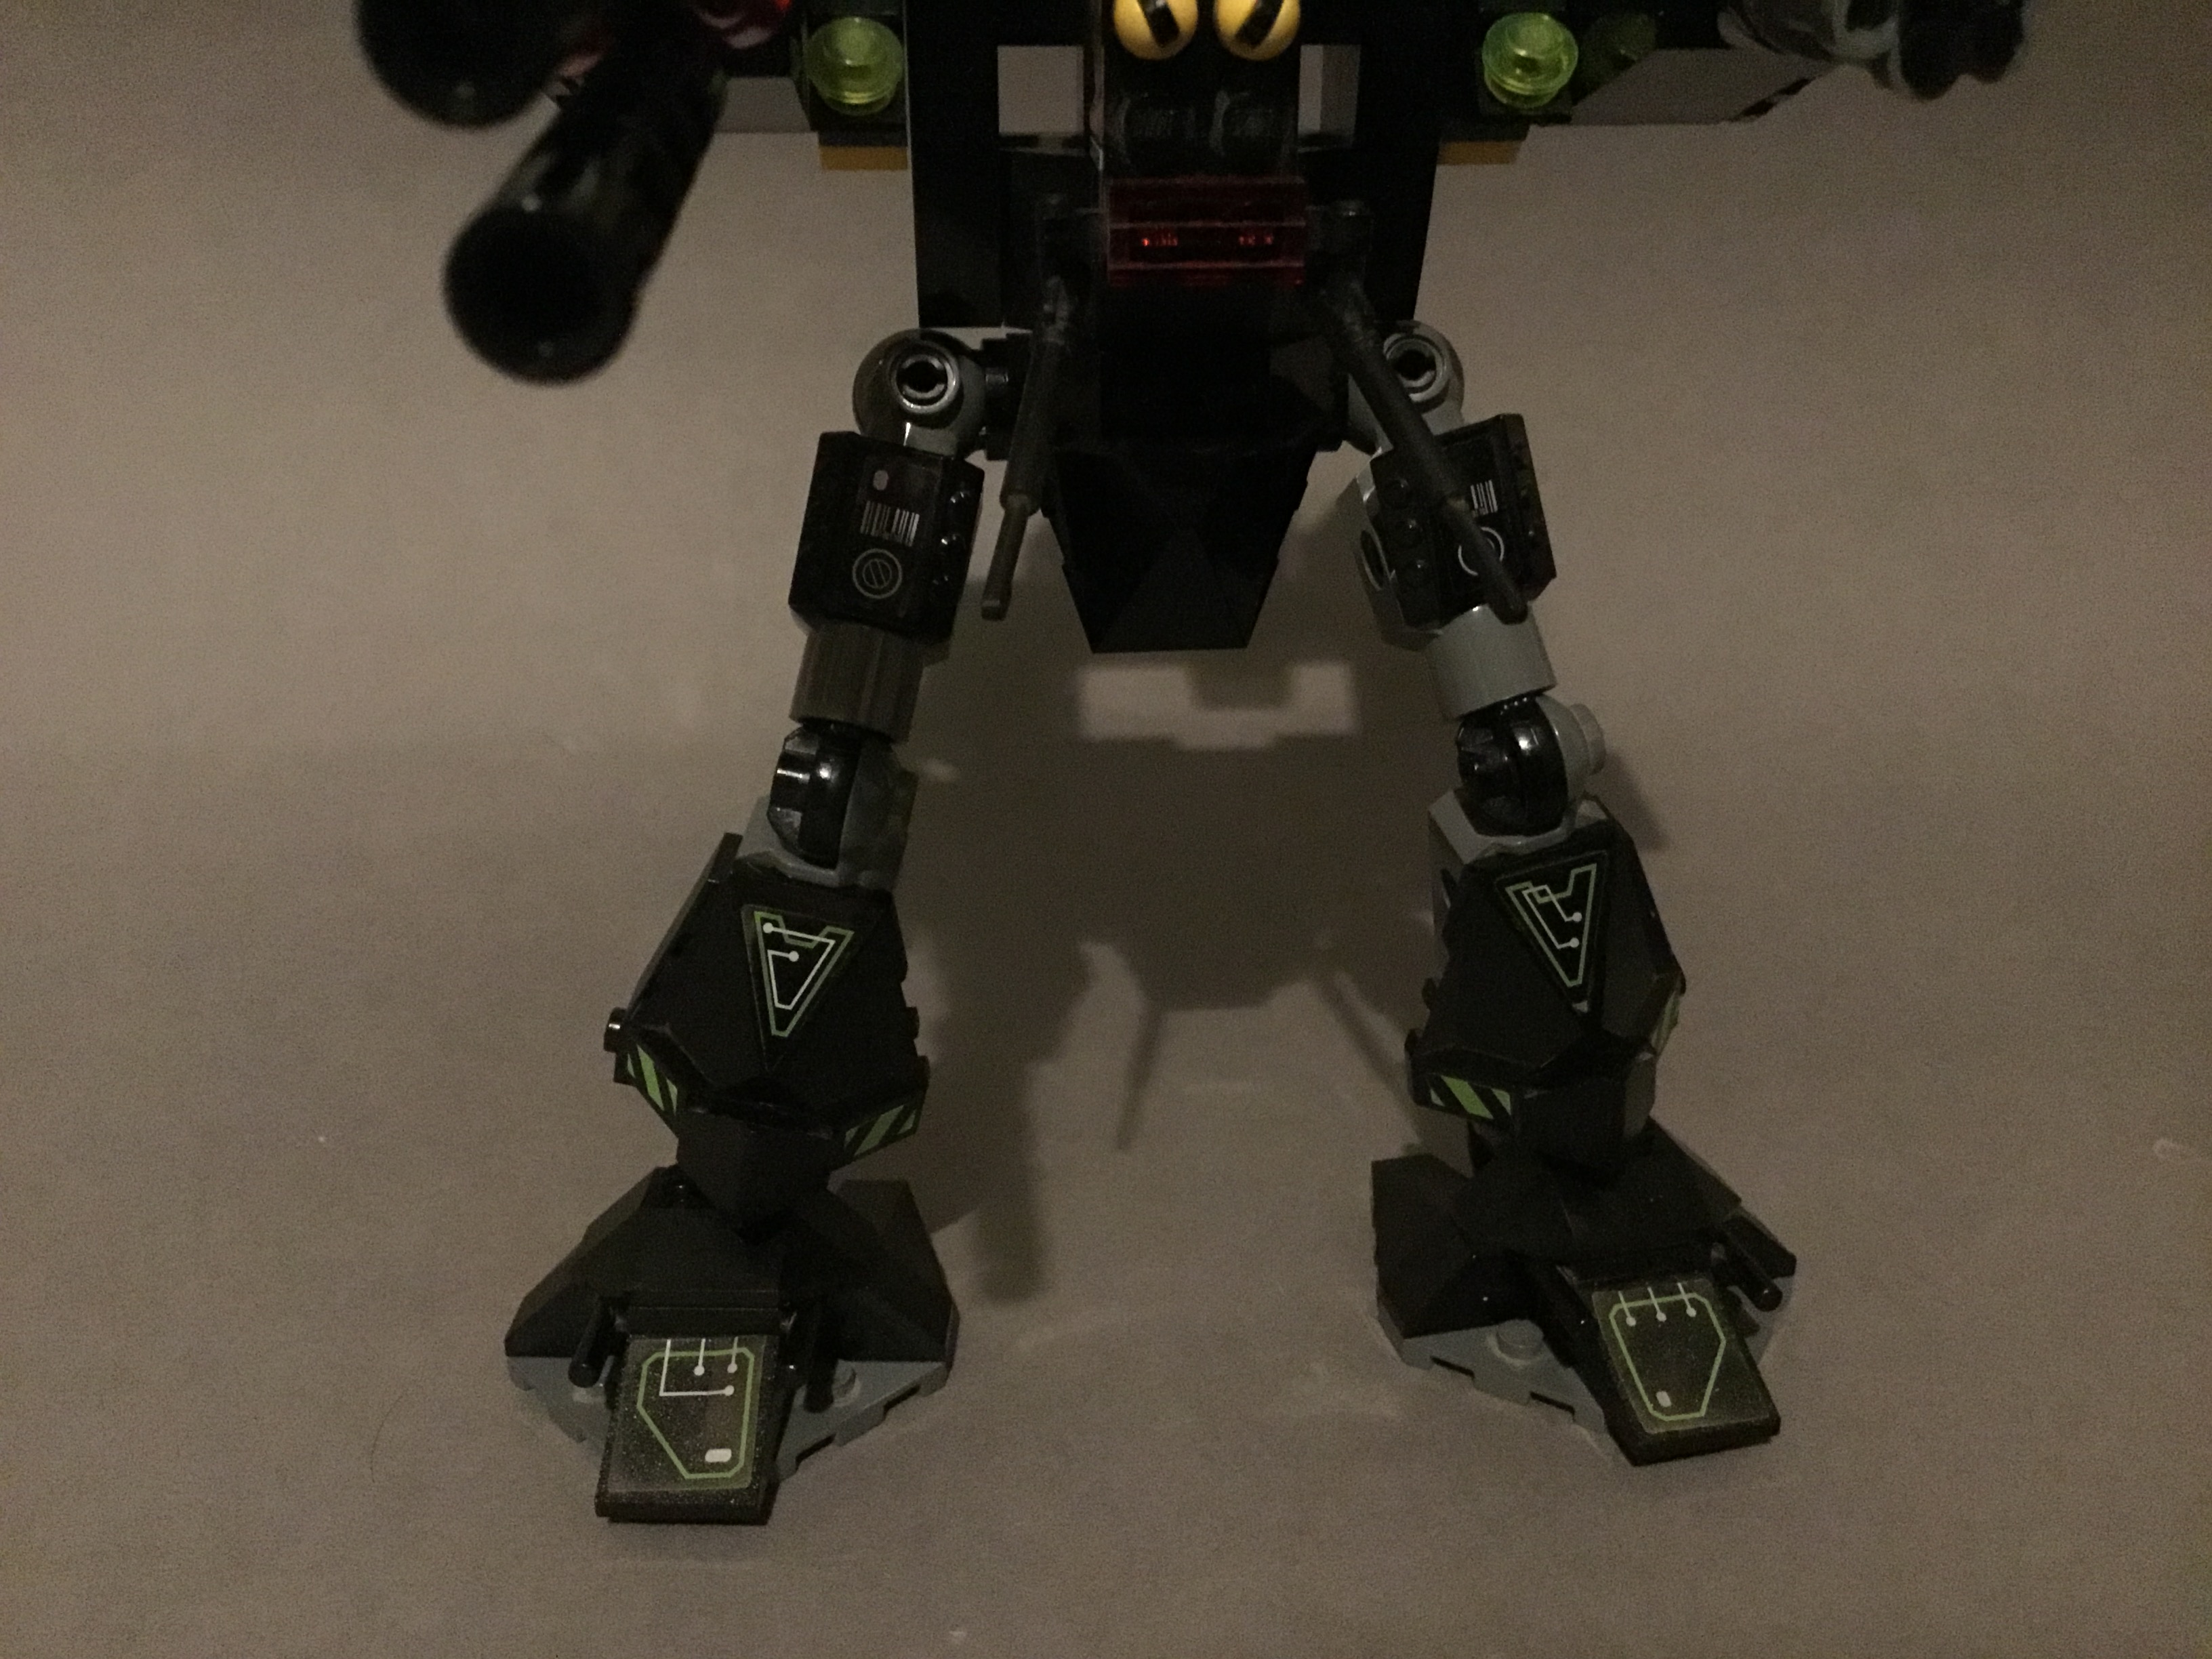
Starting, as usual, with the legs, we can see that they’re heavily based off the Thunder Fury’s, however the armouring is noticeably bulkier. The standard fuel caps are also located on the thighs, as opposed the feet or shins of every other Battle Machine. The robot’s signature caution stripes are also curiously green on this mech, contrasting to the normal yellow.
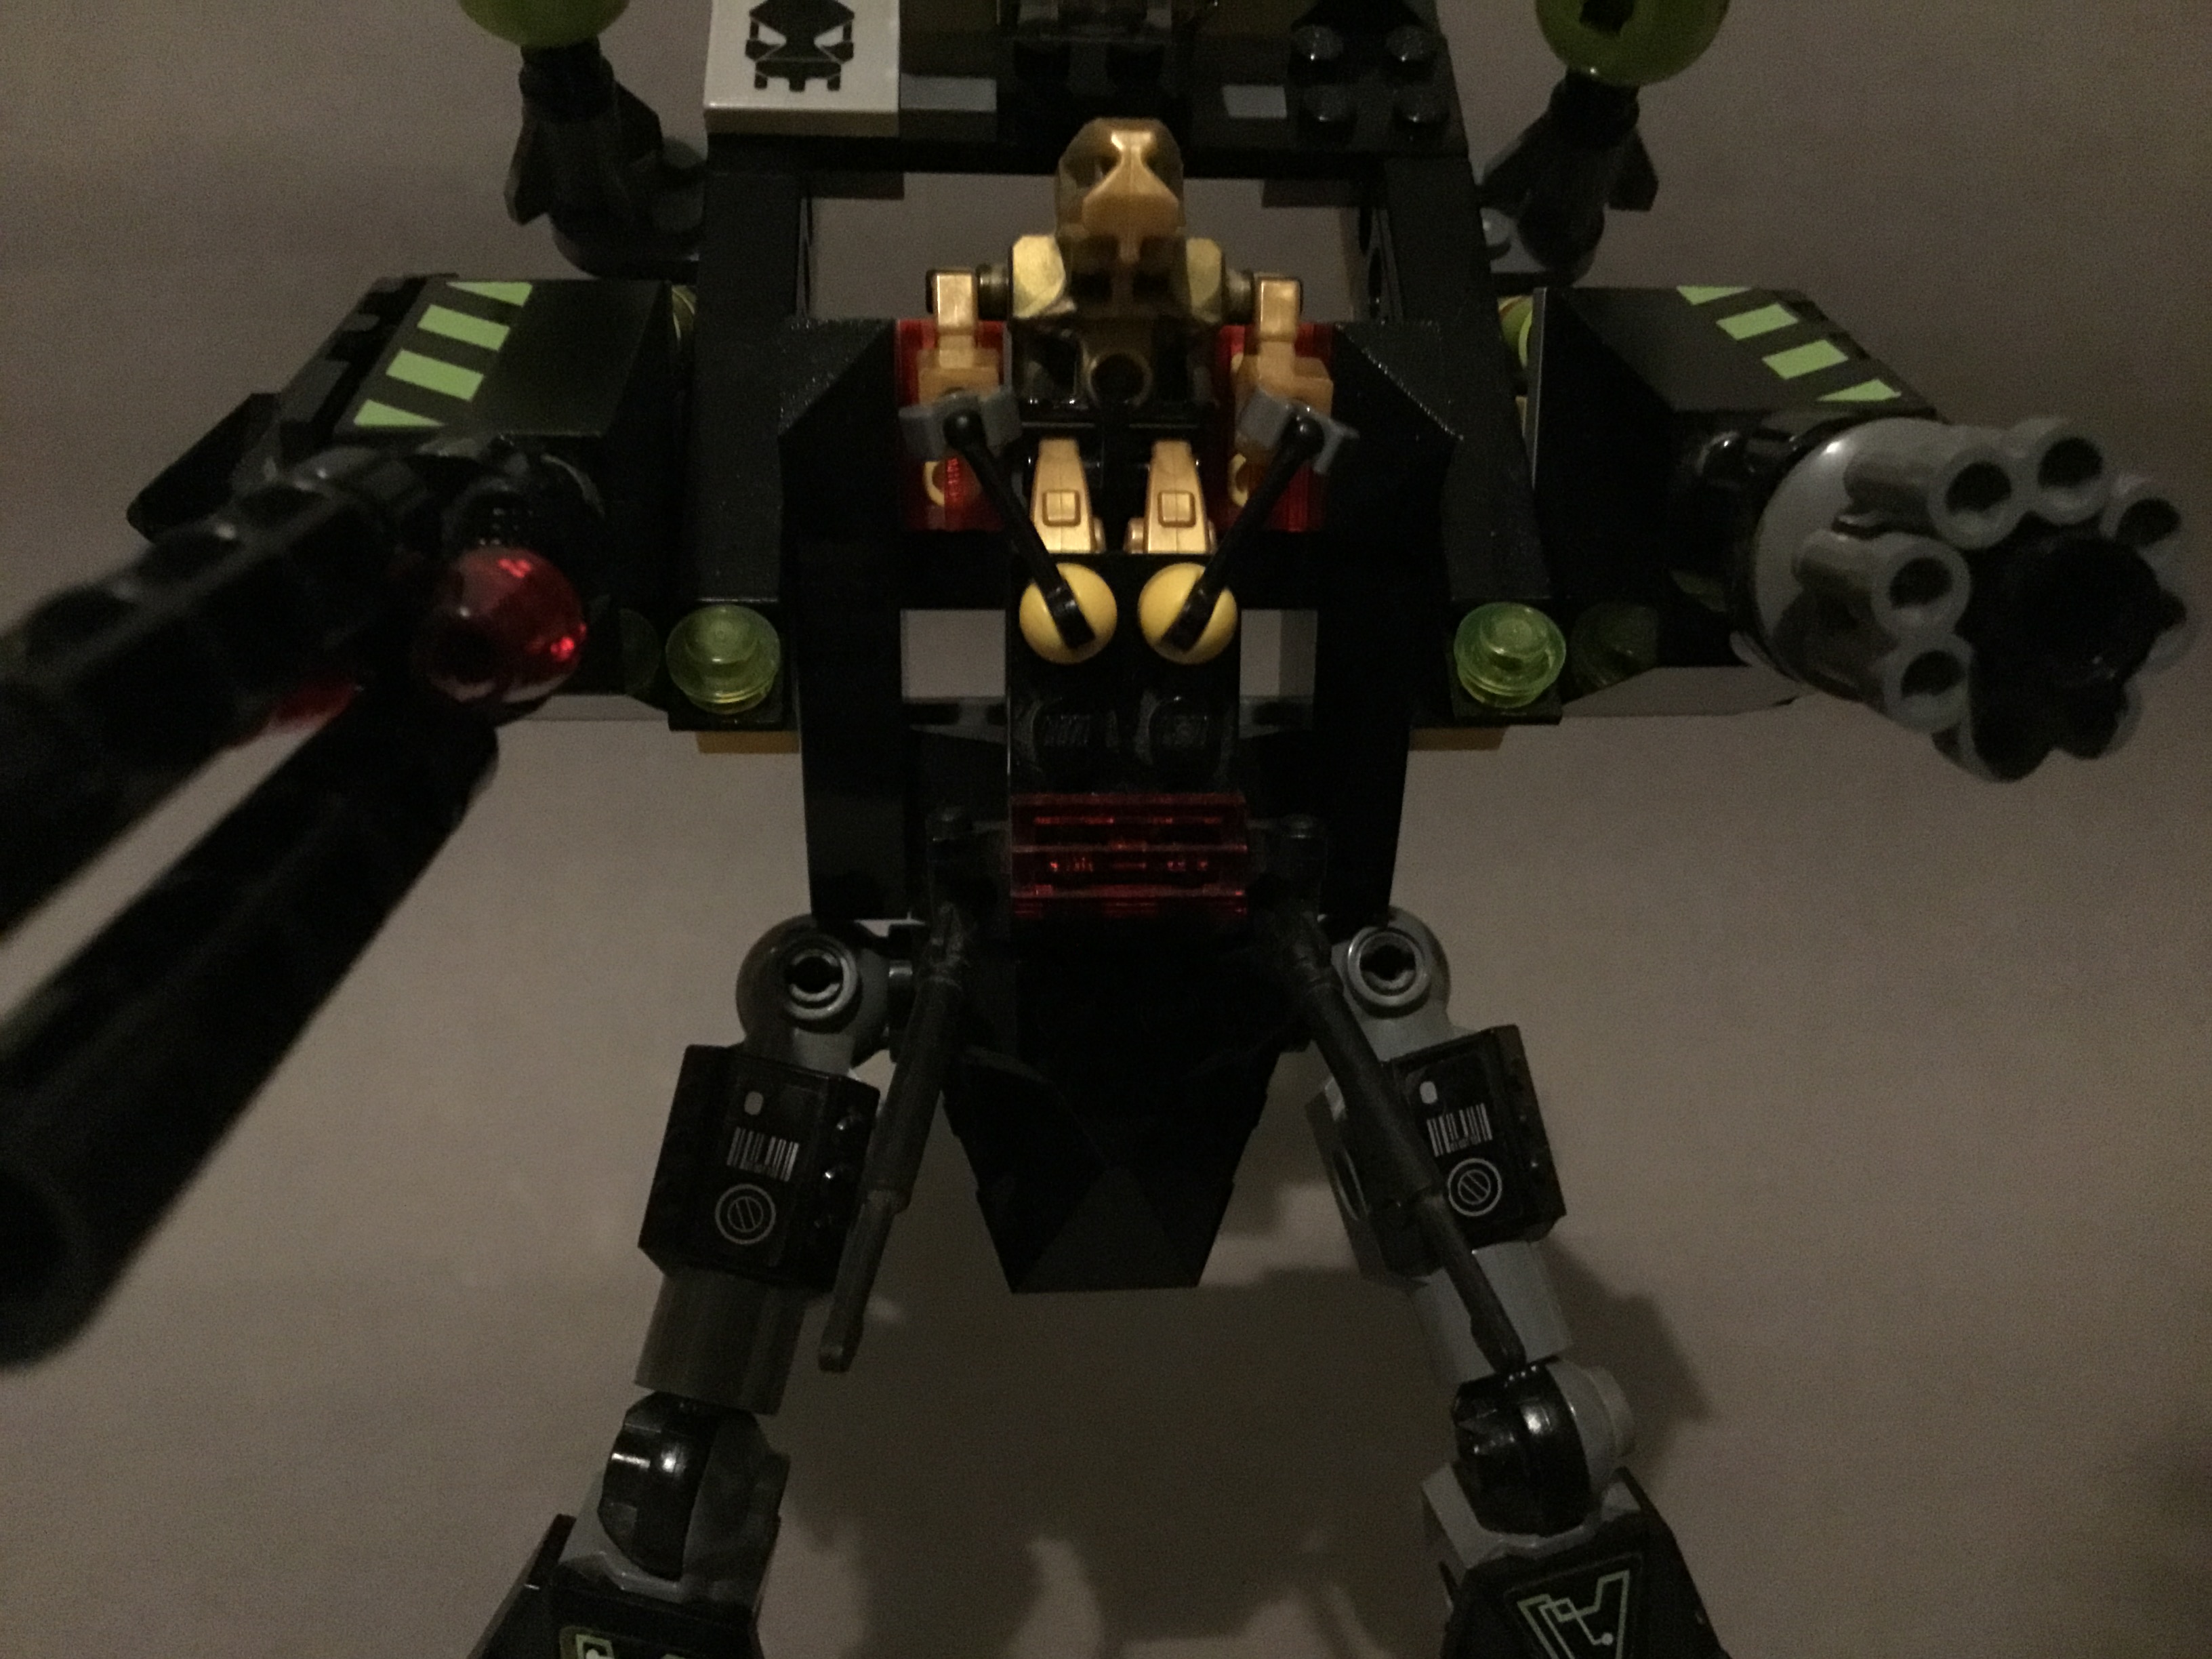
The Venom 1’s torso is a very odd contraption unlike any other mech’s. The entire shoulder structure is hinged to allow you to reposition all of the machines armaments at once, including the arms which swing up with the shoulders one the back’s brought down far enough. Meca One controls the vehicle from here, using a pair of yellow levers. Two spearguns flank the front of the pilot’s seat for targeting infantry.

The arms aren’t particularly articulate, only moving up and down. However, this isn’t really an issue, as it improves stability and is negated by the fantastic waist swivel, allowing a full radius of movement. While the White Lightning’s arms were hilariously scrawny compared to the colossal guns they carried, the Venom 1 sports incredibly bulky, powerful arms with a lot smaller weapons, an arrangement which seems a lot more realistic. On the left arm we find yet another copy of the Thunder Fury’s minigun, with the only difference being a black technic piece inserted into the centre of the weapon.
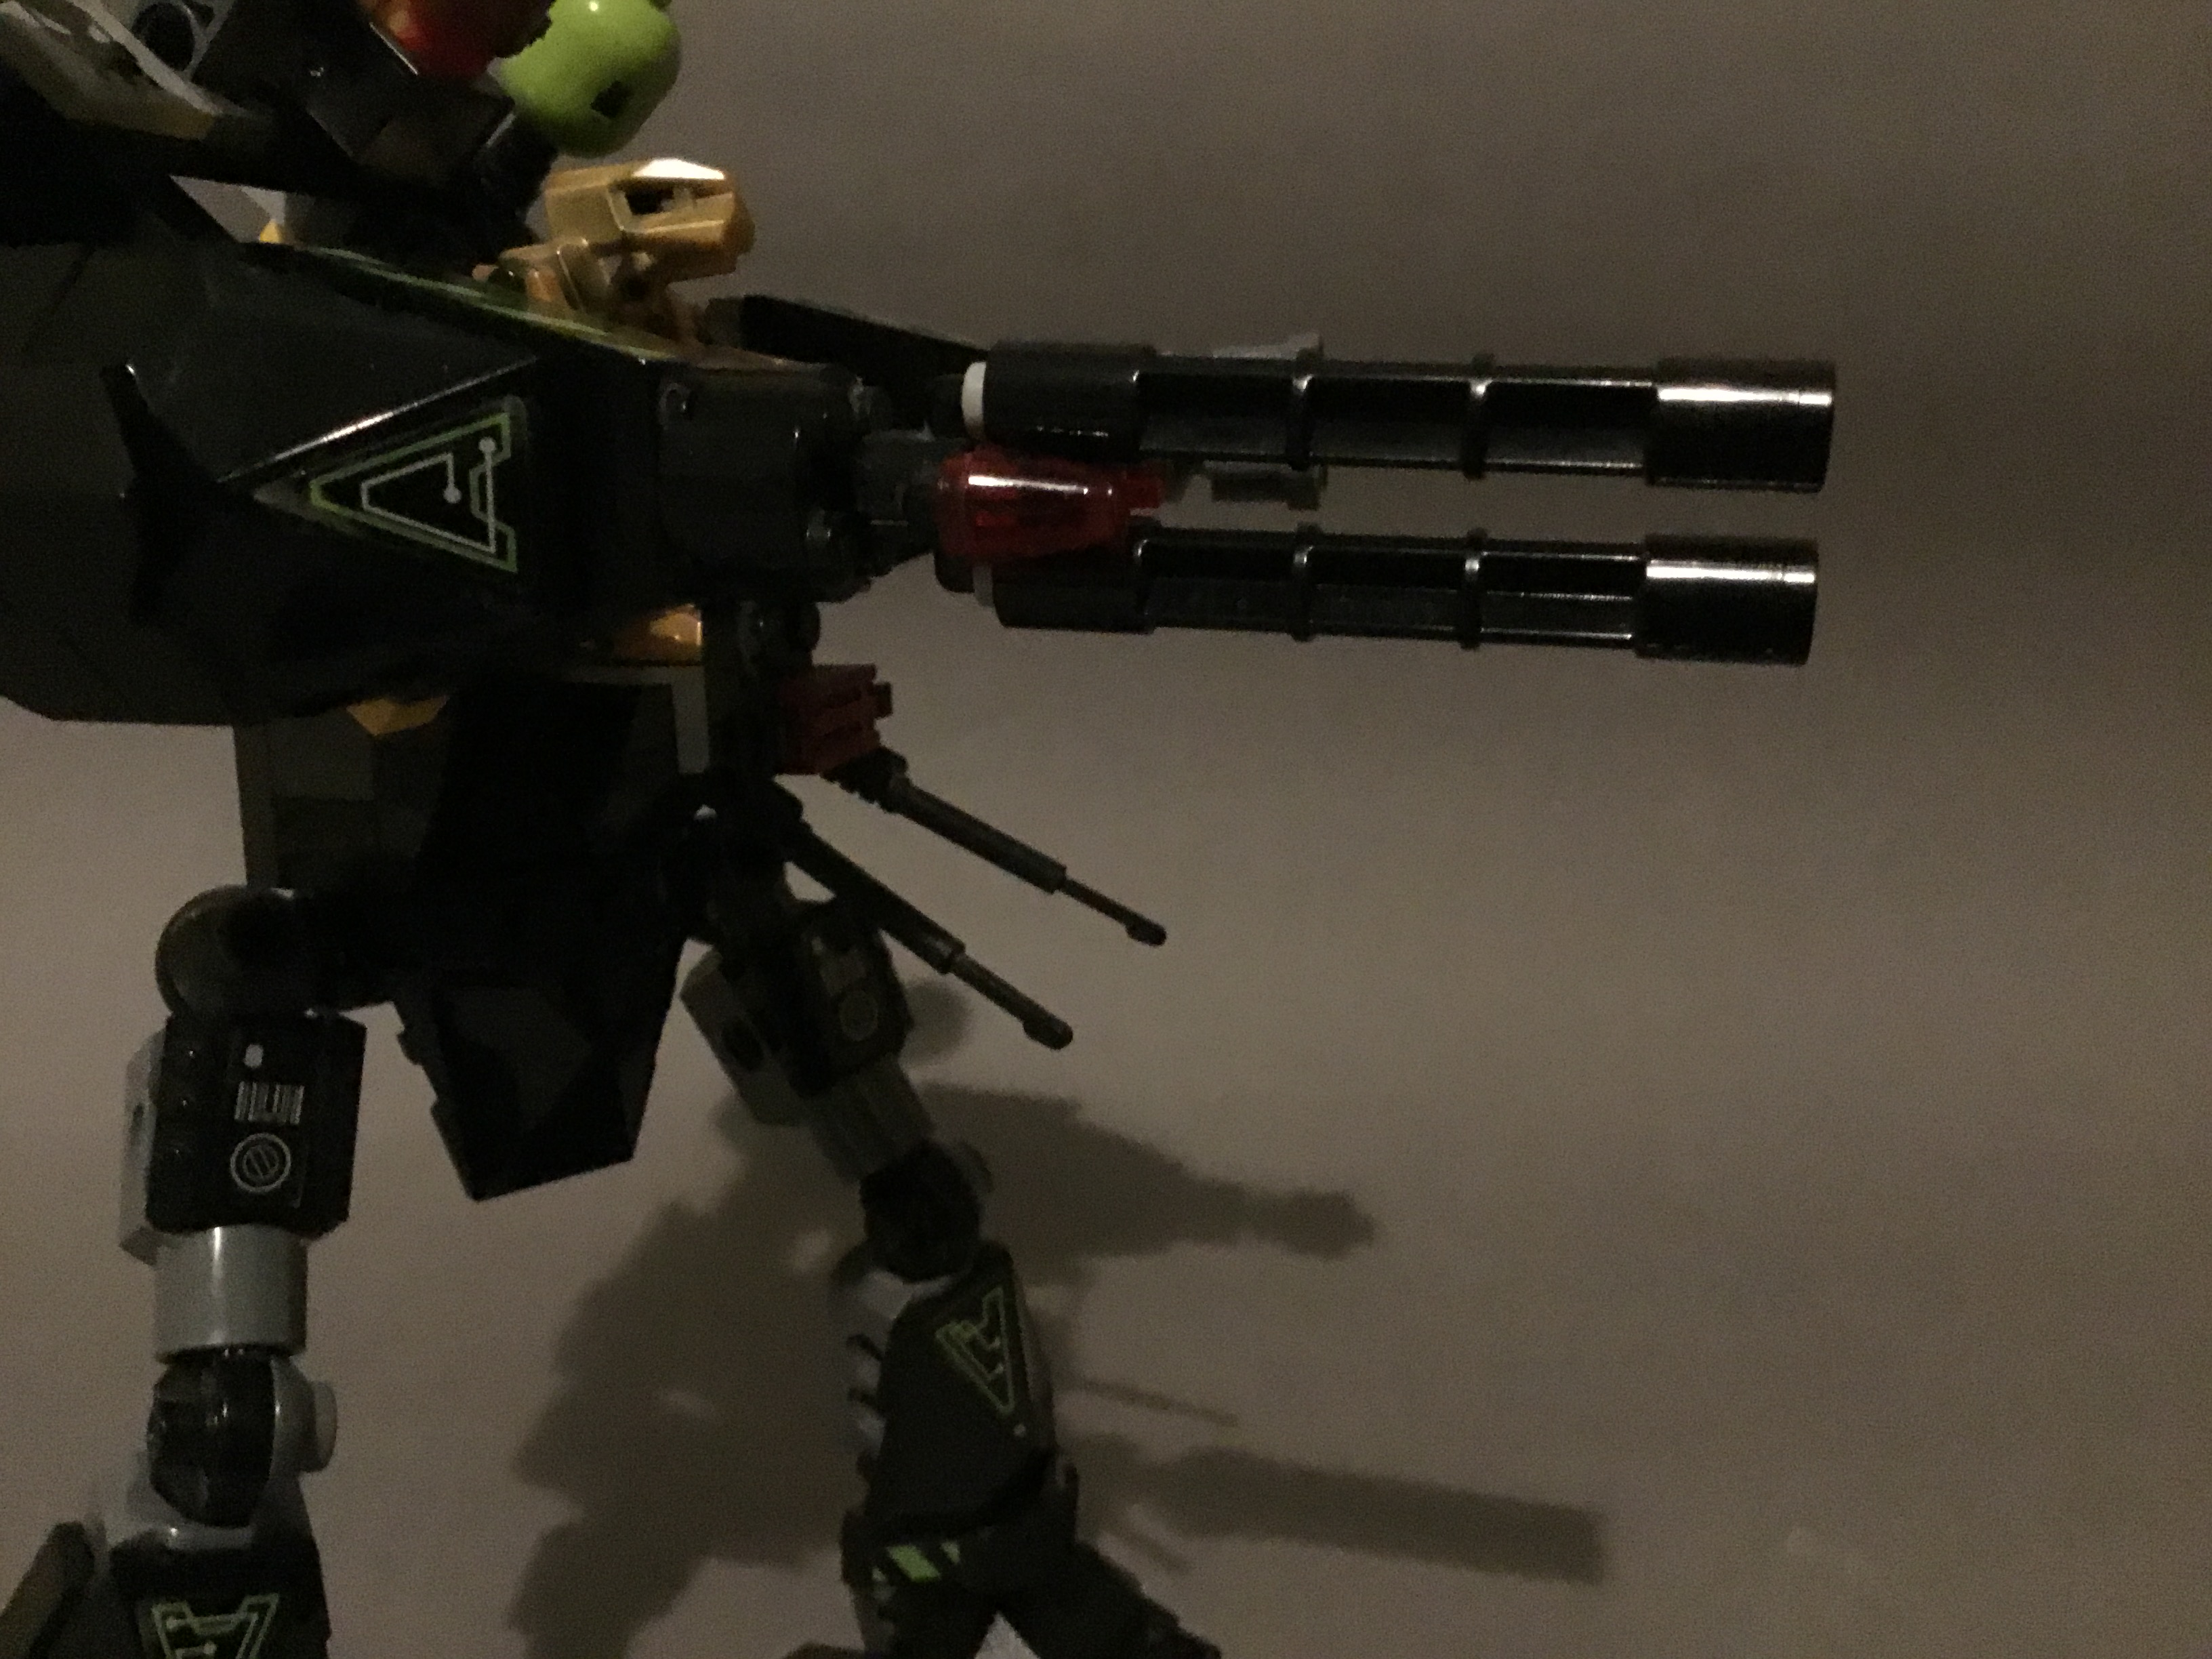
The other arm wields an impressive double-barrelled staircase gun, with two smaller red blasters set much further into the array.
Up top, a disk launcher is accompanied by a pair of huge green bombs pegged into the sides of the shoulder assembly. The assembly’s tilting mechanism can be put to use here to aim the bombs, before unpegging them and pretending to launch them at whatever it is you’re trying to blow up.
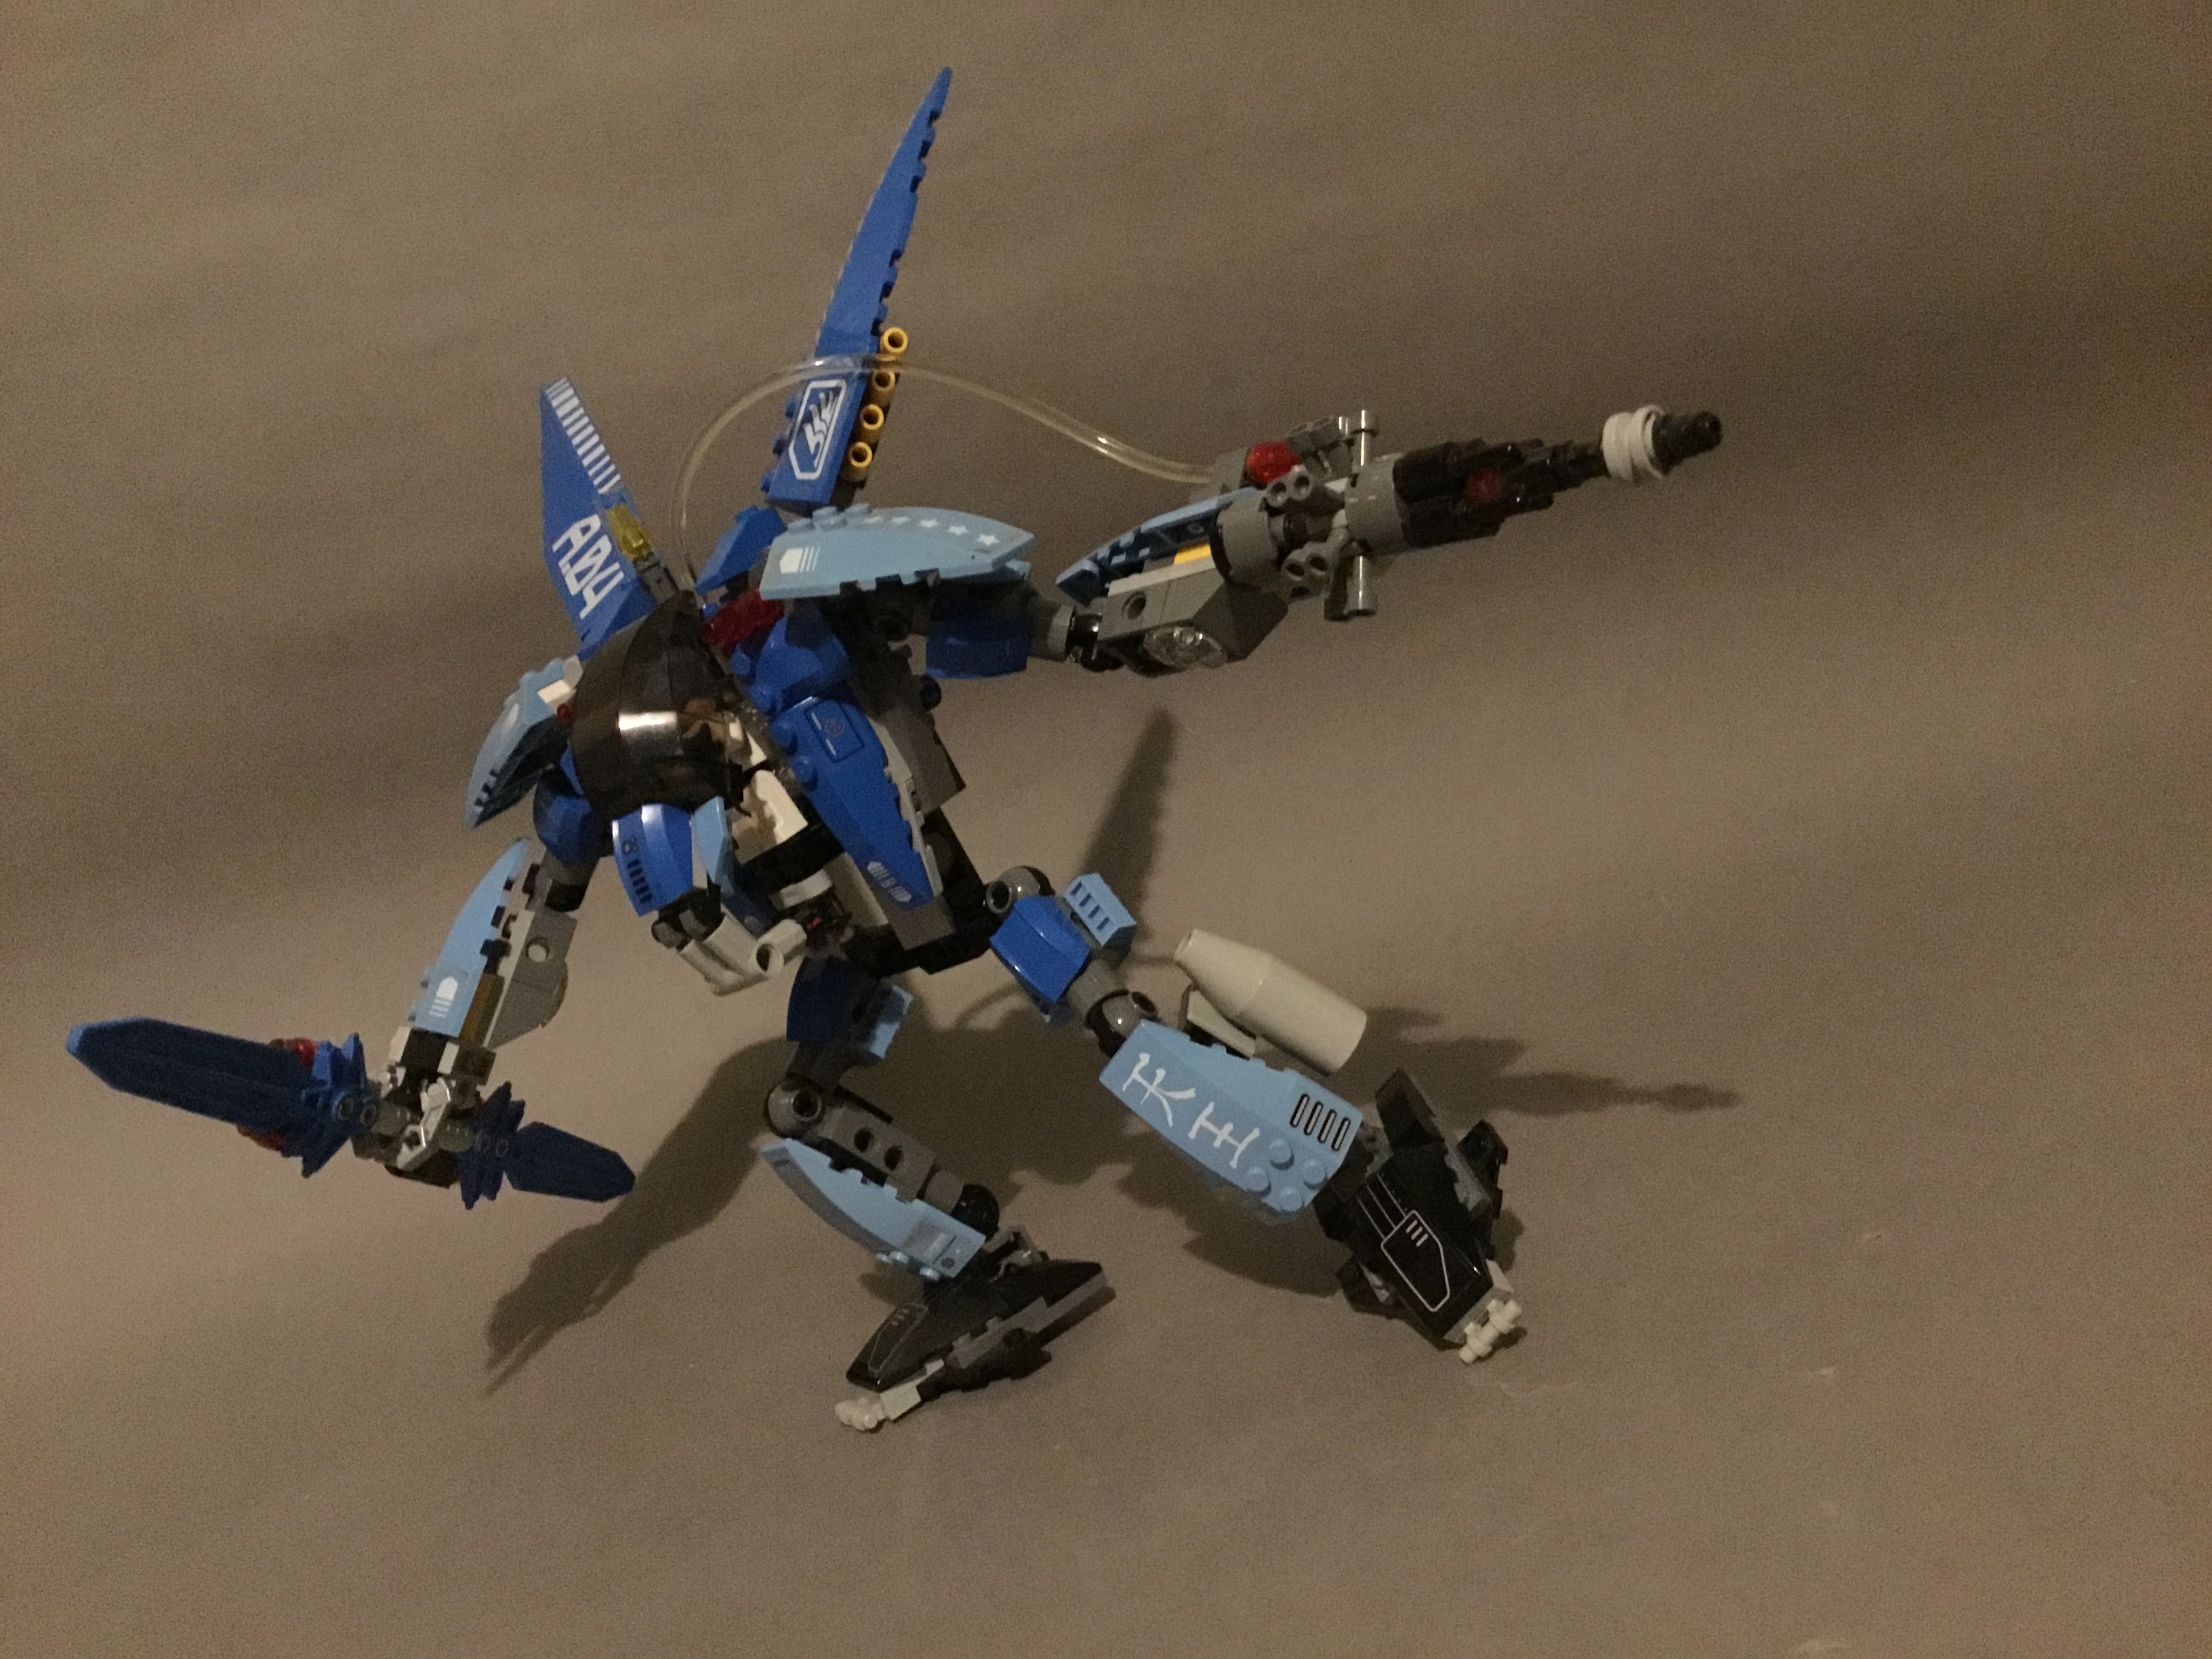
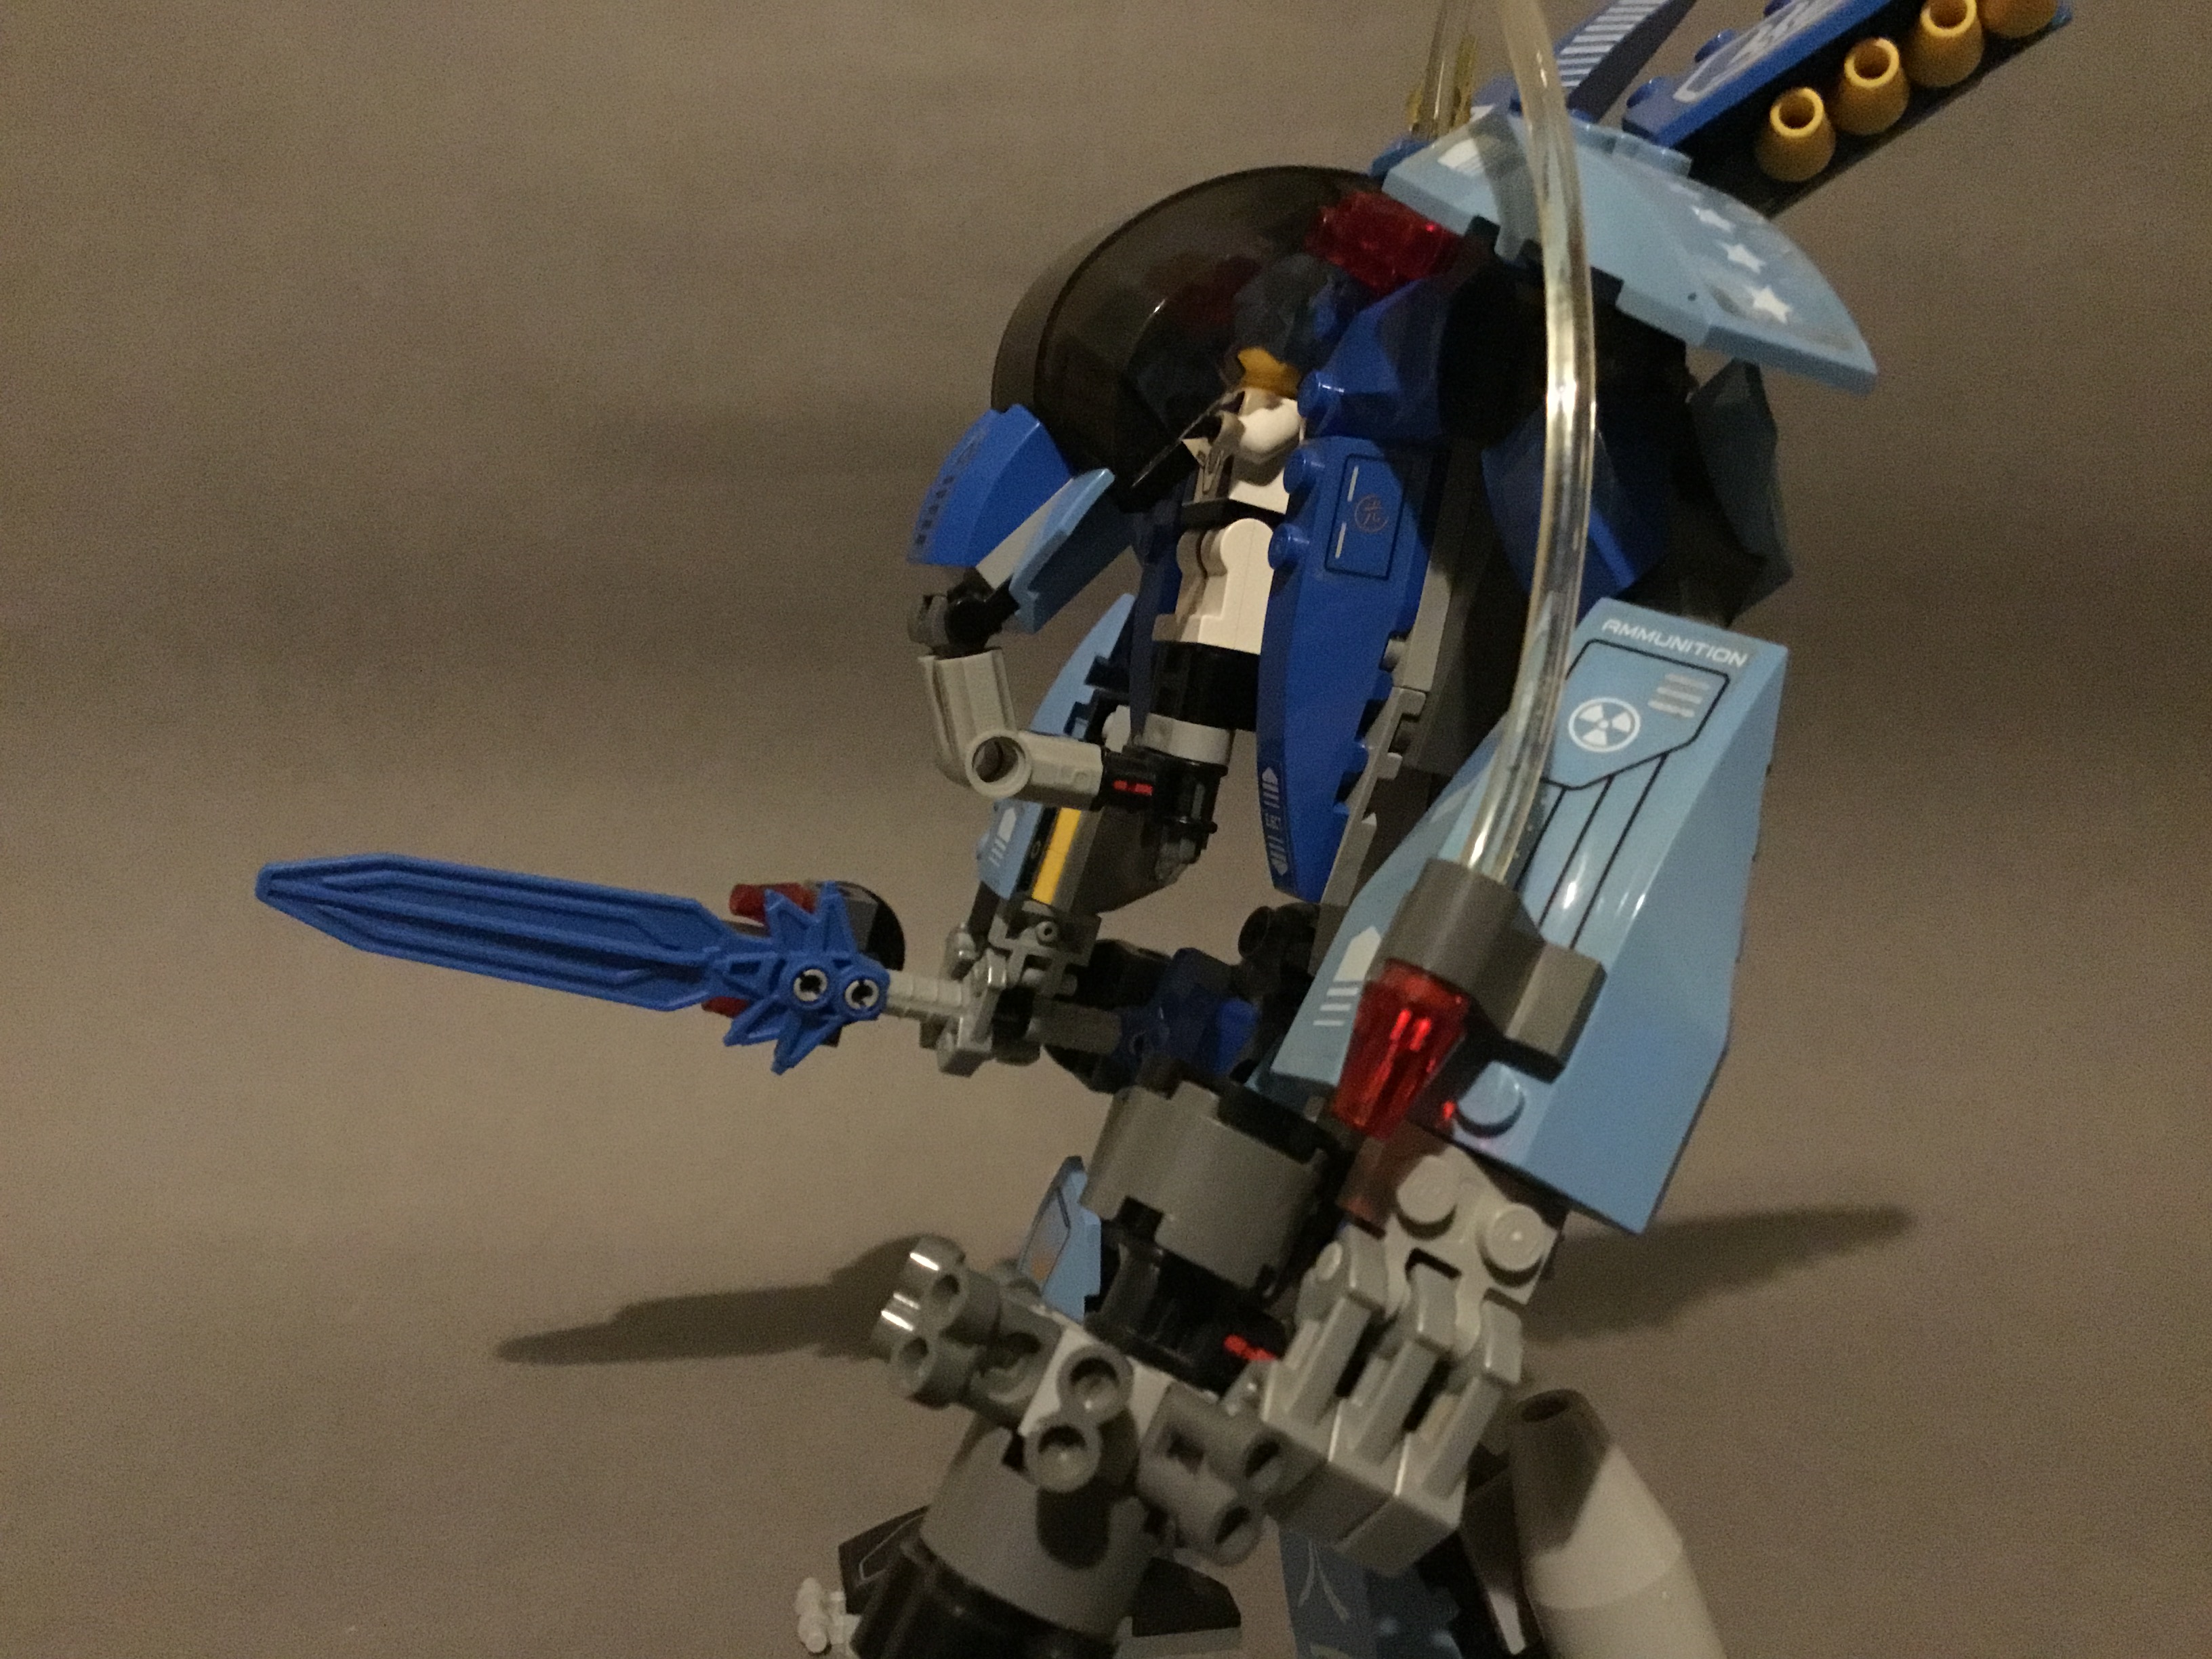
To combat the robot machine, the humans are granted the Silent Strike, Hikaru’s second vehicle after the Stealth Hunter. This model isn’t a mid-range mech, instead it is a counterpart to the “deluxe” mech Supernova. As such, it’s frame is based on a normal mid-range offering, but certain parts of it have been lengthened or bulked up. The most obvious visual difference between the deluxe mechs and their mid-range partners is definitely the fact that they have actual forearms with proper articulated hands holding the weapons rather than the weapons being attached on a hinge directly to the bicep. Several more subtle changes have also been implemented, which well have a look over now.
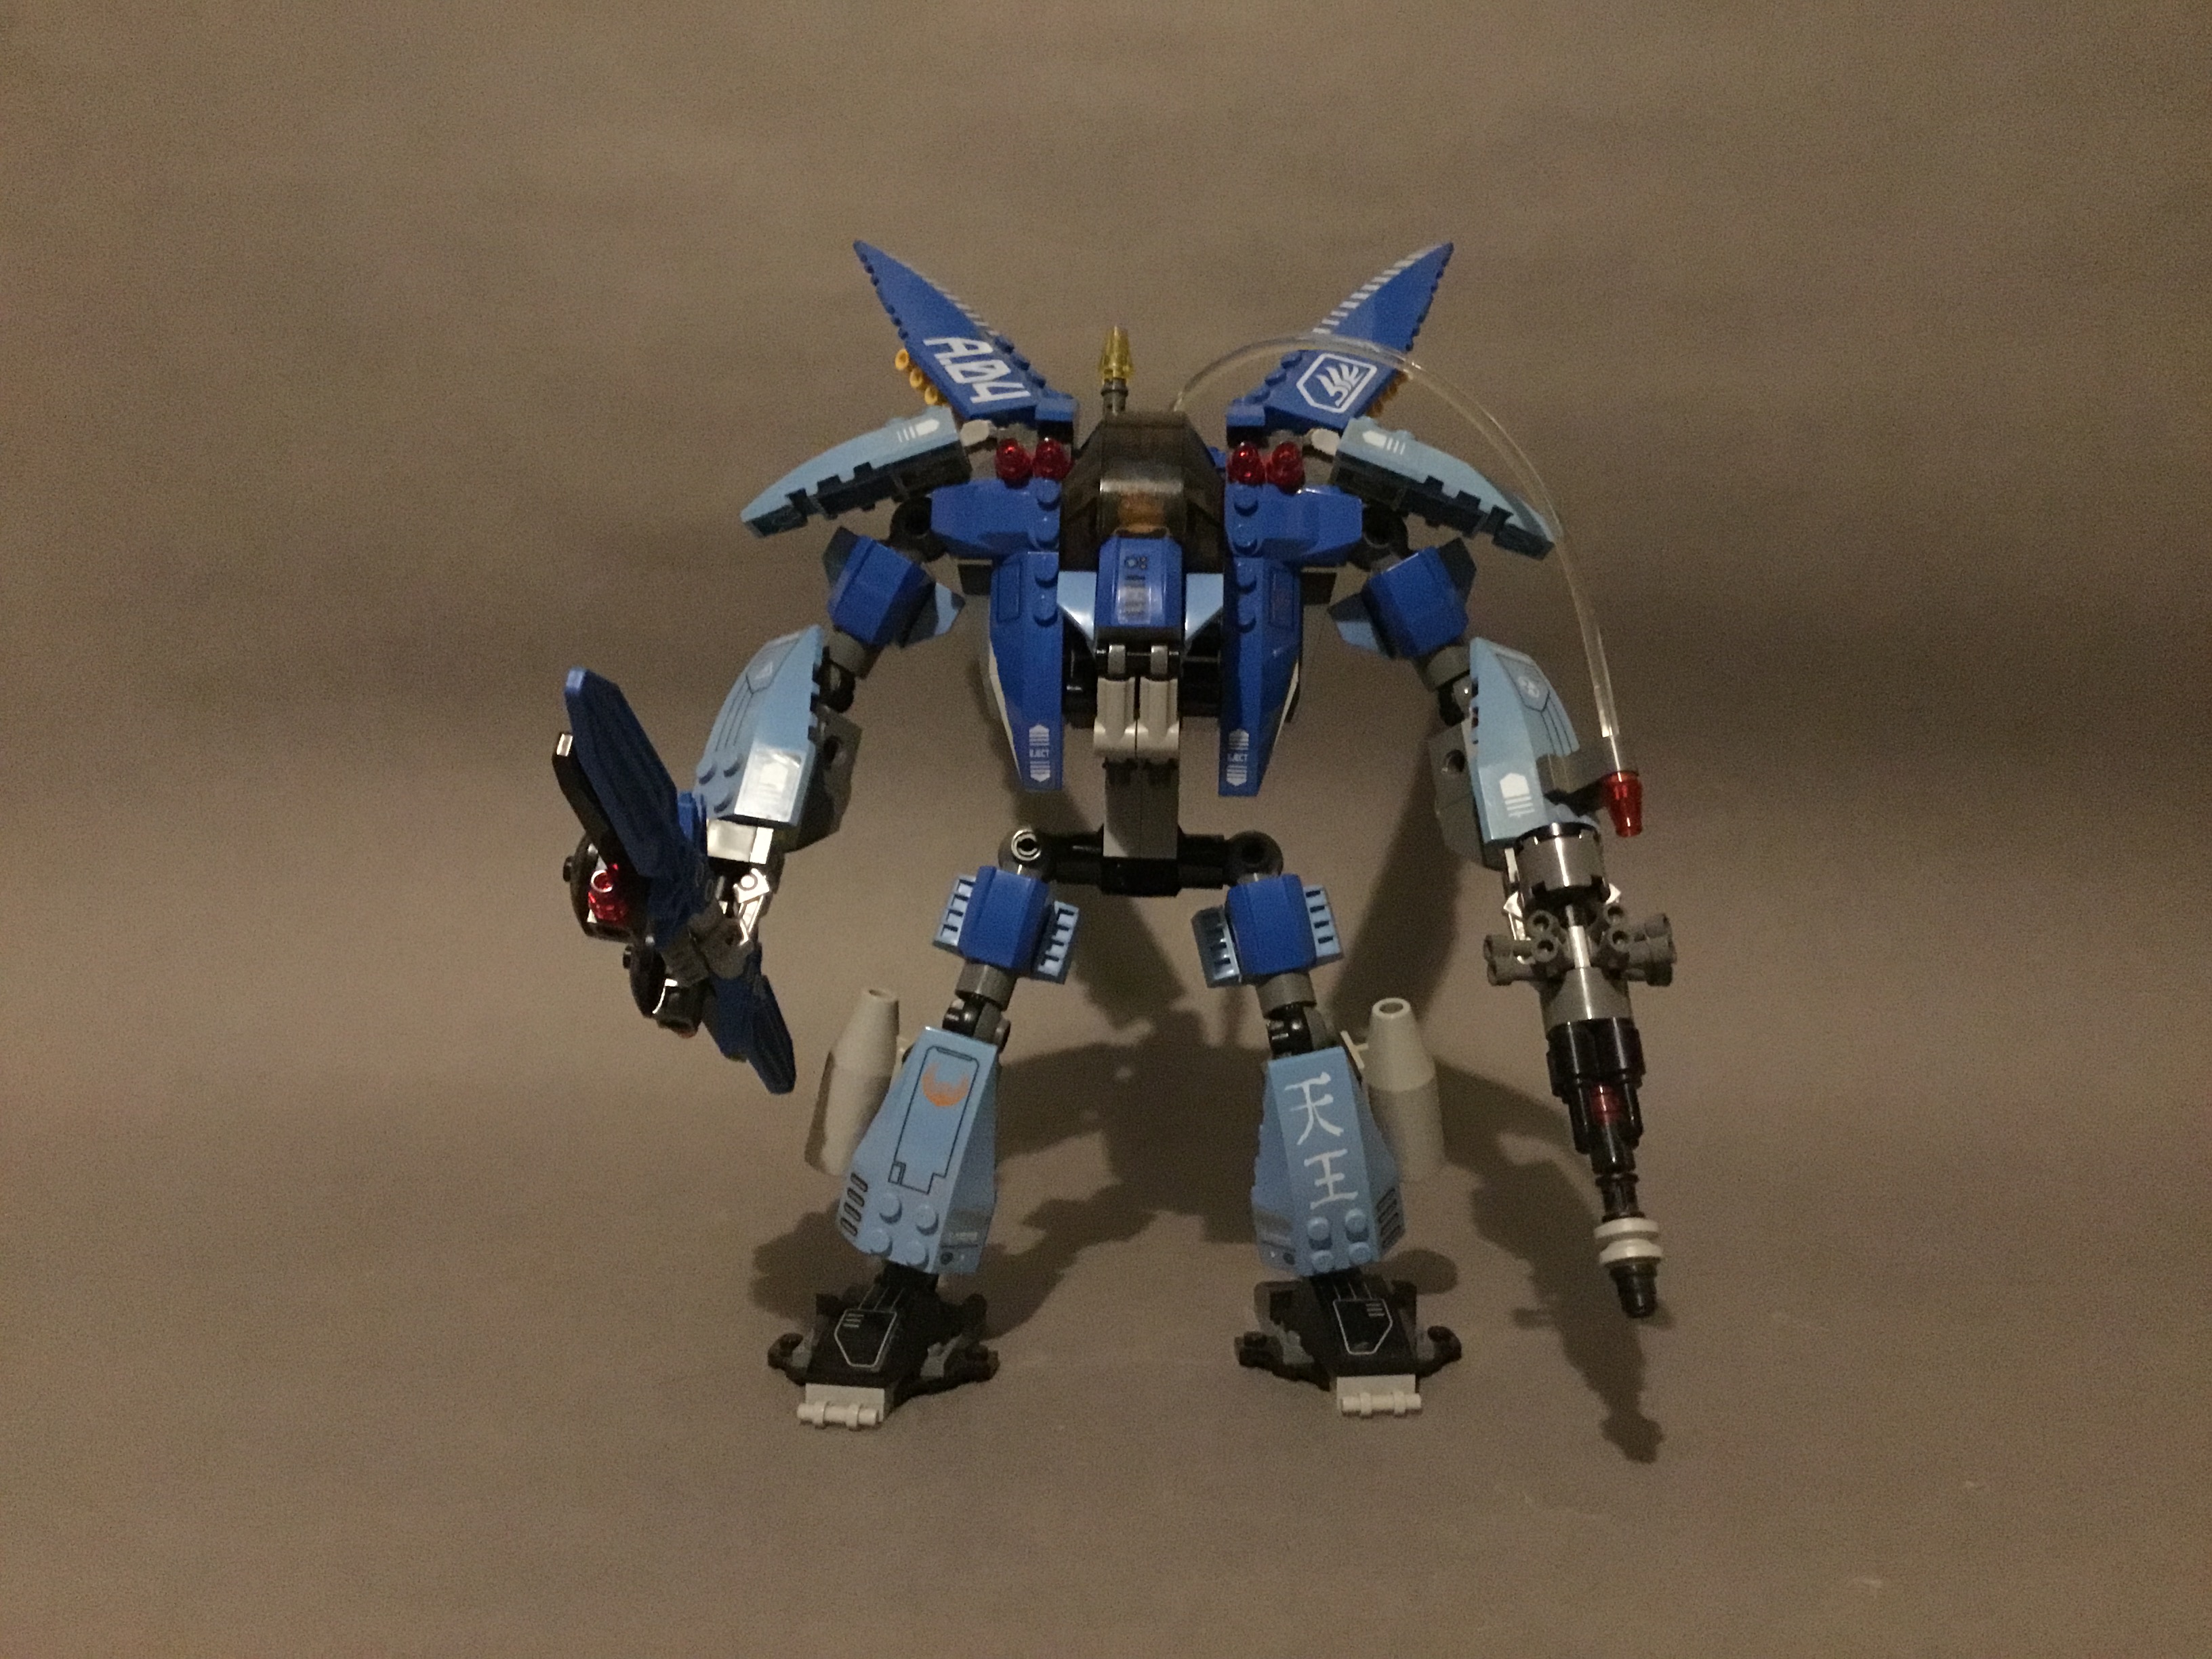
While the general silhouette of the Stealth Hunter has remained intact, the model itself is a lot more front-heavy, unbalanced and fragile, as well as being significantly harder to pose than its extremely photogenic predecessor. In fact, its substantial weight makes it one of the hardest to pose mechs out of the entire line, reduced to essentially a brick unless you get really lucky. For reference, the action pose at the start fell over at least 3 times due to the extreme weight concentrated in the cockpit.
This is certainly more of a display piece than anything, especially with how easily breakable certain area are. Regardless, let’s take a closer look at this machine.
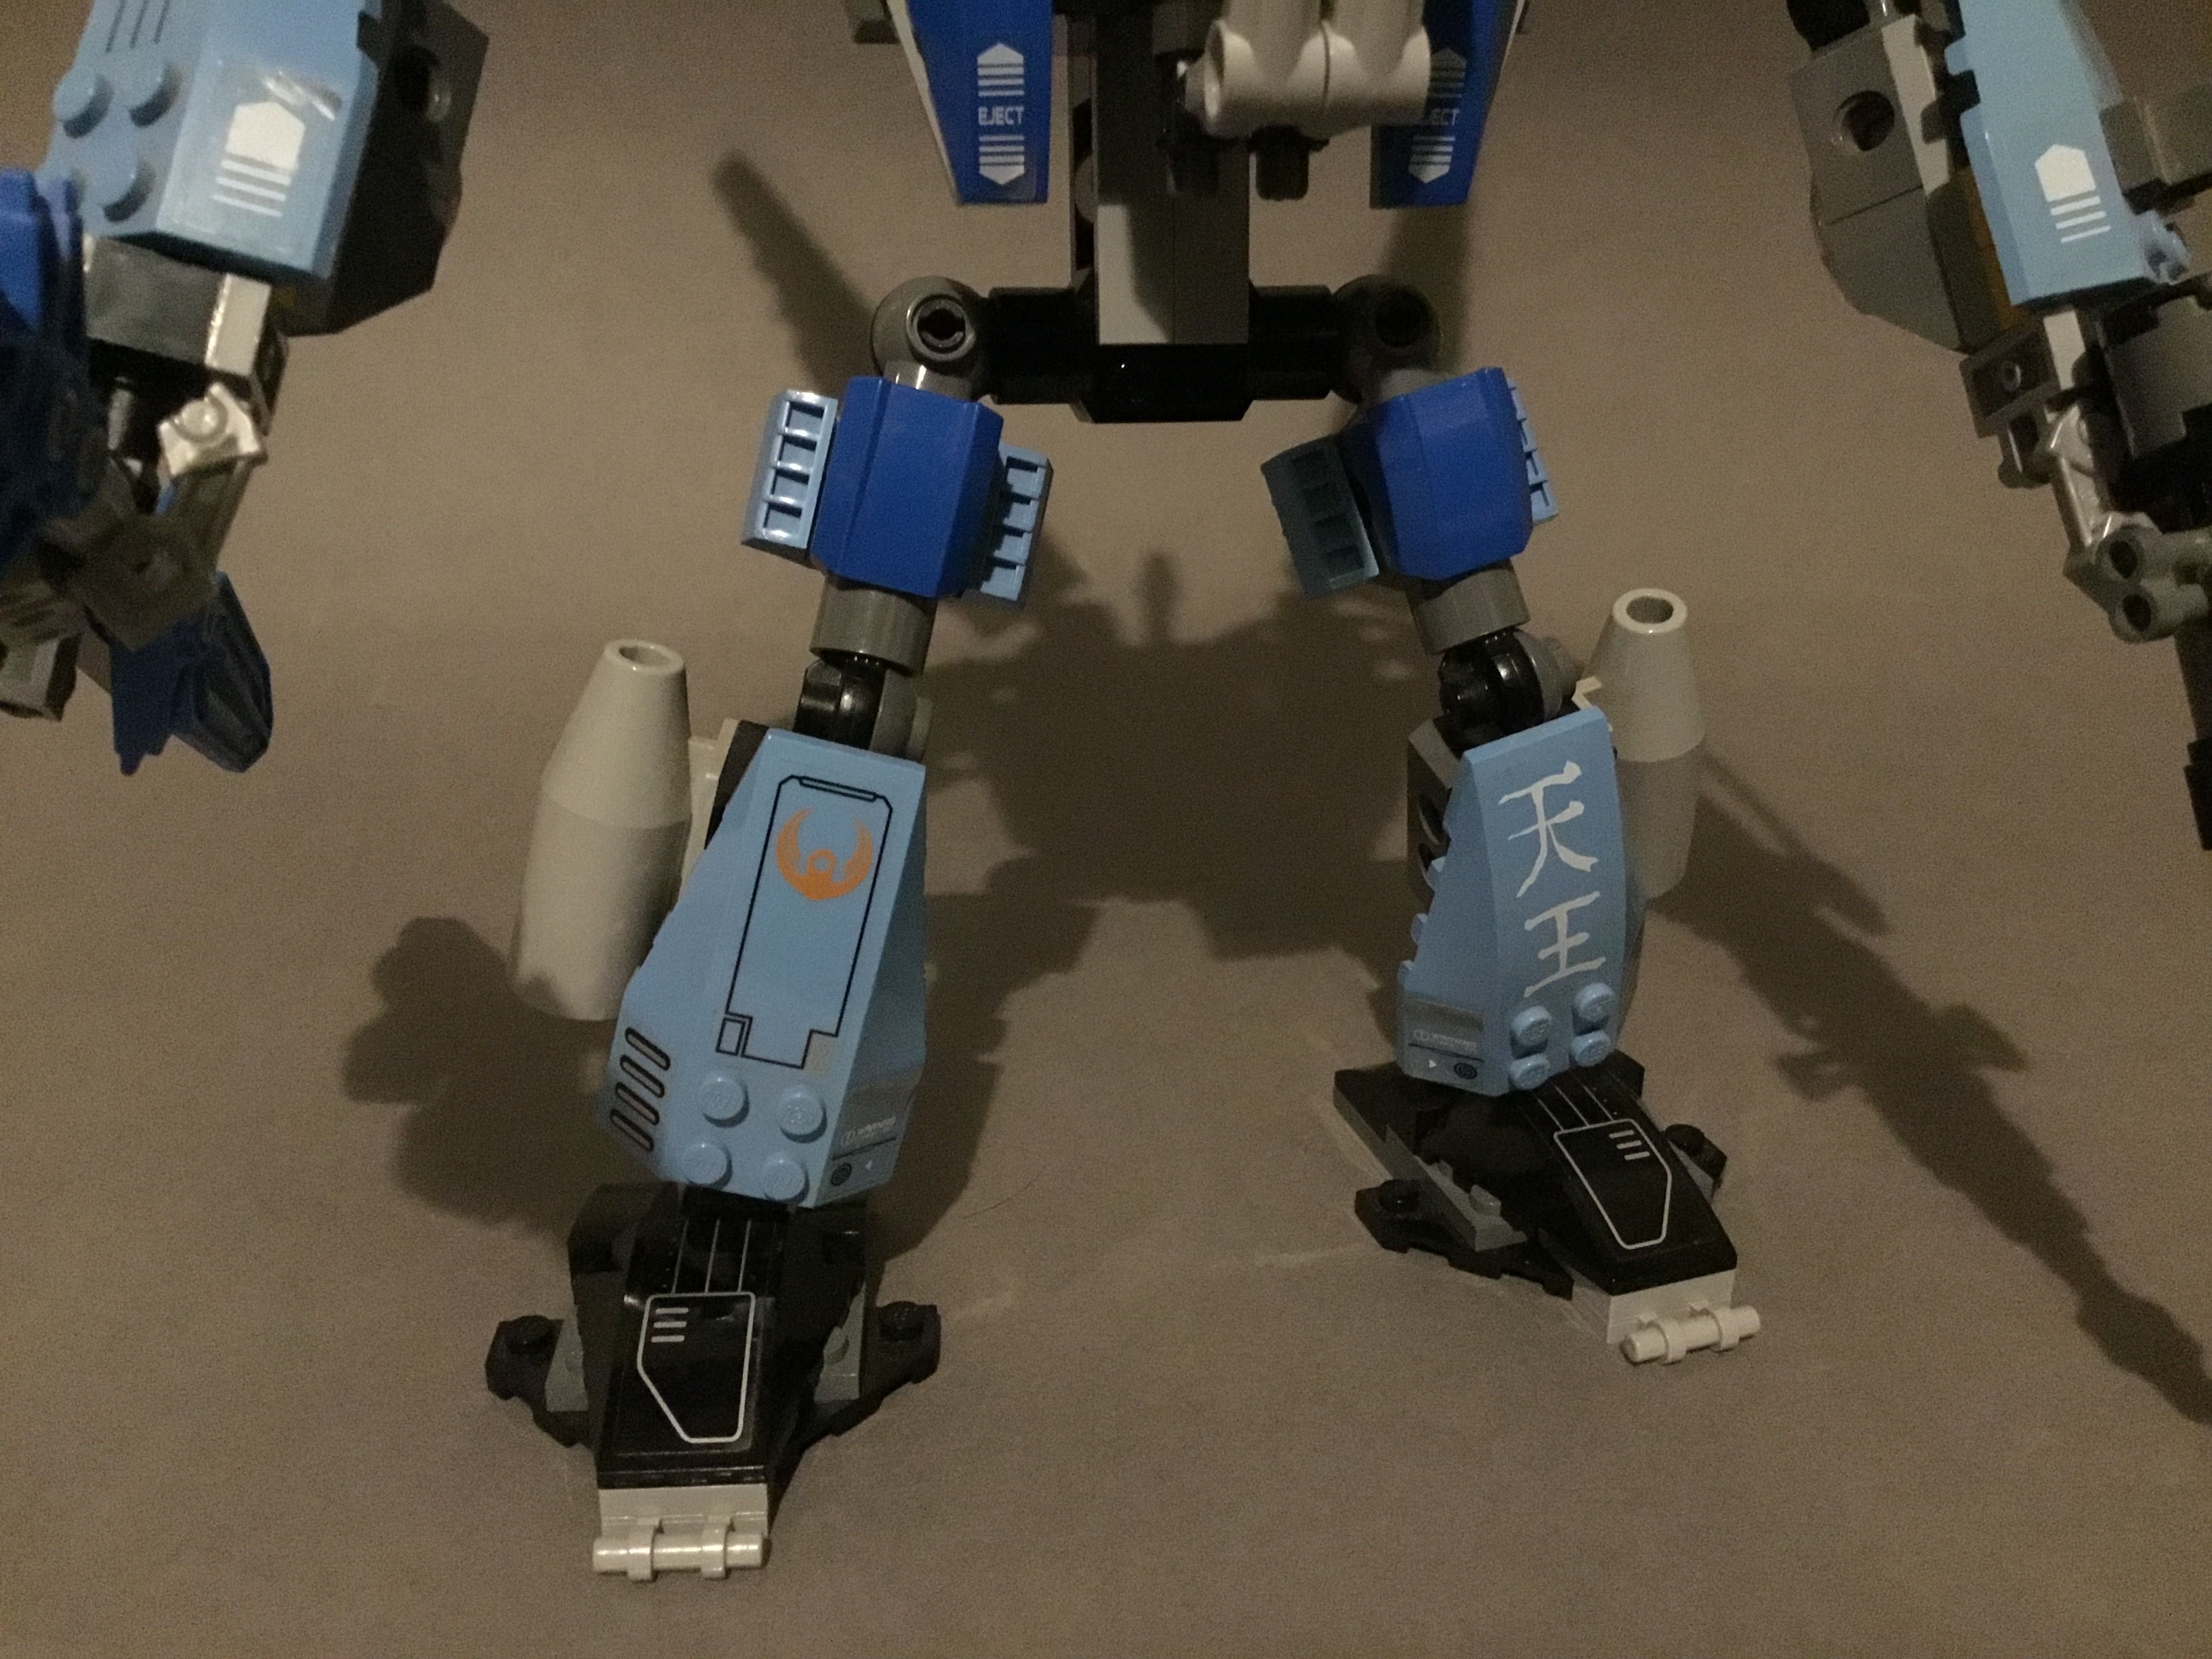
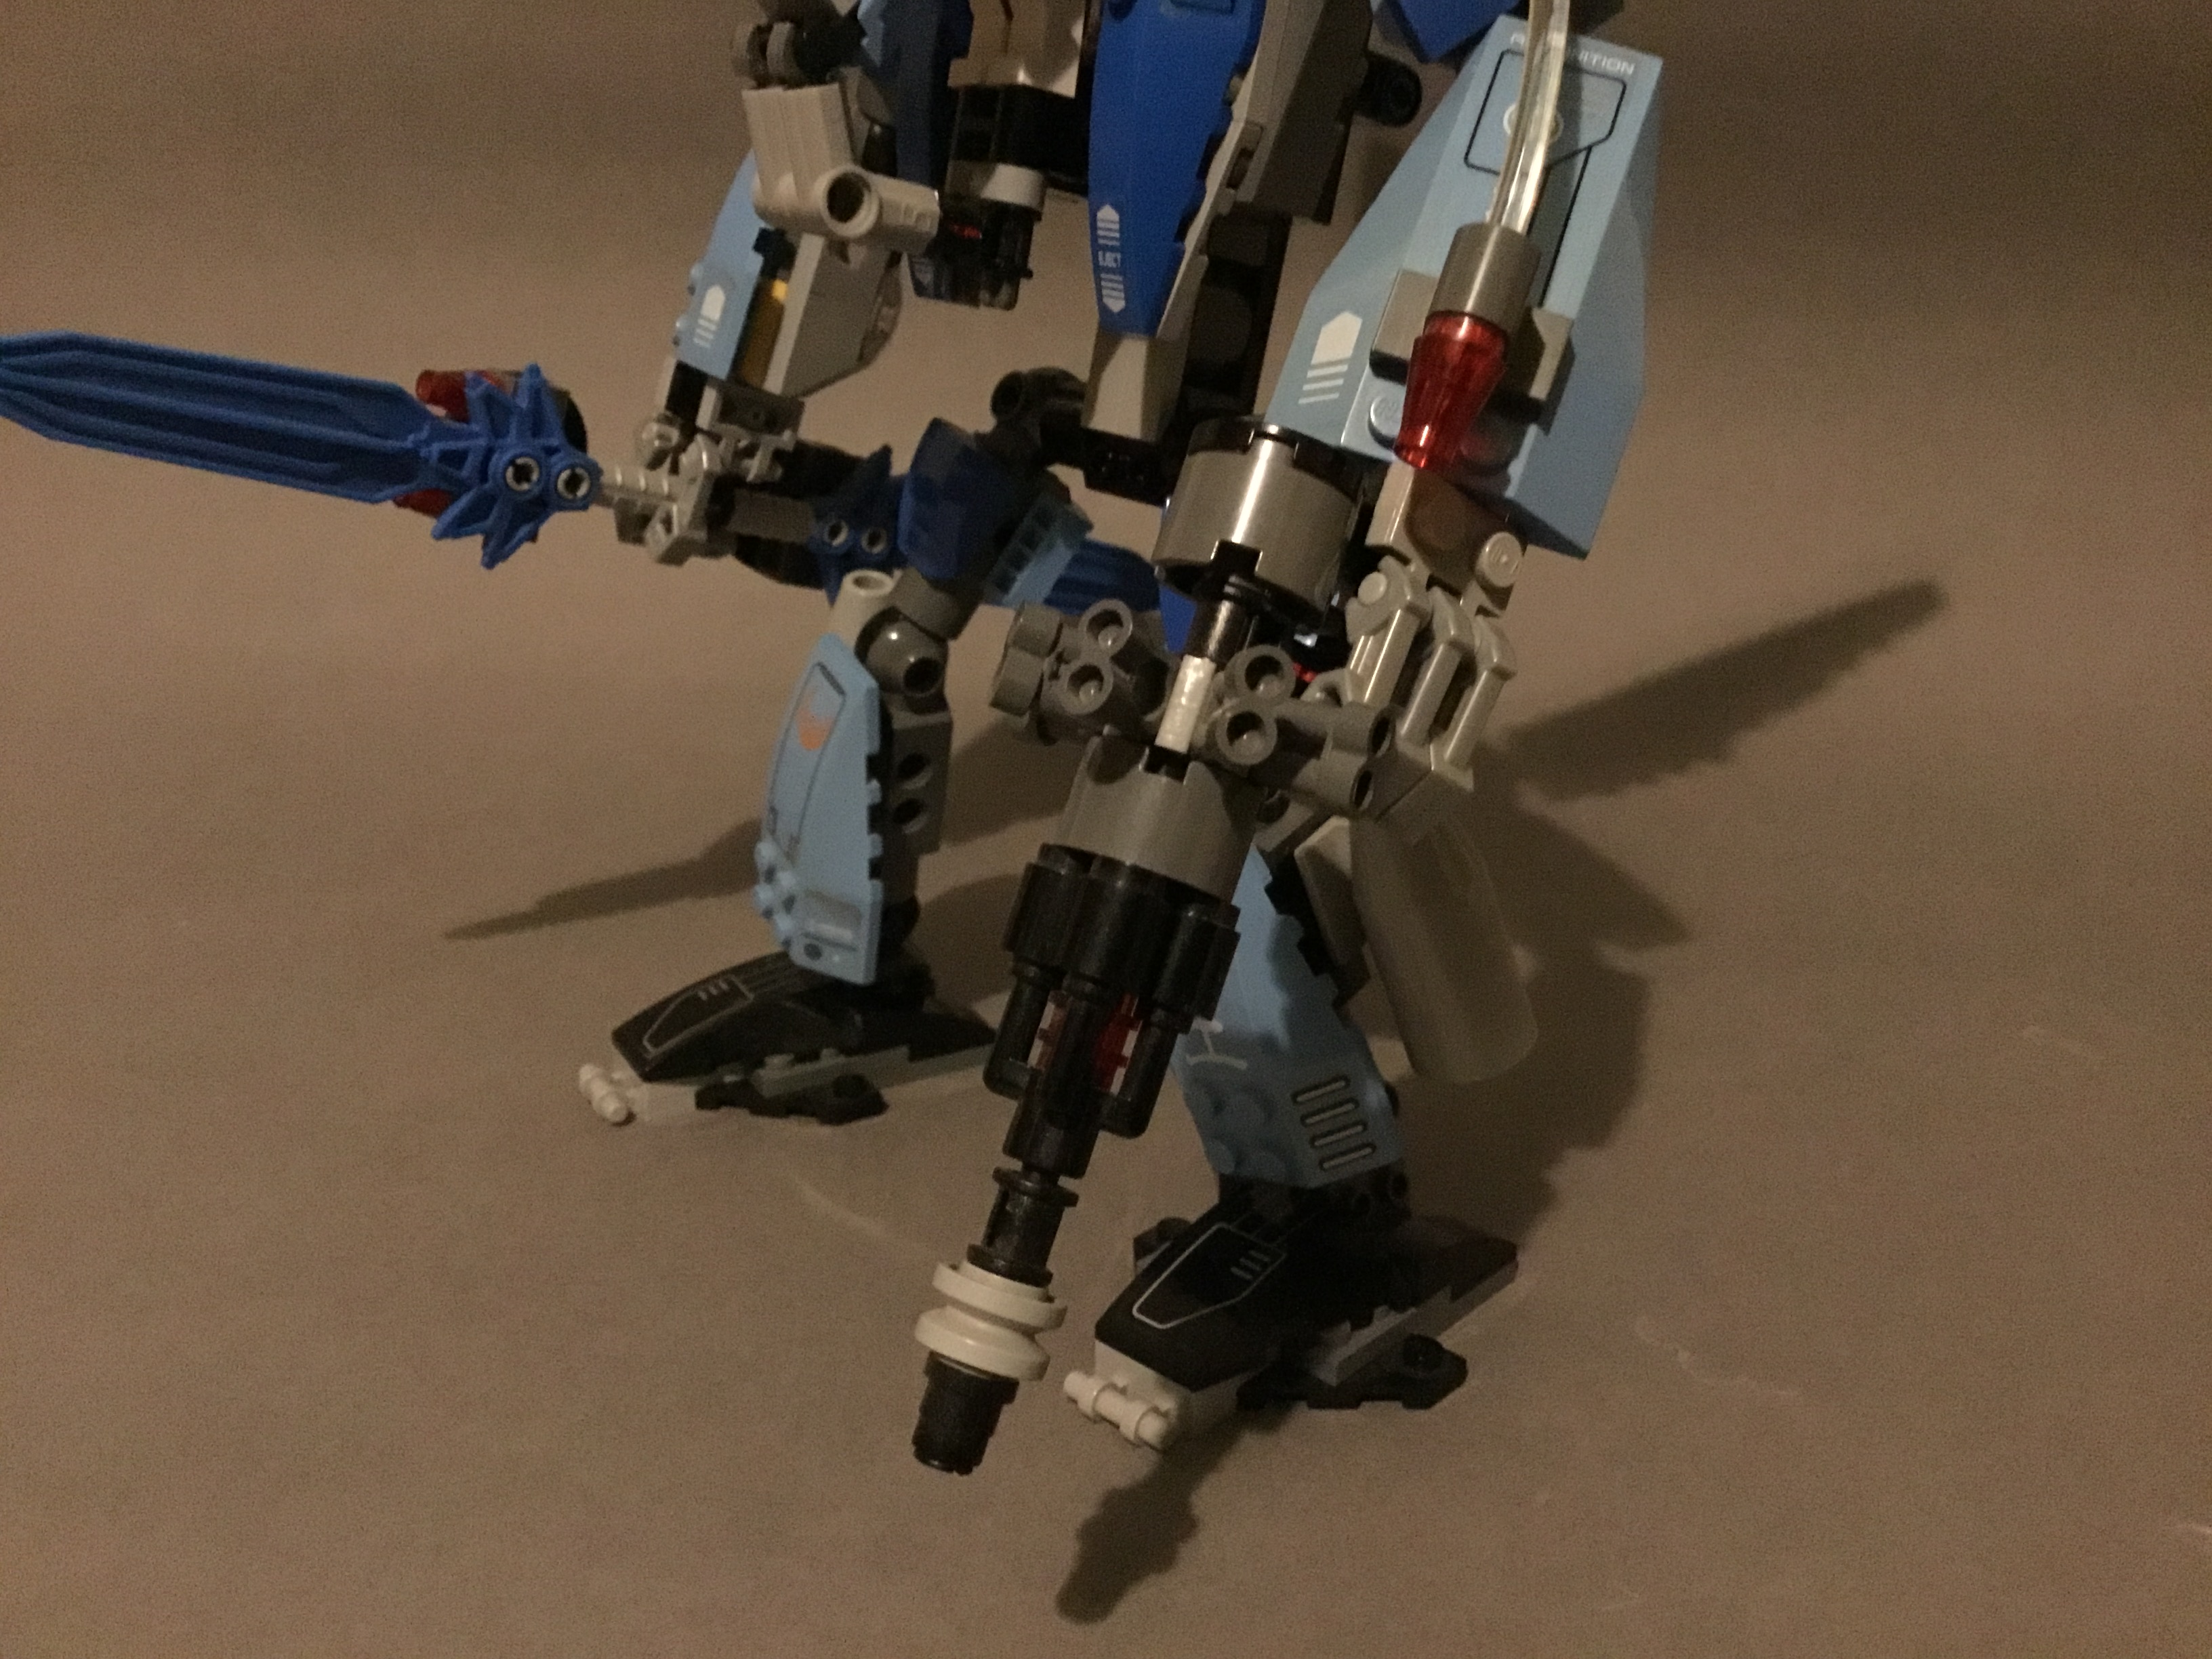
The legs share many similarities with the Stealth Hunter, but the feet and thighs are now slightly wider. Additionally, a jet engine has replaced the fin on the original, while the Japanese text on the shin now reads ‘King of the Skies’.
The cockpit is a lot bulkier, and now comes equipped with much greater firepower.
Unfortunately, it sticks out much further than I’d like, and is likely one of the main causes for the mech’s front-heaviness.

The Silent Strike wields an upgraded version of the Stealth Hunter’s sword thing, now using blue recolours of Santis’ sword as opposed to Danju’s slimmer one. A bunch of other pieces, including two forklift forks, encase both blades.
The mech’s new rifle is similarly bulky, utilising an incredibly inventive technique of slotting binoculars into a slot gear to create some kind of cooling system. A single red cone resides on the mech’s wrist, with a fibre optic cable sprouting from its rear. I’m sure you know what that means…
I’m not entirely sure what this is supposed to represent, but I’m guessing some kind of remote laser sight for the gun?
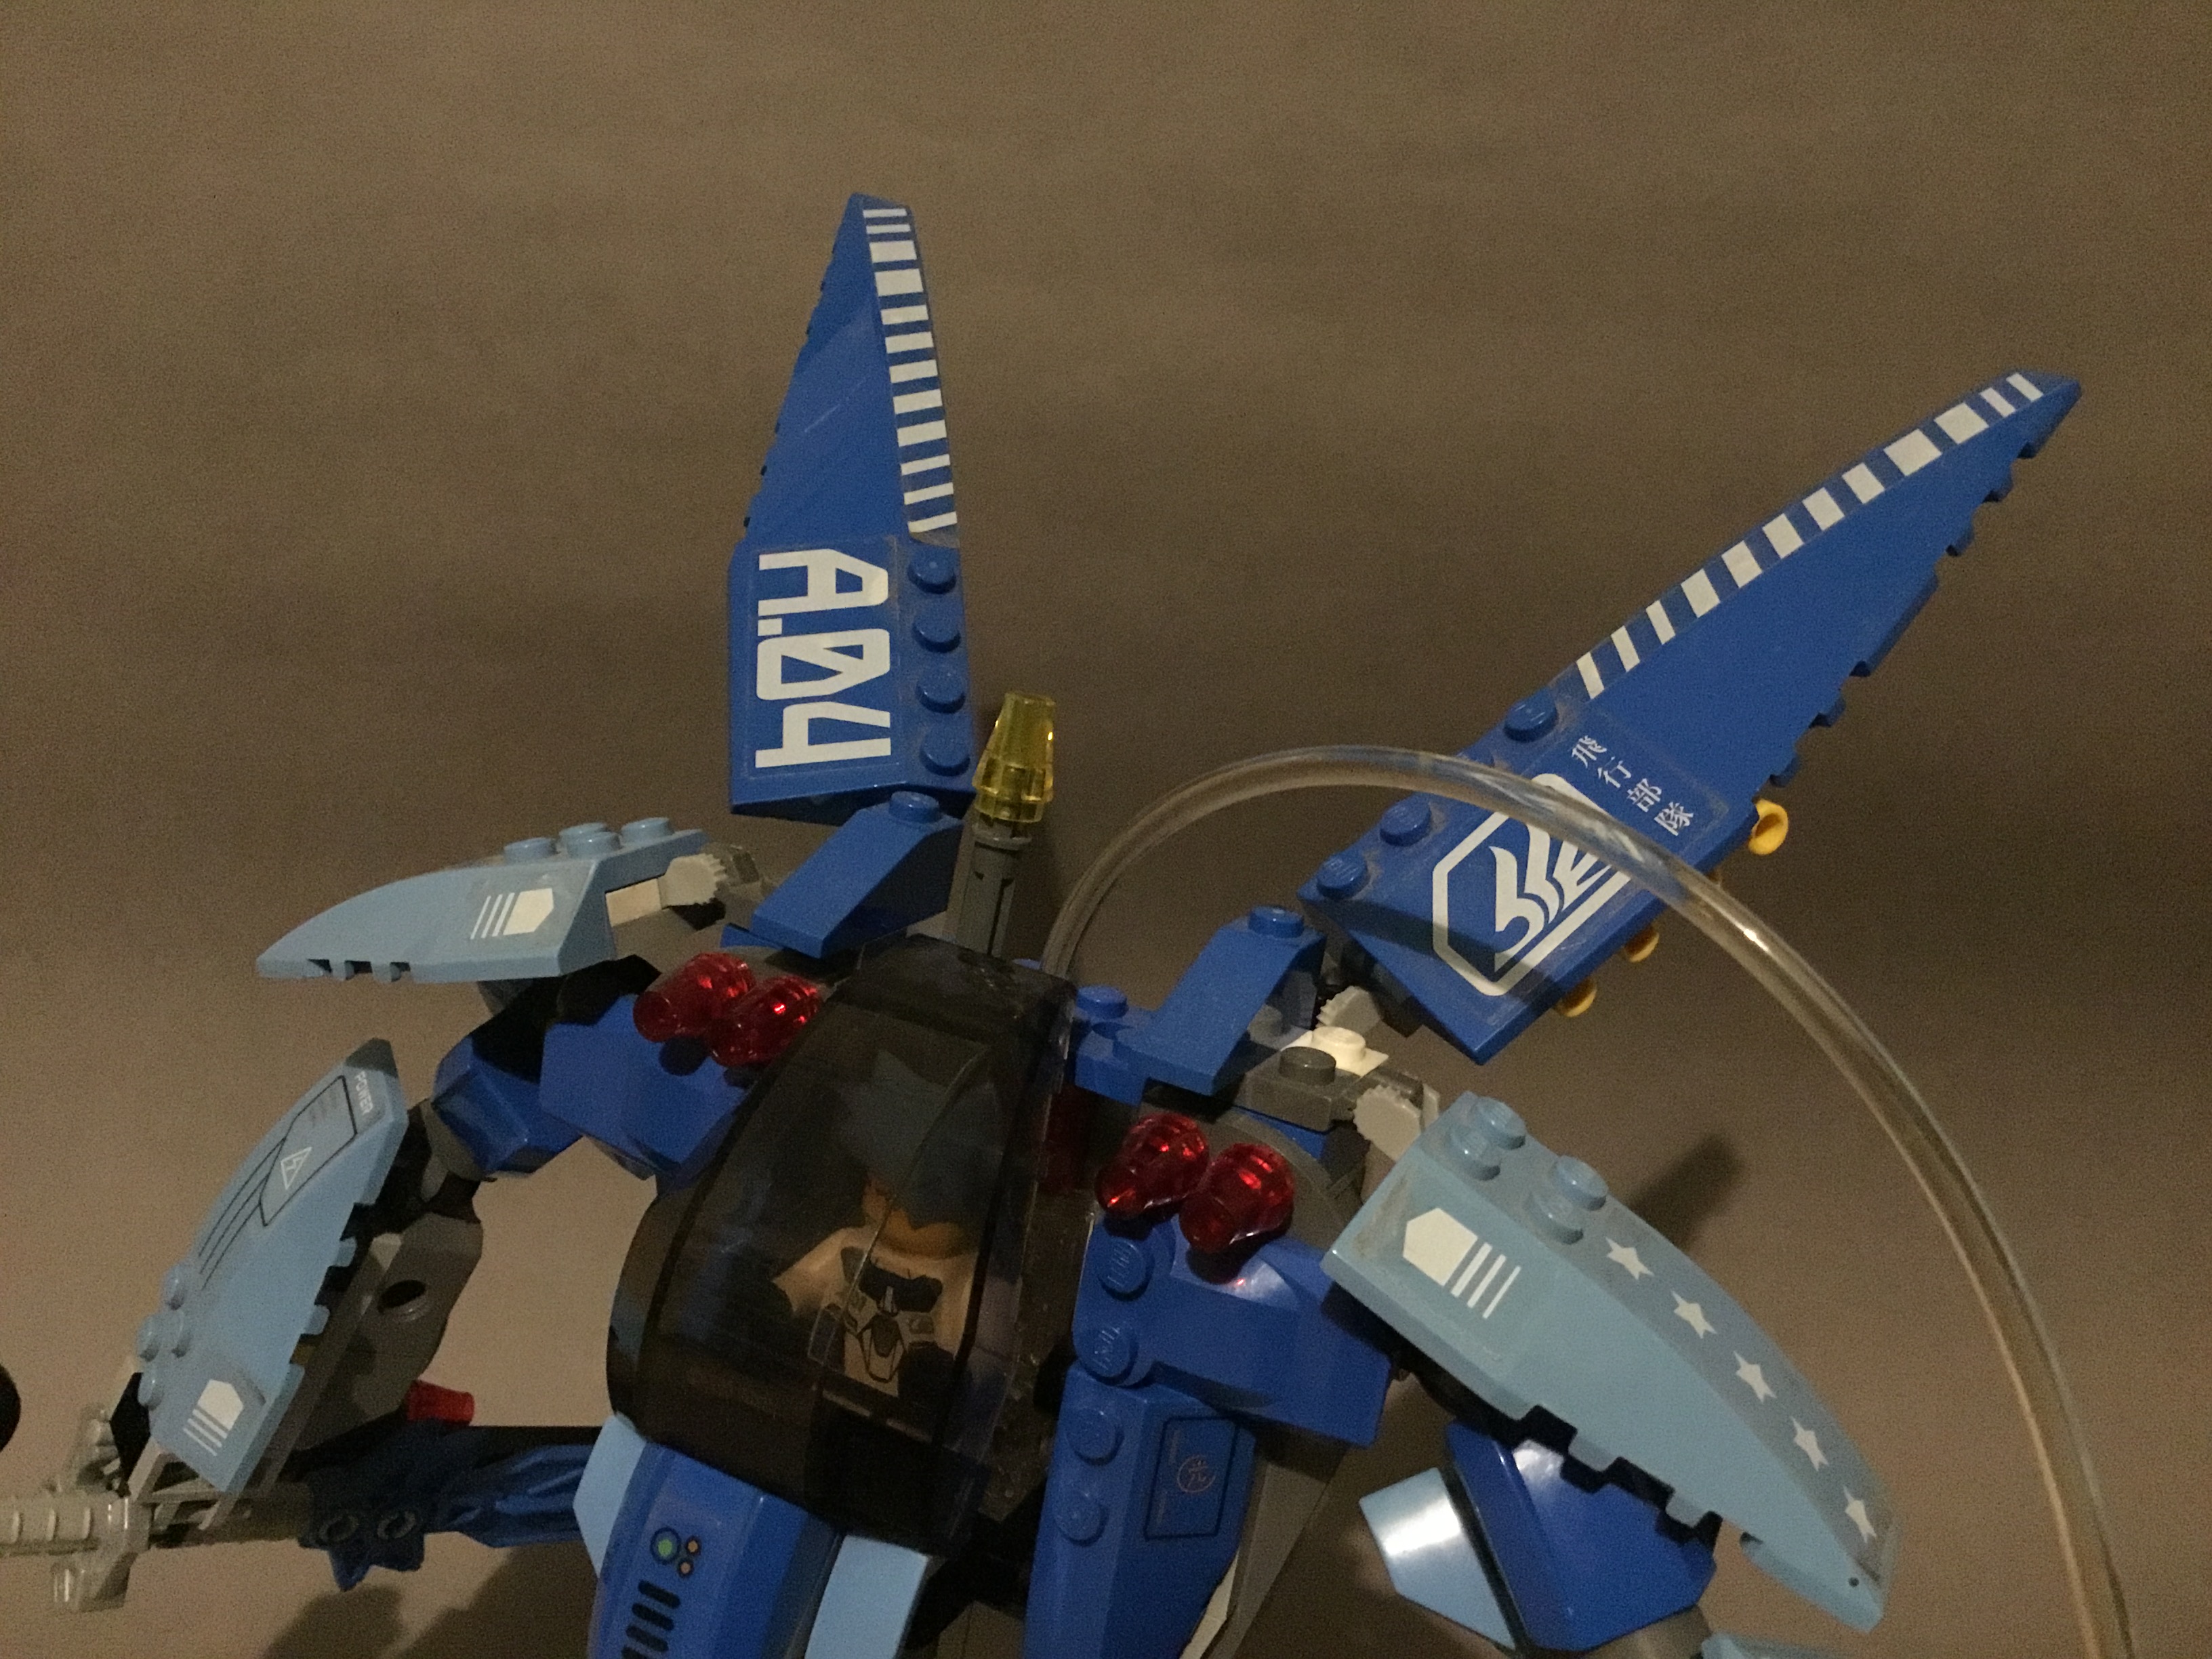
Finally, the wings are almost identical to the Stealth Hunter’s, only differing in the addition of a missile rack under each wing.
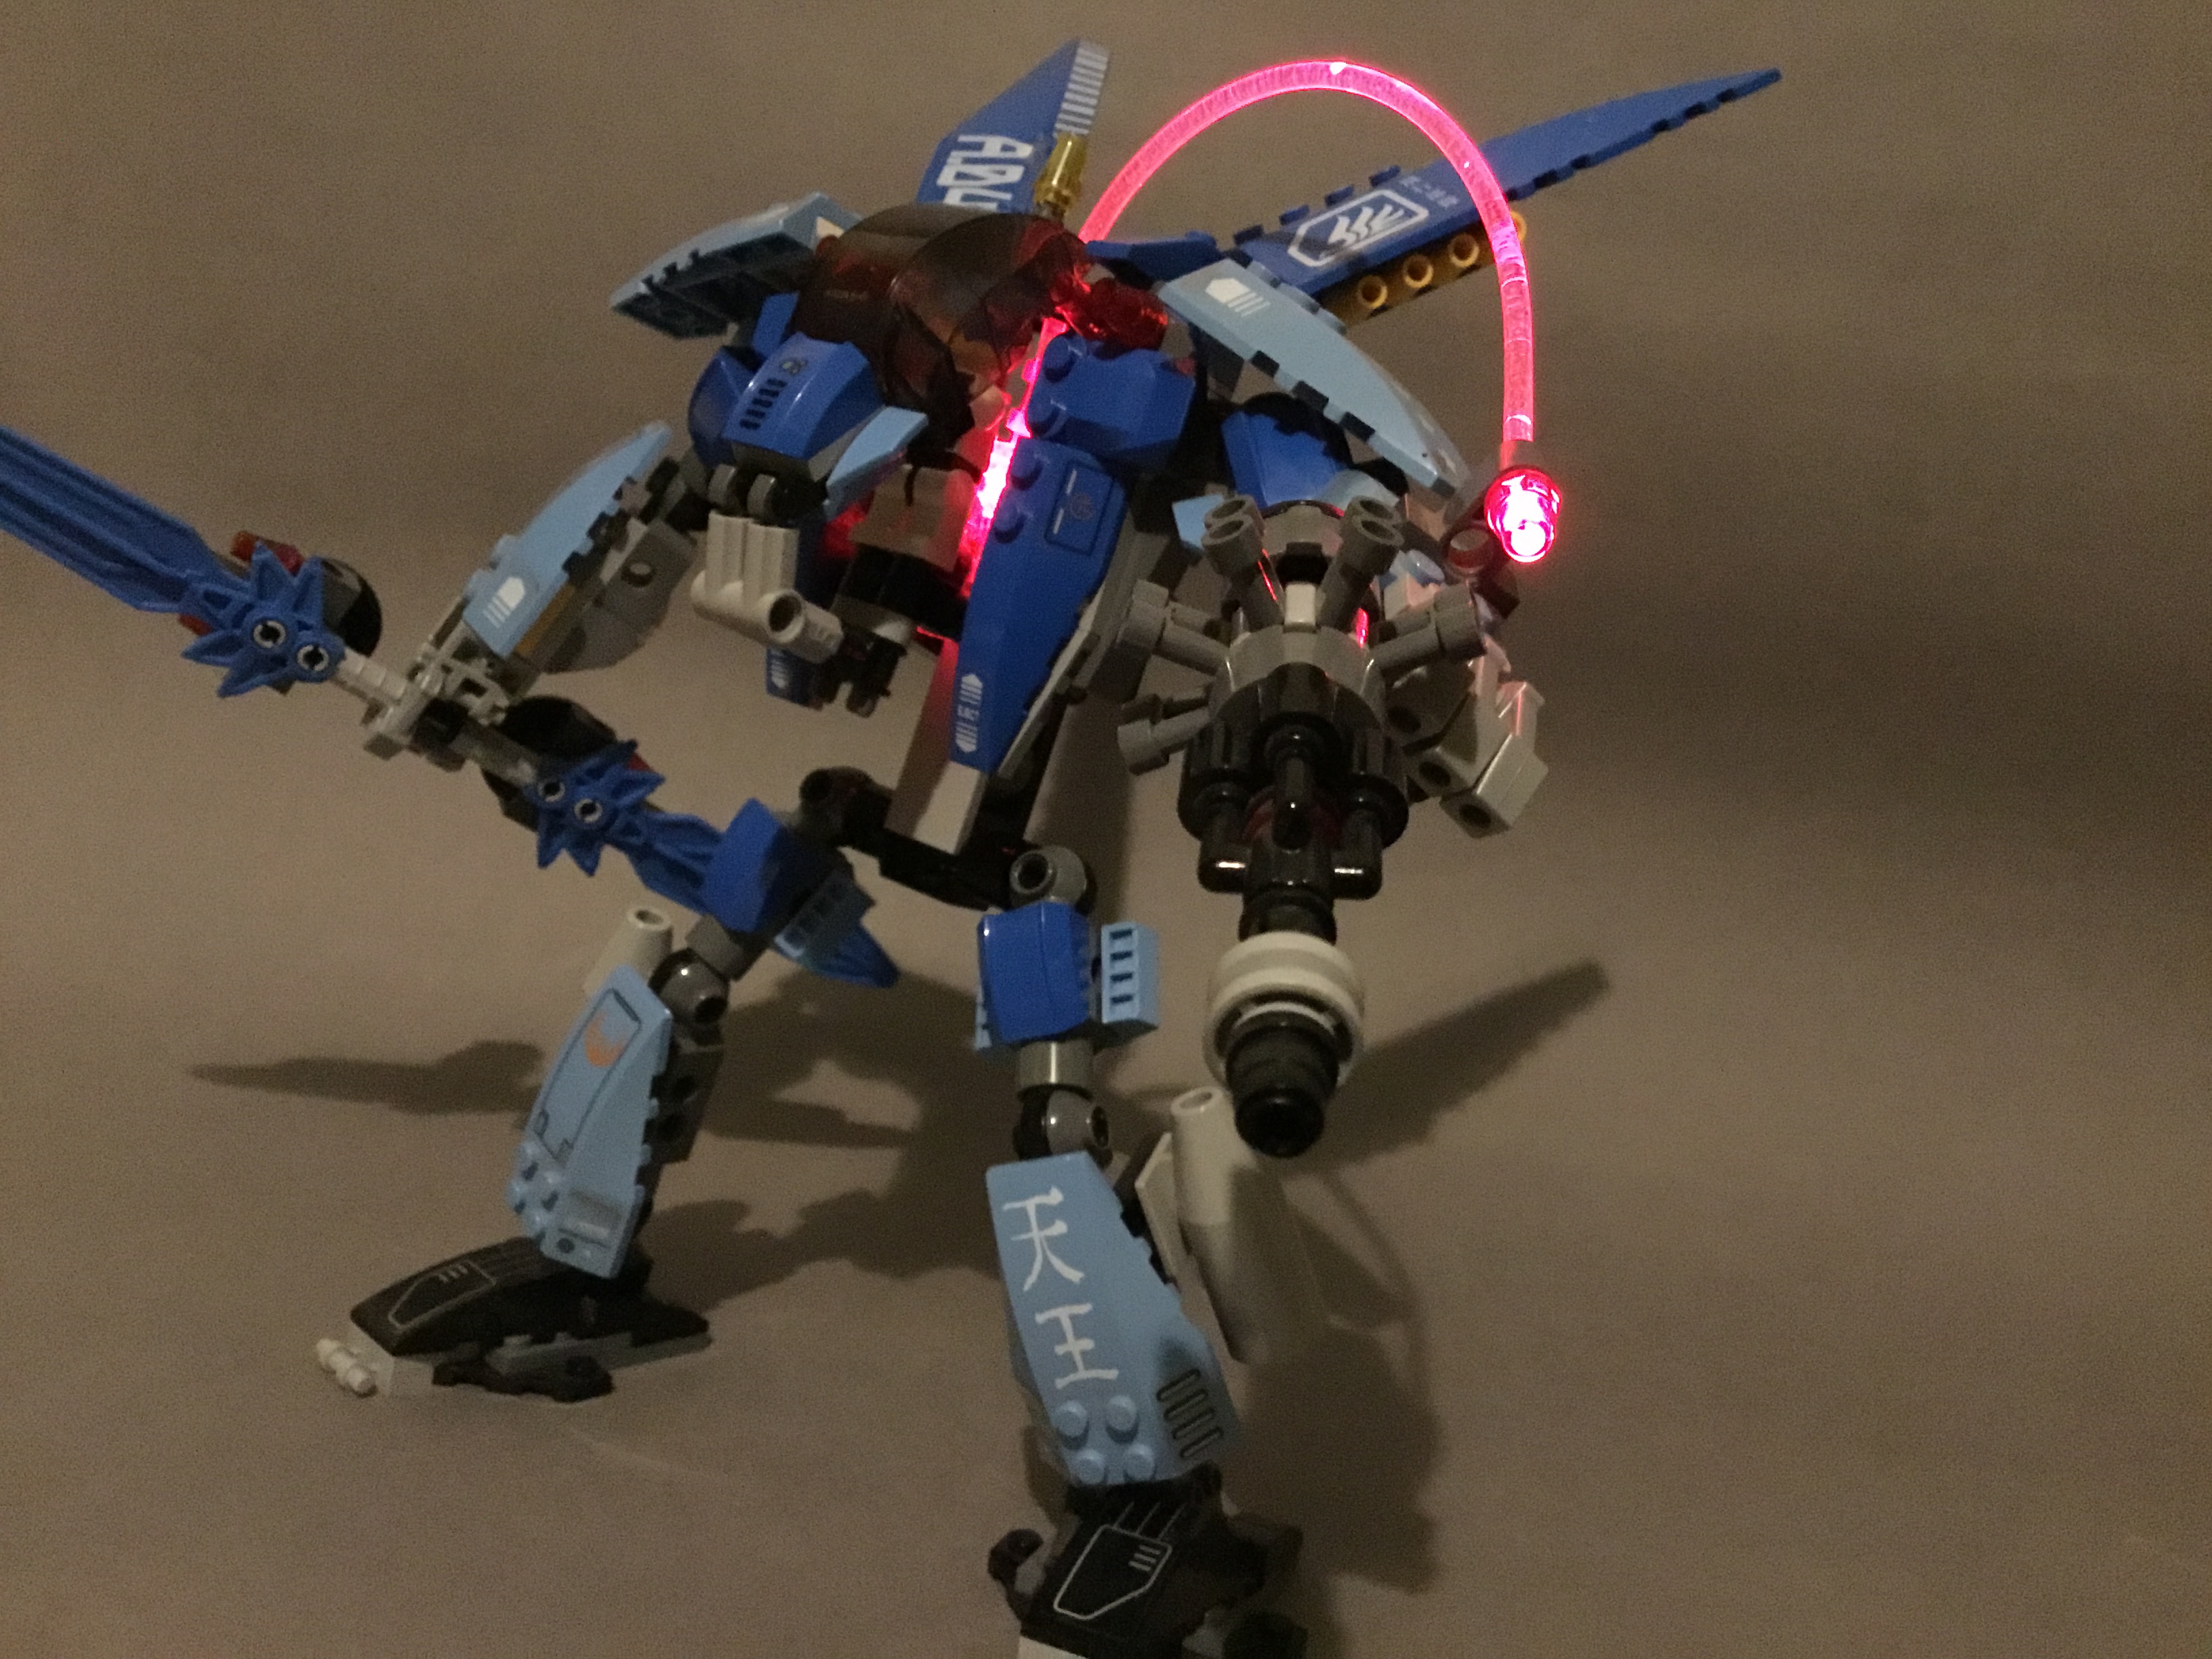
Overall, the Silent Strike doesn’t really improve on the phenomenal Stealth Hunter in any way. It’s lost any sense of aerodynamics, and it’s ditched the simple elegance that made the Stealth Hunter so great. This mech just feels clumsy, clunky and fragile. It’s still not as bad as the White Lightning, but it’s not a design I’d rate particularly high on its own.
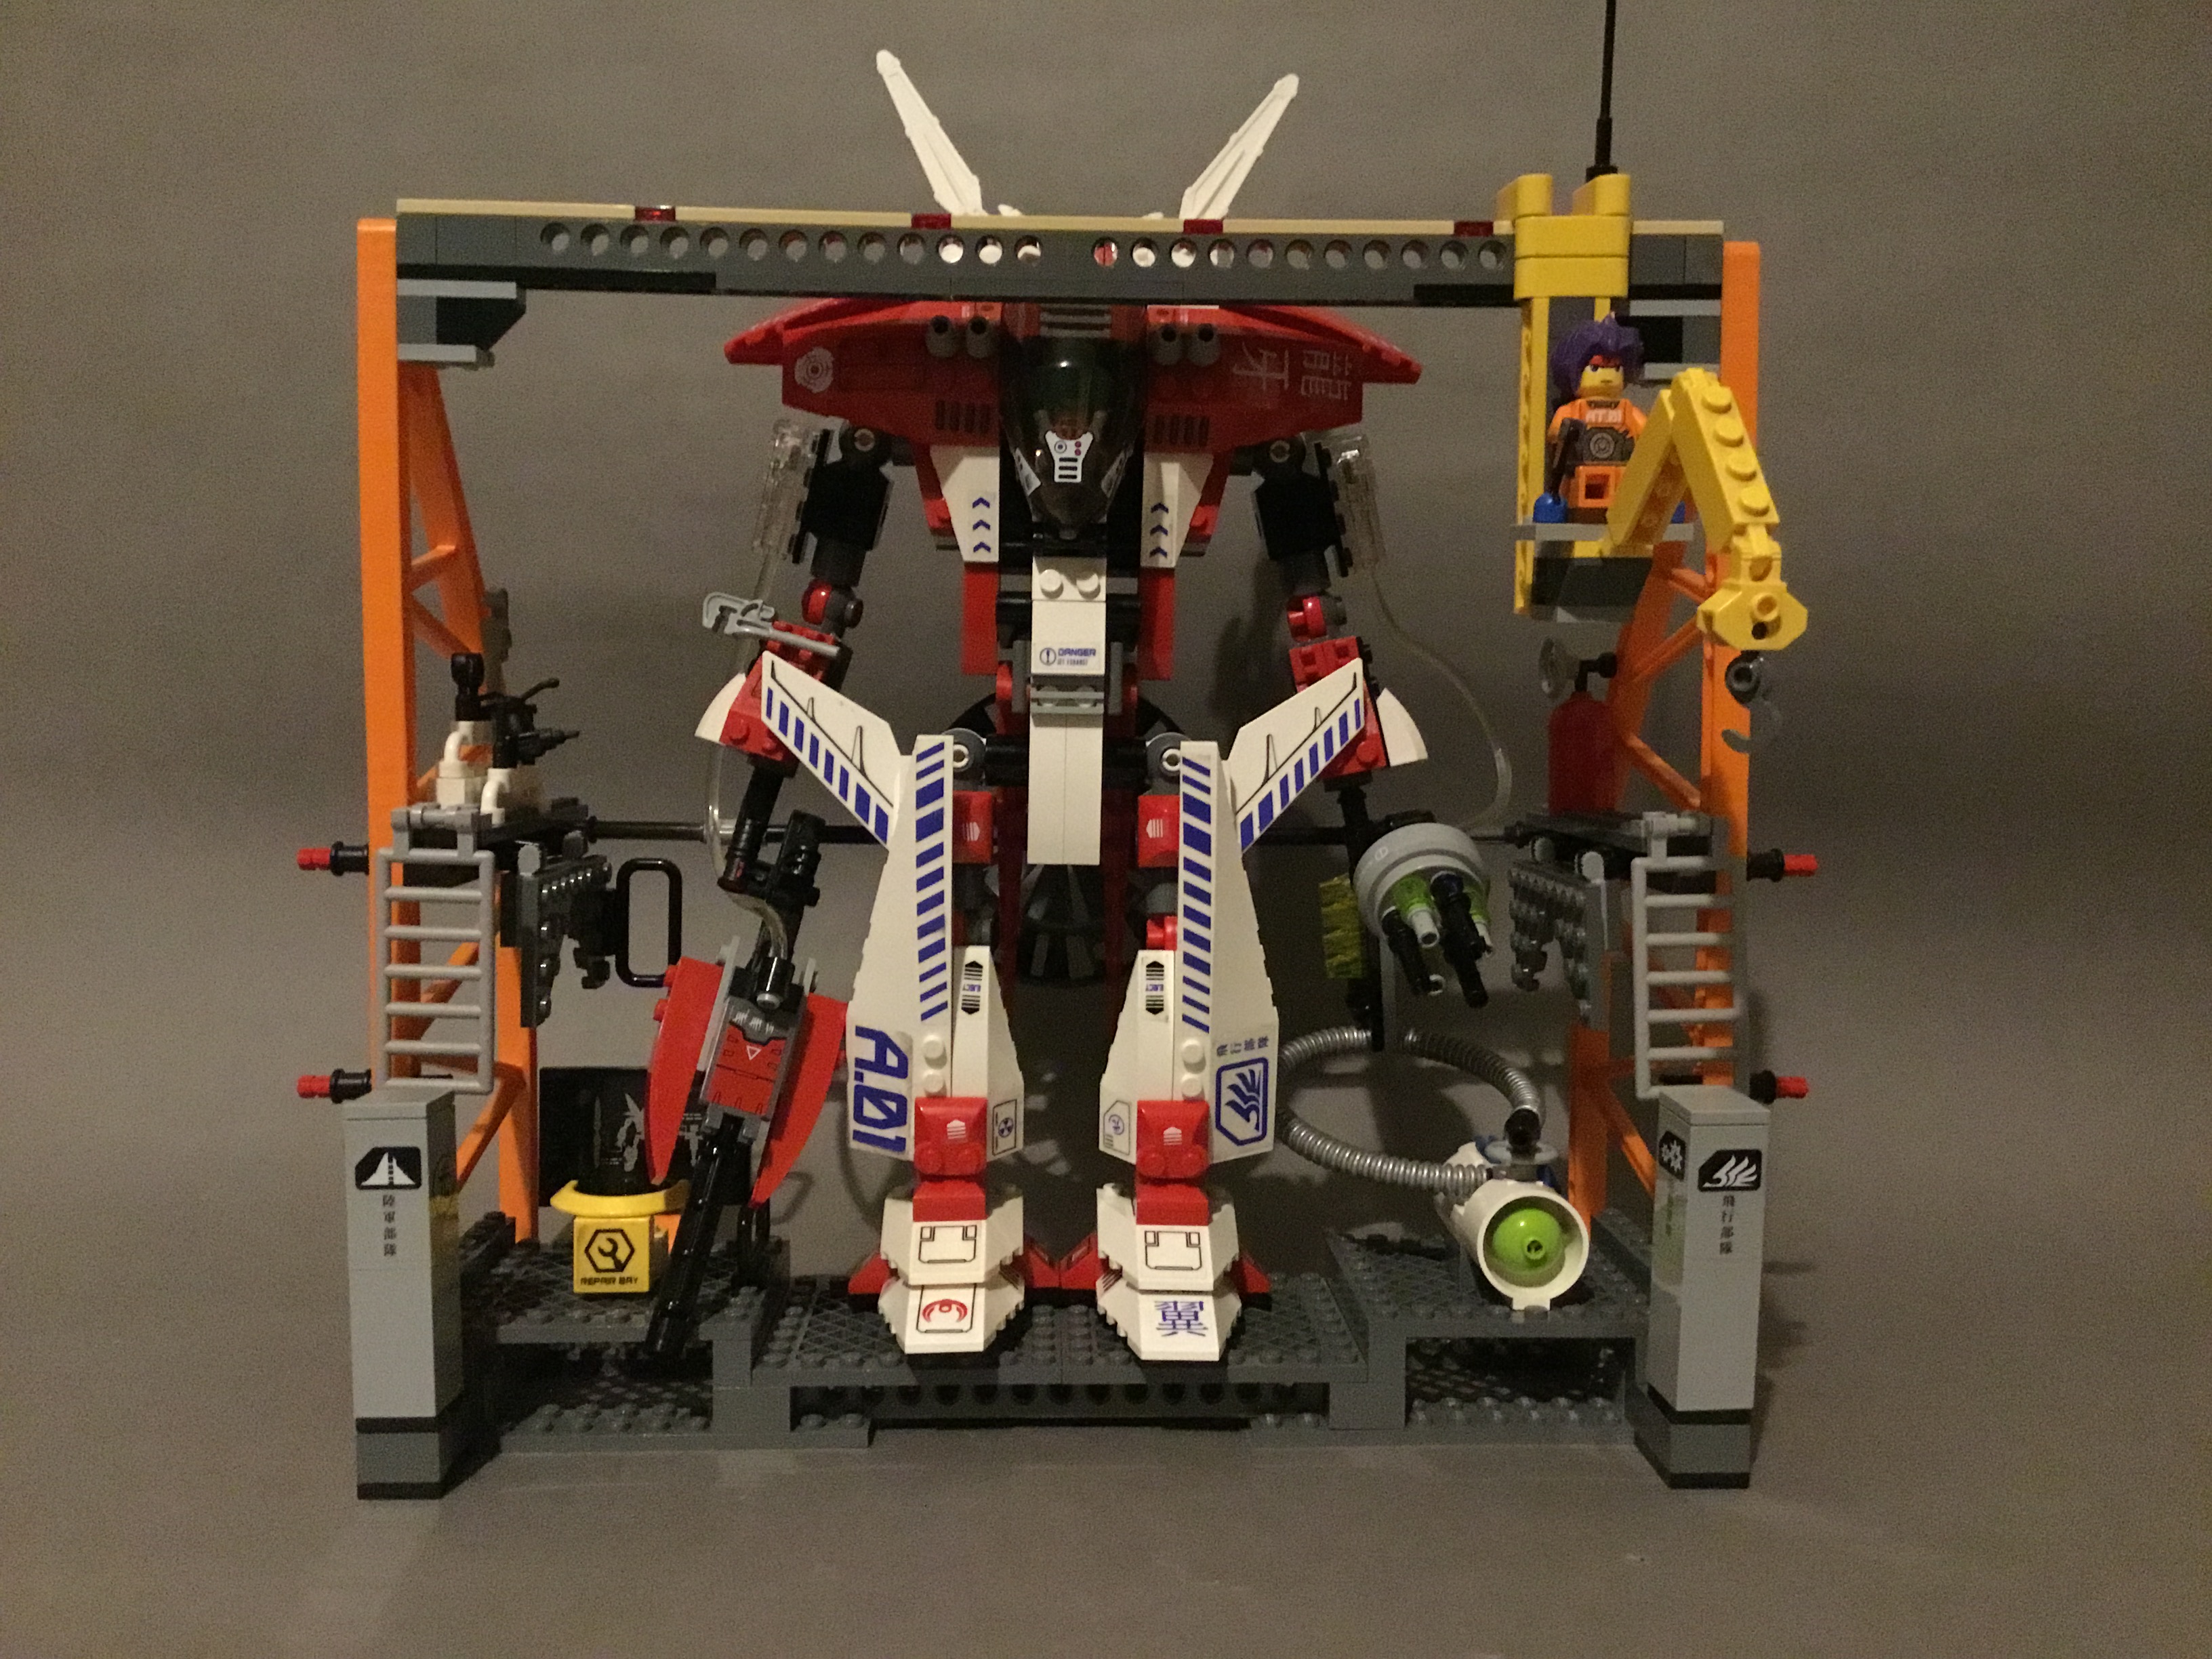
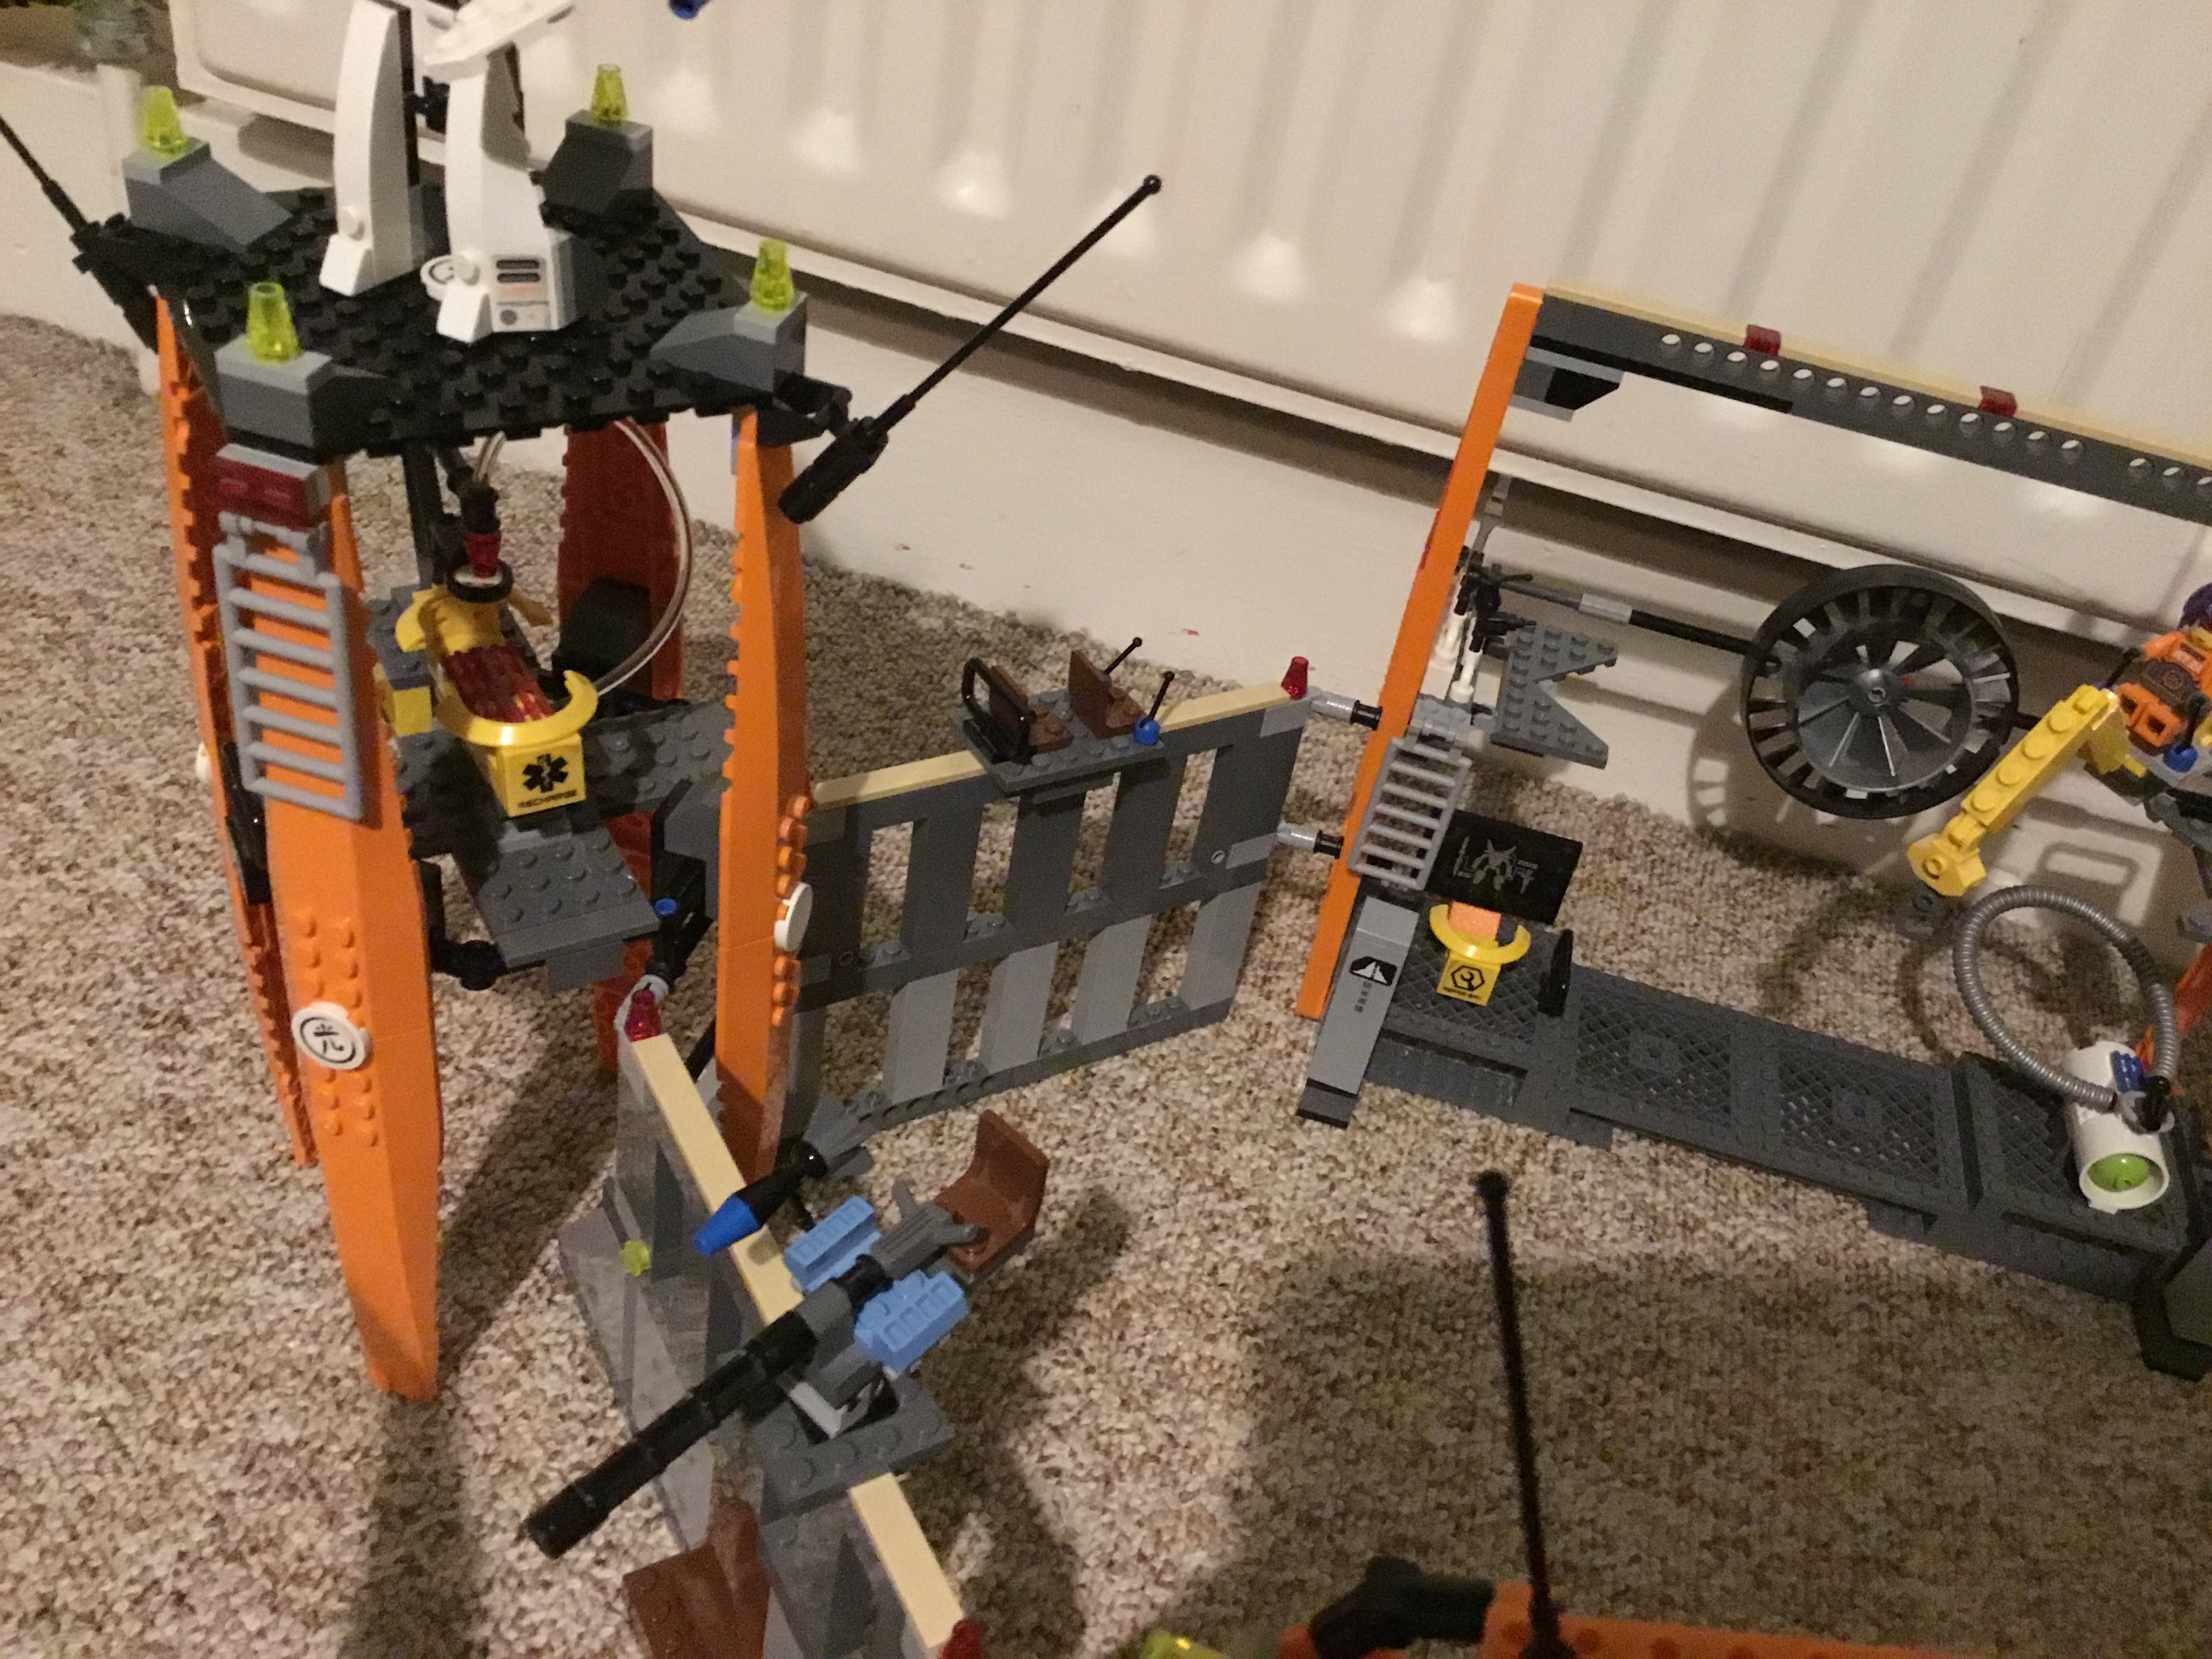
Luckily, it’s not on its own: the humans have brought an entire fortress with them! The assembled building is far too large to fit in my normal setup, so I’ll be examining each section one at a time, starting with the gigantic main gate.
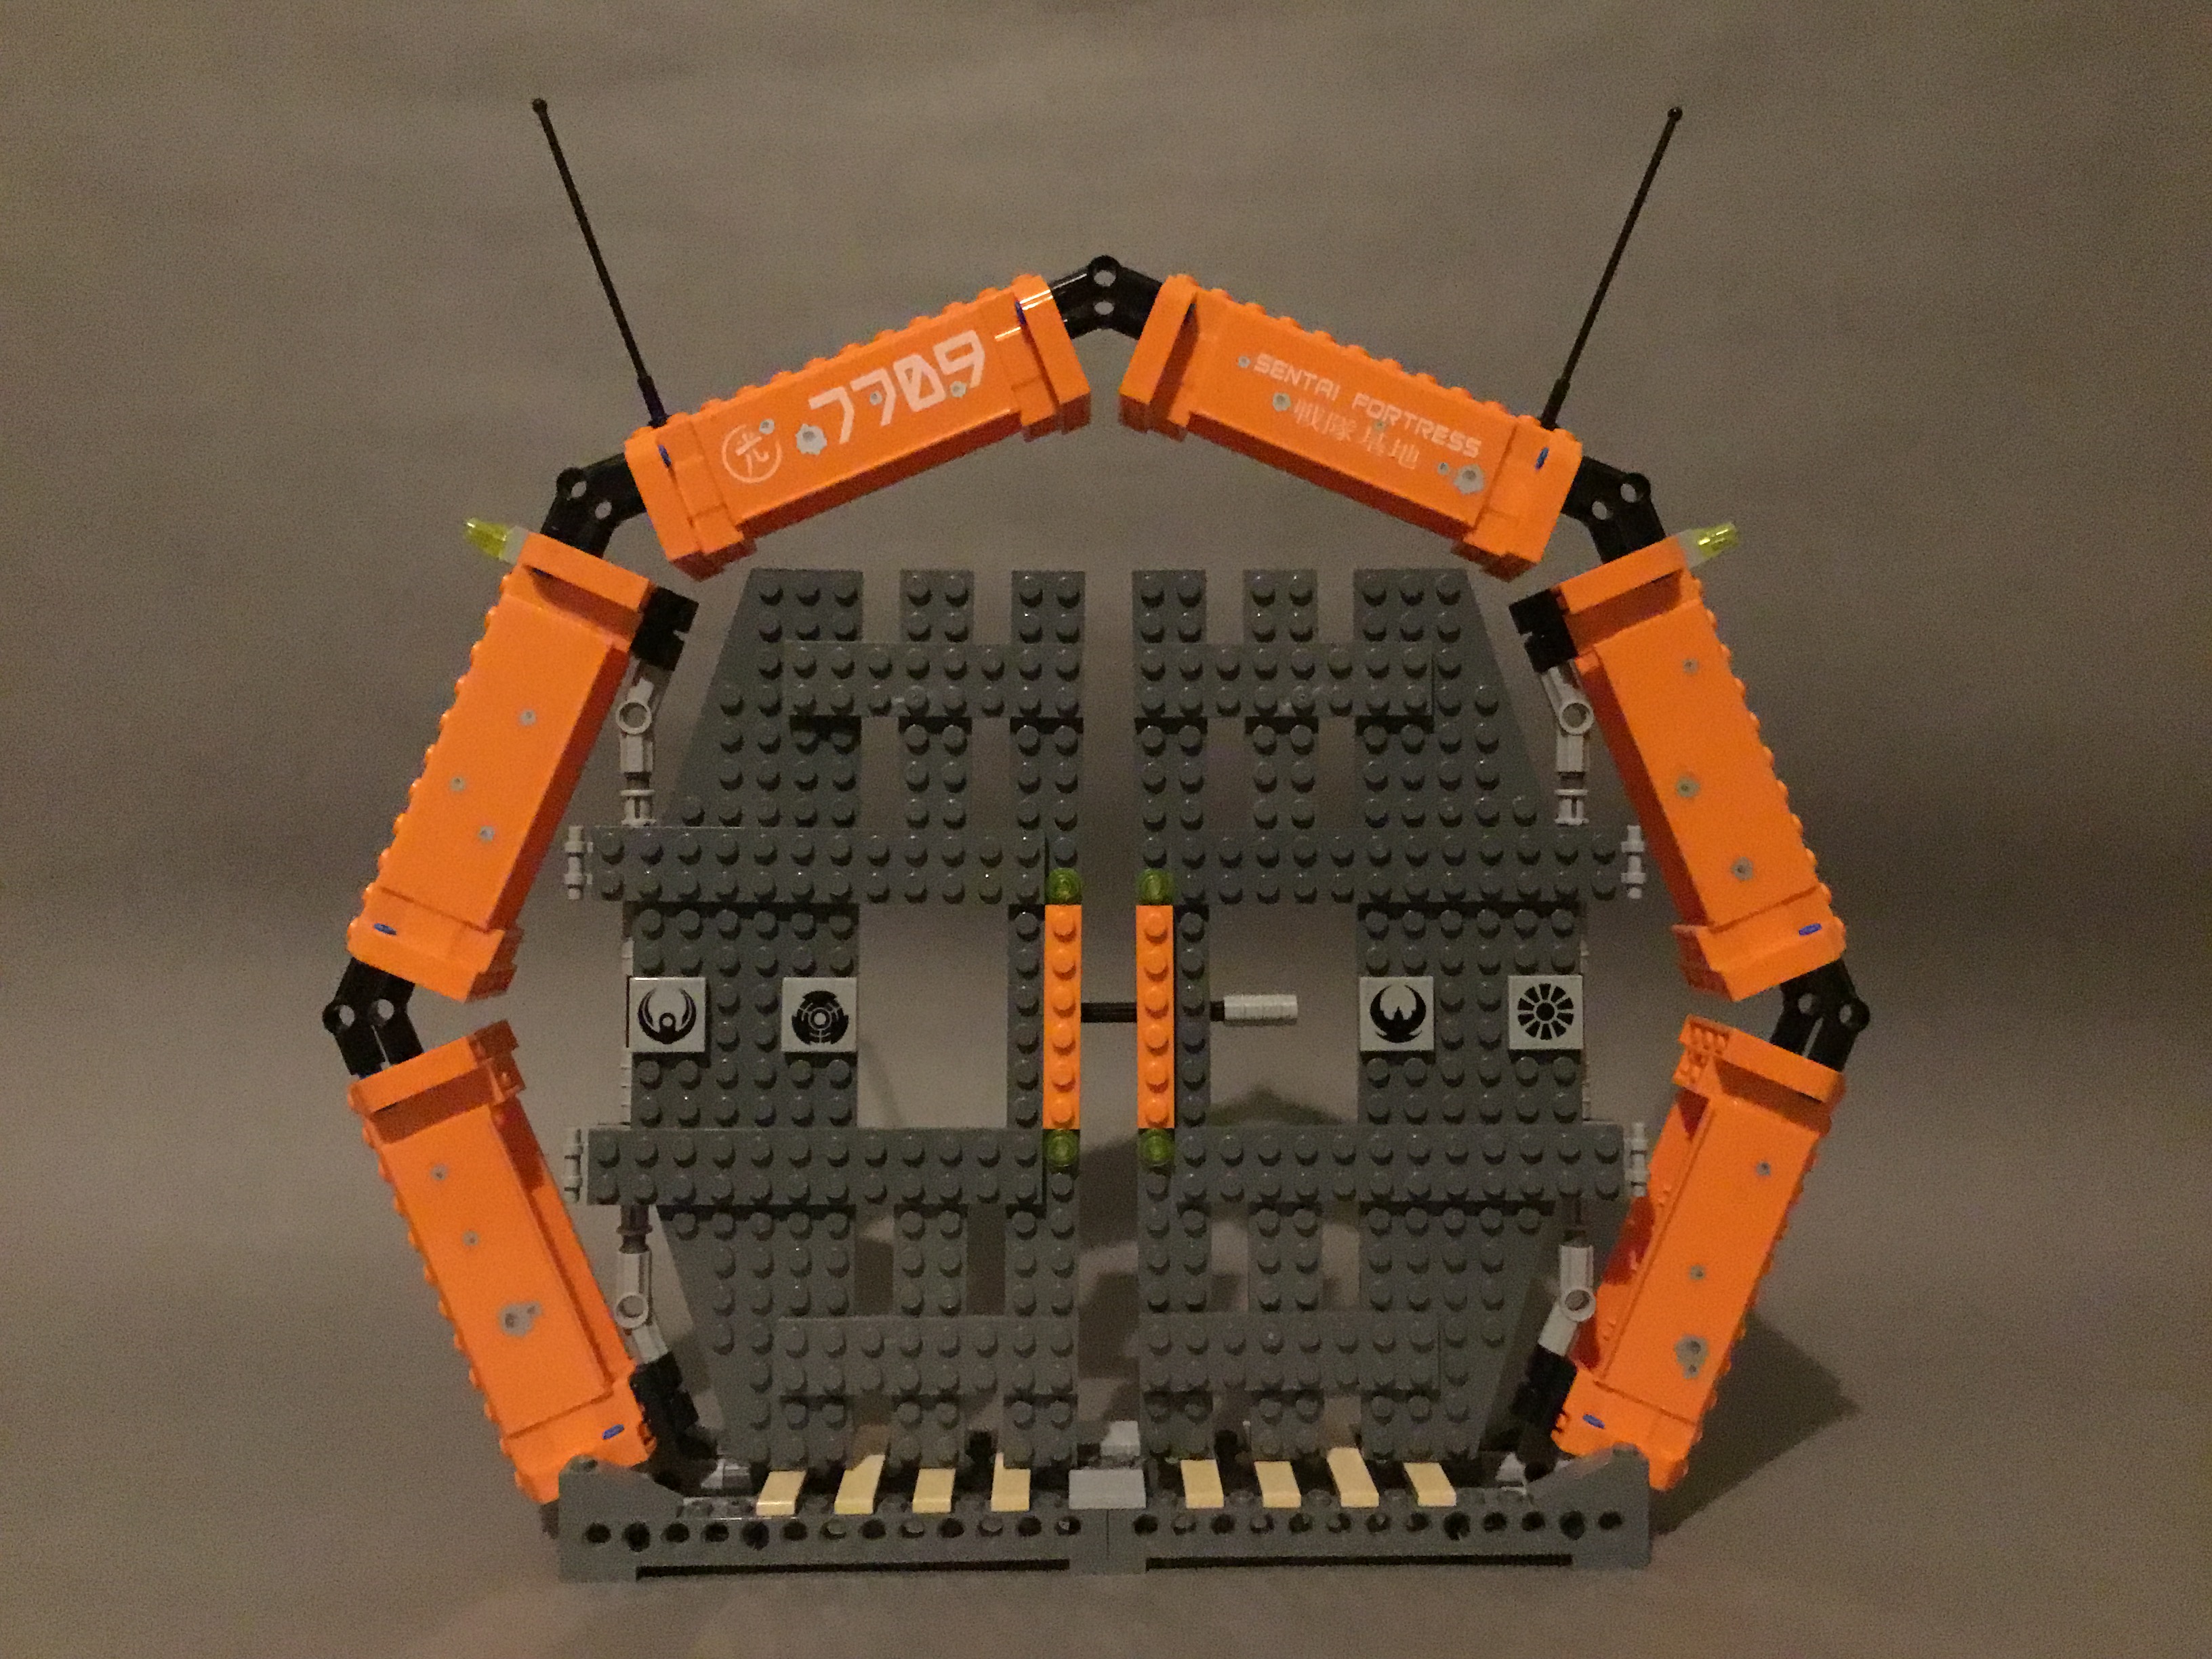
The gate is incredibly visually striking, mainly as a result of its eye-catching octagonal shape, constructed entirely of orange crane booms covered in bullet hole stickers. This is a very cost-effective way of making something so massive, something shared through all large Exo-Force sets.

The doors of the gate are decorated with all four of the main pilots’ symbols, alongside a couple of lights and orange pieces. A technic lock mechanism prevents the doors from being opened, but sliding this pin out allows them to swing freely.
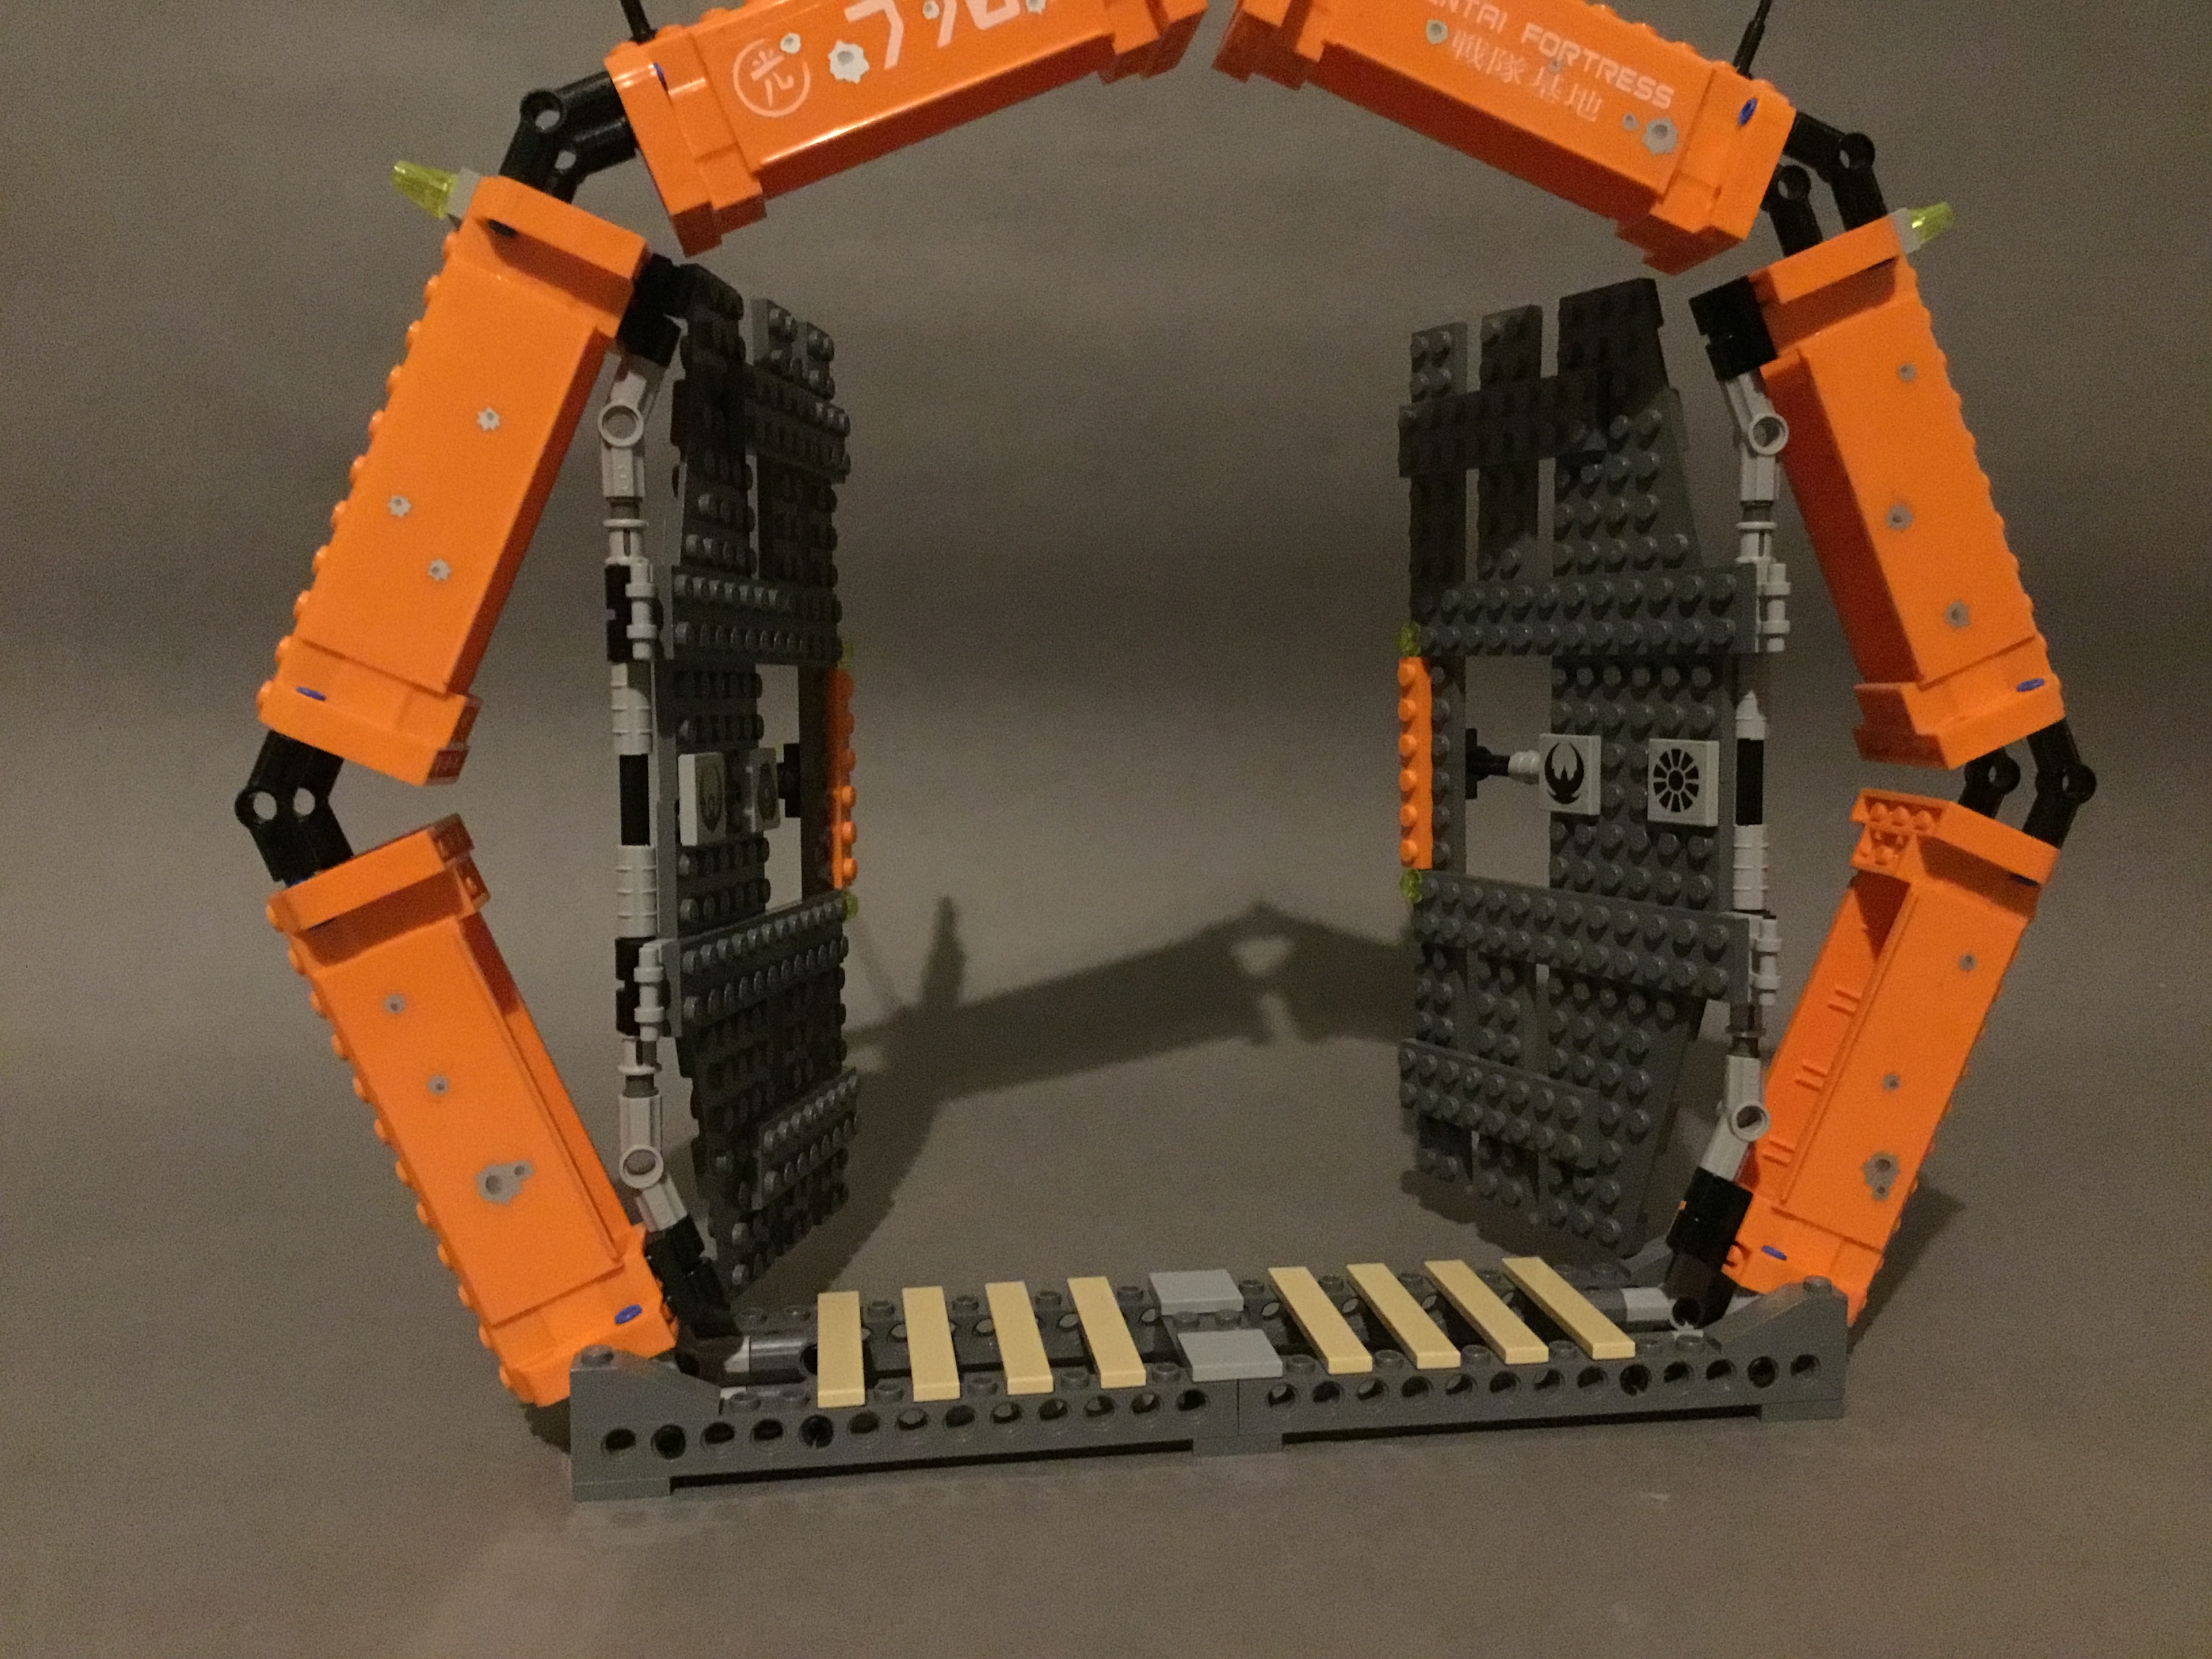
Once the doors are opened, most Battle Machines can comfortably fit through the entrance to enter or exit the fortress. A few wooden planks decorate the floor at the door’s base.
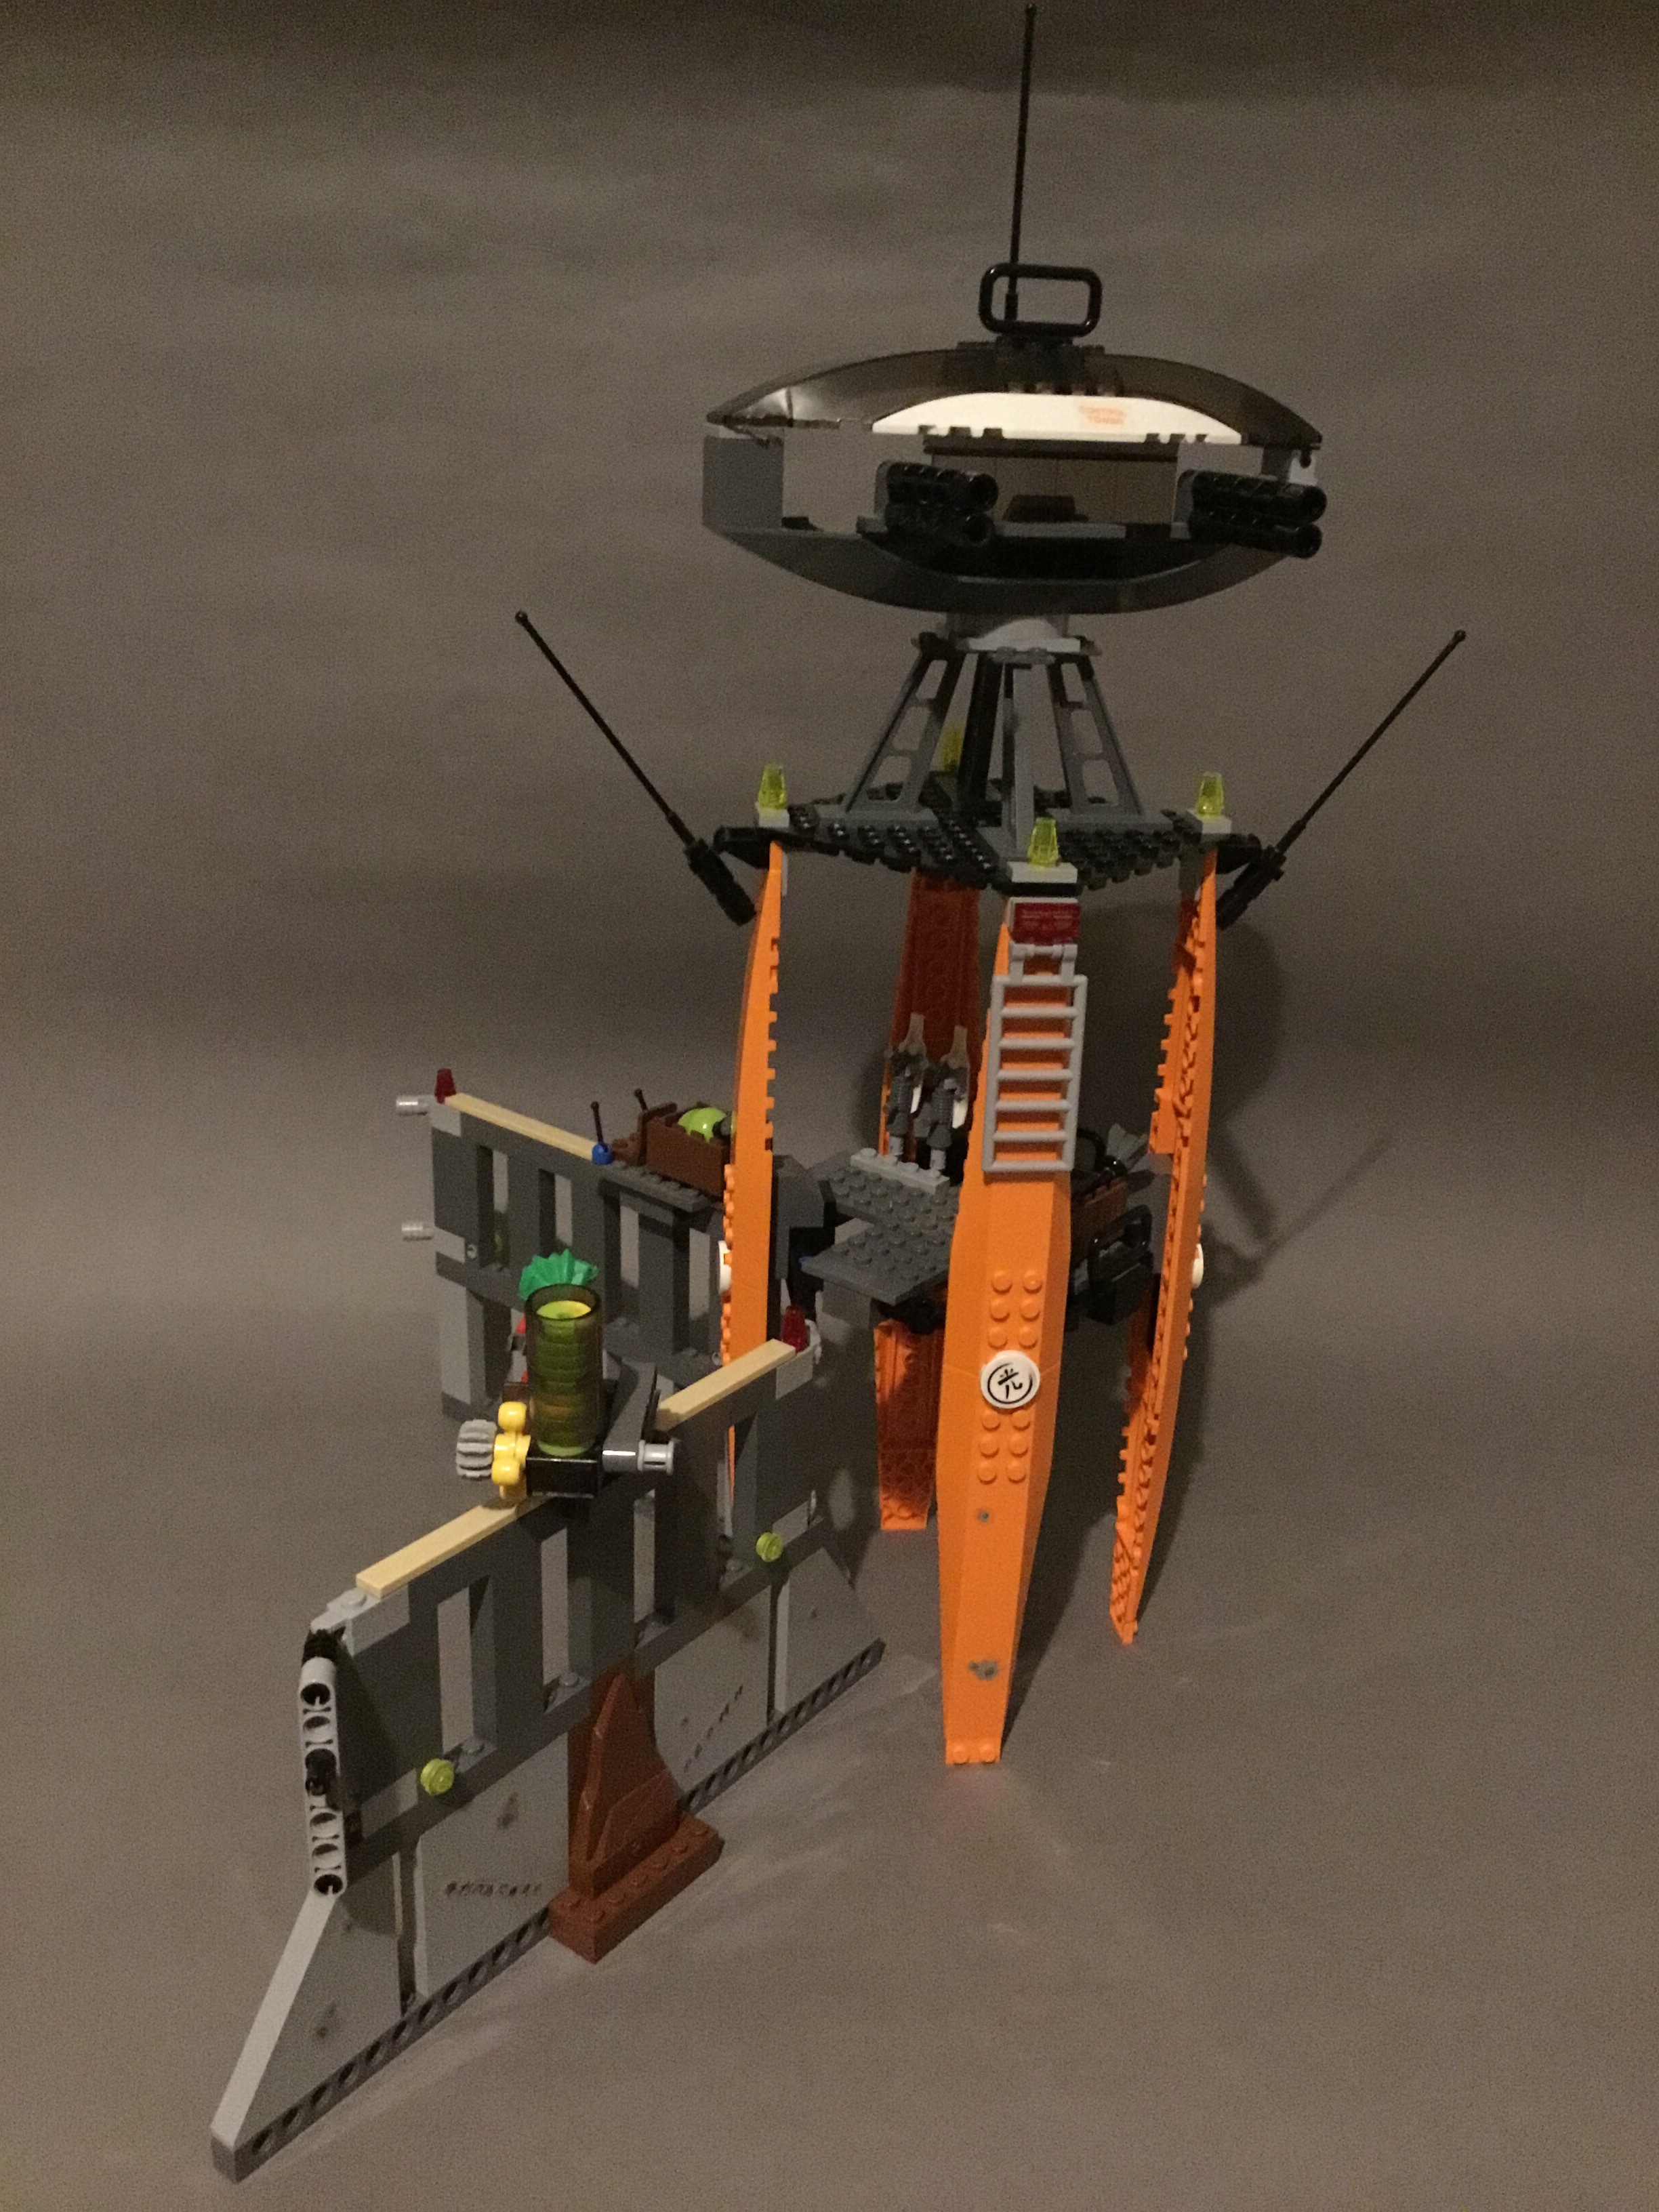
Next we’ll have a look at the Control Tower and its accompanying walls.
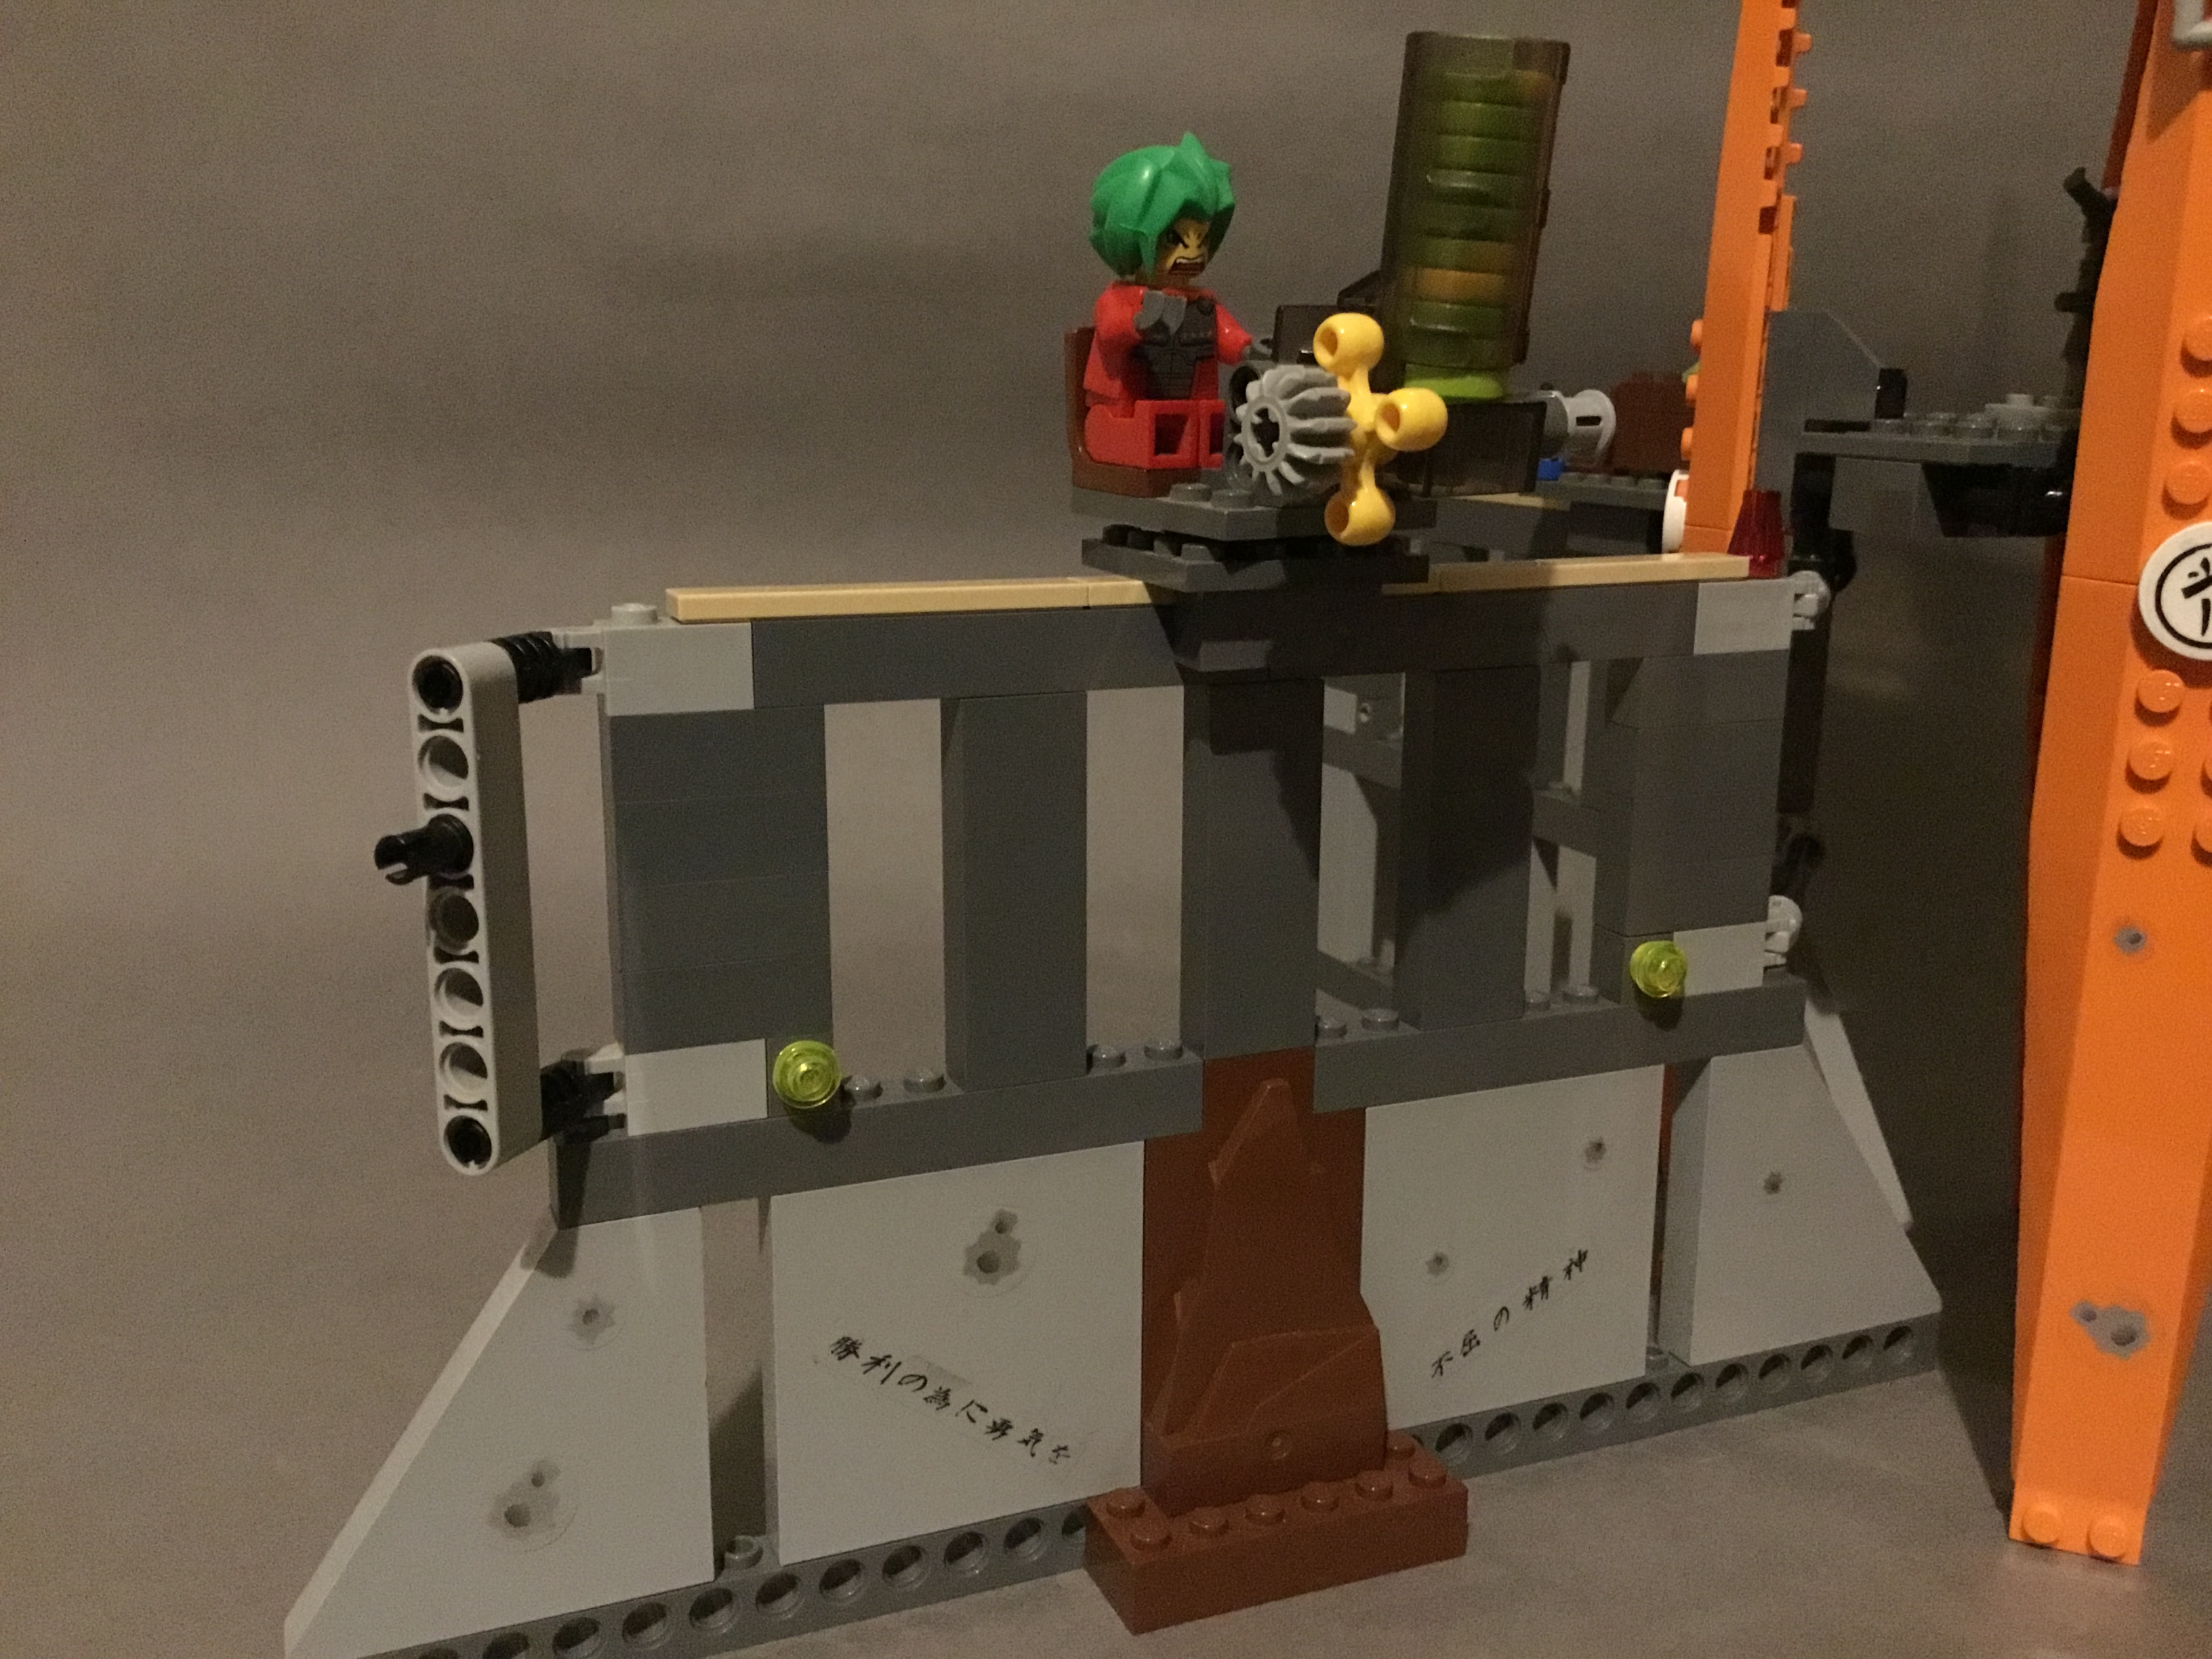
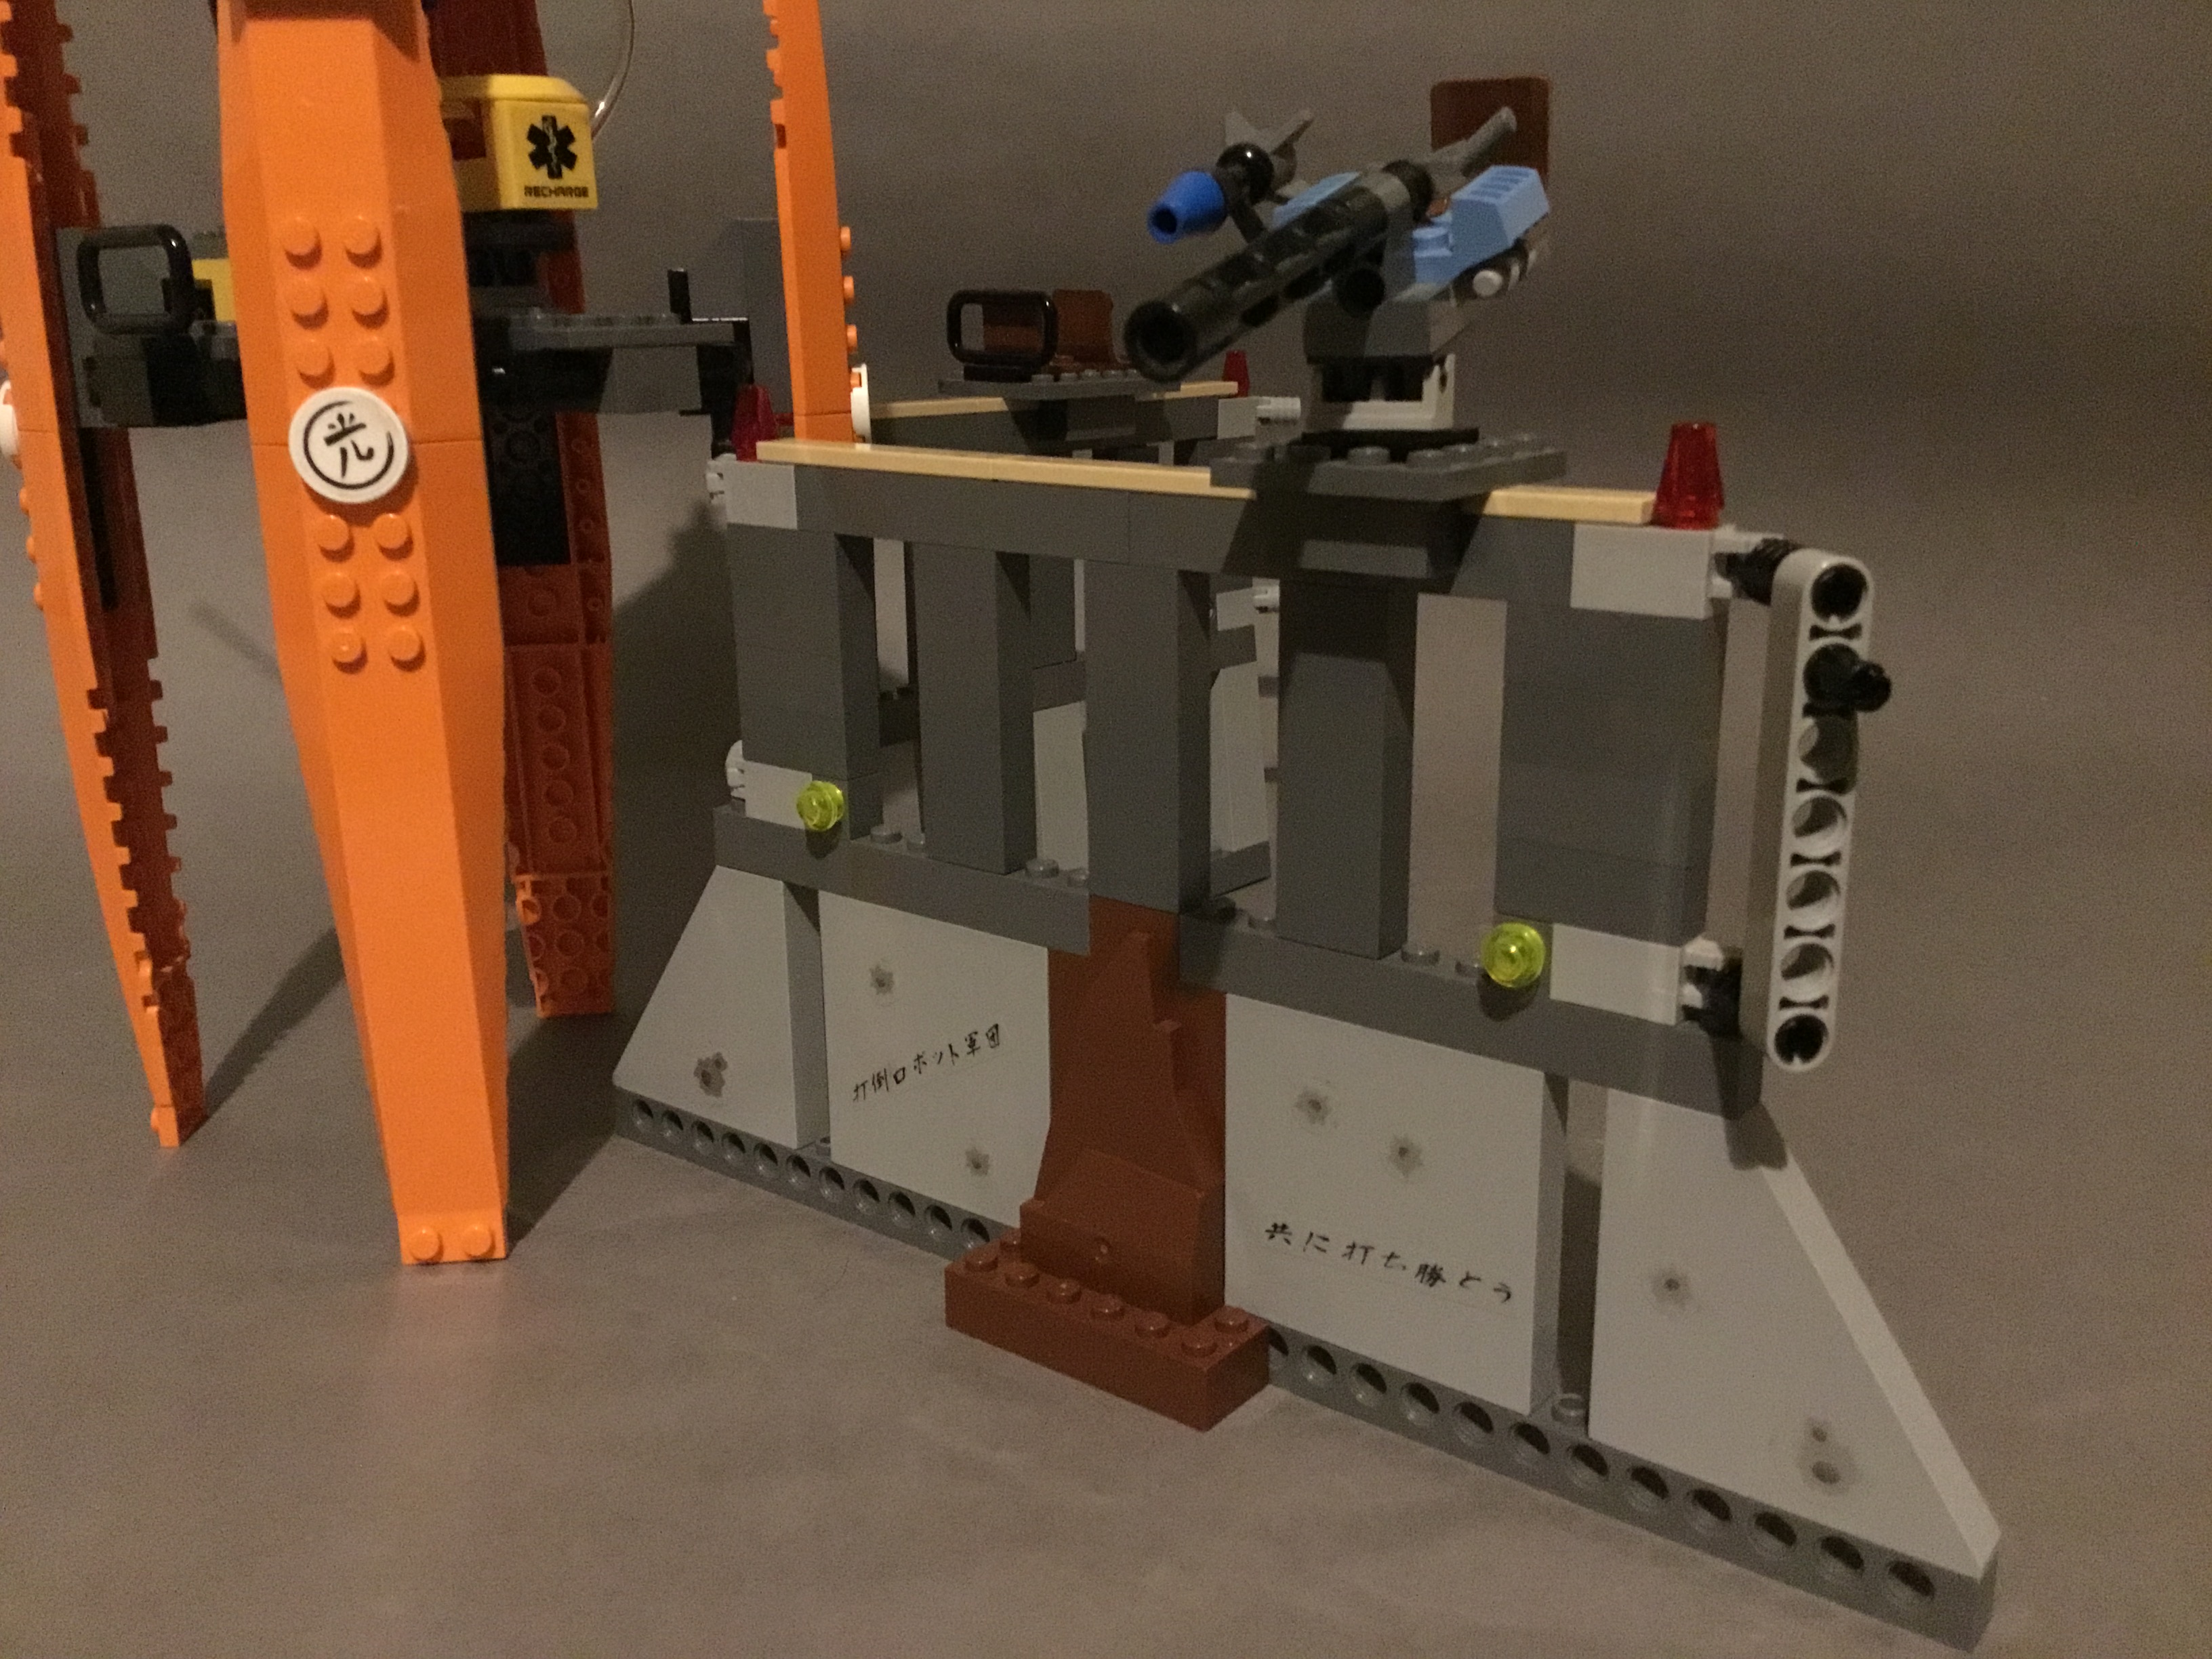
The front wall is covered in even more bullet hole stickers, along with some Japanese graffiti reading ‘Courage for Victory’ and ‘The Spirits of Never Surrender’. A small rock formation has built up at the centre and provides support for most of the wall.
A disk launcher turret has been attached to a rail system on top of the wall, allowing the emplacement to slide along and rotate for a full range. A knob gear is attached to one side for automated rapid firing.
The base of the tower itself ends in four huge points, with the front one bearing a few more bullet holes. The tower structure is attached directly to the wall, creating an integral structure which links the whole fortress together.

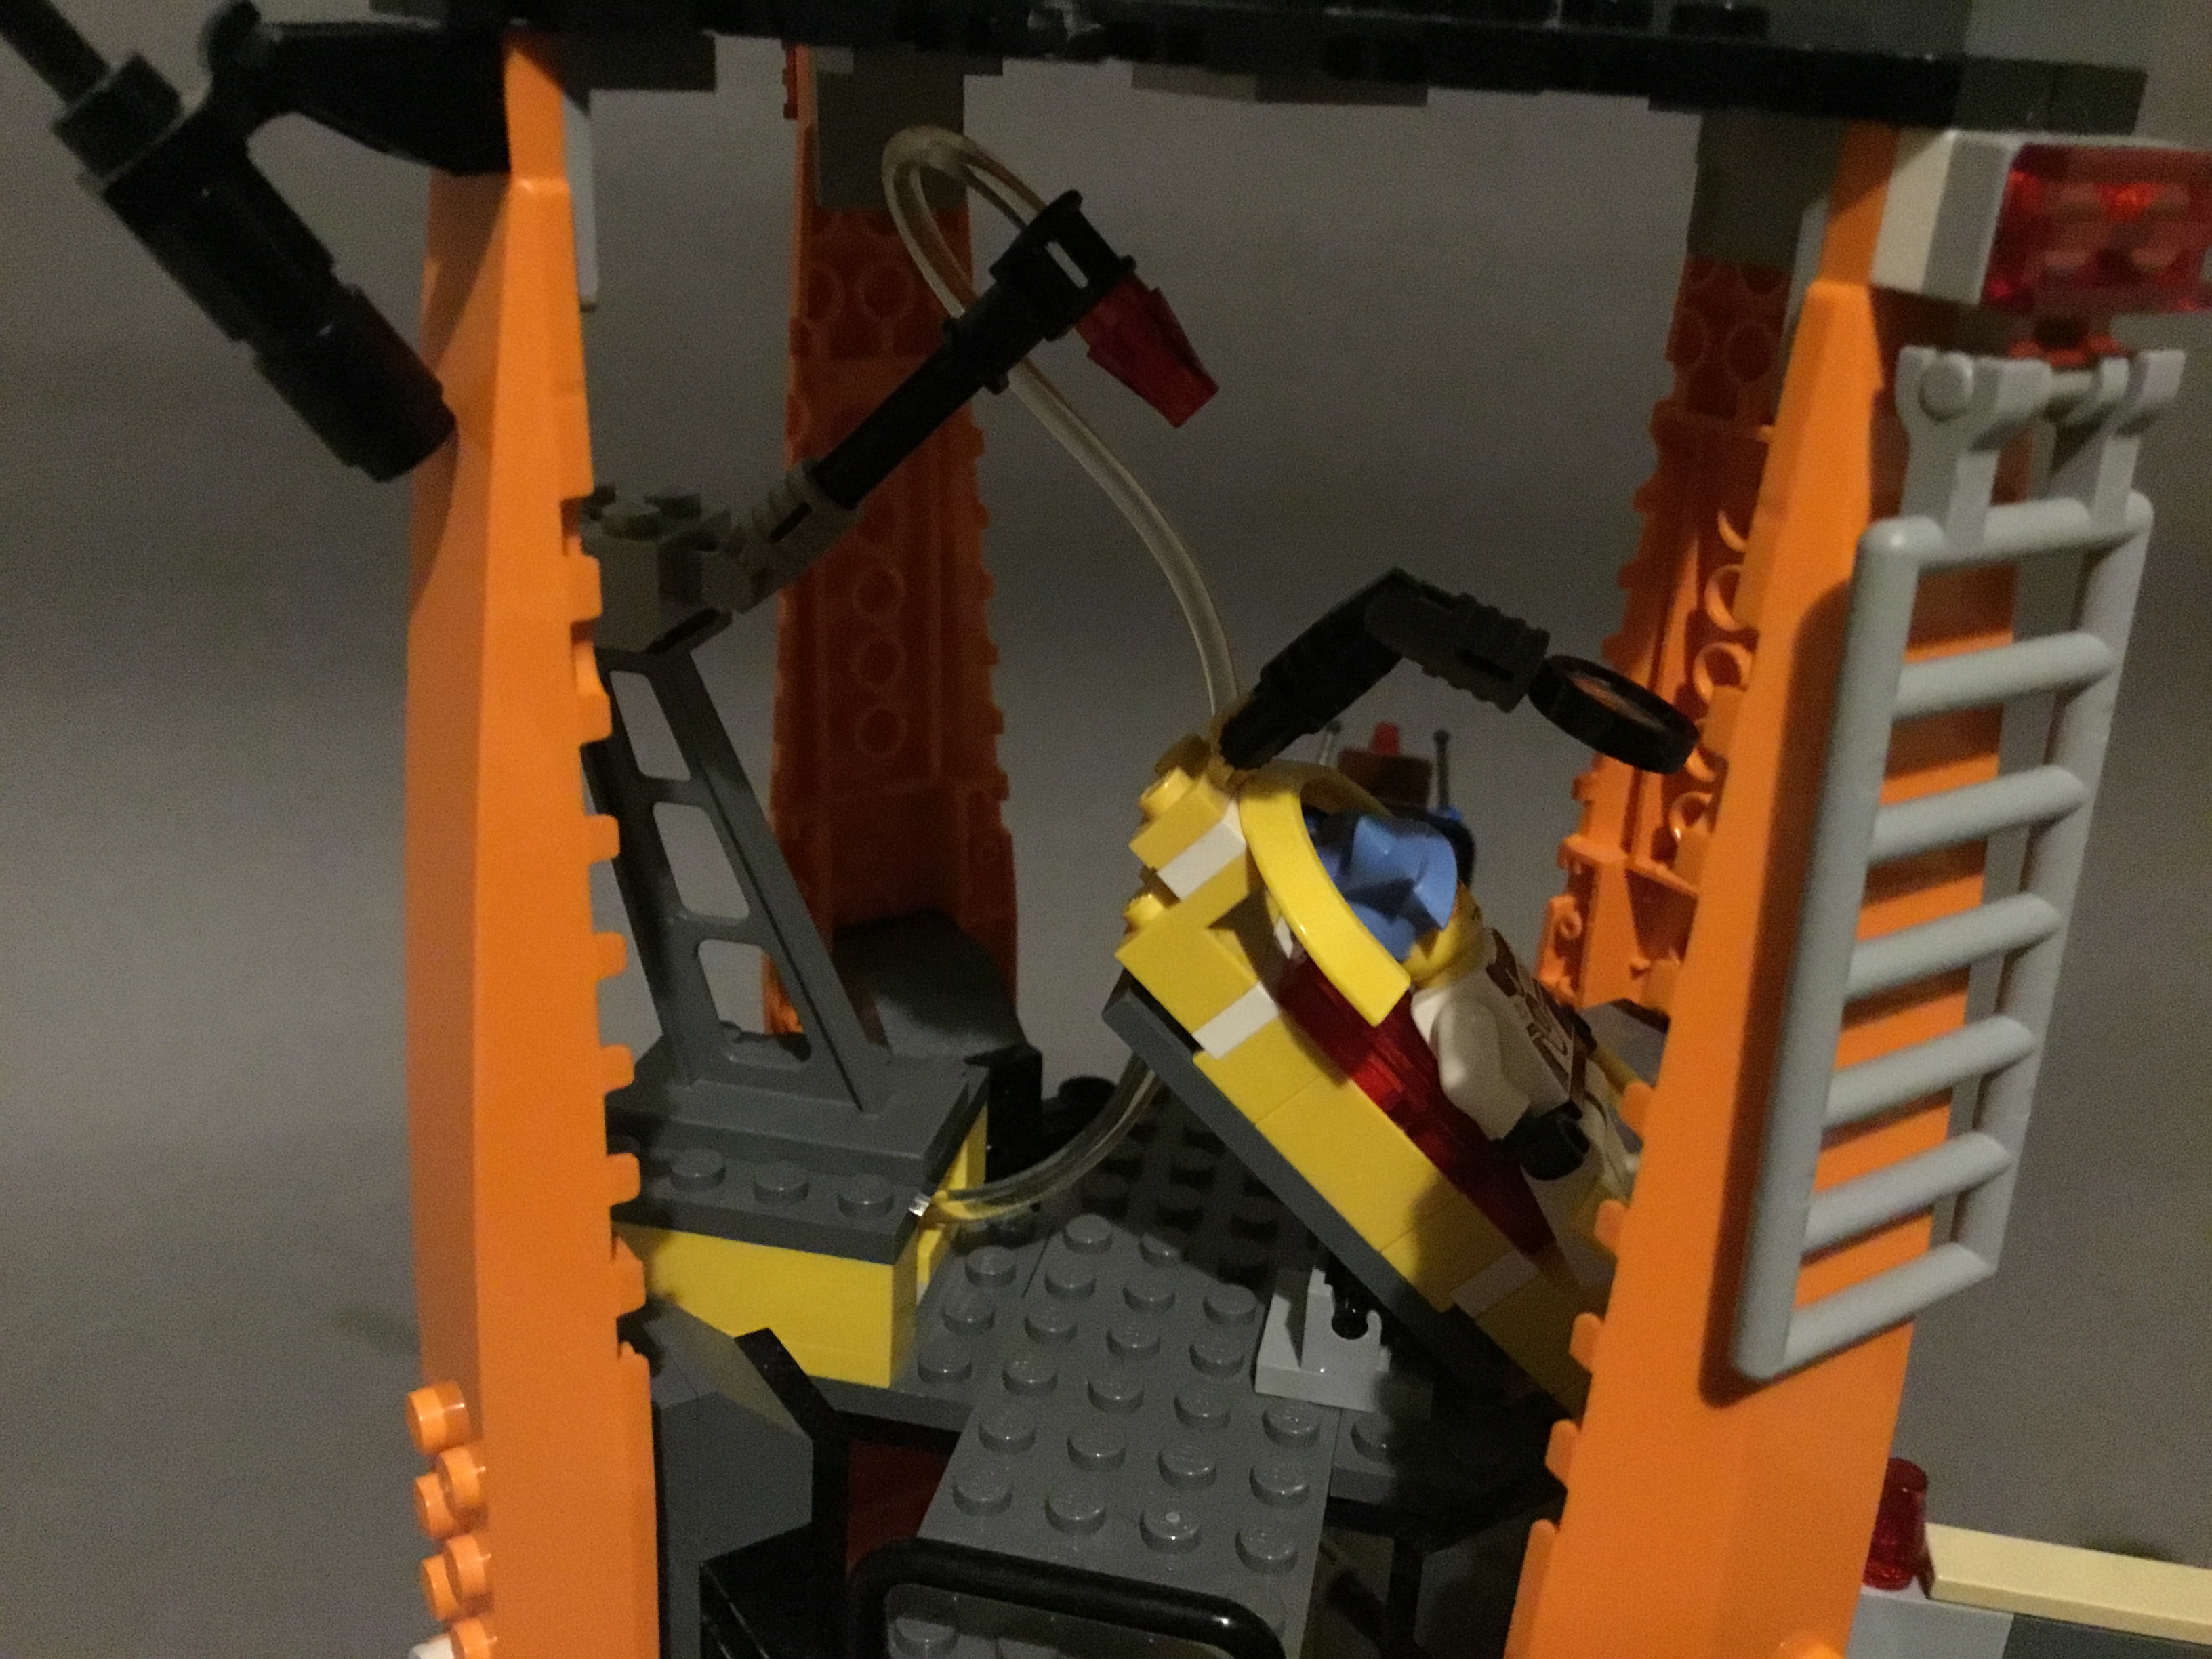
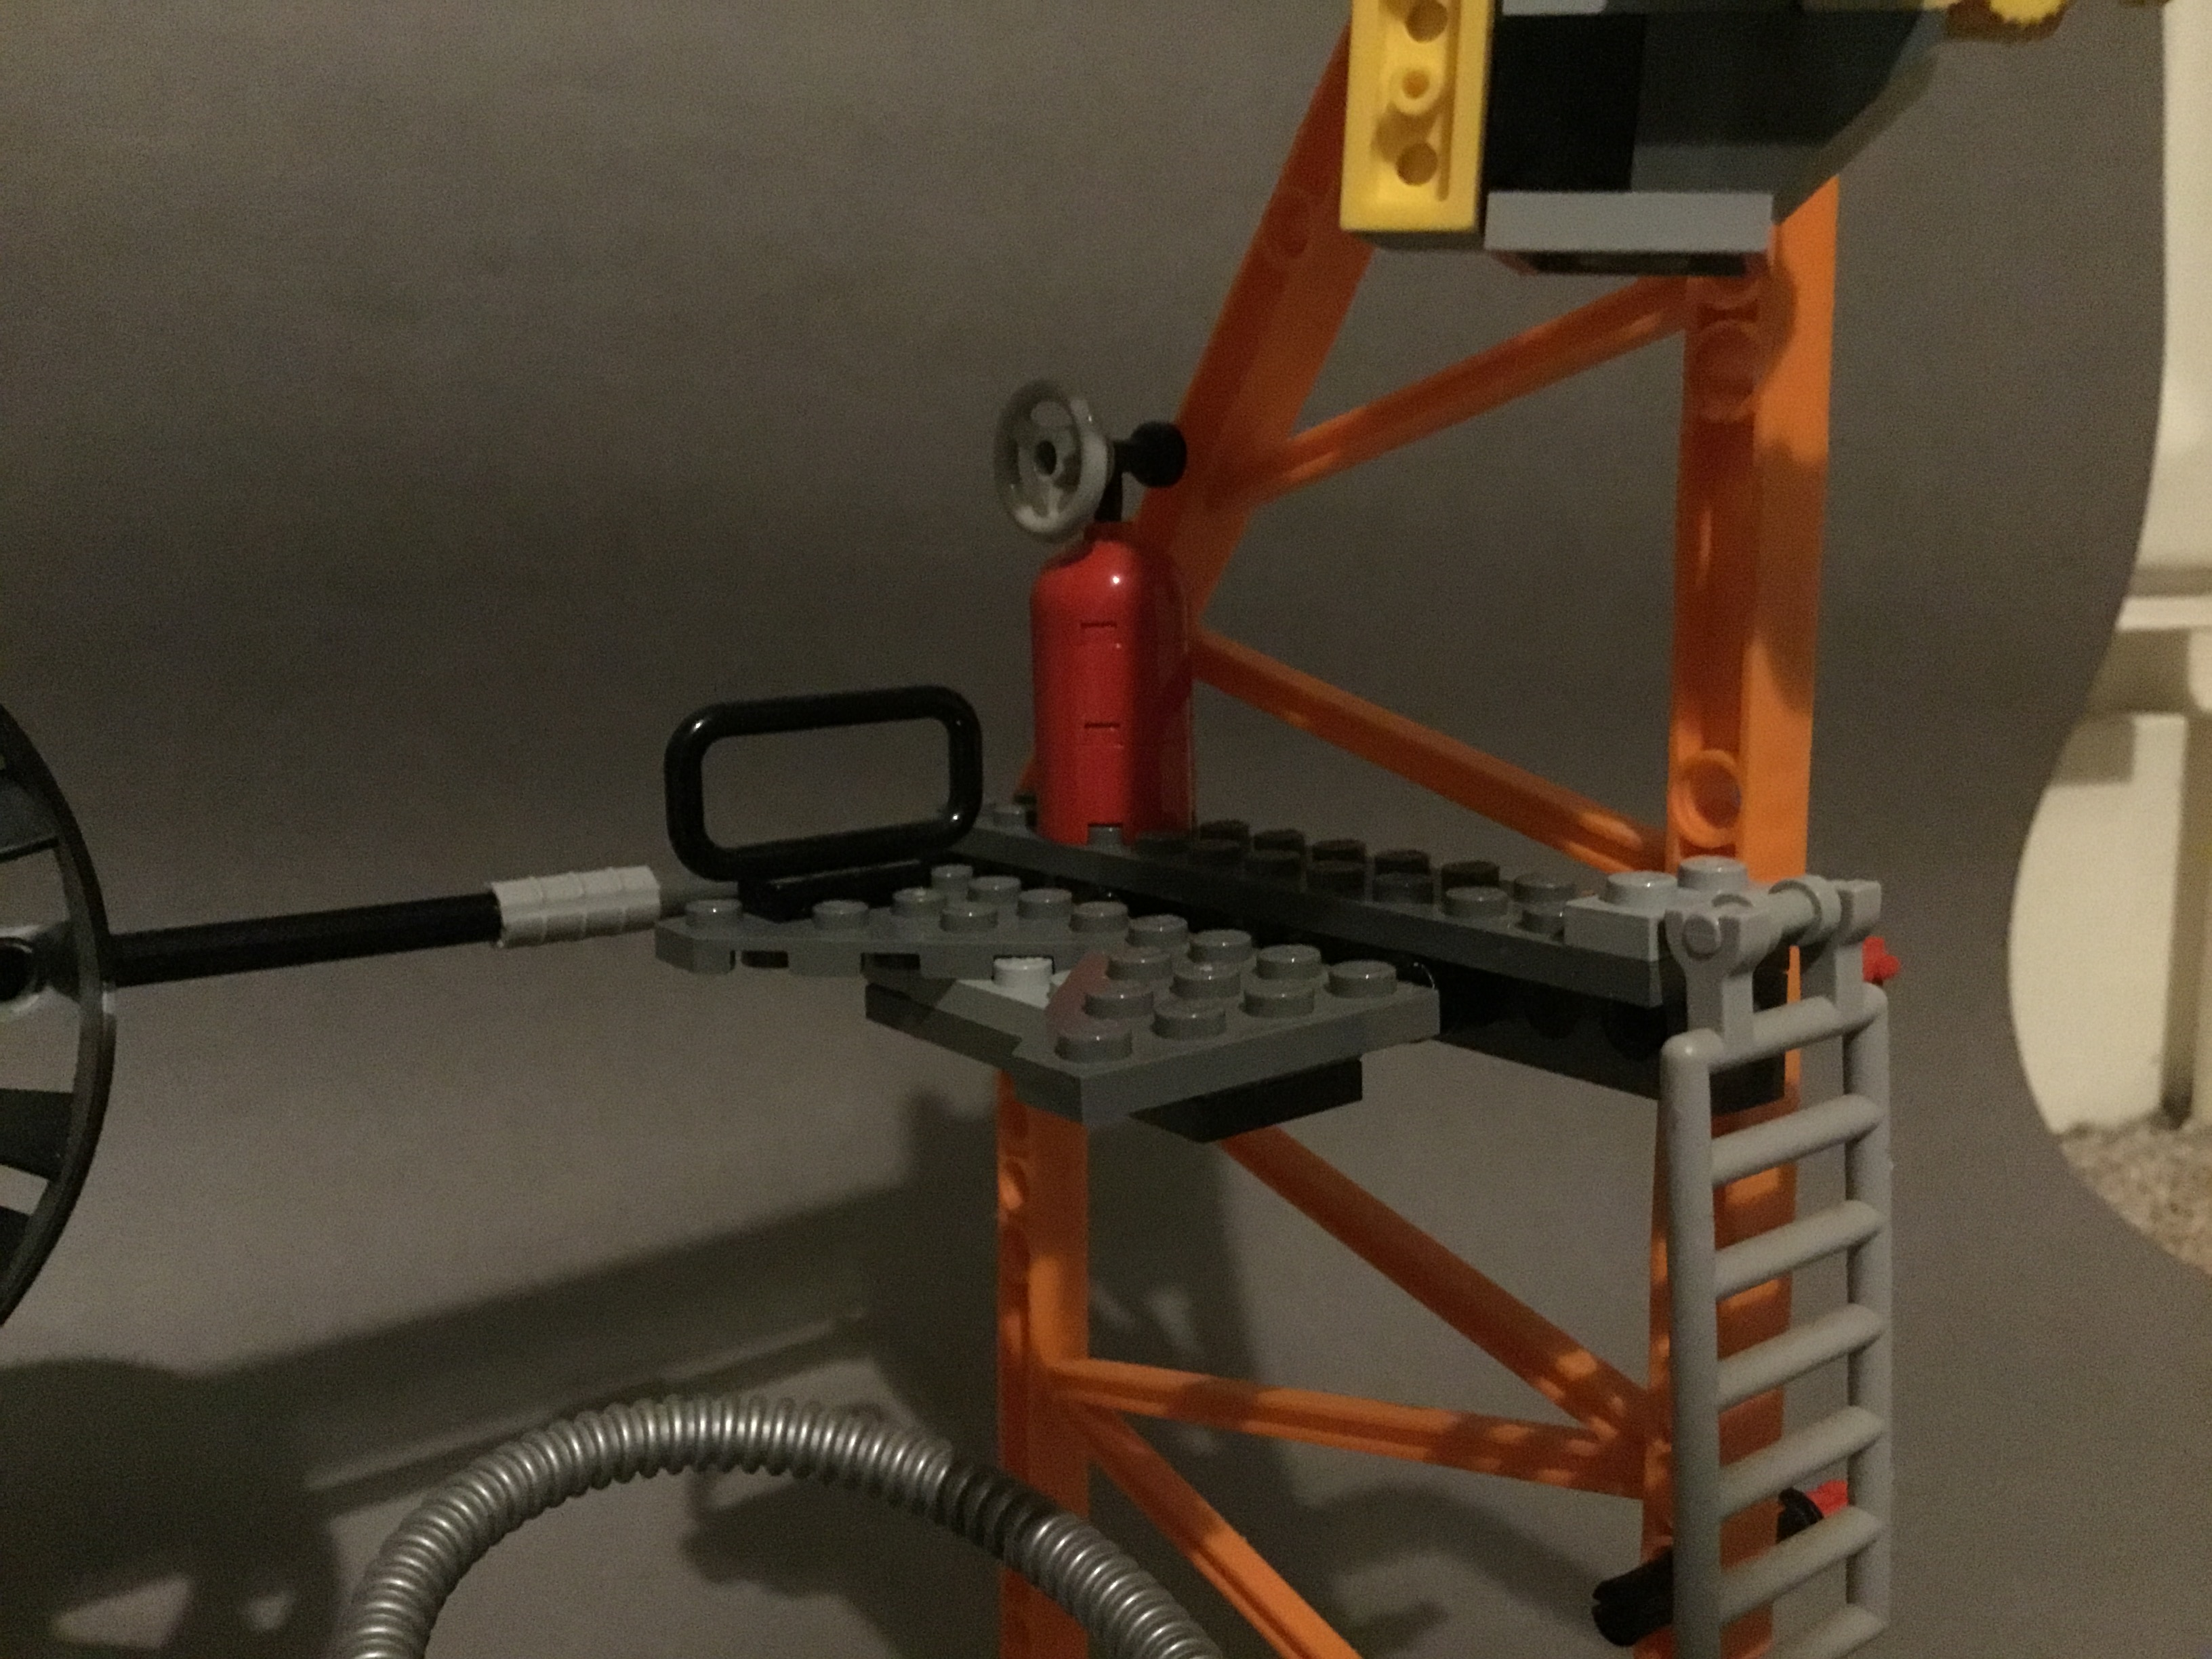
The interior of the tower contains a small armoury, with plenty of floor space for placing figures. Two brick-built guns sit on a rack in the corner, with the grips exposed for quick access to the characters.
Despite their size, figures can comfortably hold the guns without issues. A revolver forms the handle of the weapon while a white ski creates a stock.
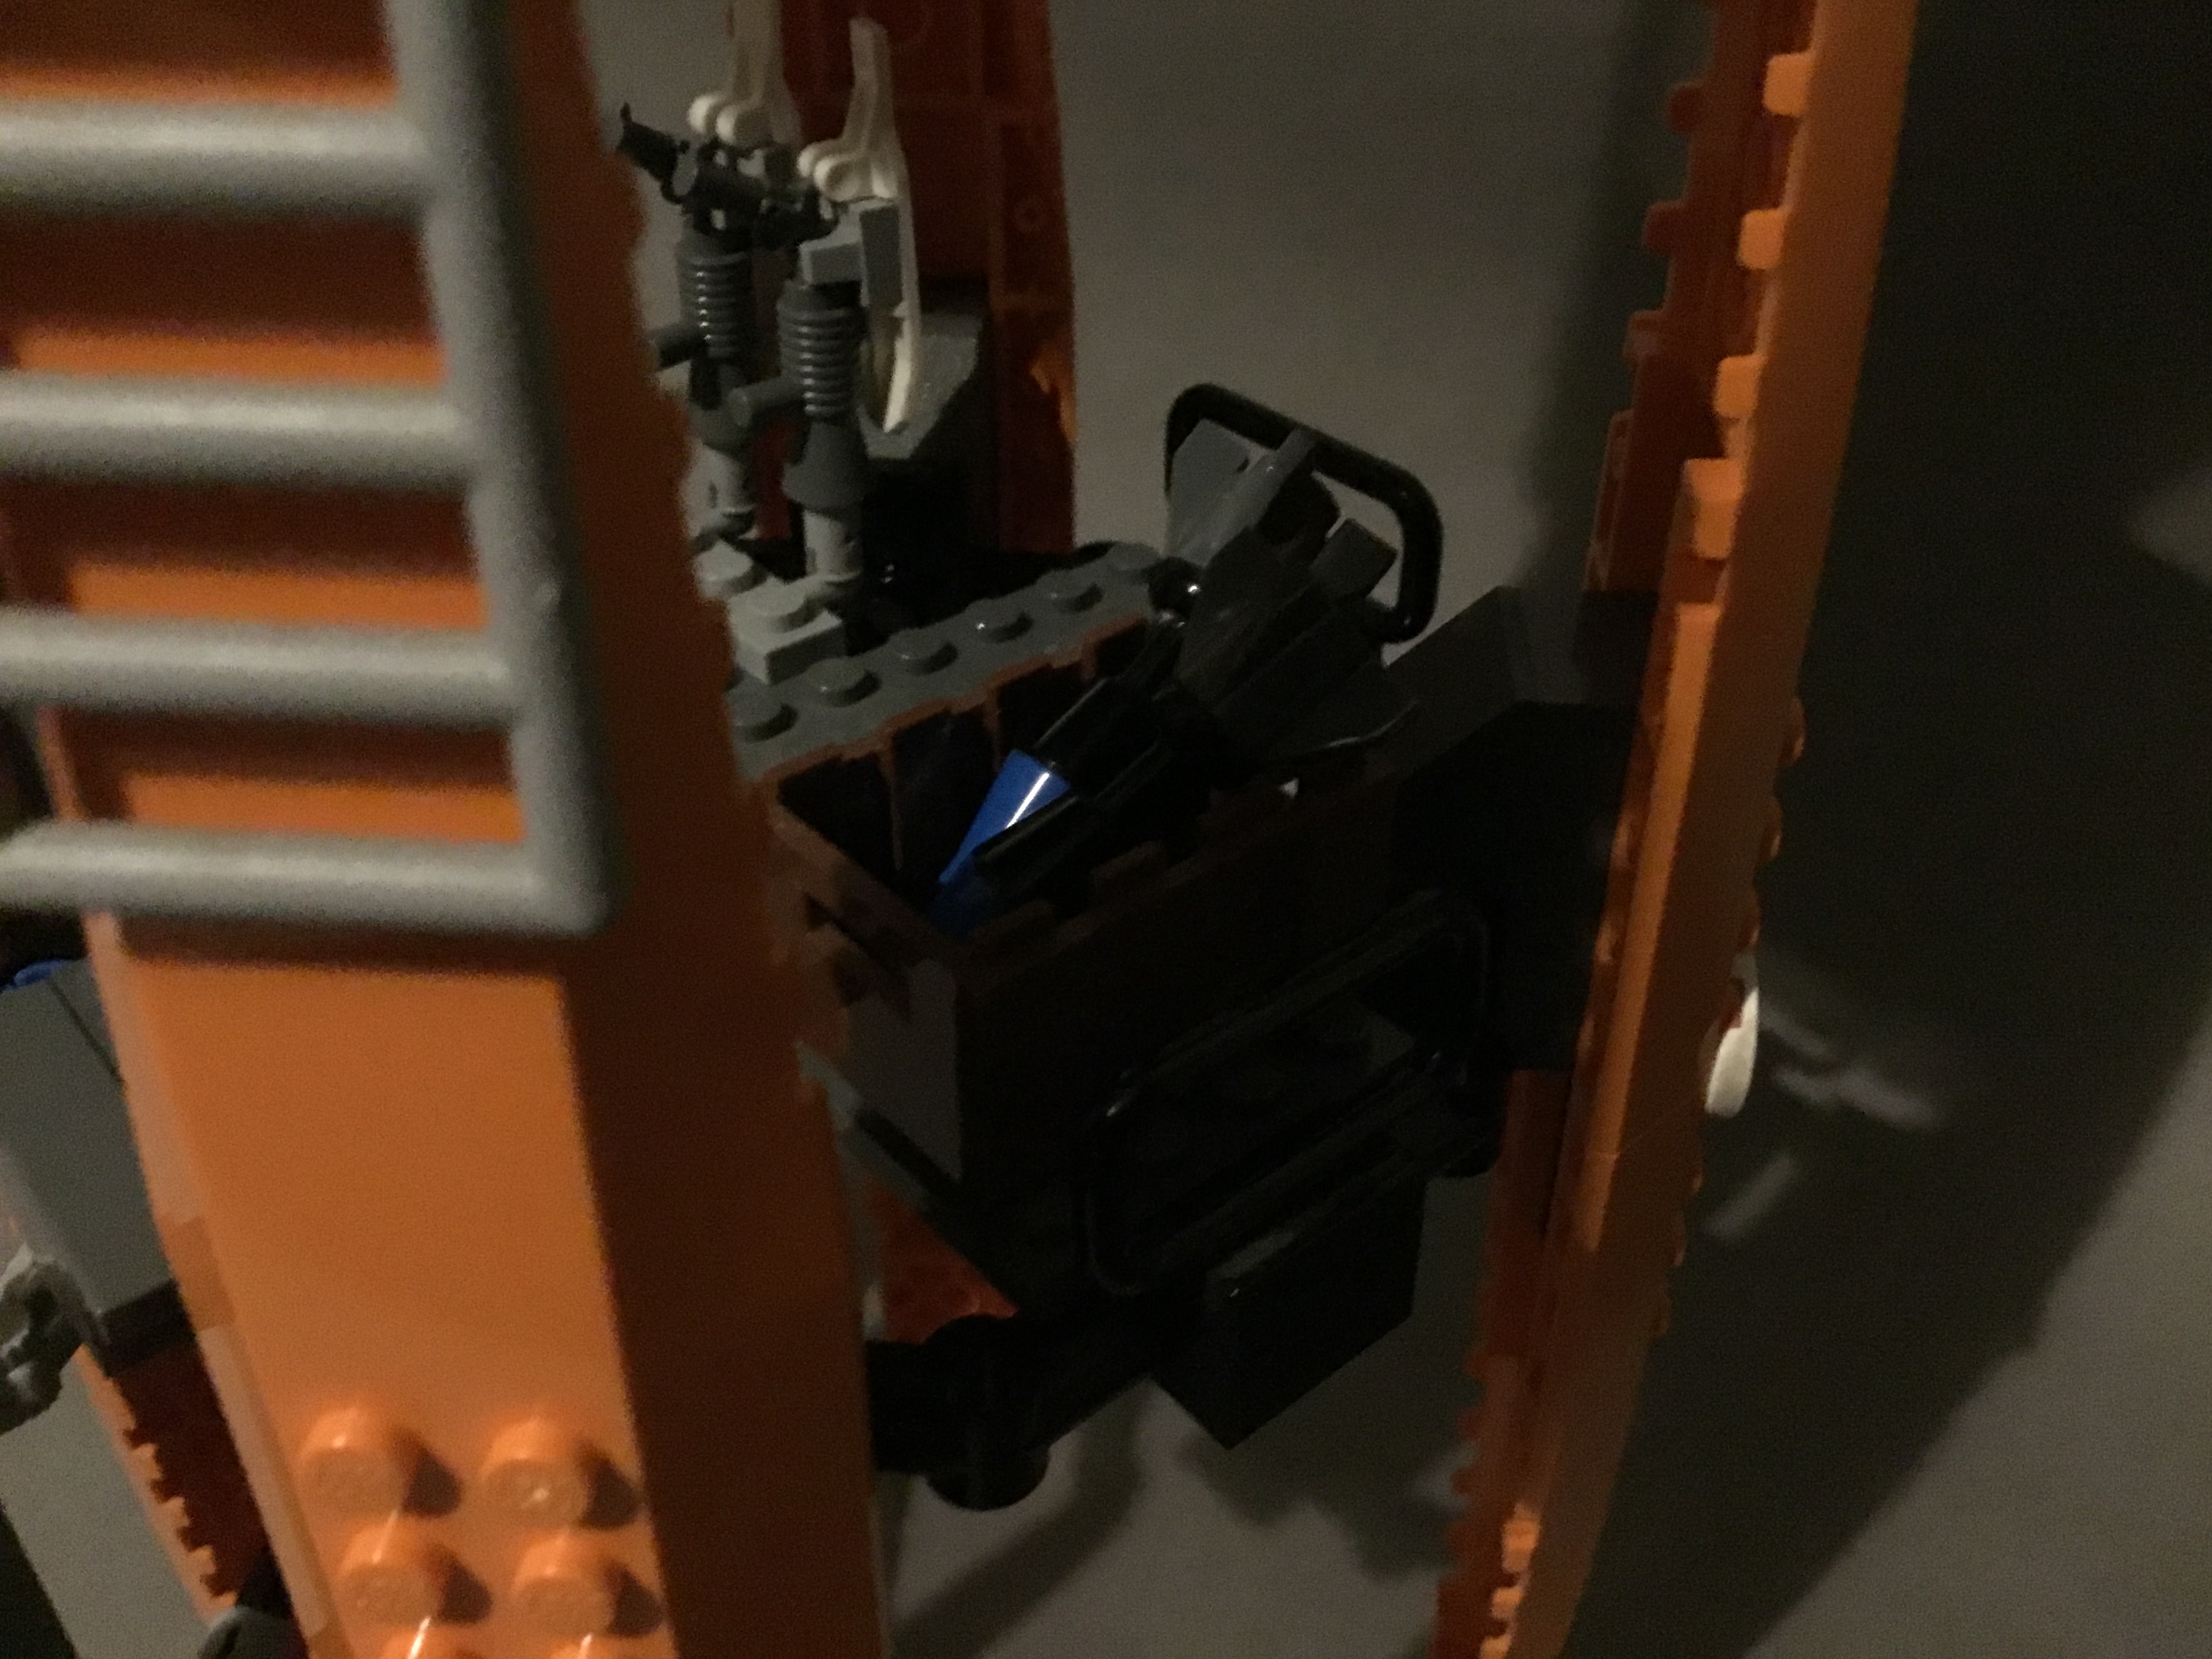
The other side of the room includes a crate holding two more blue-tipped goblet missiles for rearming either the Gate Guardian or other emplacements around the building.
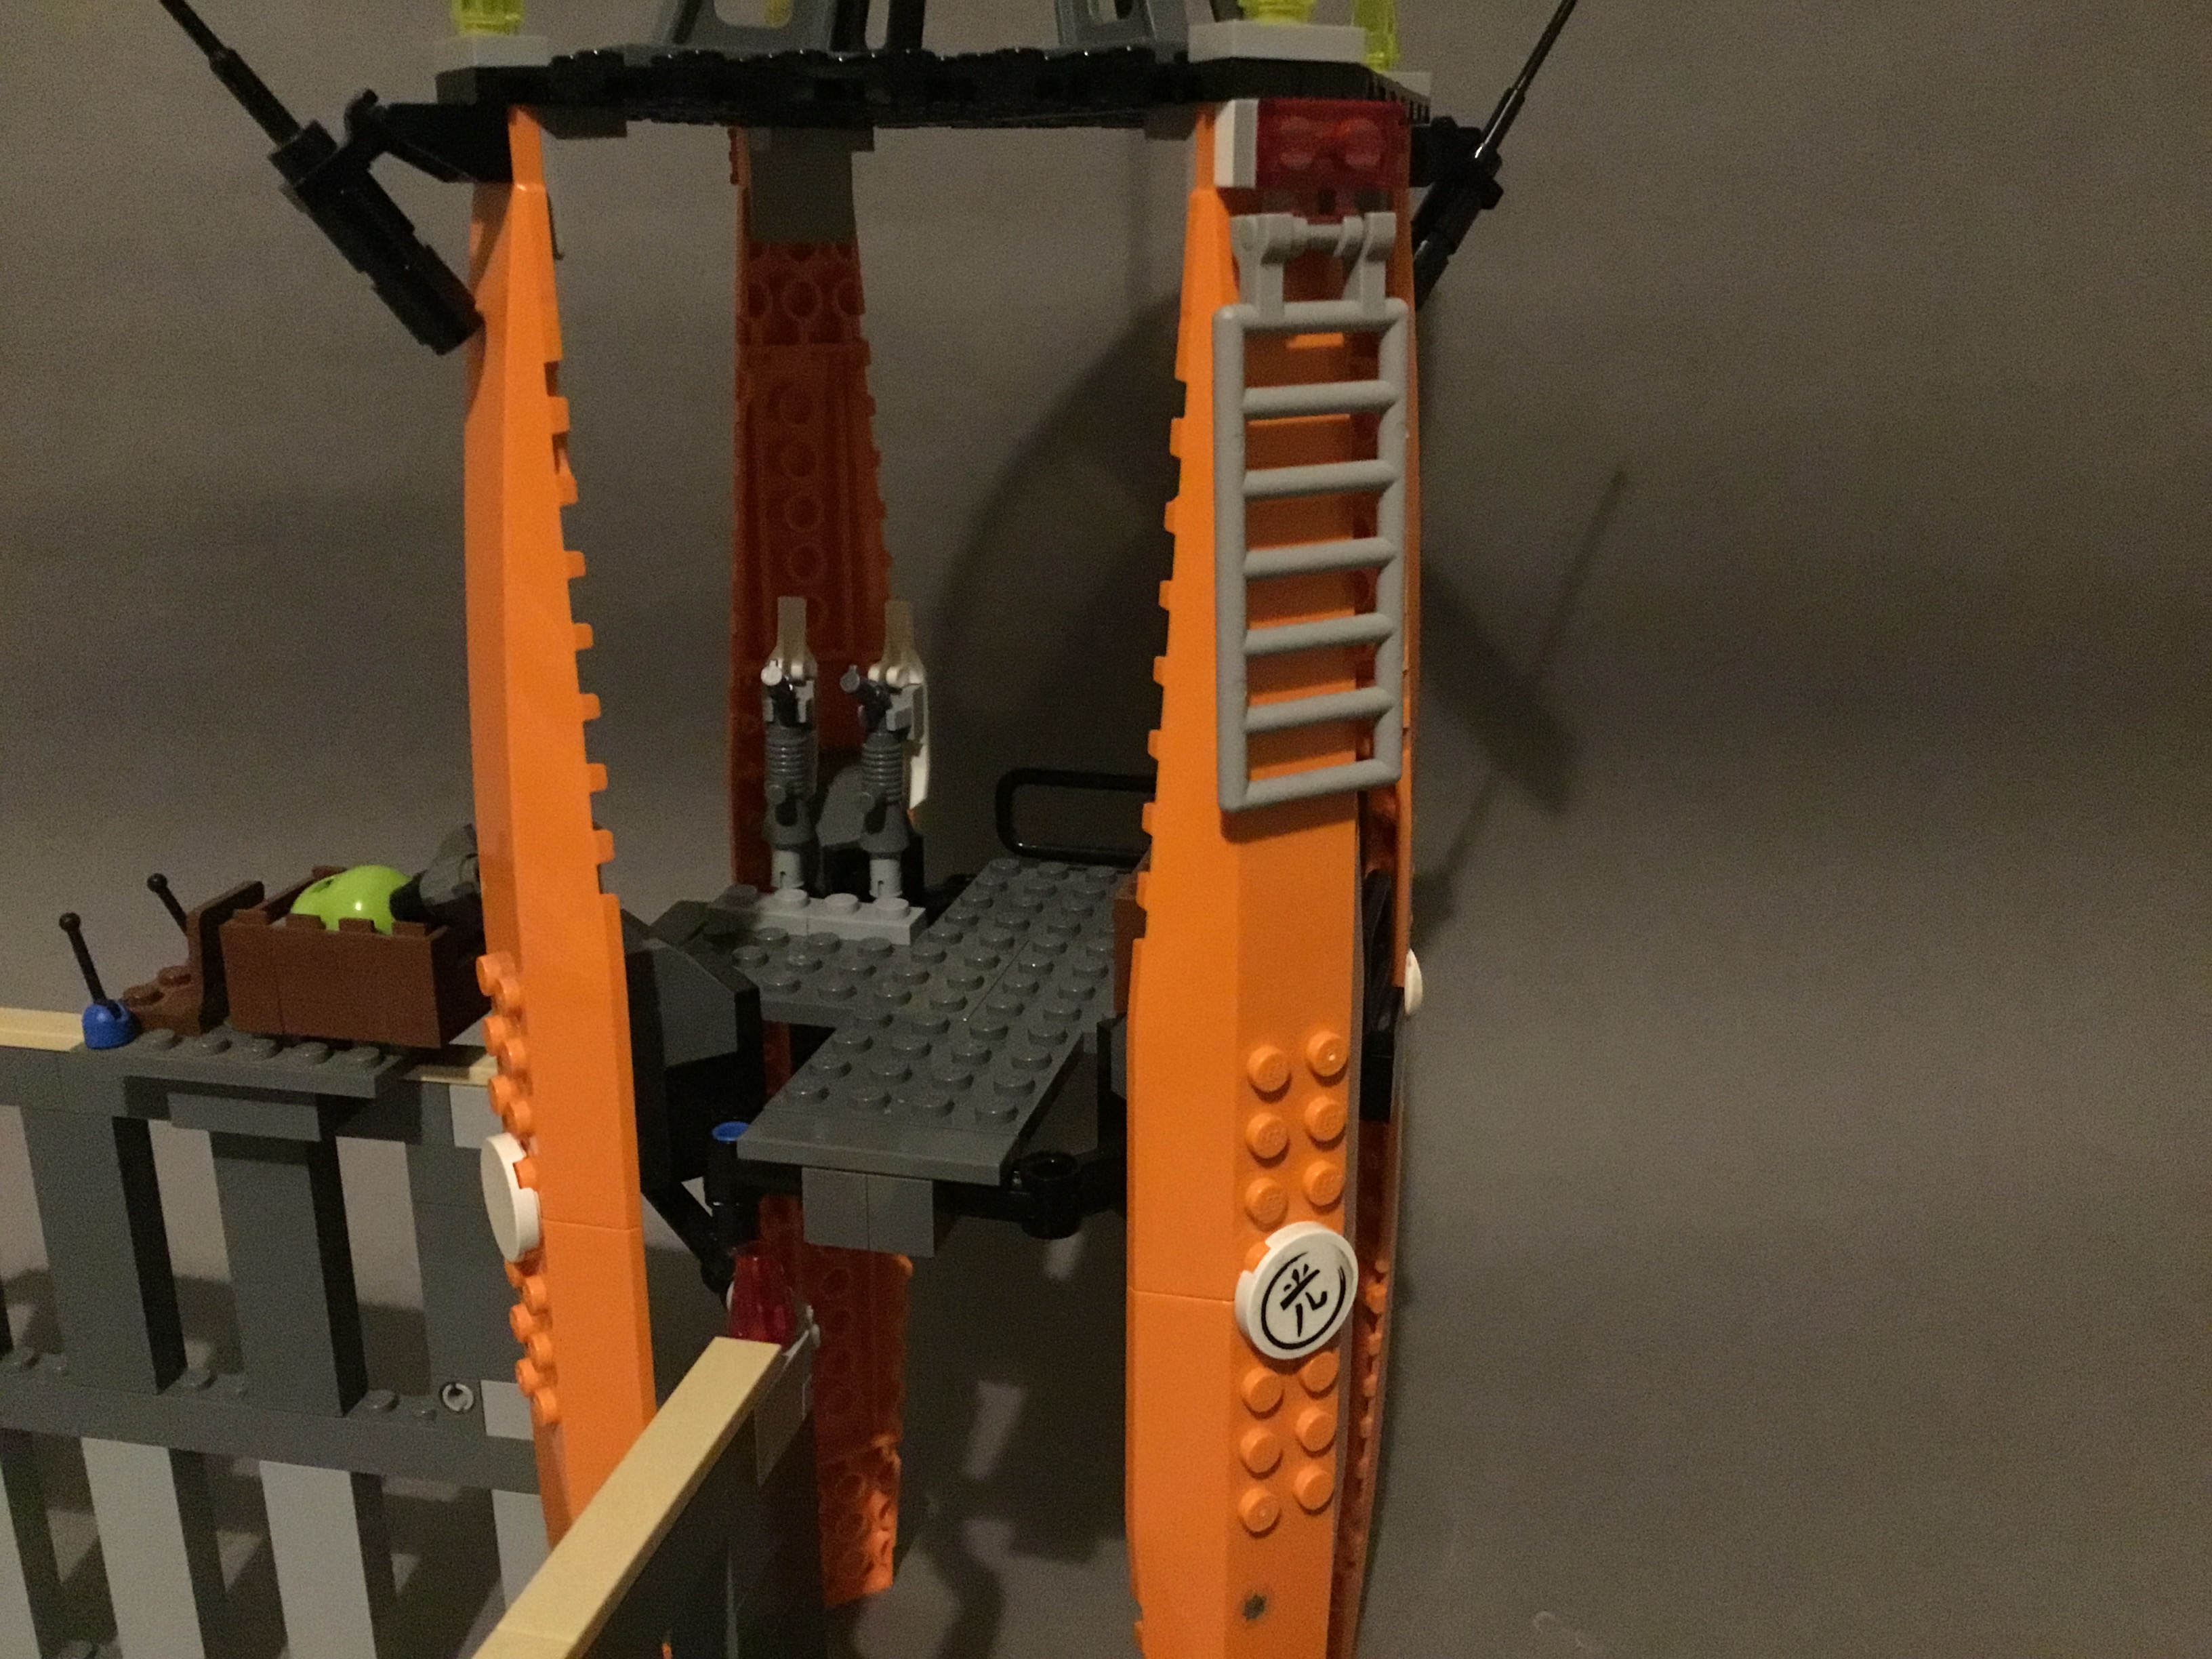
A single ladder is the only way to traverse between levels, which seems a bit shorter than it should be. It’s more thought than Lego usually puts into these types of structures, though, usually there’s no method of ascension at all!
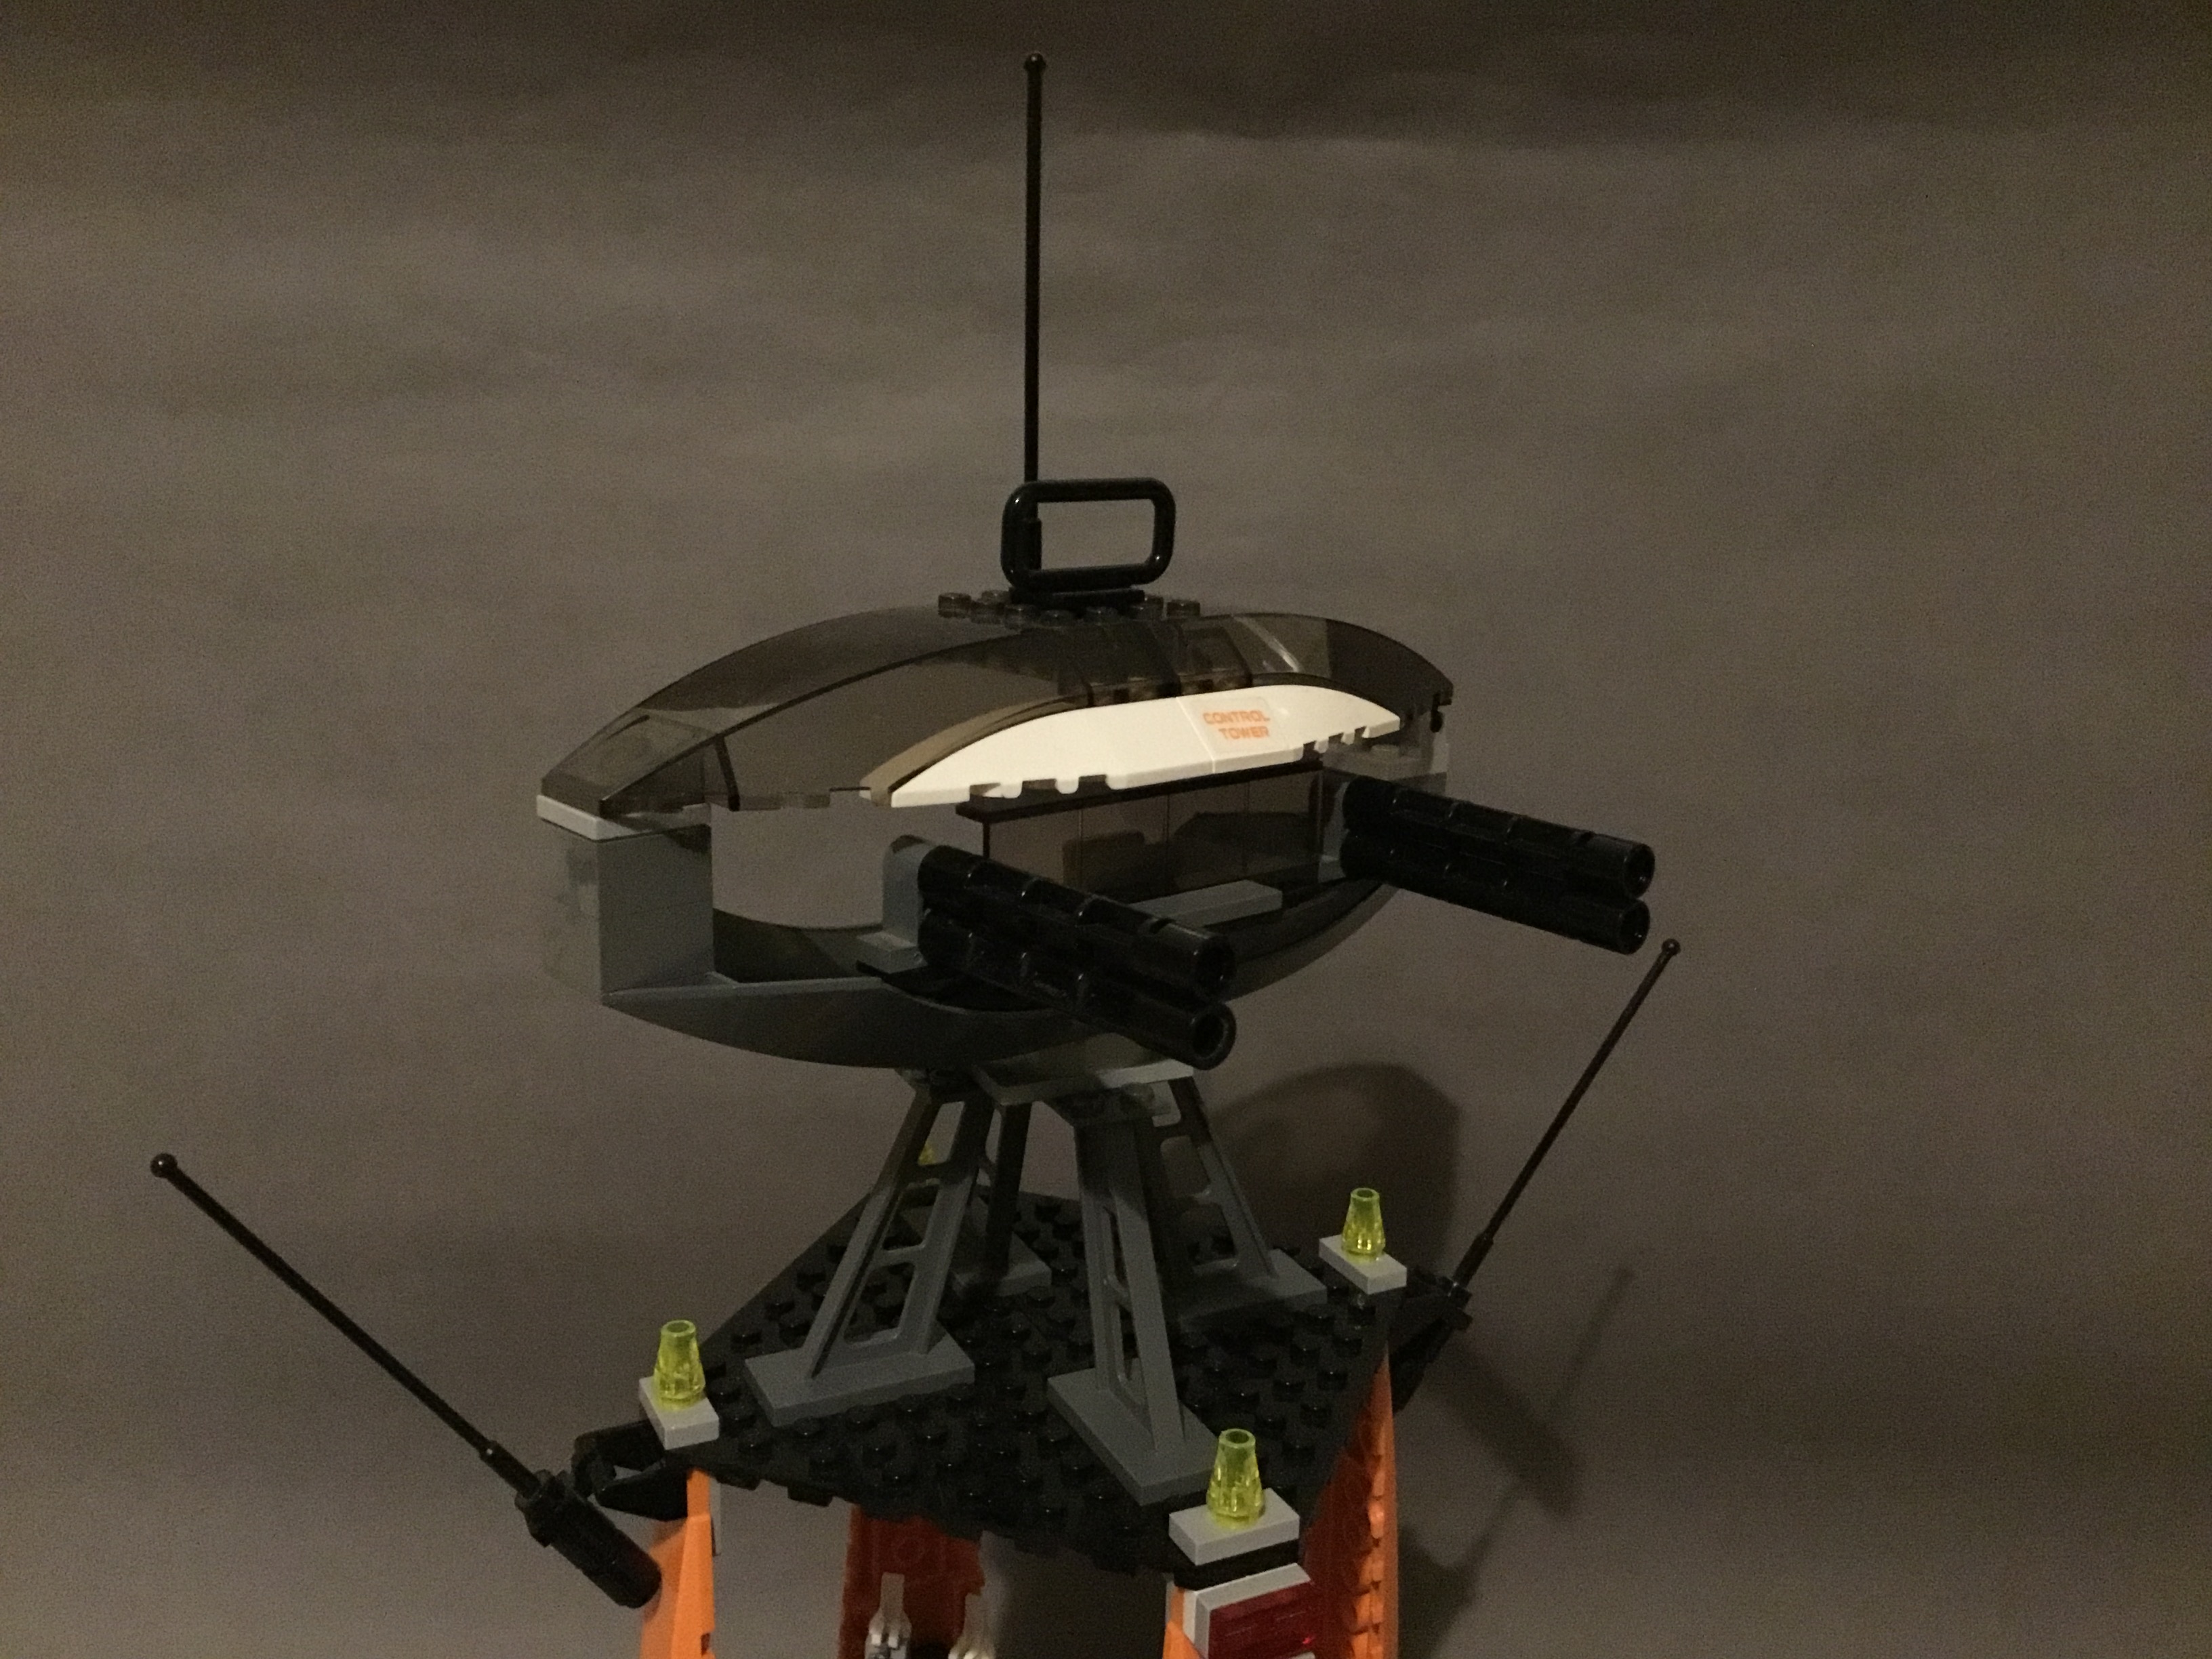
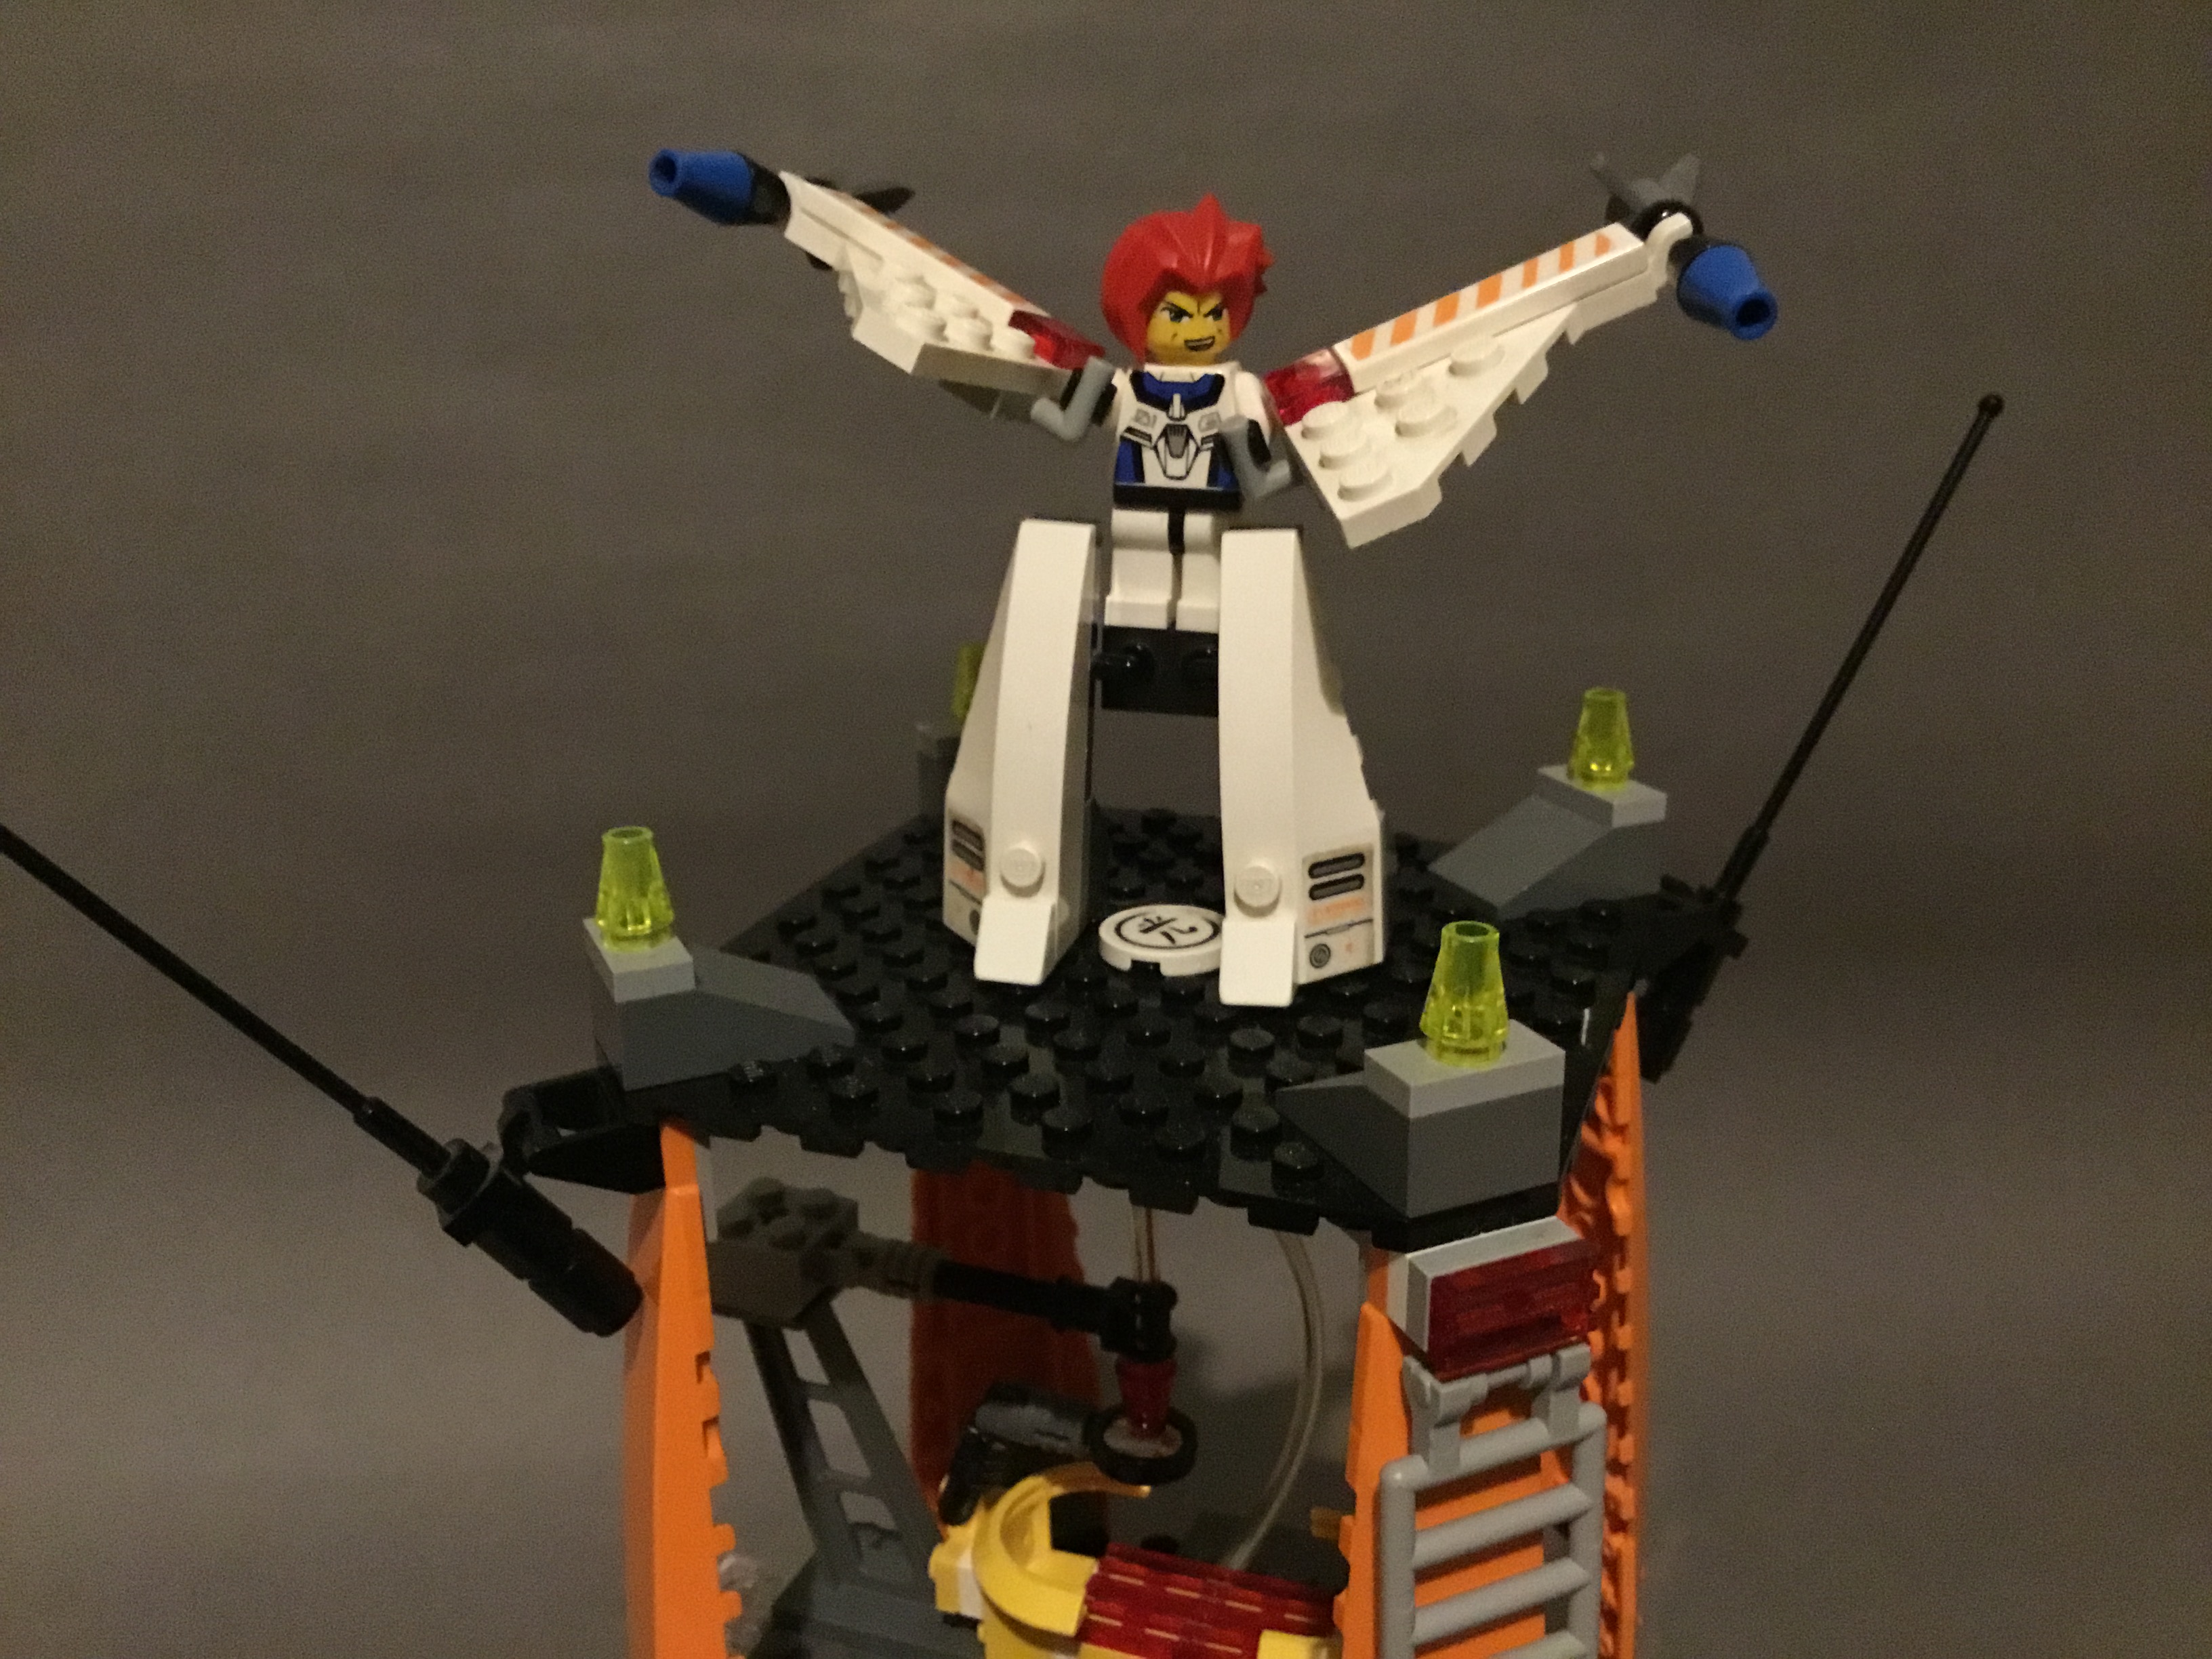
The top of the tower has a large air control booth placed on top, allowing the Exo-Force to permit entry to allied machines and deter any robot attacks. Four staircase cannons extend from either side of the booth for firing at unwanted visitors.

The turret is very mobile, featuring a full range of rotation. The transparent roof can also open up for easier access to the interior.

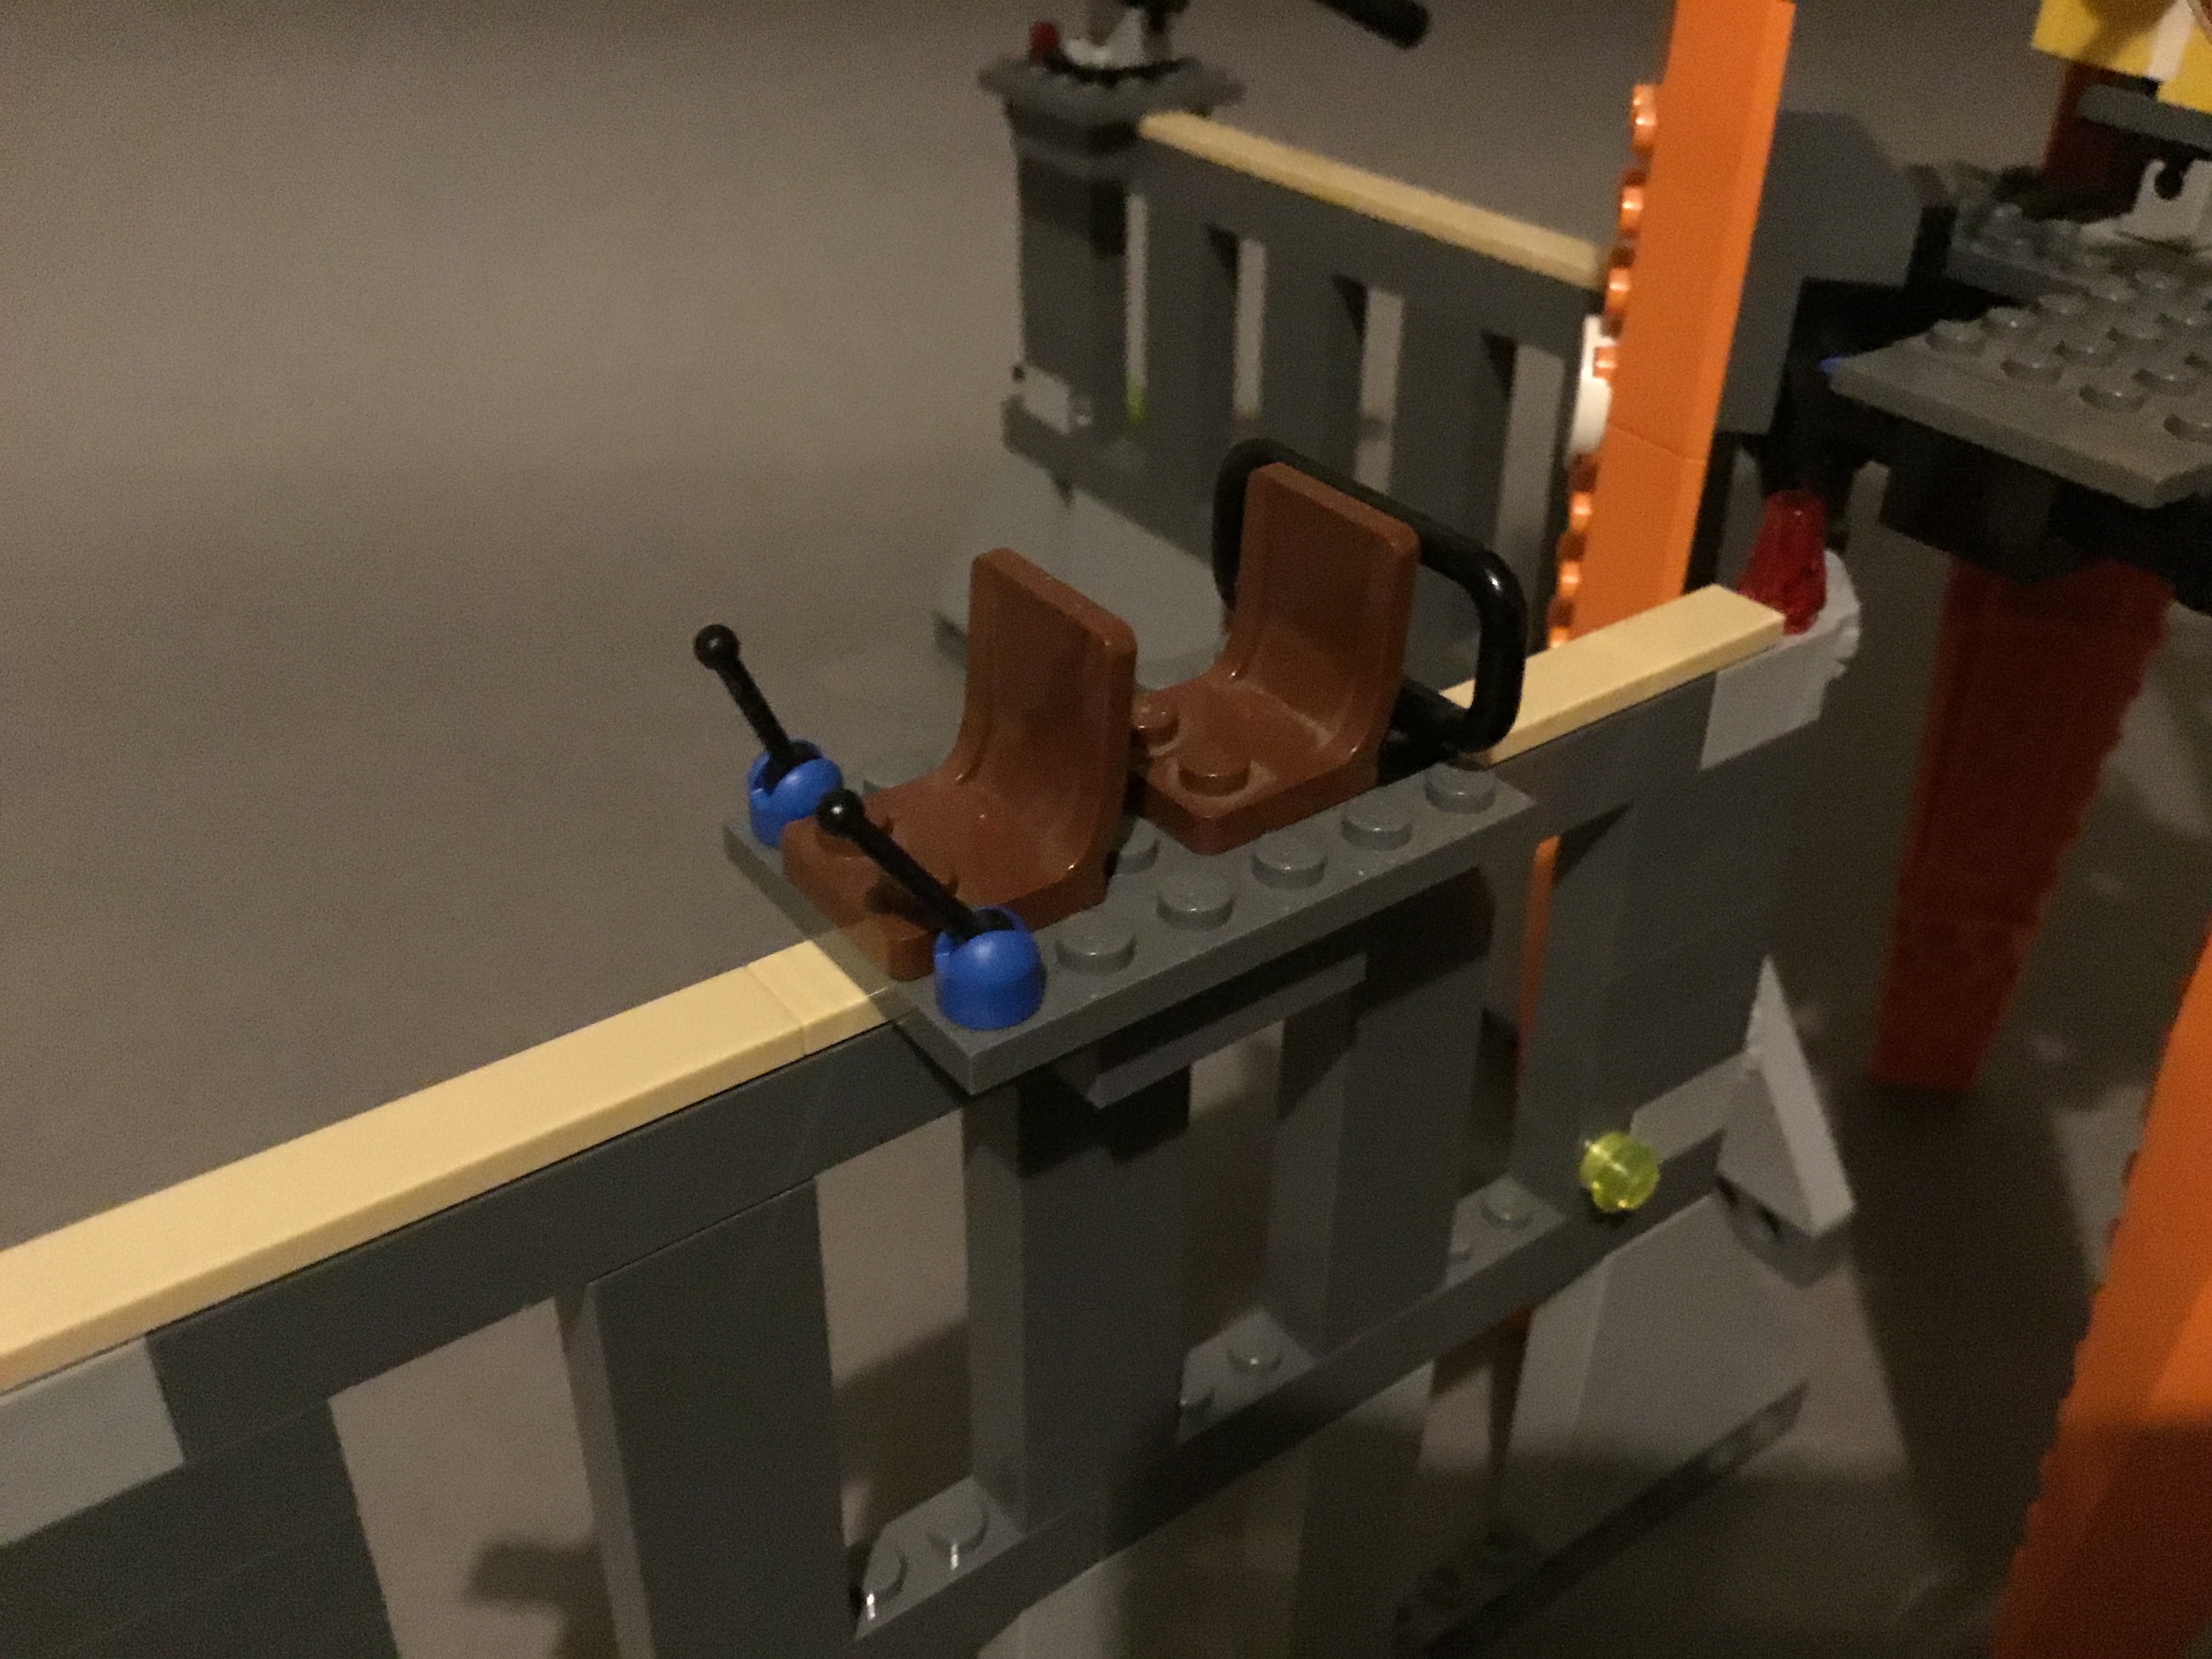
Inside the tower we find seats for two and a control panel featuring a targeting system and a very large amount of switches. A rectangular window protects the gunners from any retaliation they might receive.
The back wall is noticeably gappier than the front one, but considering the back of the fortress is generally inaccessible in-universe, this isn’t much of a problem.
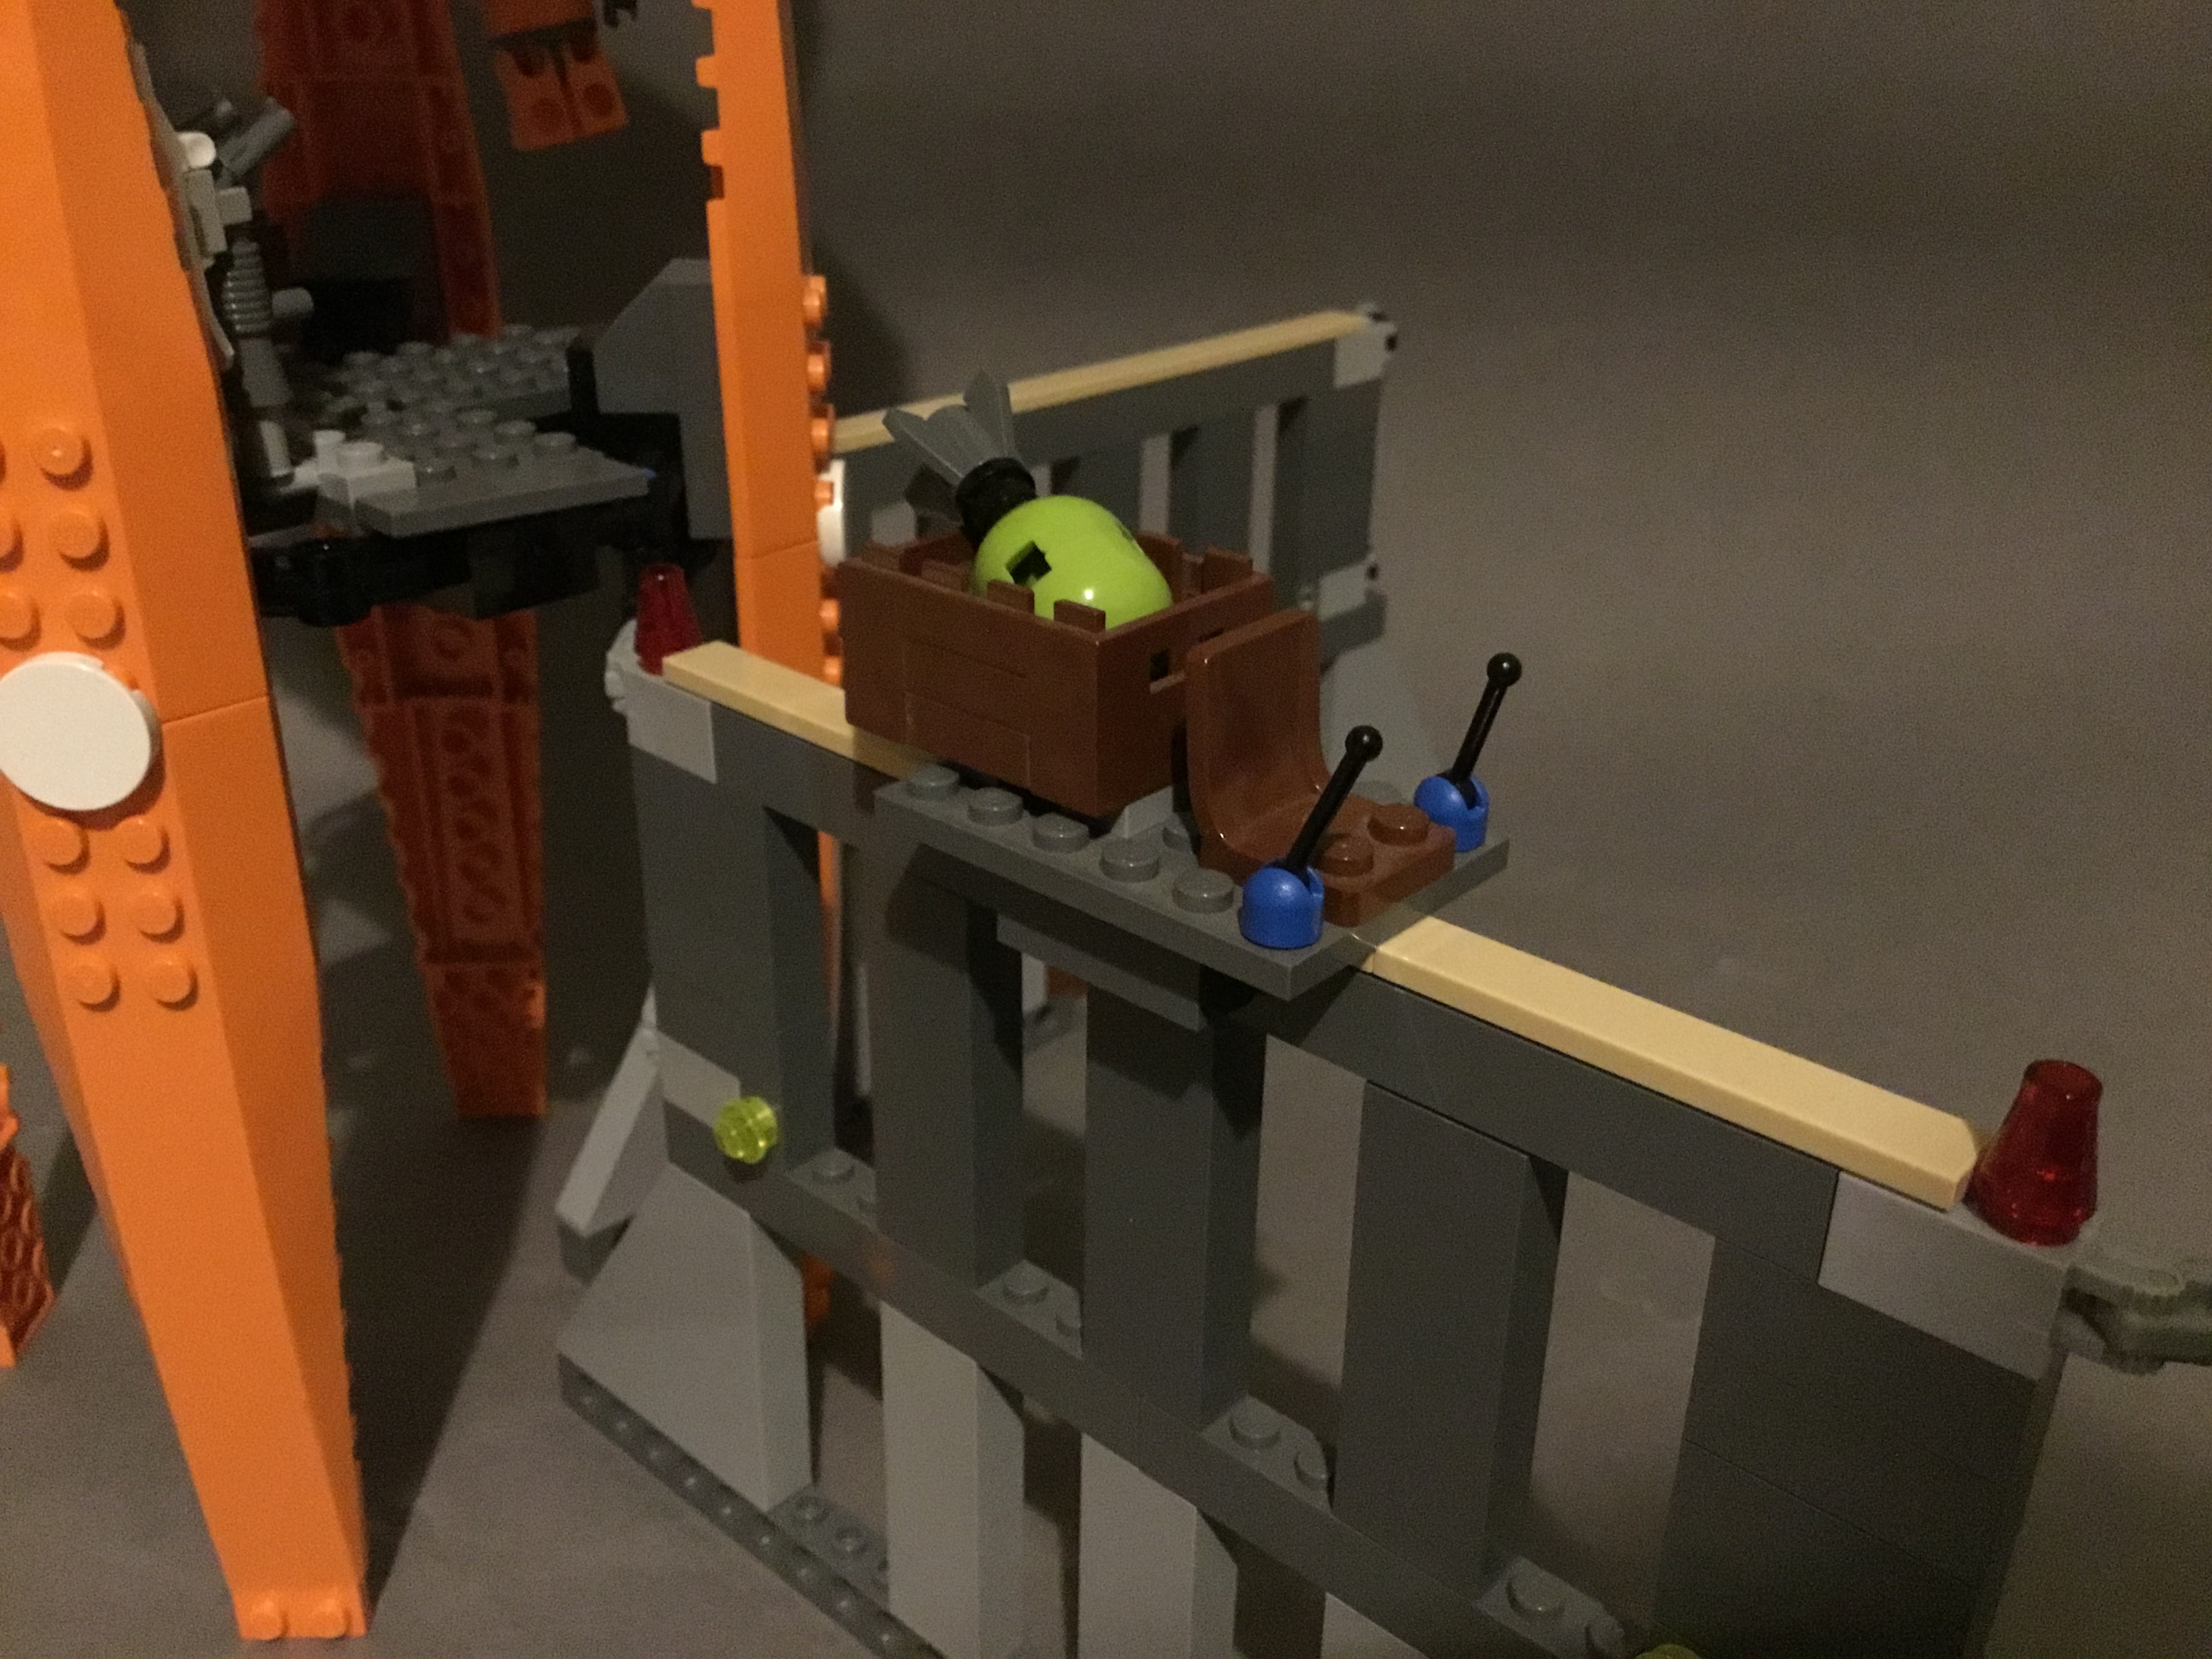
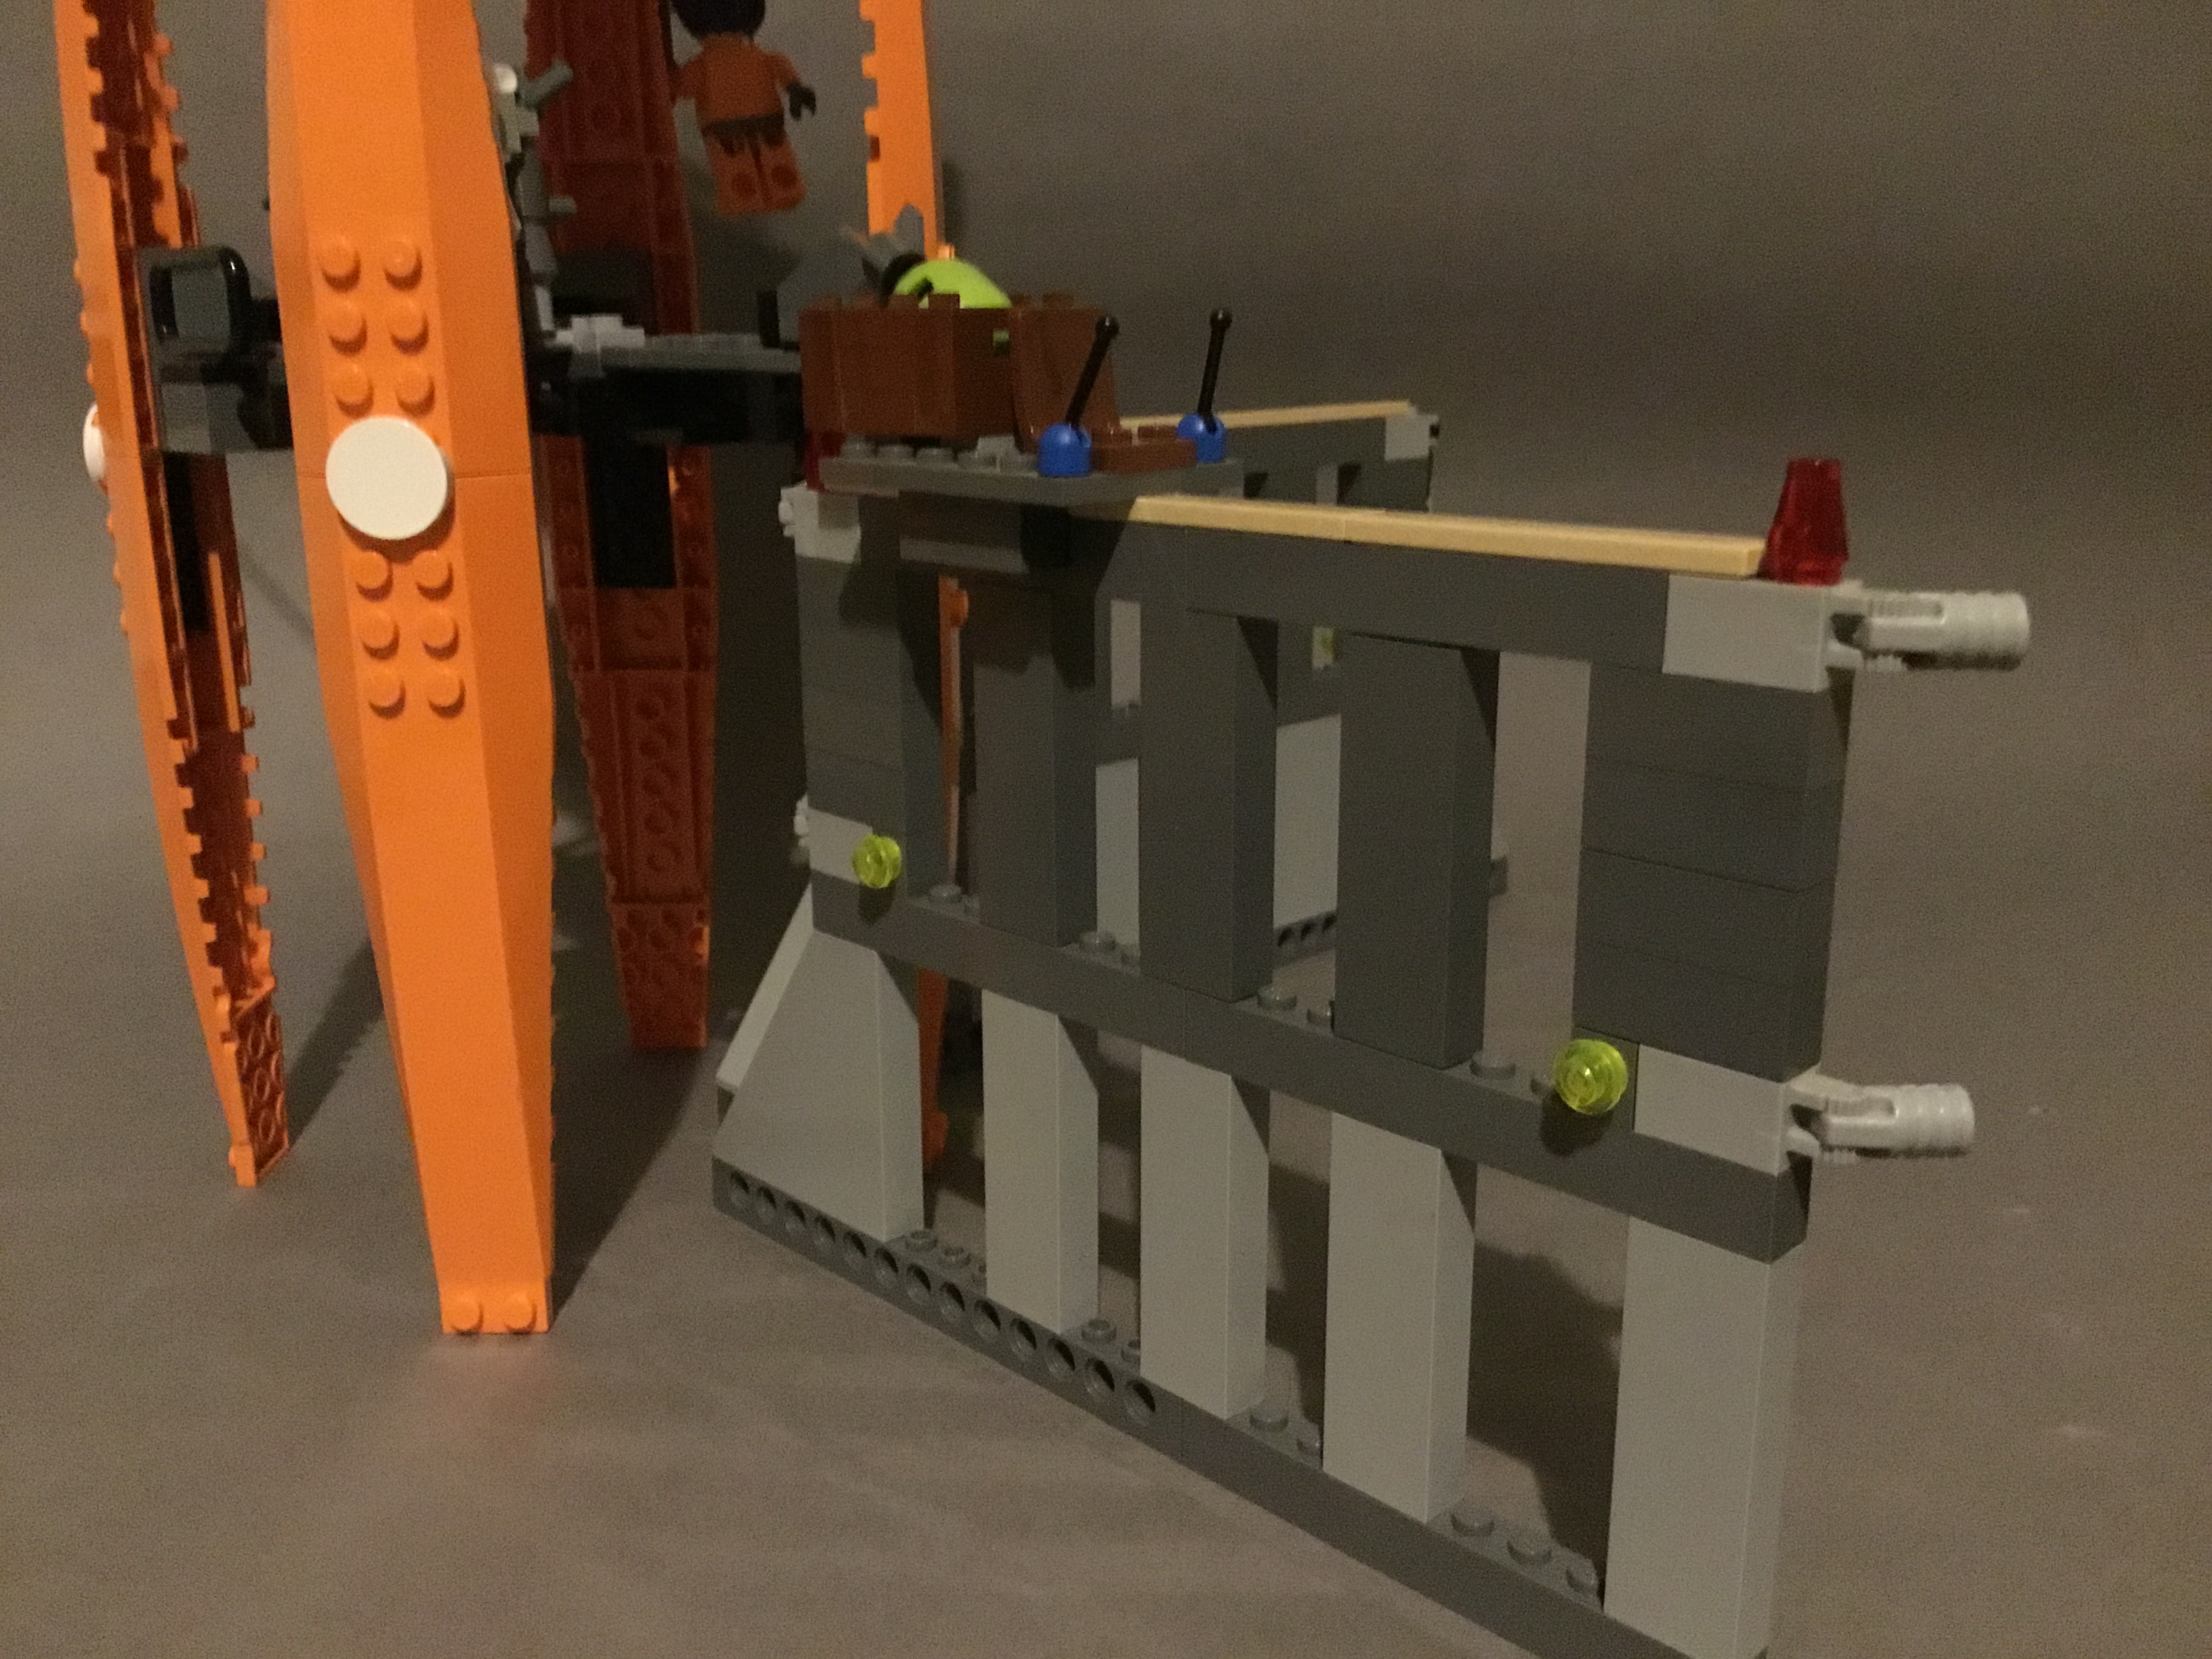
A second rail adorns the top, this time yielding an small transportation sled with a crate in the back. This crate is easily removable, allowing you to swap it for the crate inside the armoury to deliver other types of weaponry. Interestingly, the bomb held in this crate is identical to the ones attached to the Venom 1, suggesting that this is a piece of unexploded ordinance that the humans have retrieved to do research on.
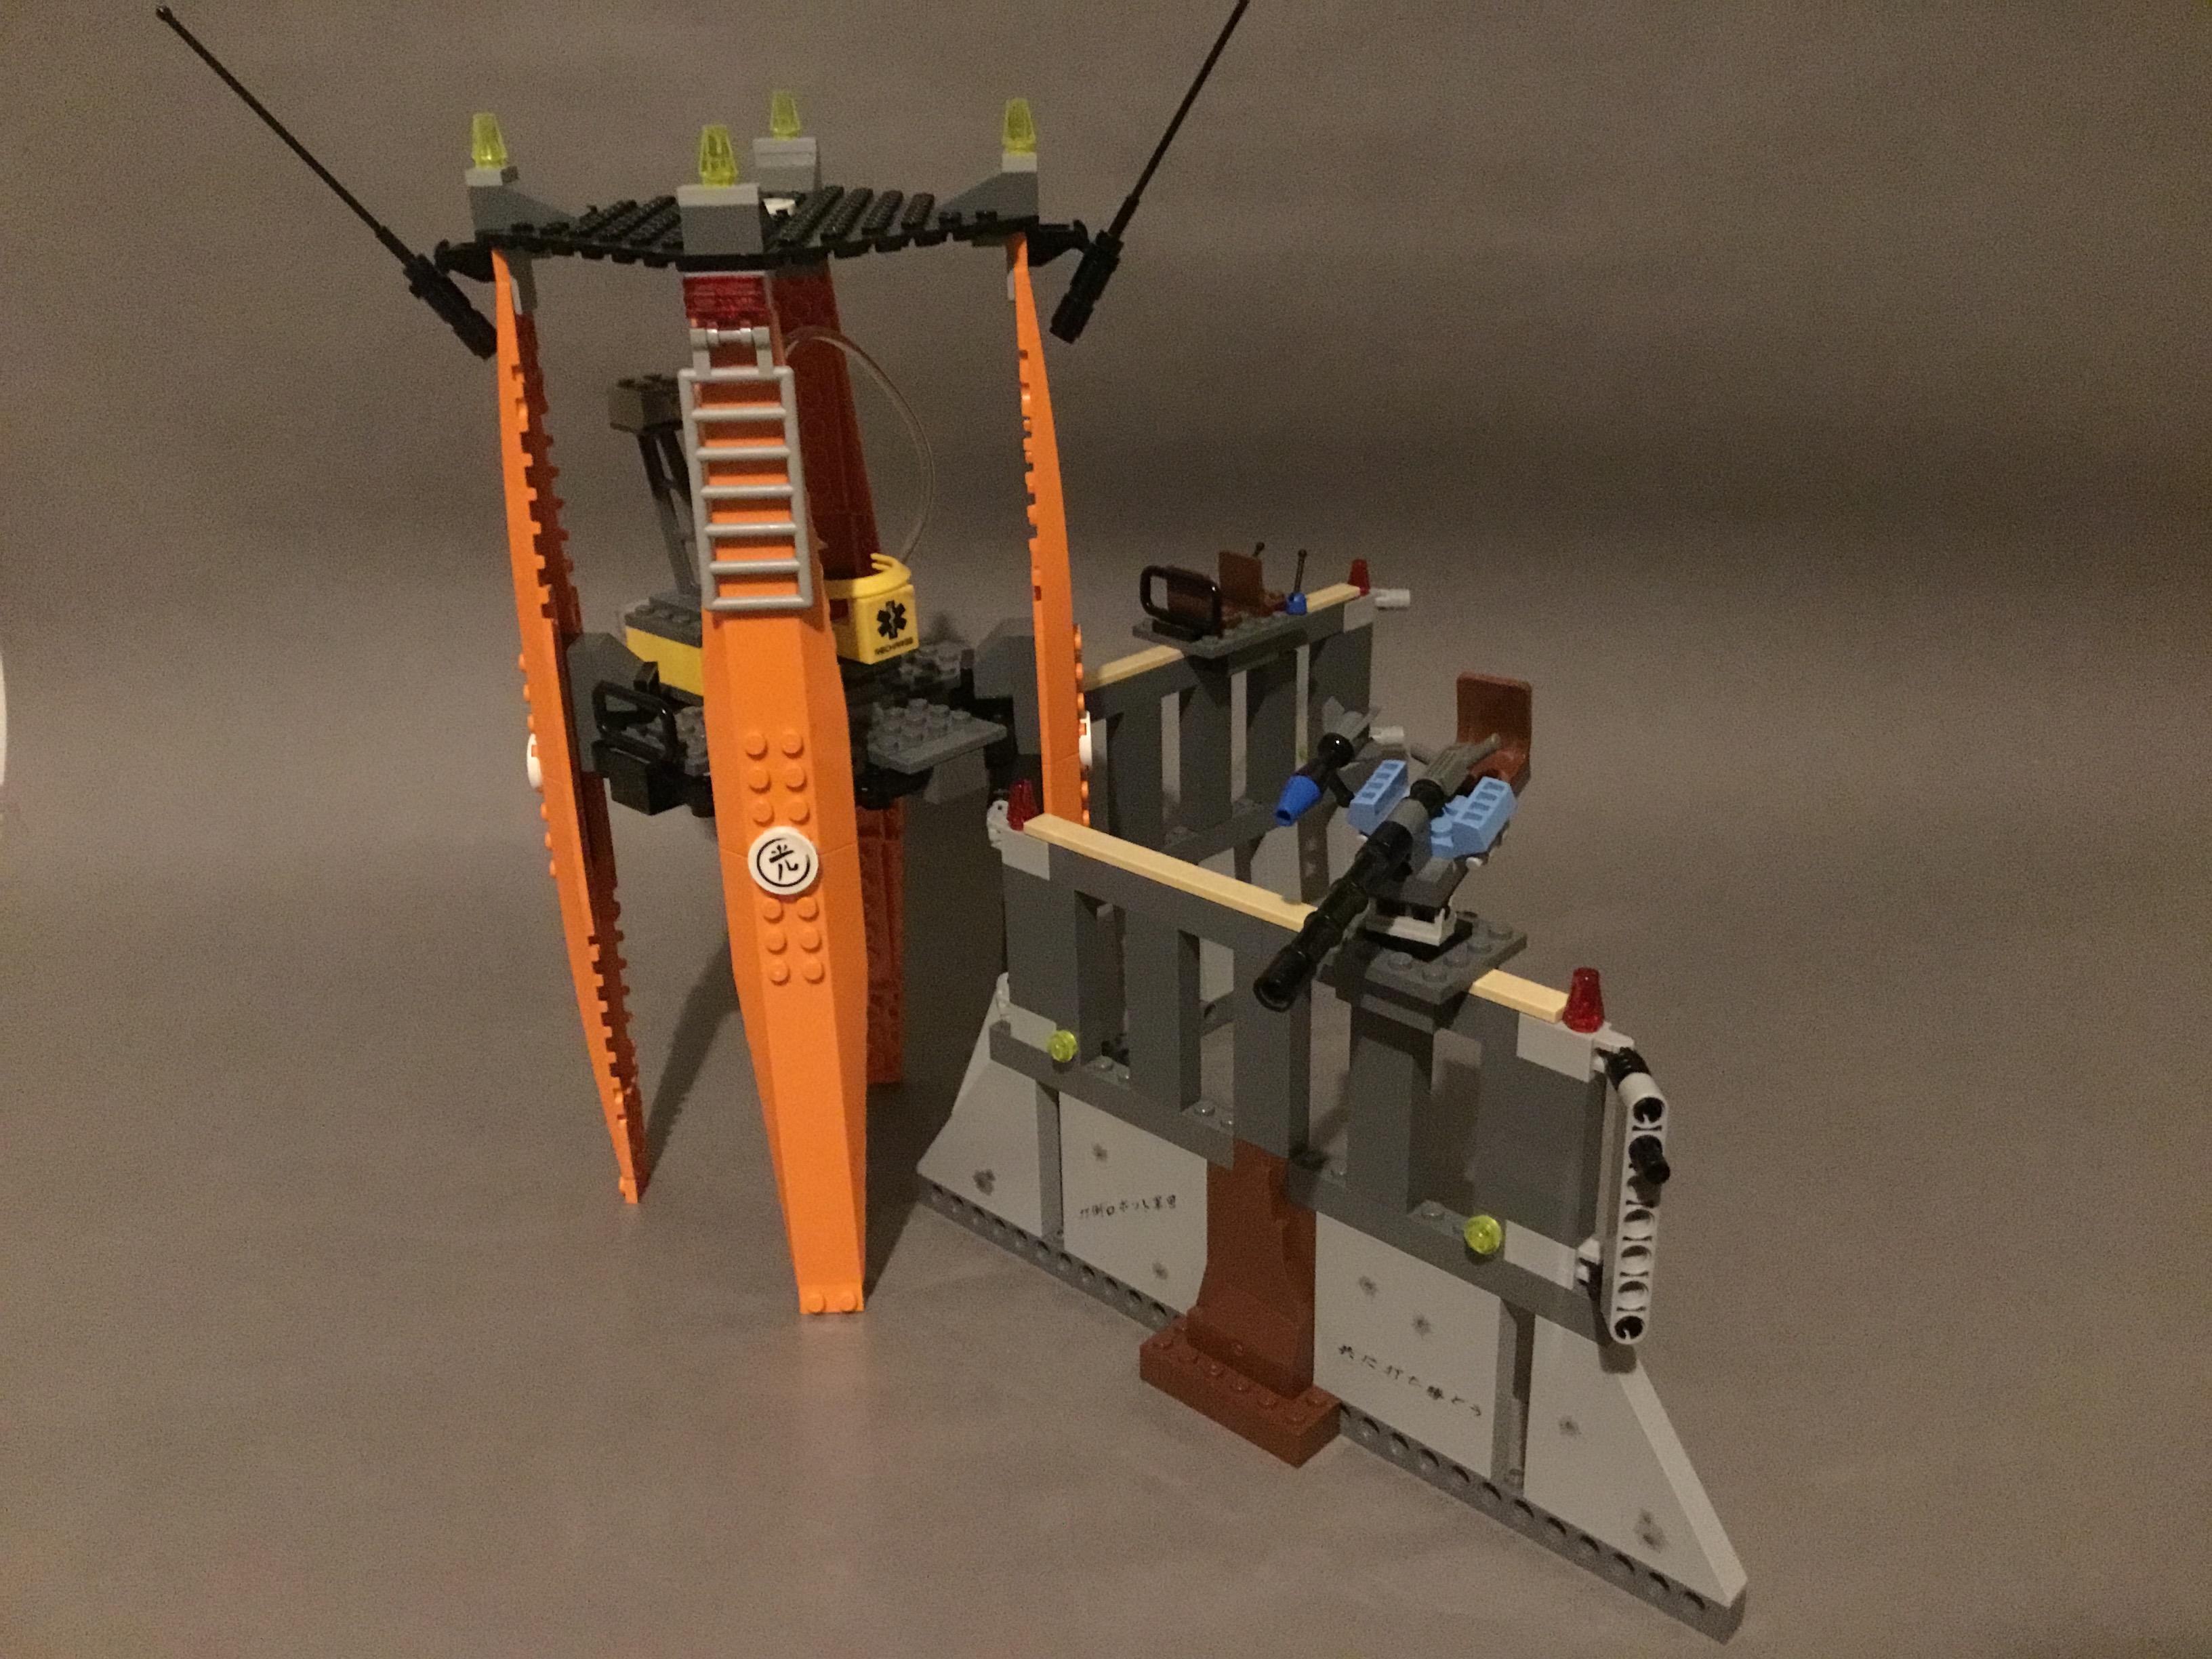
The Medical Tower’s structure is very similar to the Control Tower, but its contents are much different.
The front wall is an identical build to the other side, but the graffiti here is altered and now reads ‘Fight the Robots’ and ‘Together We Win’.

The turret on the rail system does differ, however, now bearing a staircase gun and a goblet missile. A minifigure jackhammer provides controls for the turret.
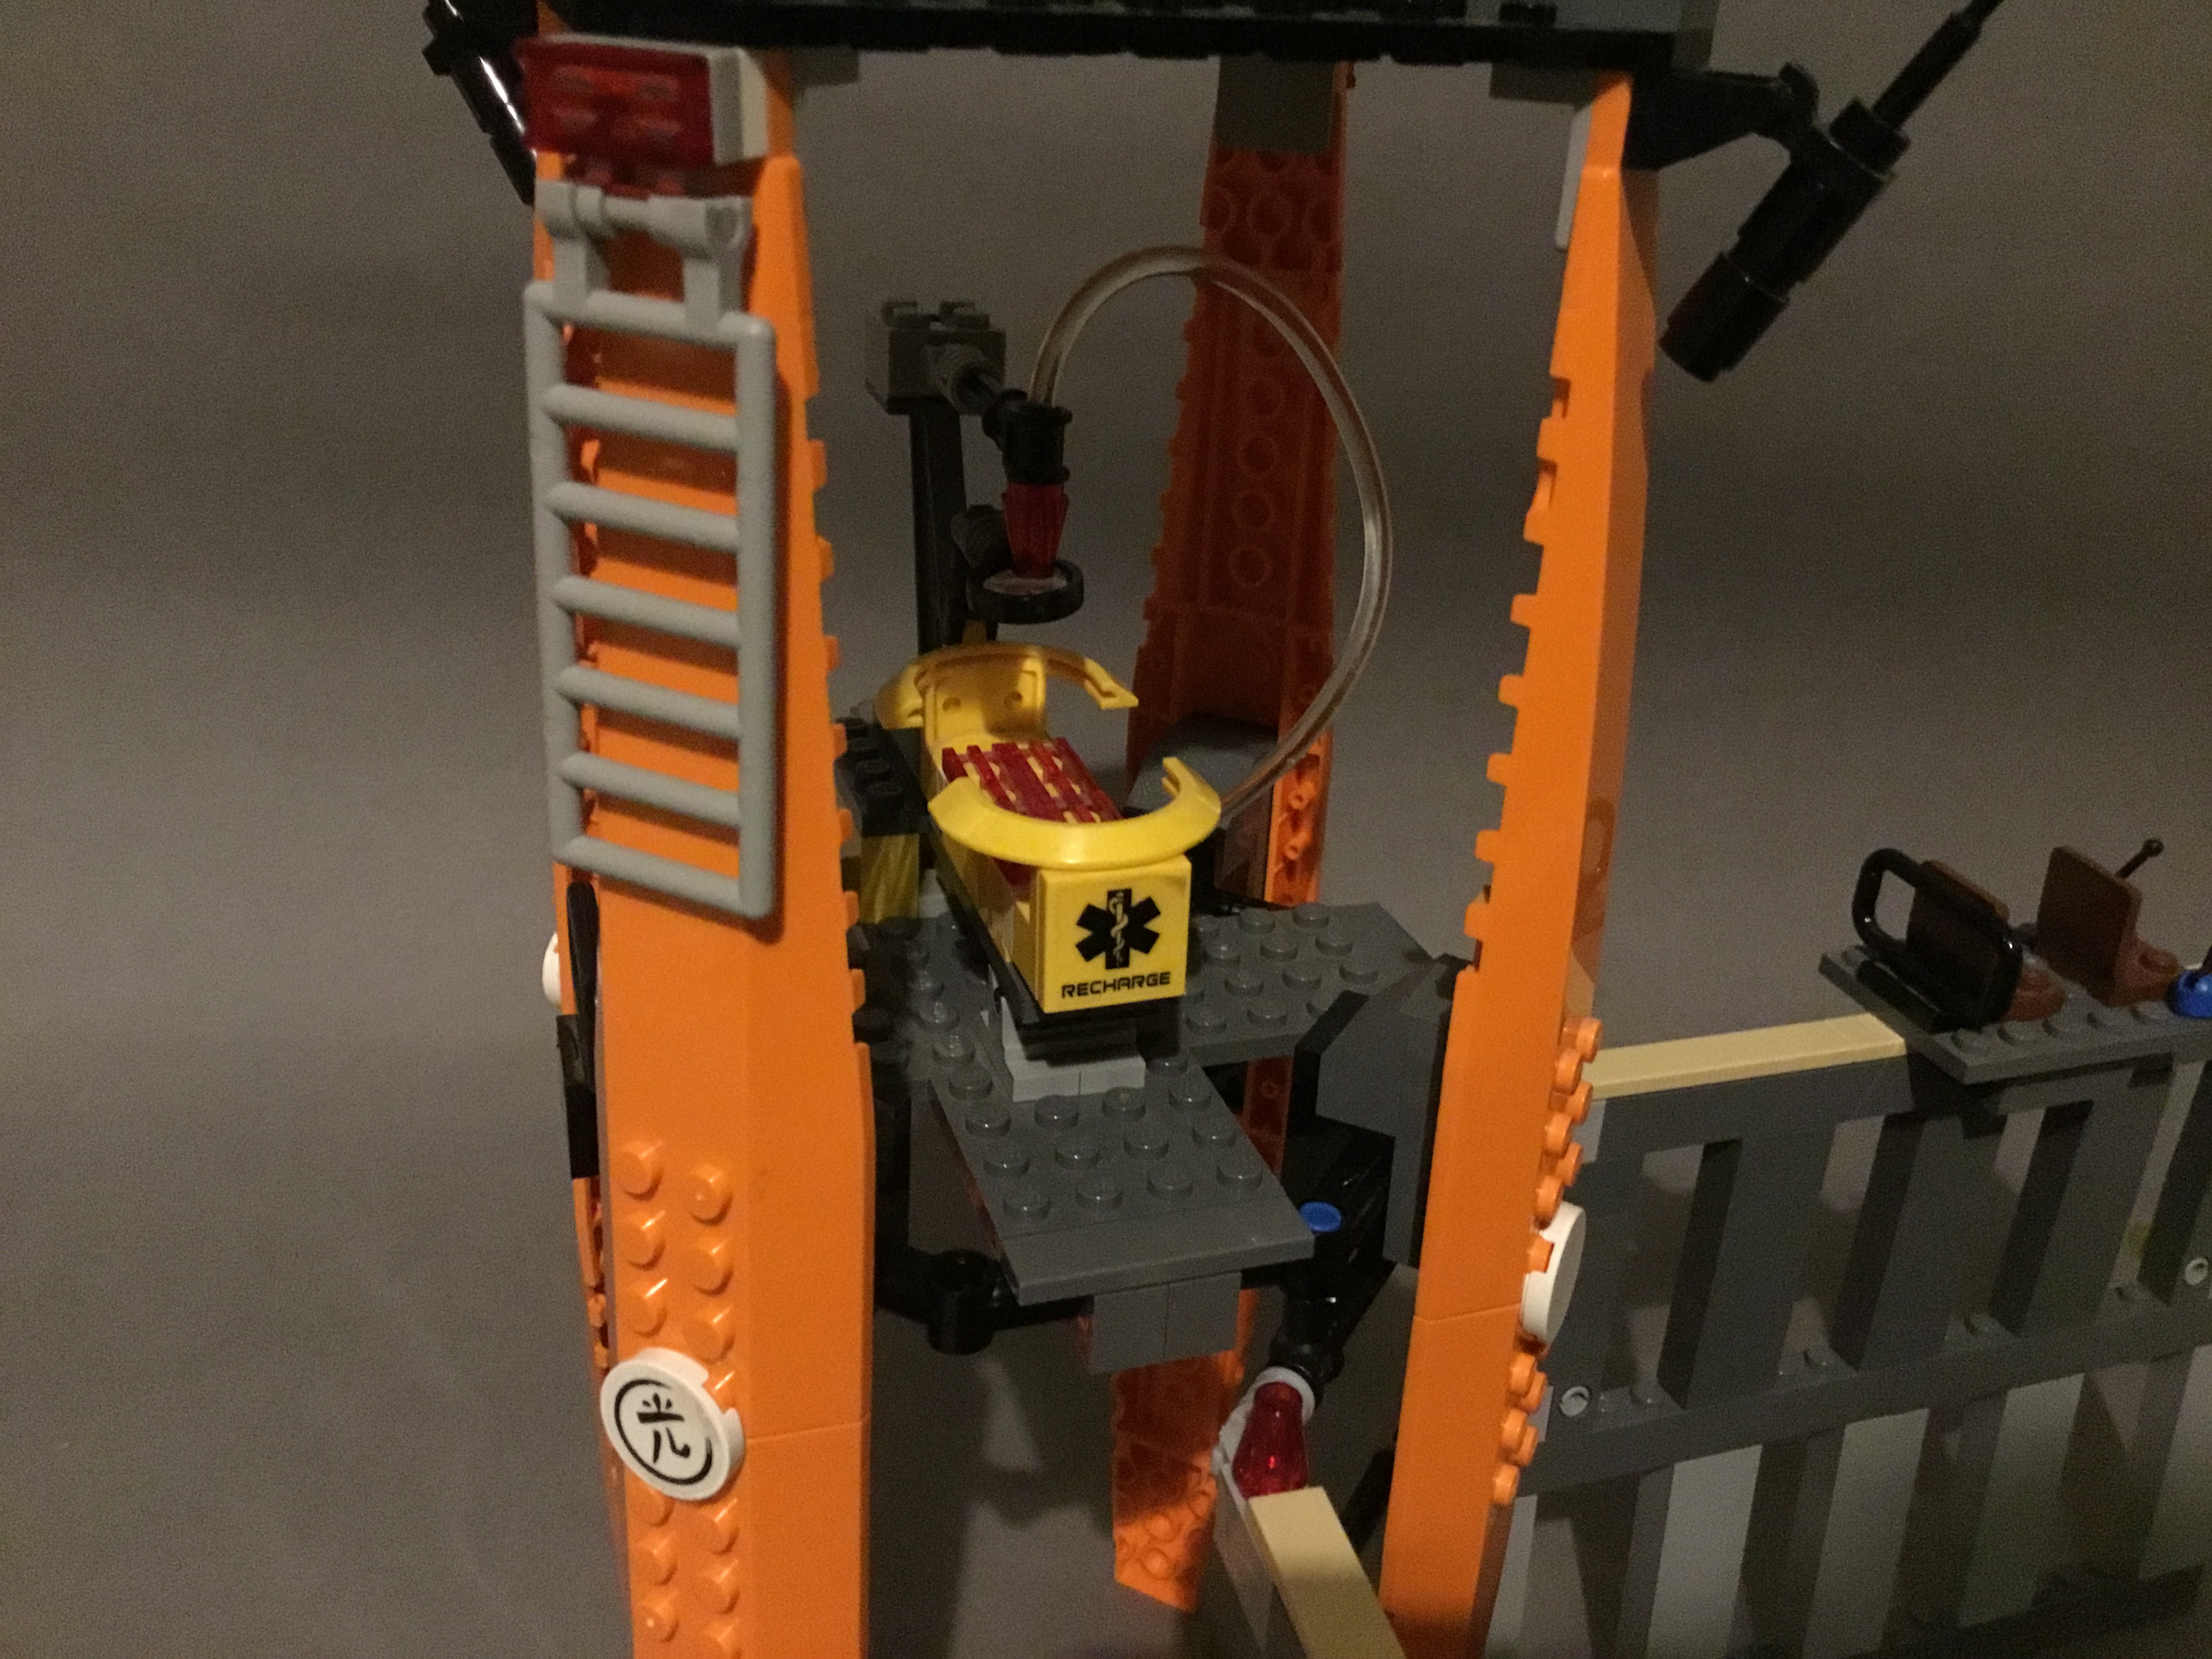
While the outer structure of the Medical Tower matches the Control Tower, the interior of the builds are completely different. Instead of an armoury, we receive a small medical bay for recovering any wounded fighters. The bed is decorated with the Star of Life and the word ‘recharge’ in bold lettering. Recharge? How are you meant to recharge people? Unless this is implying than this bed can also be used to recharge the light brick ‘power cores’?

Once a patient is placed in the bed, pressing a button at the rear of the tower illuminates the fibre optic cable, which travels through a magnifying glass to shine the red light all over the figure. This is presumably some kind of healing device, or perhaps simply an operating lamp.
Both the emitter and magnifier can be moved out of the way to allow the bed to tilt forward once the patient has recovered.
The roof of this tower bears a landing pad for the Gate Guardian, decorated with some lights for if the machine returns at night. Once again, a ladder leads to this section for minifigure accessibility.

The rear wall is an identical build to the opposite wall, as would be expected.
The rail system includes a simple people-mover this time, likely for dropping off or taking away patients from the medical room.
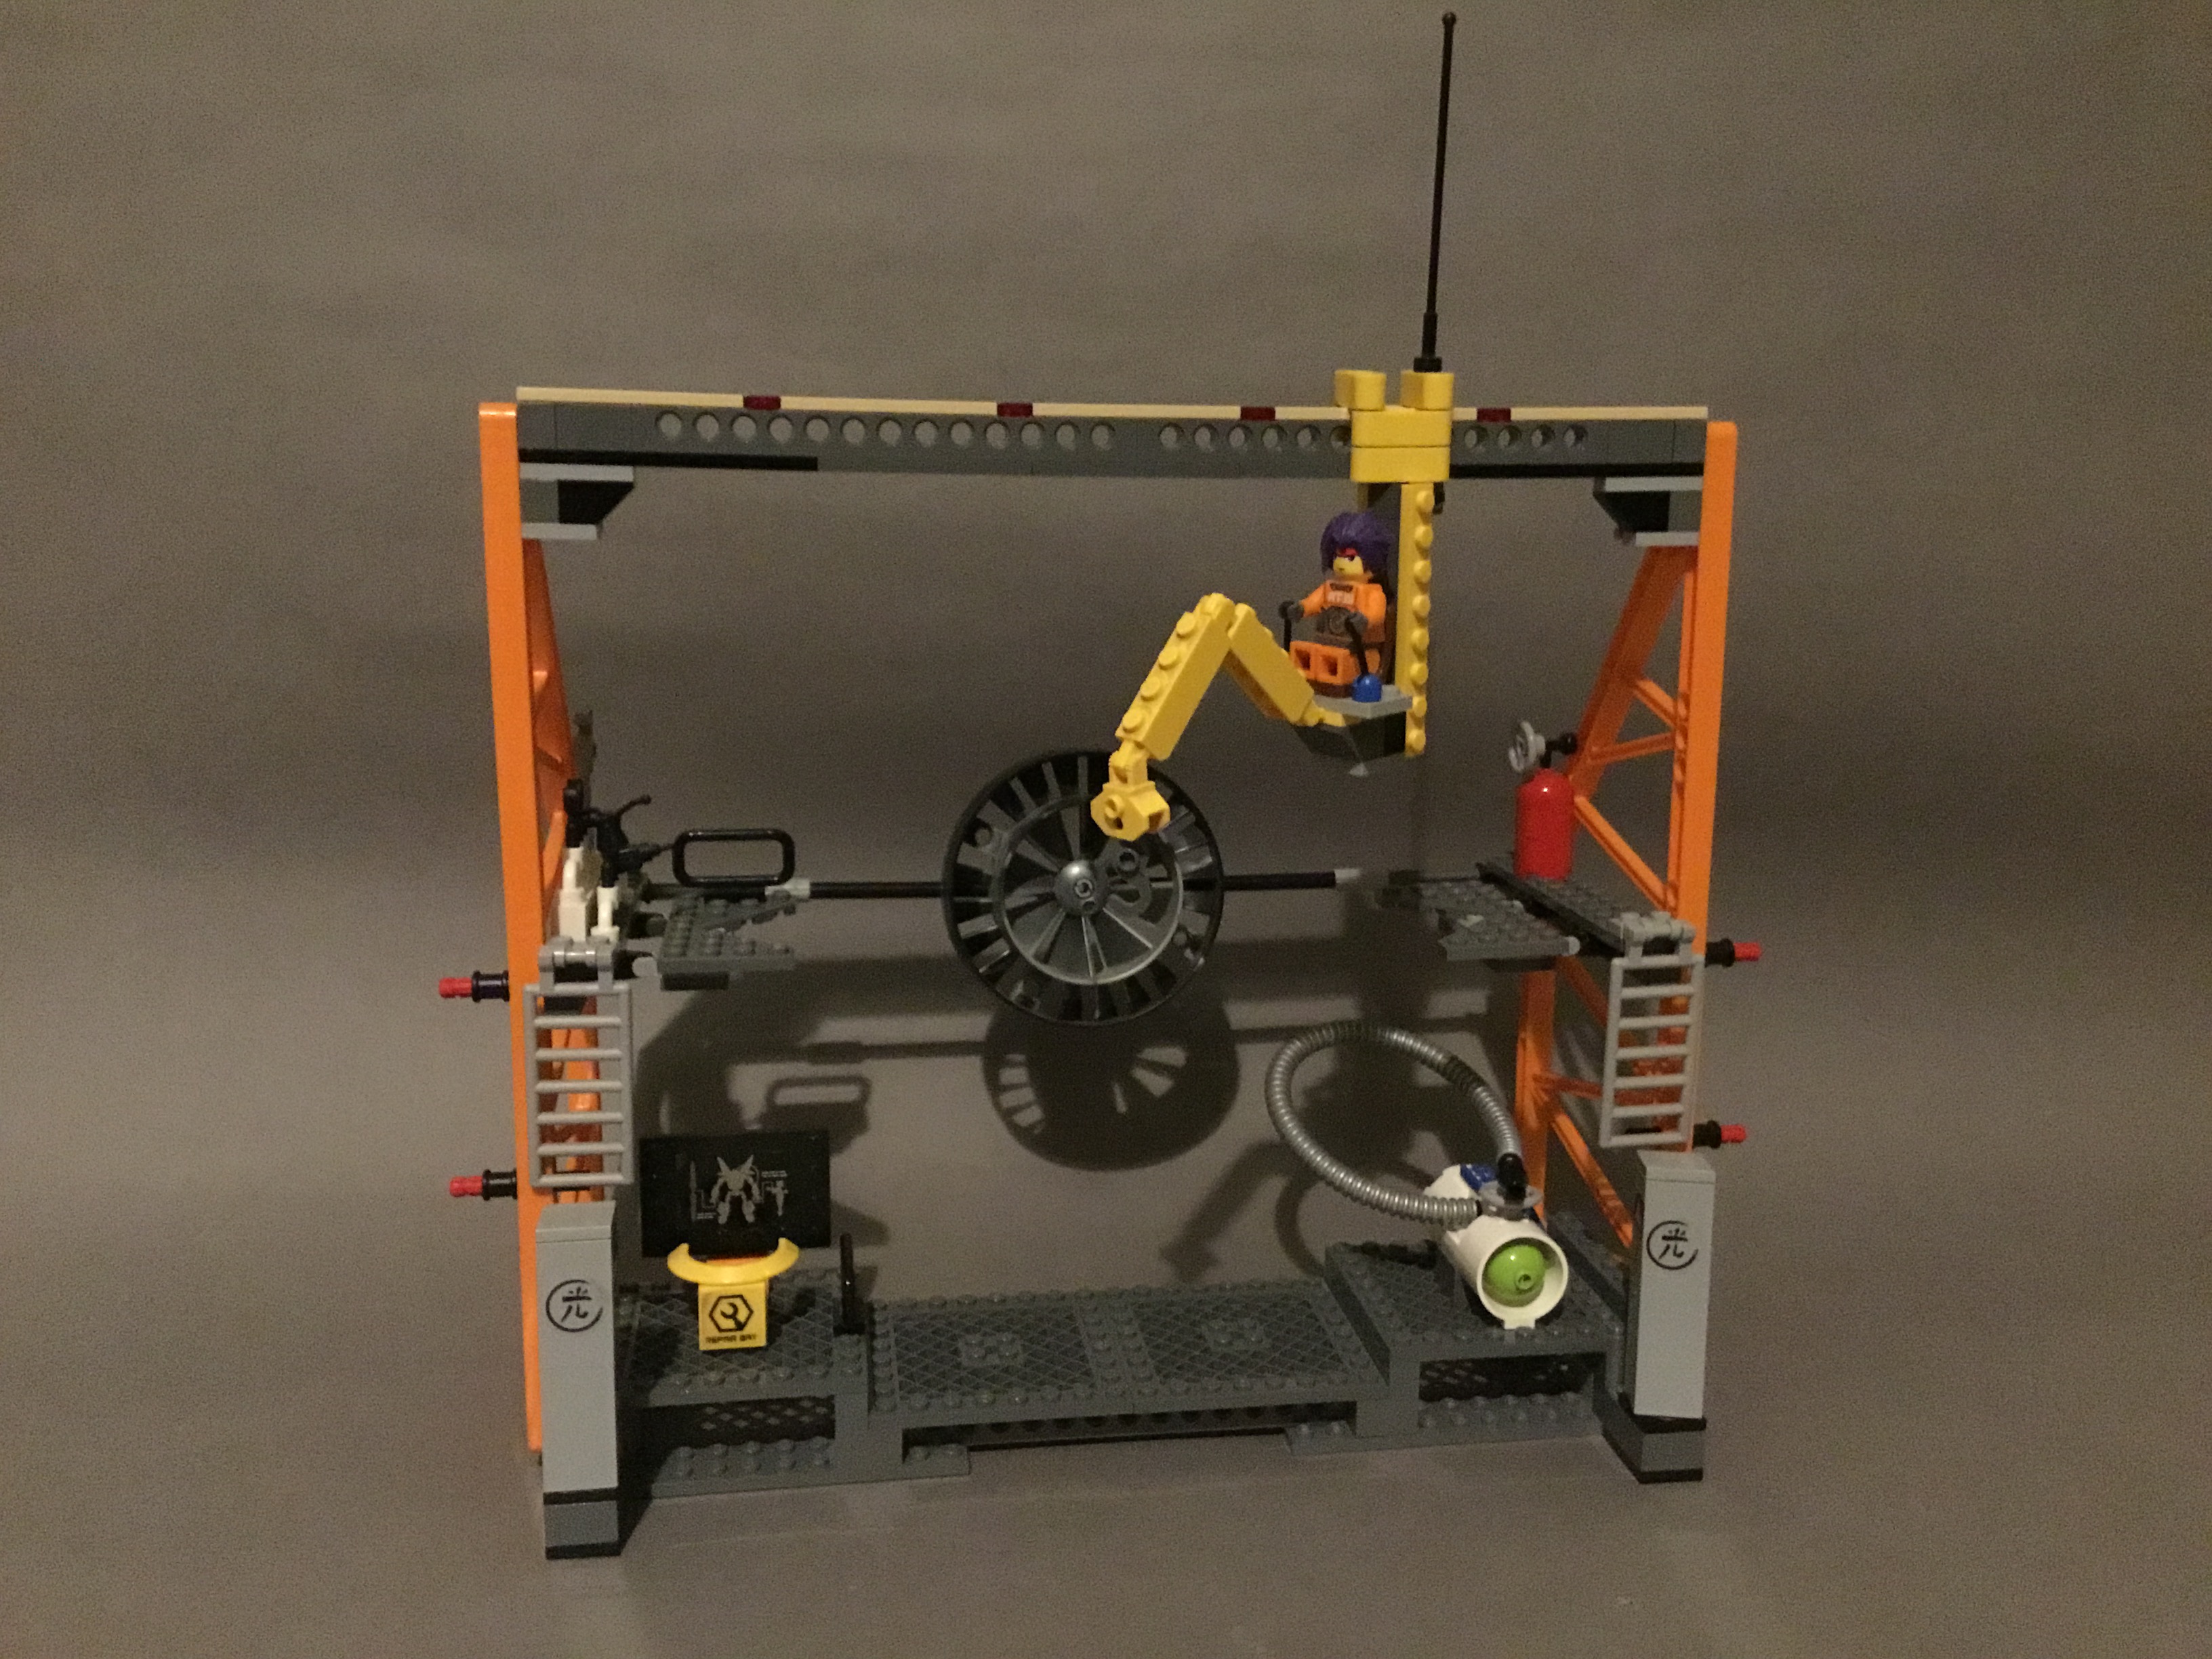
The rearmost section of the fortress is the largest, forming a huge repair bay for the humans’ Battle Machines.
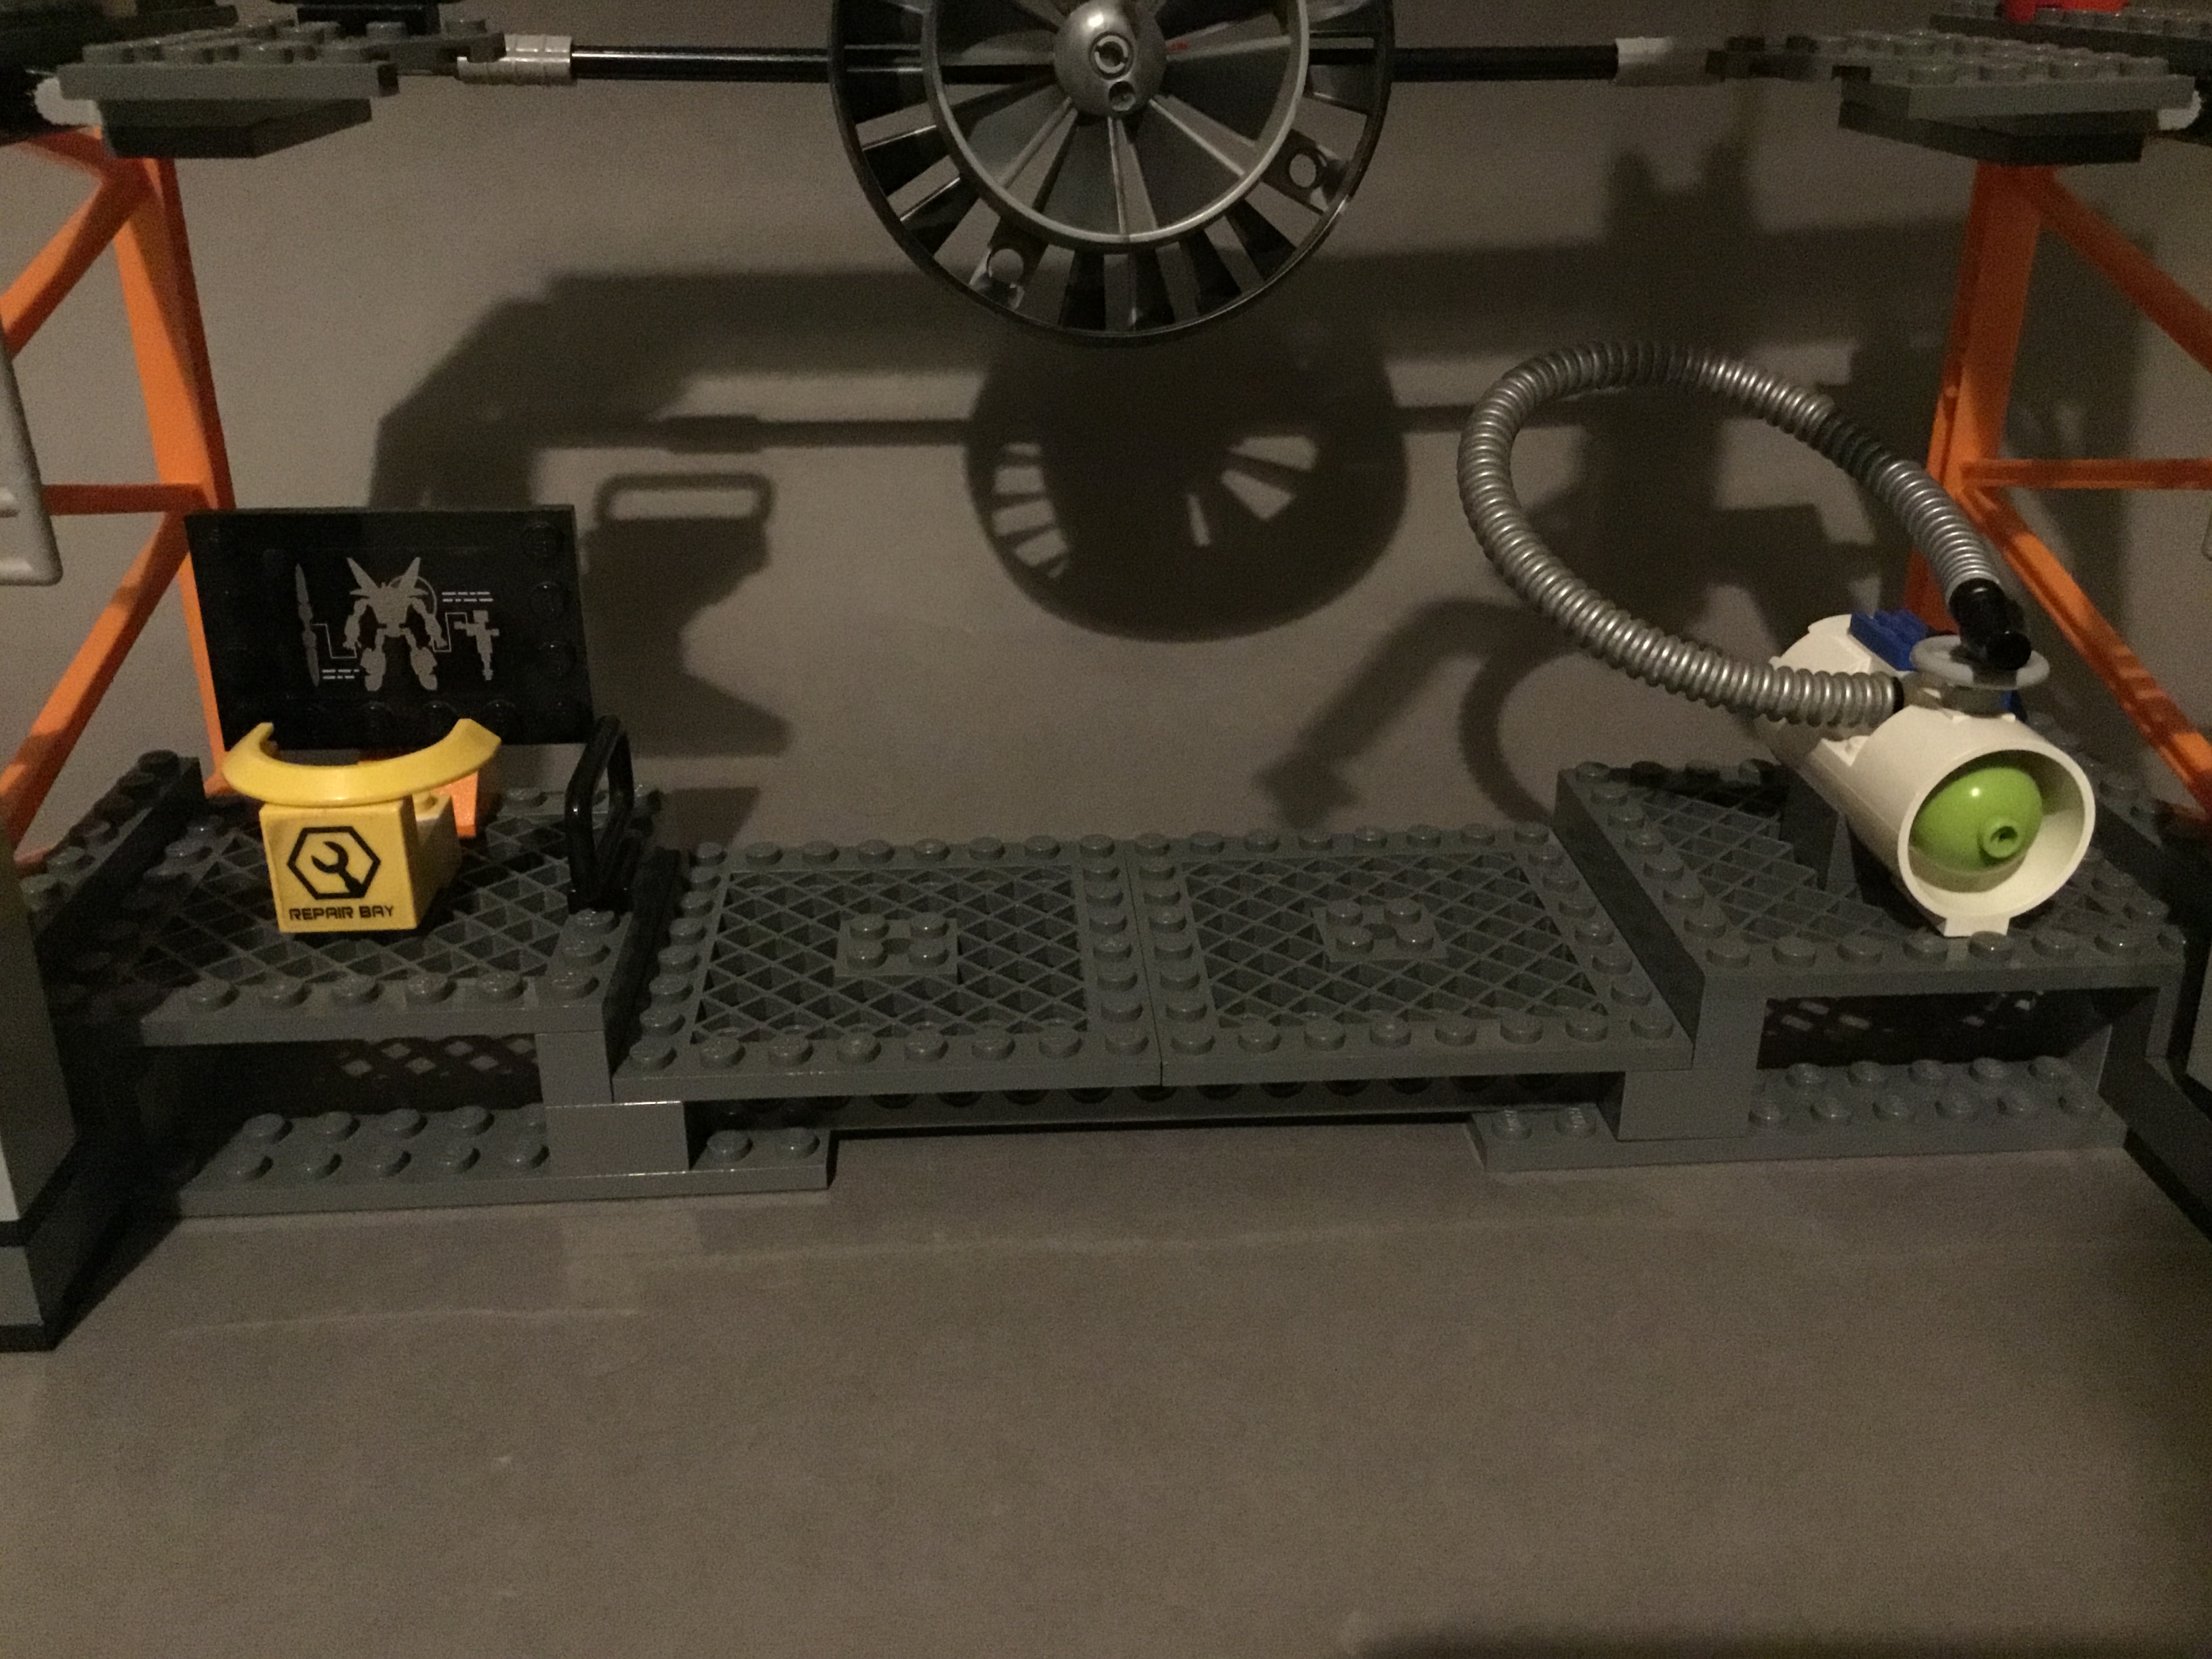
The floor of the bay is slightly raised up, featuring several metal grates. On one side, we find a repair management area, with a seat for the chief repairman and a screen for assessing any damage inflicted on the mech. The other side includes a large fuel tank, with a removable nozzle attached to a flexible hose. This allows you to actually use the fuel caps present on every 2006 Battle Machine, with their placement on the legs finally making sense: it’s at ground level for the refuelling crew.
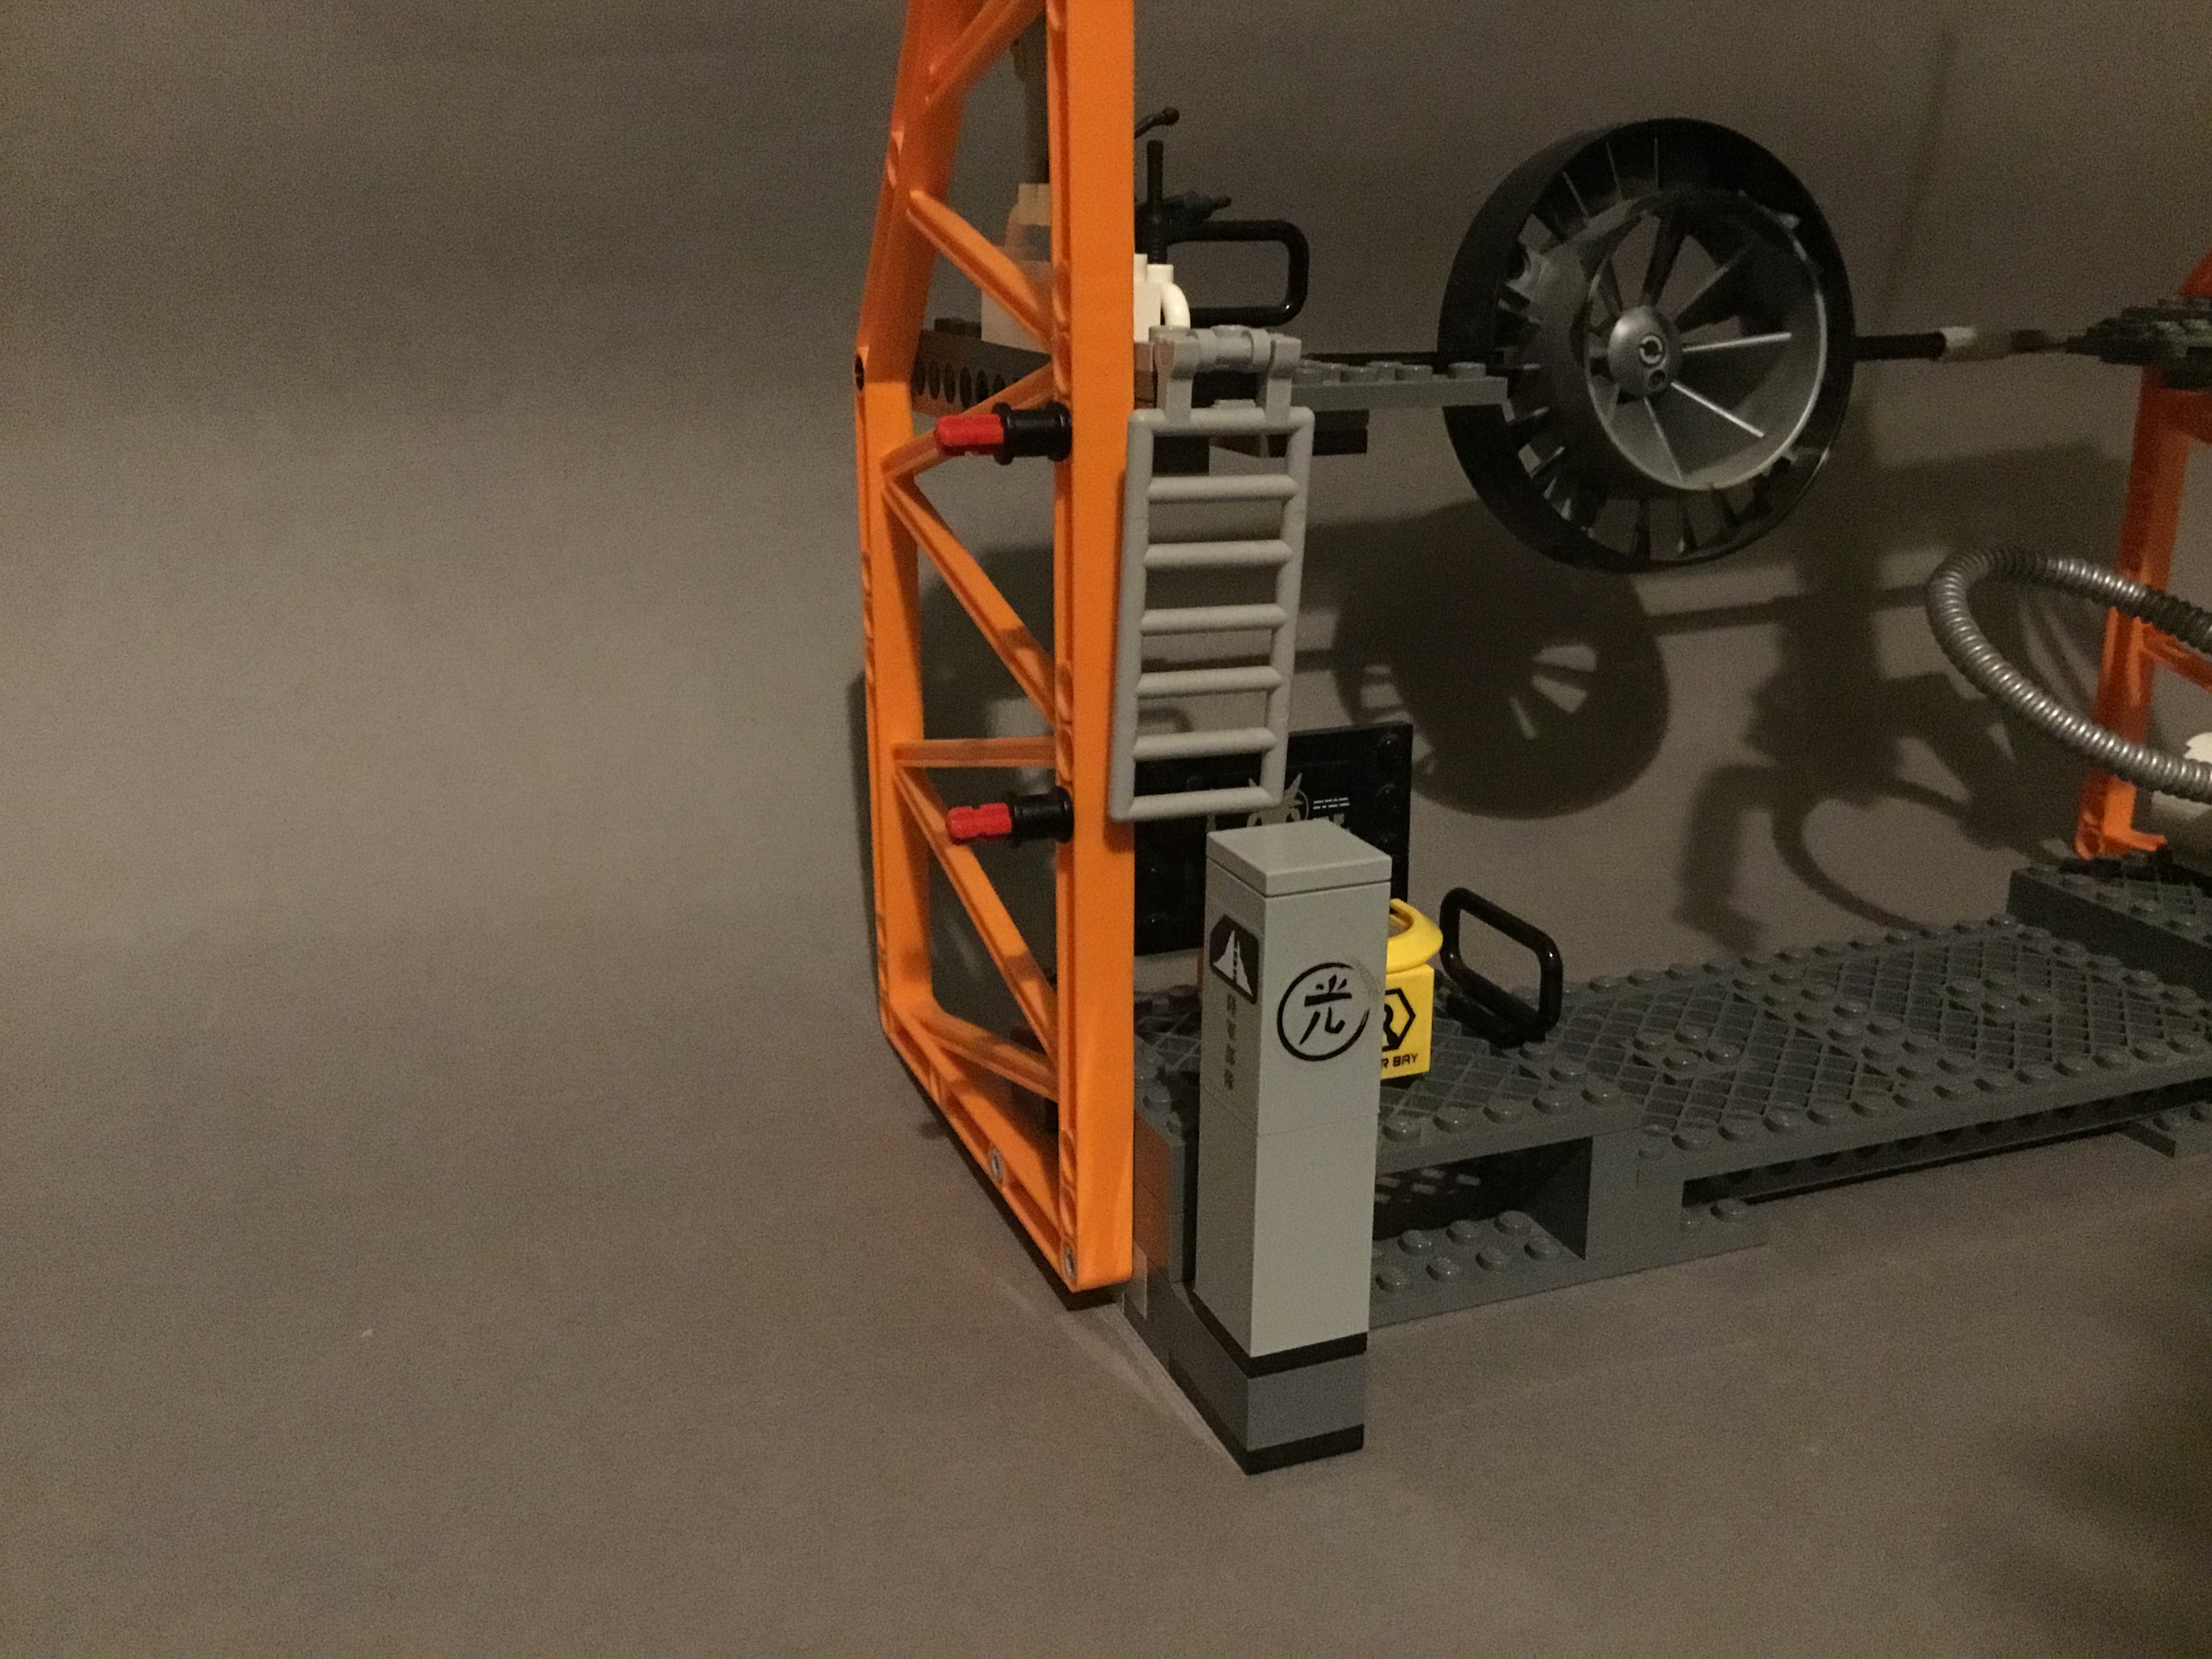
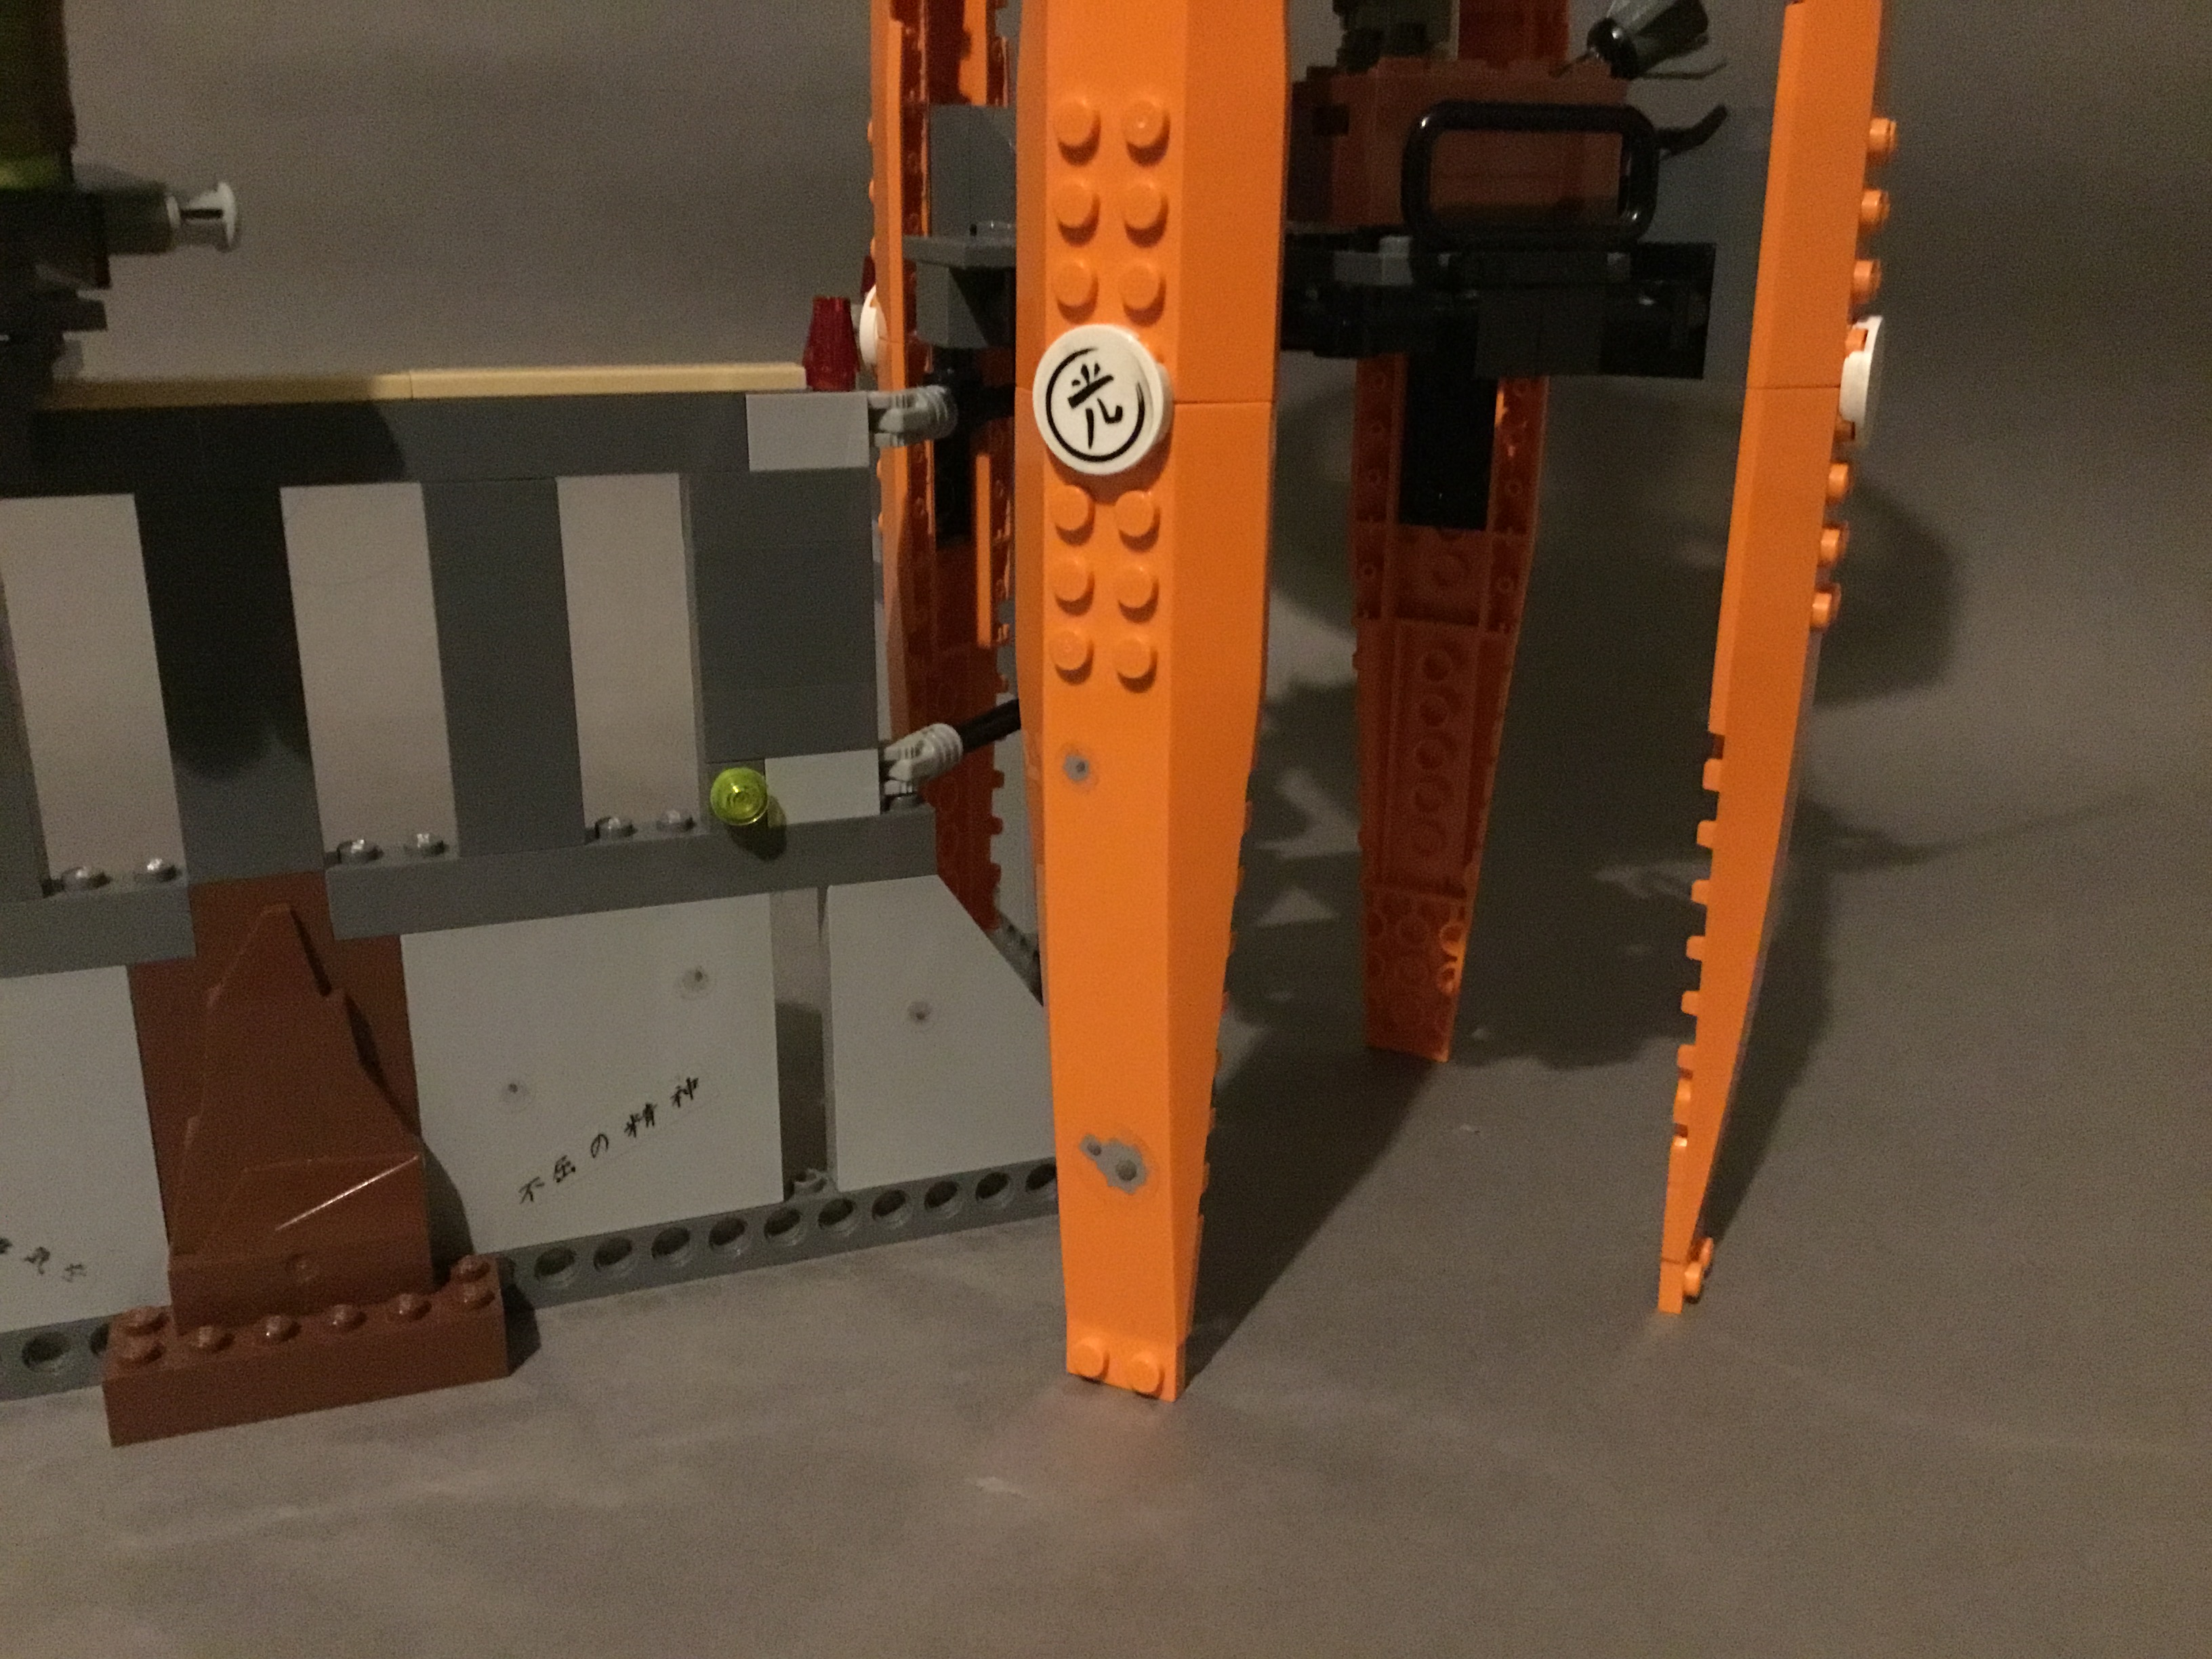
Each wall is based around an enormous orange girder piece, providing great height for such a low piece count. Ladders lead from the ground floor to the second floor, again seeming slightly too short for figures to actually use. At least they exist, though. Below each ladder is a strange gray pillar, decorated with a generic symbol and the symbols of all three of the different divisions: Land, Air and All Terrain. These pillars are rotatable, allowing you to choose the appropriate logo for the situation. If no mech is being repaired currently, the neutral symbol can be used, while the necessary logo for each division can be chosen for any other mech.
If there’s a combiner model in the repair bay, you can even choose both of the appropriate symbols from the pillars!
Above each ladder is a small platform for making any repairs at waist height for the mech, with well-thought-out gaps for the machine’s arms. If the machine is still too large, such as the previous combiner, the platforms can be folded down for easier access. The left side has a full tool set for any situation, including an additional giant wrench.
The right side, on the other hand, has only a large gas canister.

A large fan is connected between both platforms for cooling the selected mech down. The angle of this fan assembly can be adjusted if the mech is particularly small like the Uplink.
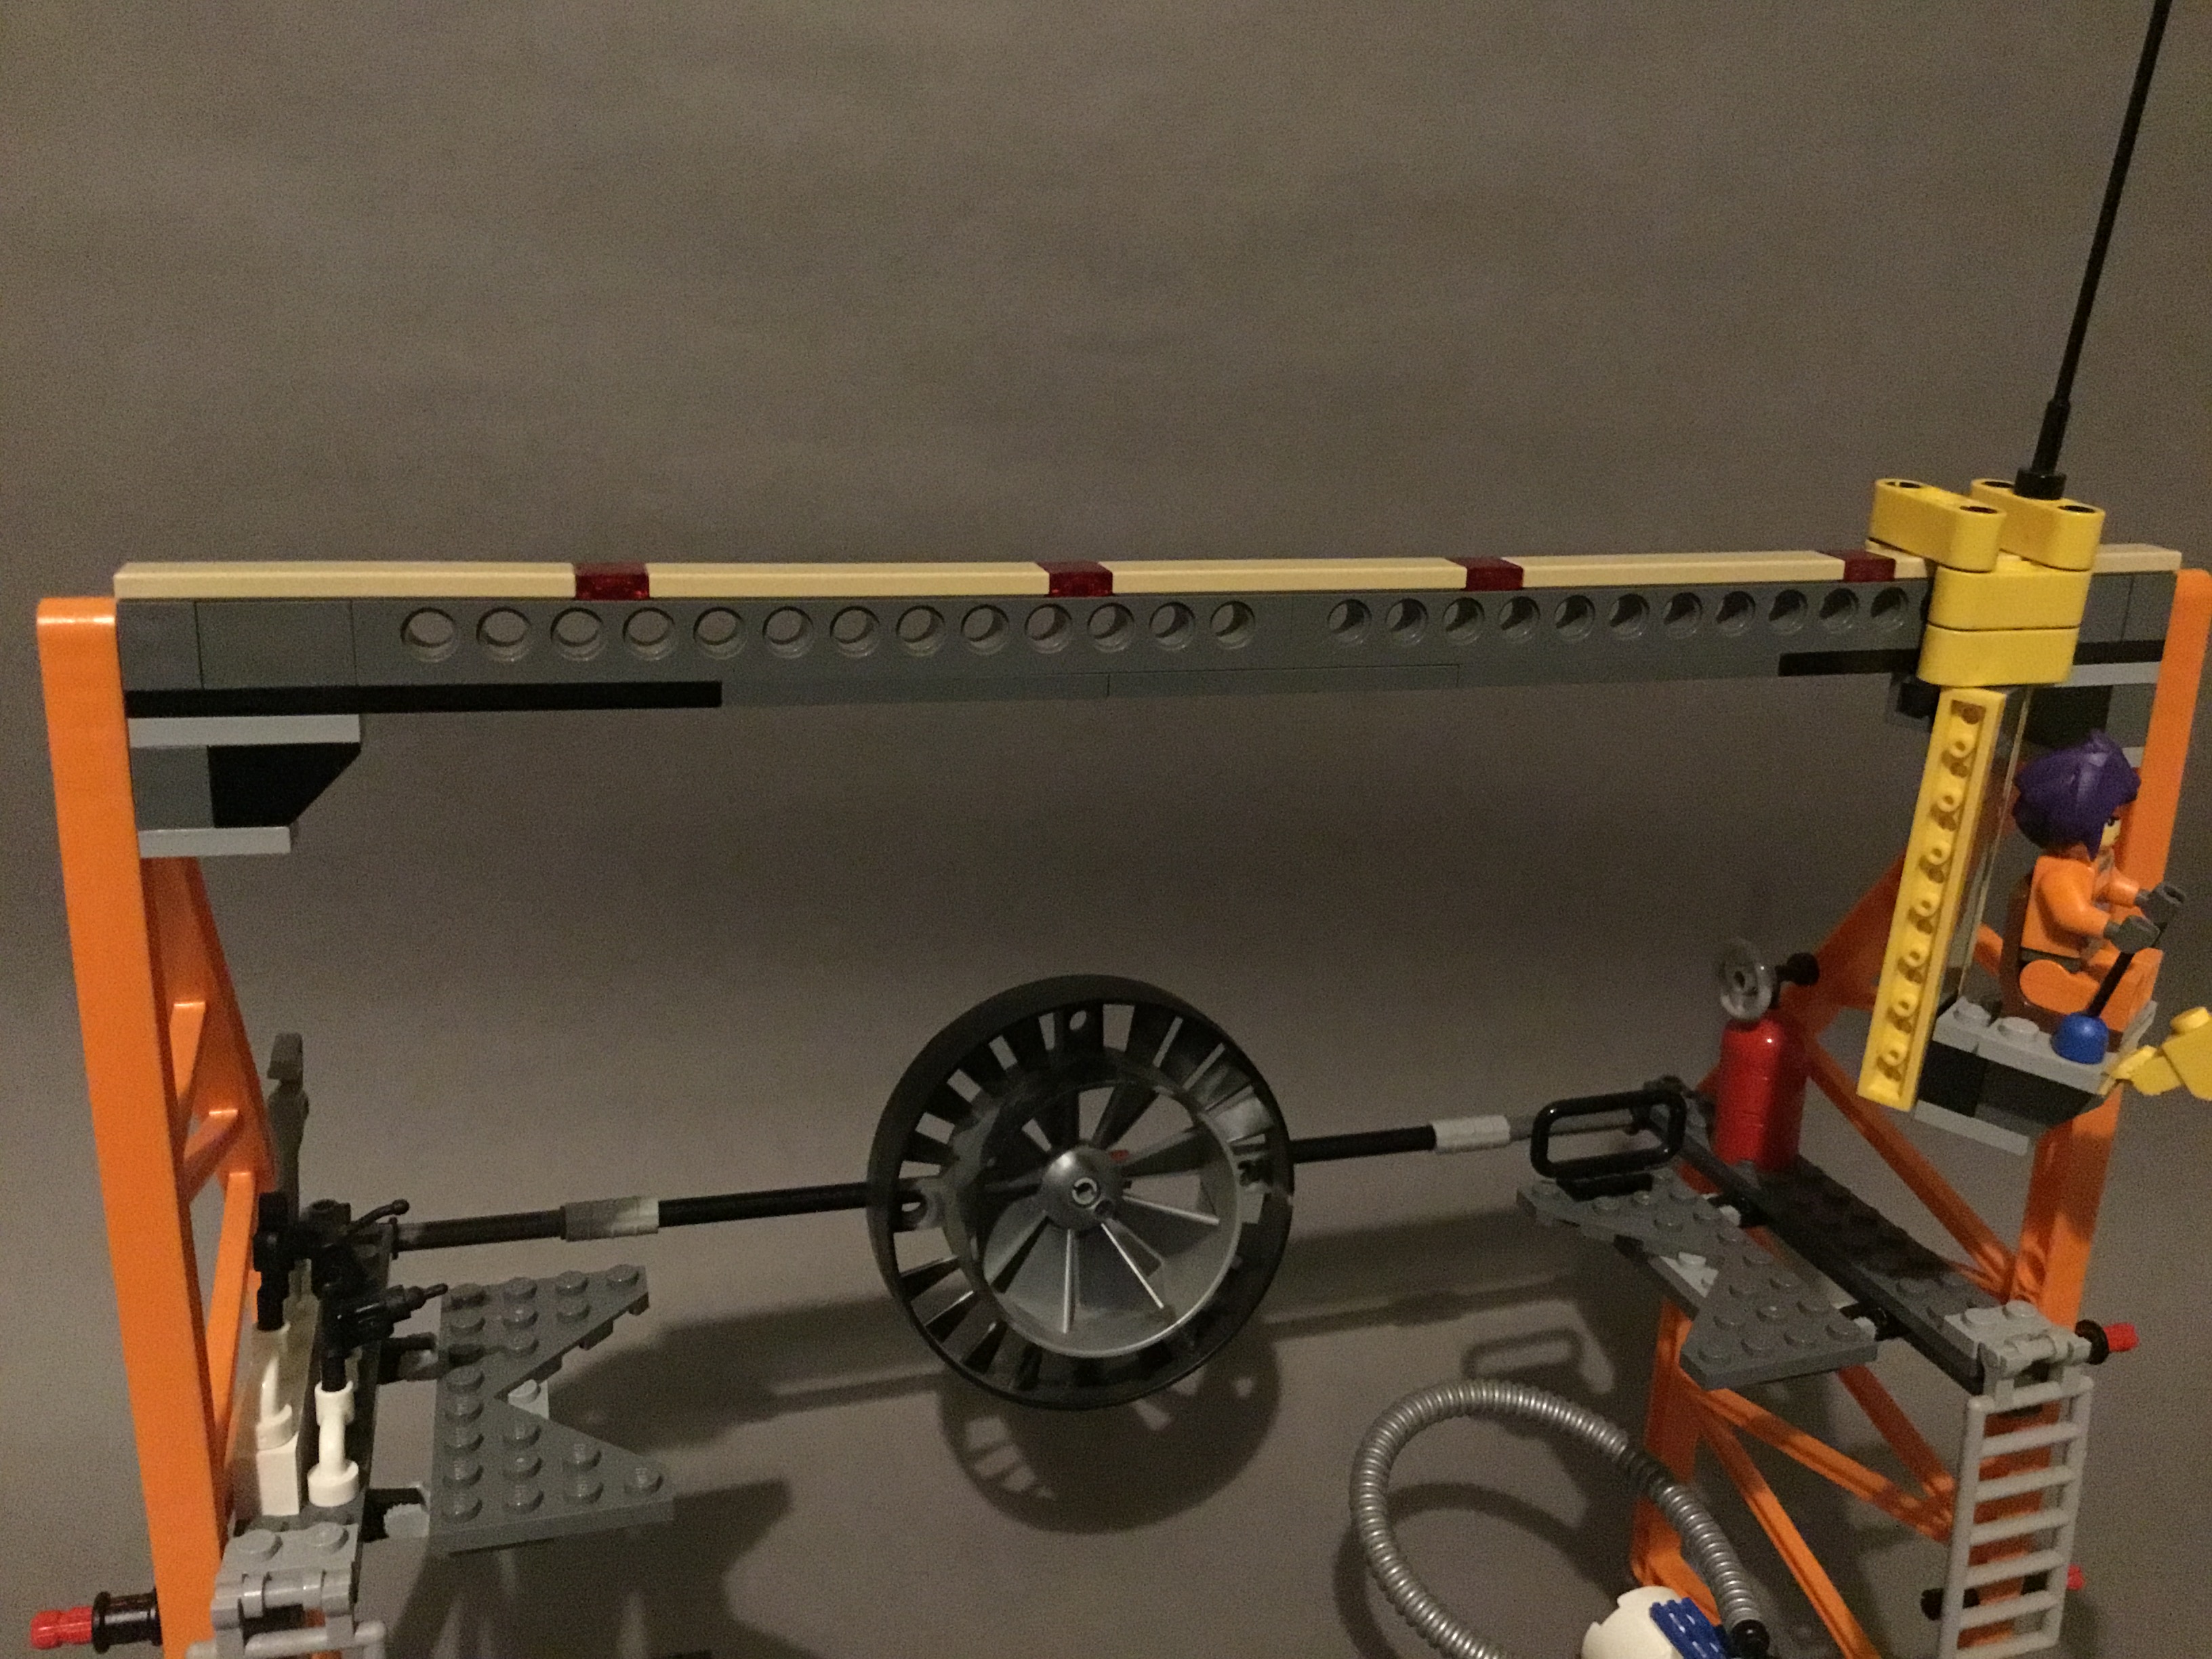
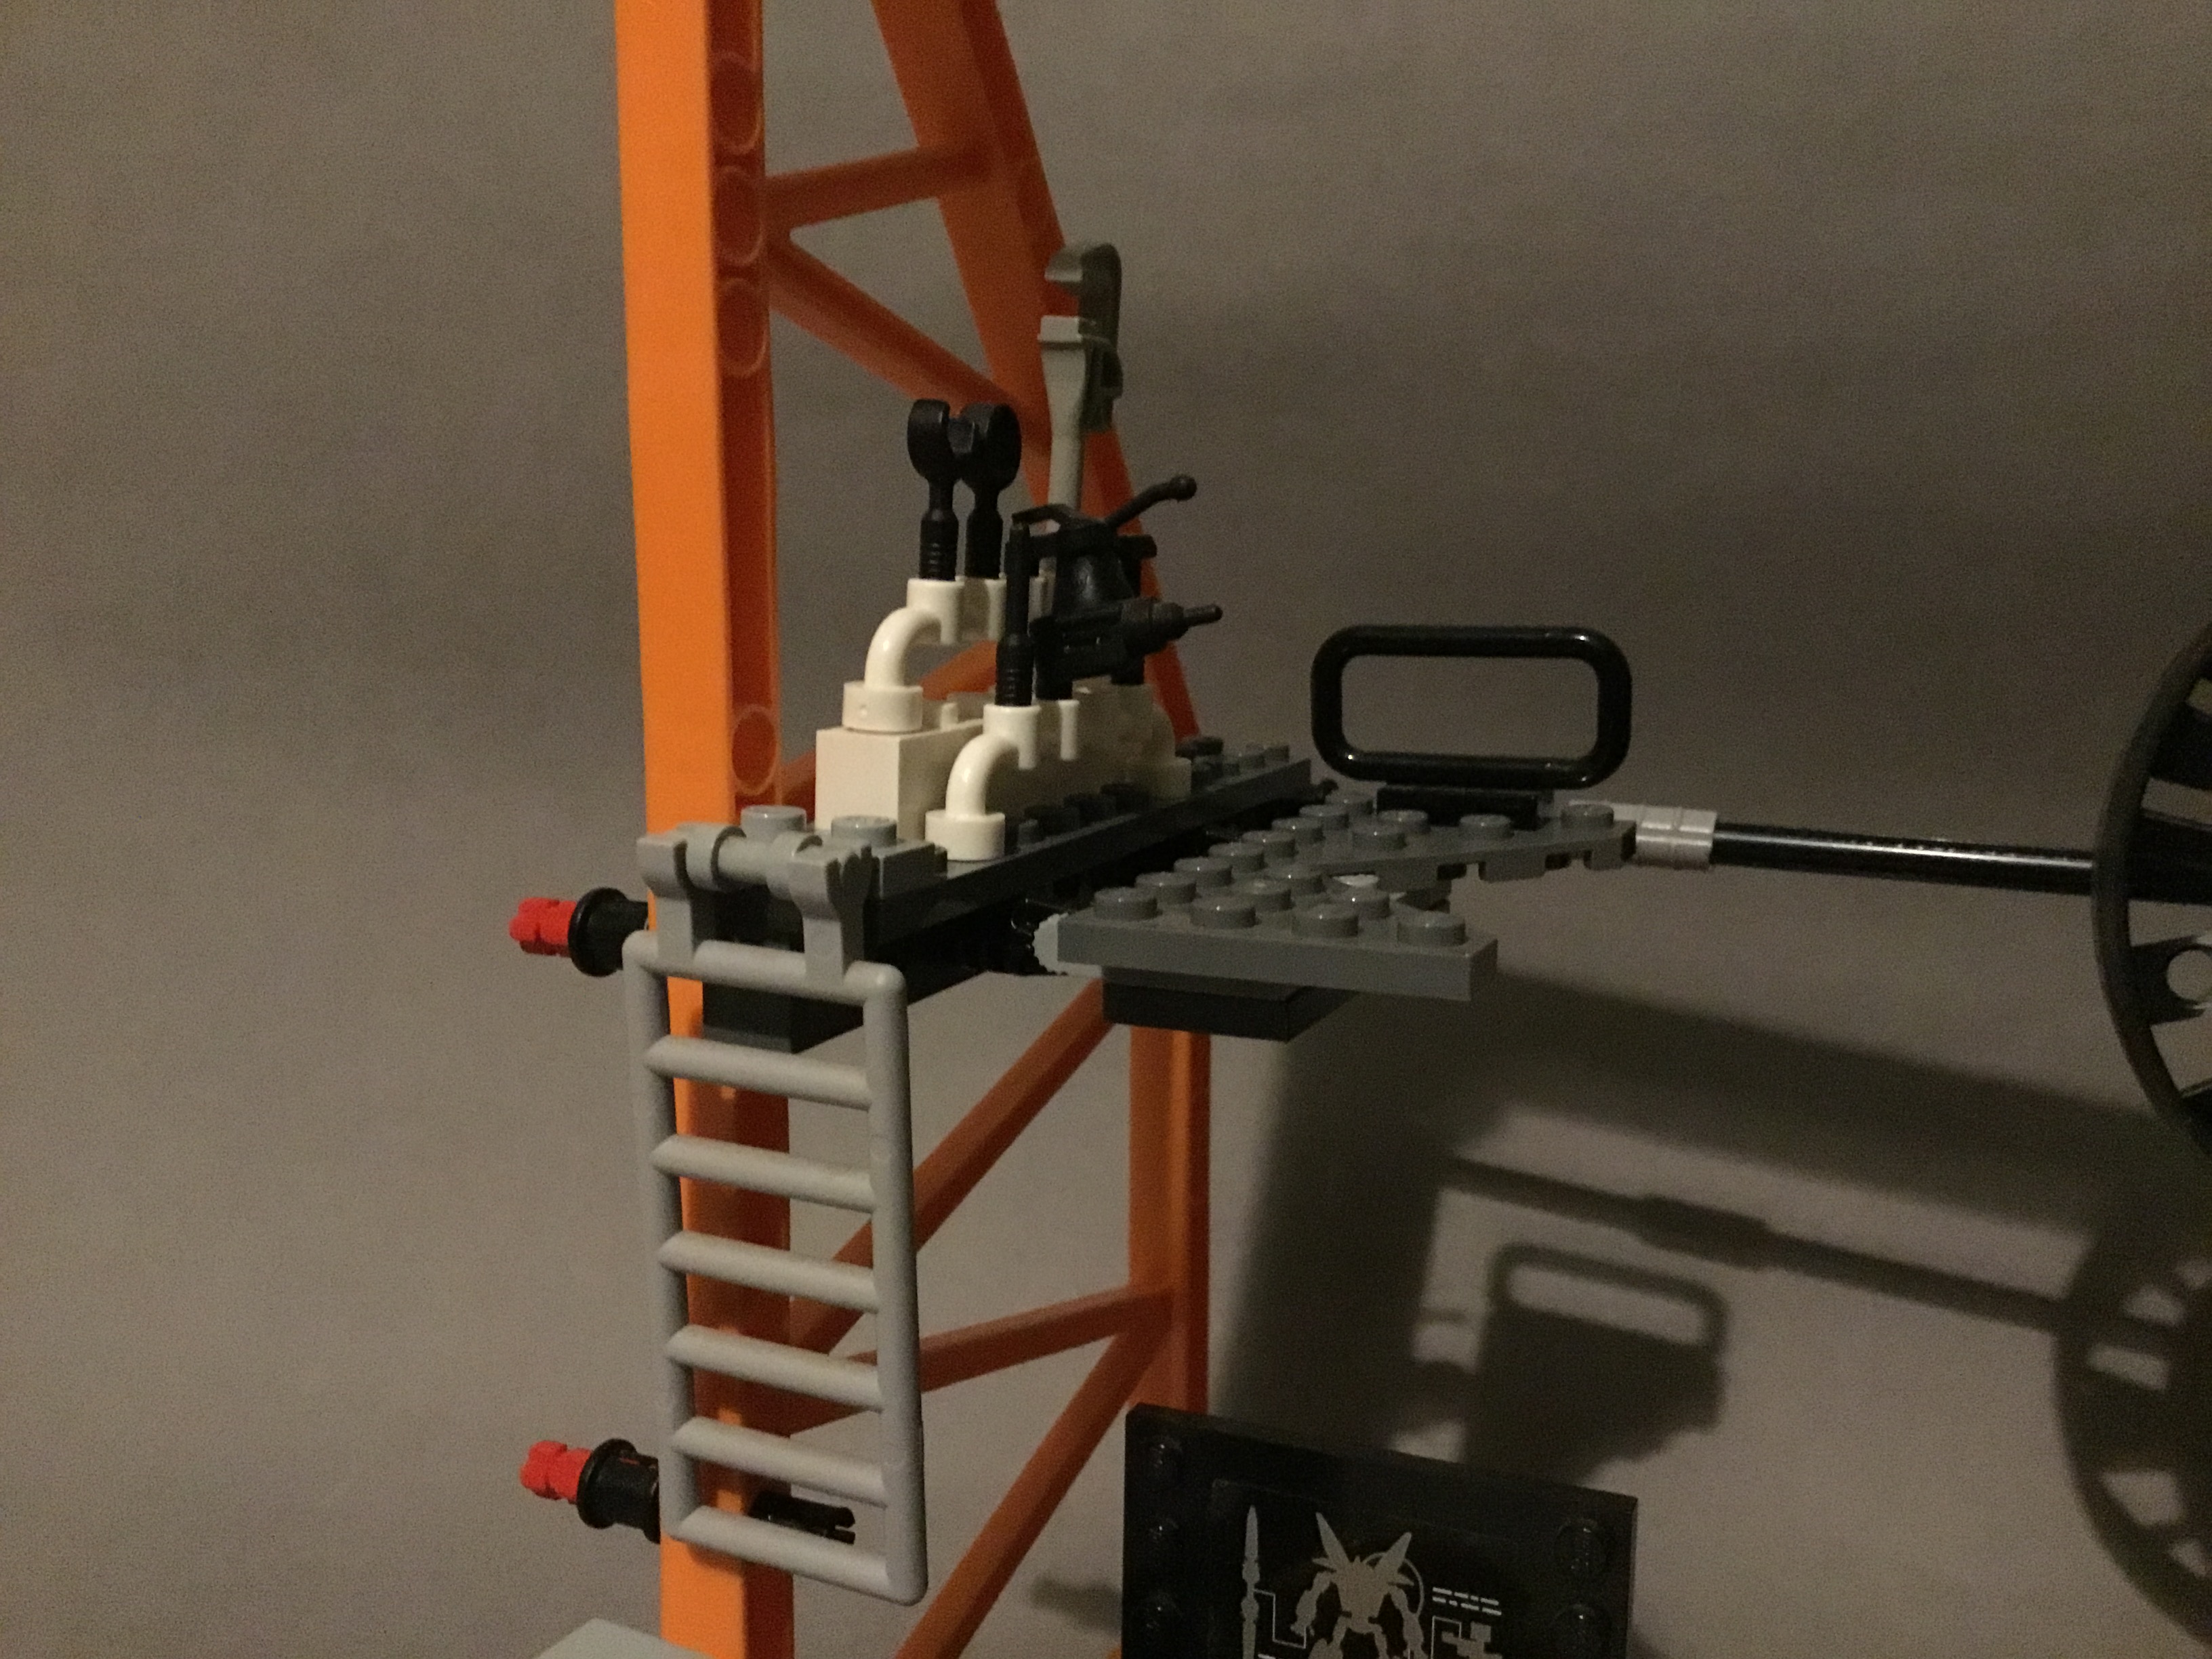
At the top, we find yet another rail-based system, this time featuring a one-person repair crane.
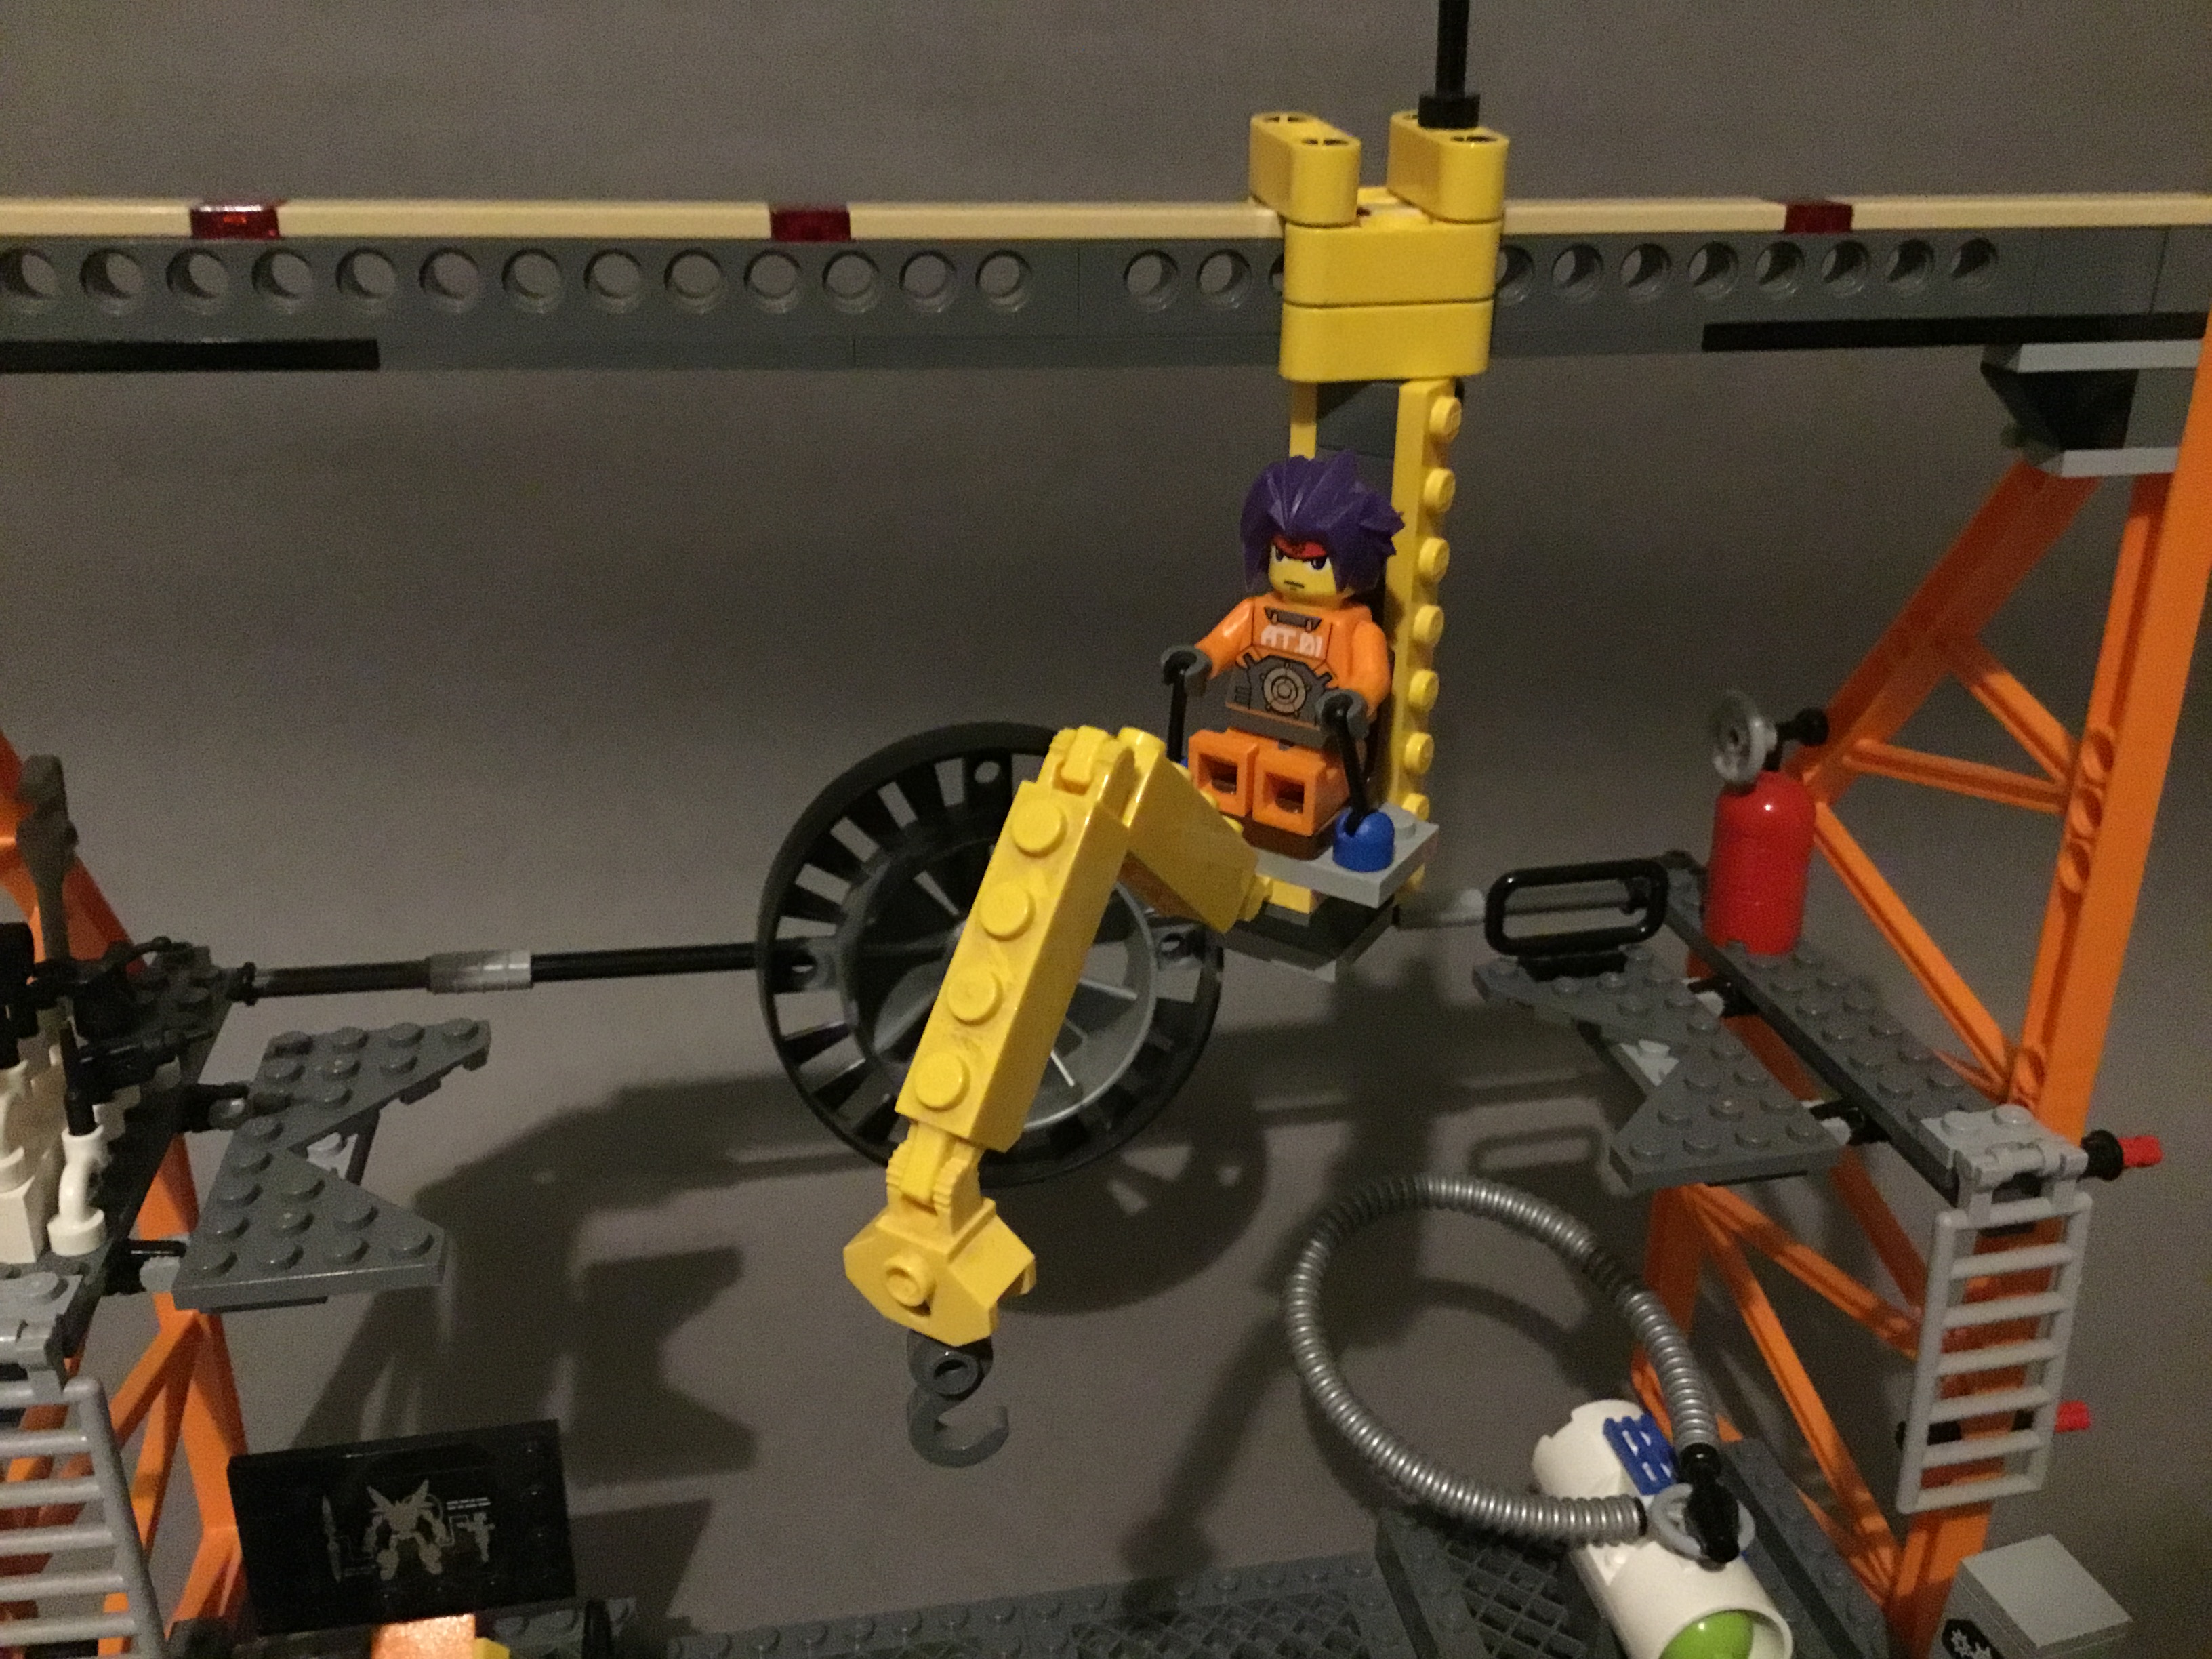
The crane features appropriate operating levers and can swivel around for a greater range of motion.
It’s outstanding just how inclusive this bay is: every single human mech, including the combiner models, can fit in this bay through its incredible versatility and adjustability for the different heights and widths of the machines.
Well, that’s all the separate components of the set. But how do they look together?
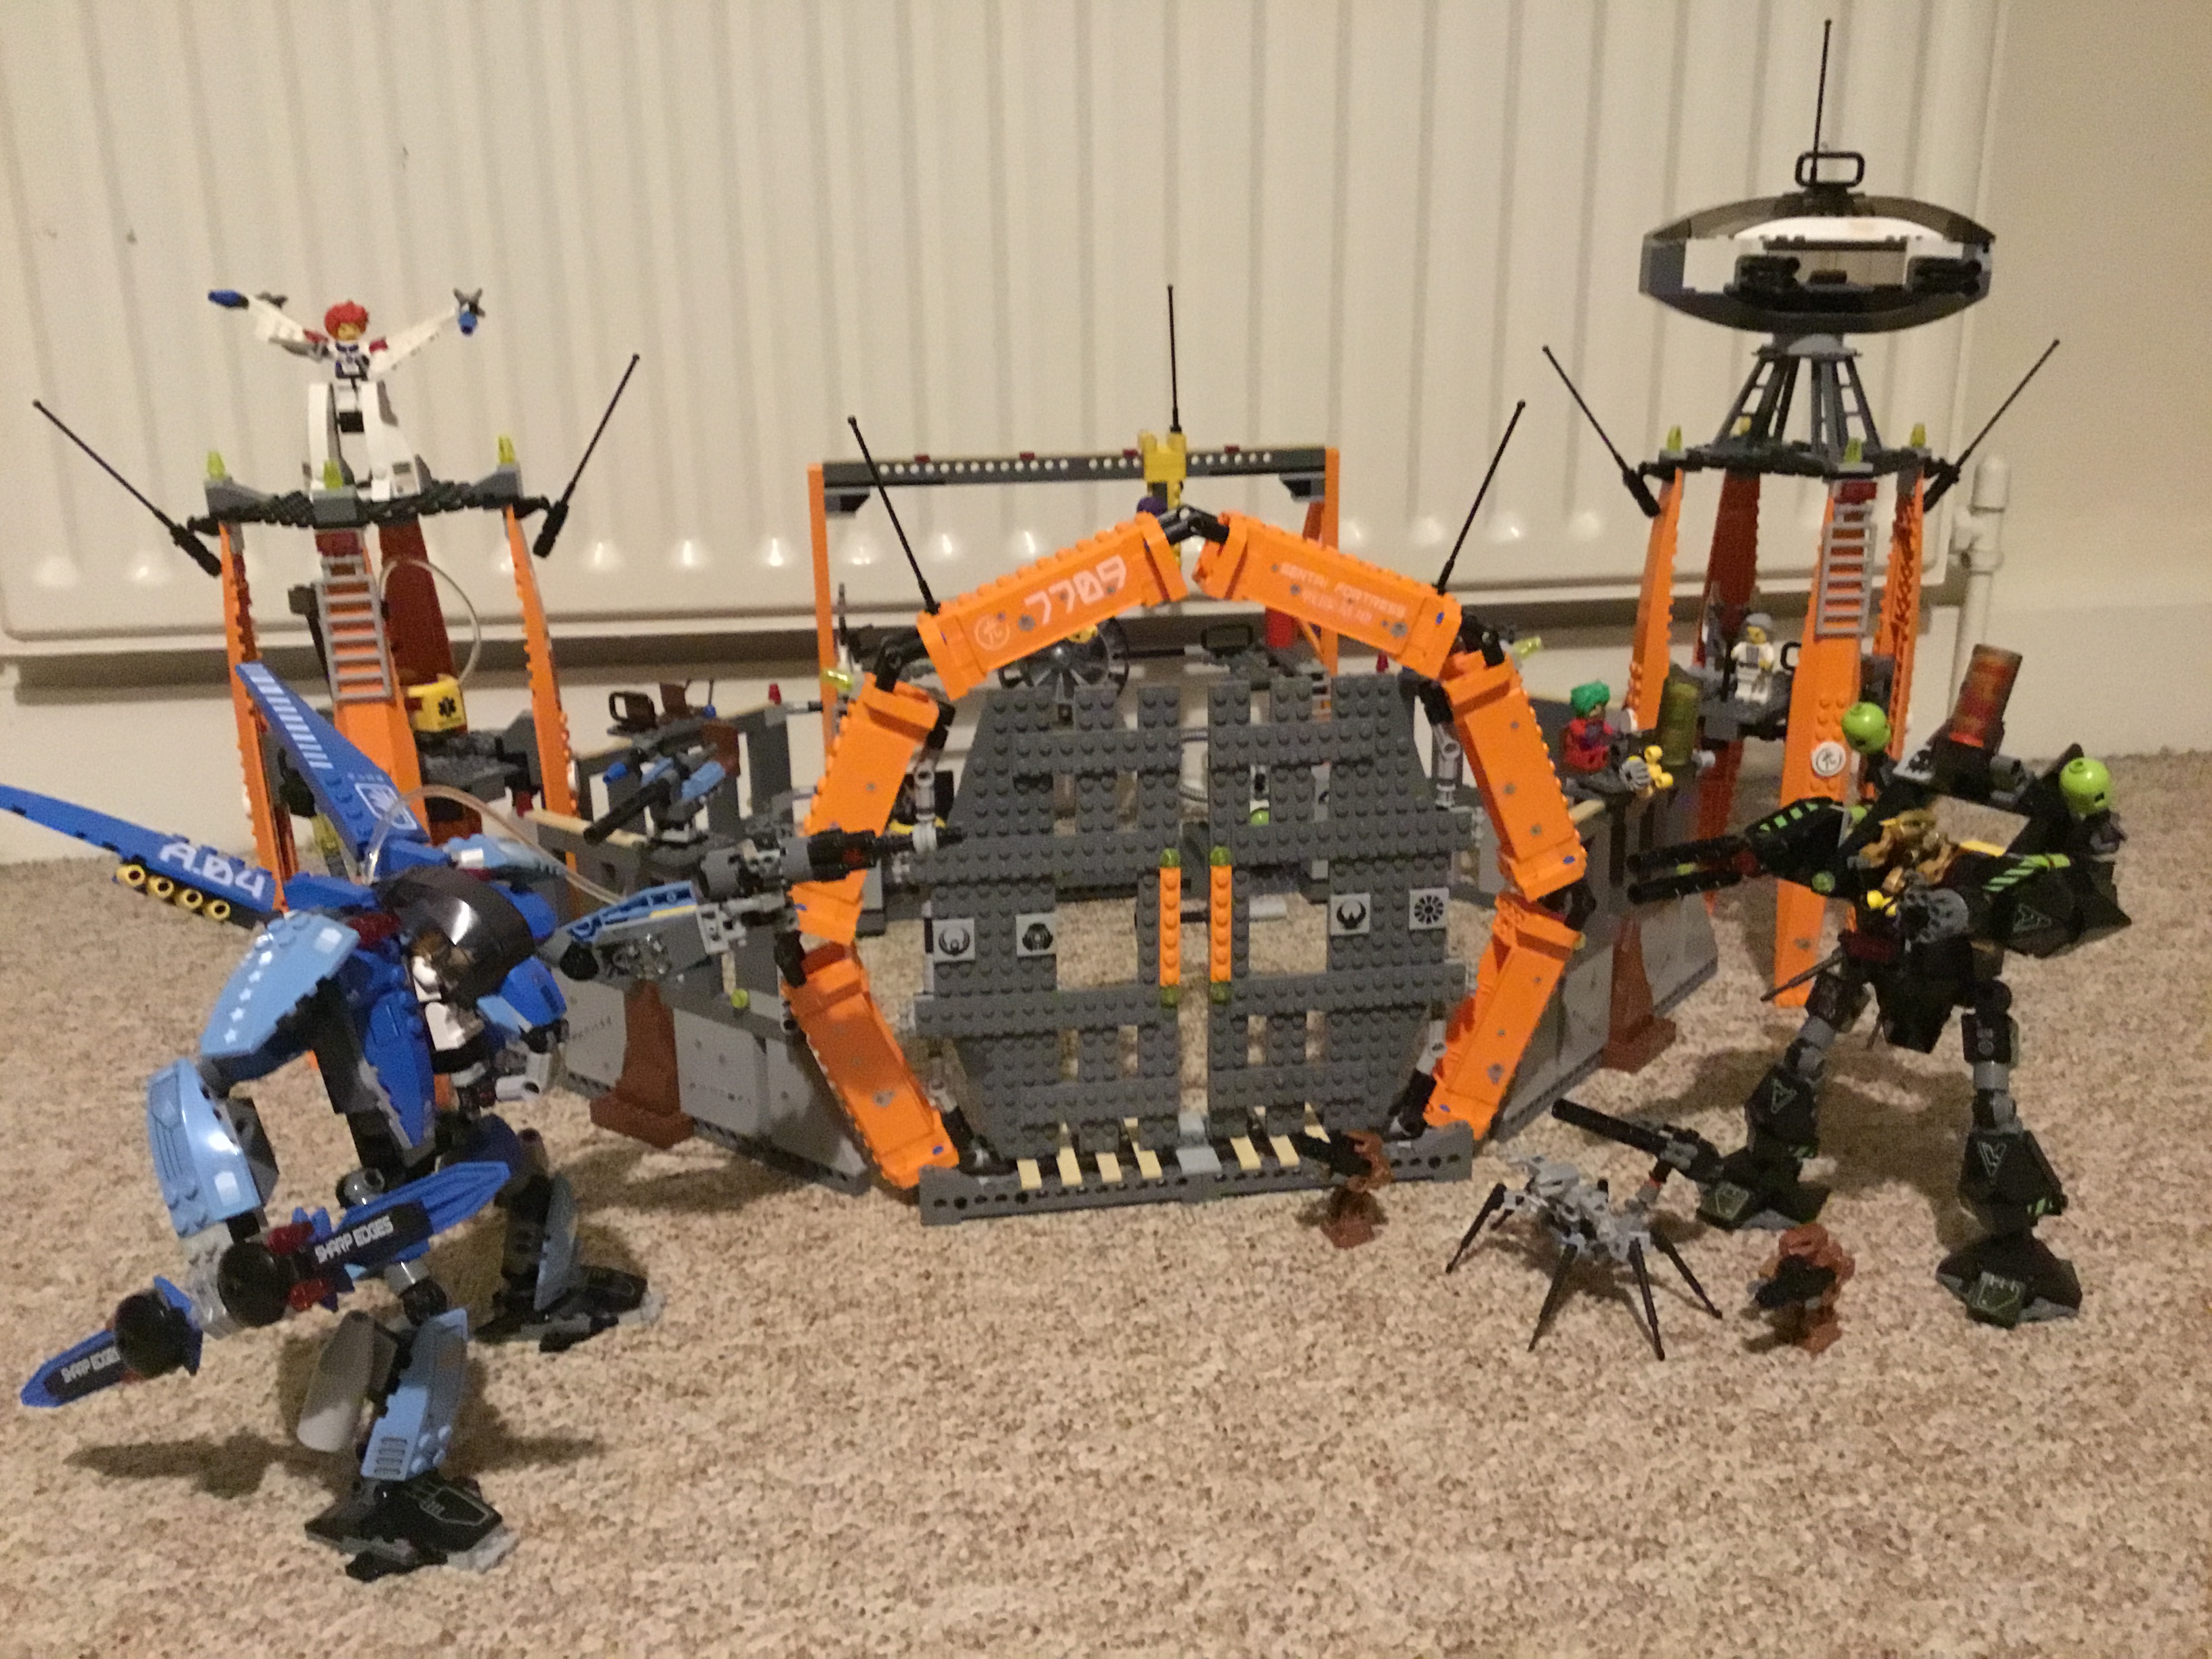
The sheer scale of this set isn’t apparent until you take a step back and look at everything together. The fortress looks wonderful when fully assembled, with a surprisingly cohesion employed by the shared use of the large aerial pieces.
Everything works extremely well together, with the connected ladders allowing you to traverse all three levels with the help of the rail system continuing throughout the base.

The crane can be used to unload weapons delivered from the armoury, which it can then equip on whichever mech is being repaired.
There’s just so much to do with this set. You get the entire Exo-Force team aside from the generic guy seen in 7705 and 7706, the leader of the robots and a fair number of his troops, a ‘good guy’ mech, a ‘bad guy’ mech, a smaller support unit, a repair bay that can fit every human mech ever made, a medical bay, an armoury, a lockable gate, a landing pad, an air control tower and a rail system present throughout the set, all within a fully enclosed fortress.
This represents incredible value for £69.99, especially with almost 1500 pieces. The aftermarket value of this set has increased slightly, now worth around £97, which still represents amazing value. The only real flaw of this set is the fact that there’s simply not nearly enough people to fill the base with. A crew of five is nowhere close to how many people you need to fill every position, which I count as at least ten. Luckily, if, like me, you have a bunch of duplicate figures, you can swap the heads and hair around to create some generic guys to fill the fortress.
If you’re only ever going to get one Exo-Force set, make it this one. You get almost every play pattern represented, plus the full main cast of humans and the robot leader. 10/10. Exo-Force seems to be really killing it with these big sets.
Next time we’ll begin 2007 with a look at the two mid-range ground mechs…