
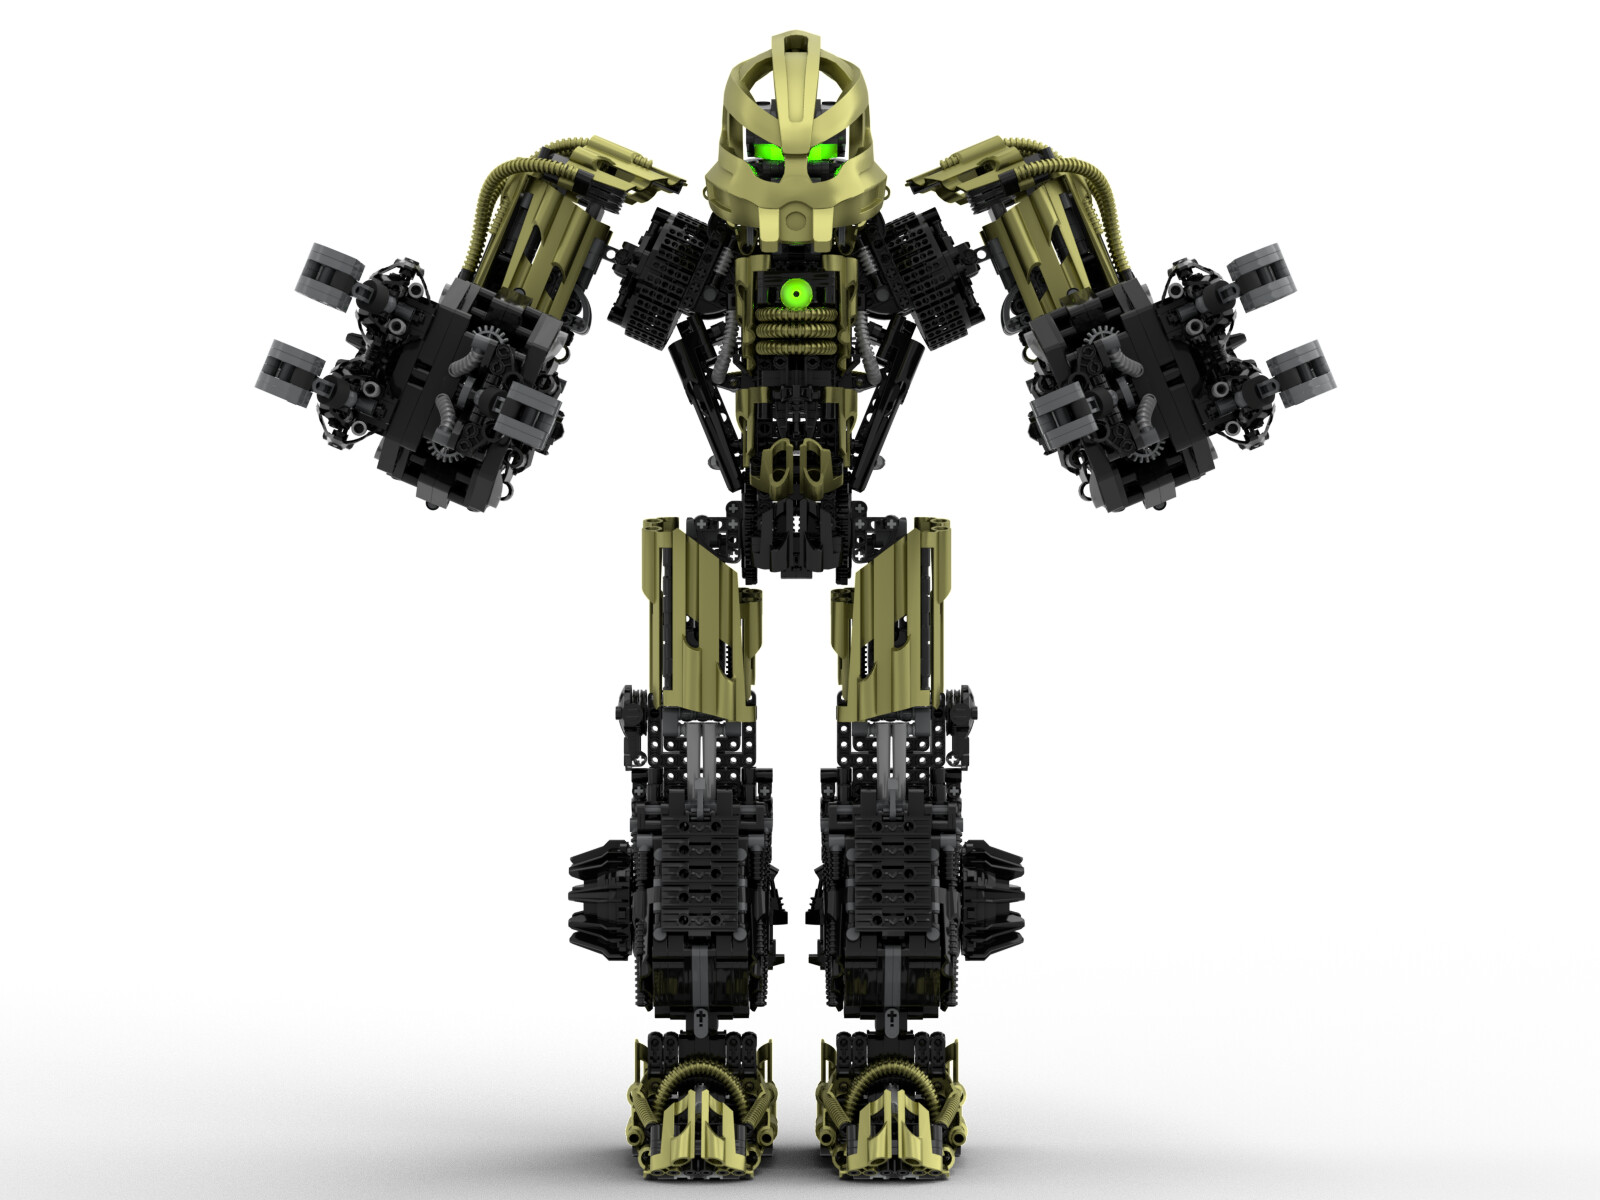
My personal deadline for this was 810nicle Day, so here we are (and to think I was planning to have it done by the end of last year). It’s taken longer than I expected, but I’ve finally finished my 3x scale model of Toa Bomonga, based on the model that inspired Bomonga’s canon appearance in last year’s Toa Hagah Canonization Contest. This model is meant to represent Bomonga while using his Mask of Growth, and the basic idea behind it was inspired by this post from @TLROsborne171 , with initial design beginning the same day that that post was made.
With the obvious exception of the mask, this model is 100% purist, taking advantage of a number of old-school Technic panels and ribbed hoses that were released in metallic green in a single Technic set back in 2001.
Clocking in at exactly 4600 pieces, this is by far the largest Lego model I have ever “built”, by any standard.

Some people may recognize that I shared a very early, incomplete rendition of this model on a Discord server early in the year, featuring waist poseability and a motorized gear function. Neither of these features remains, as I was already struggling to integrate them, and I later had to make the torso even smaller to properly match the proportions of the original model. That was the first of many redesigns; virtually every part of the figure has been massively rebuilt at least once, with the exception of the fingers and shield.
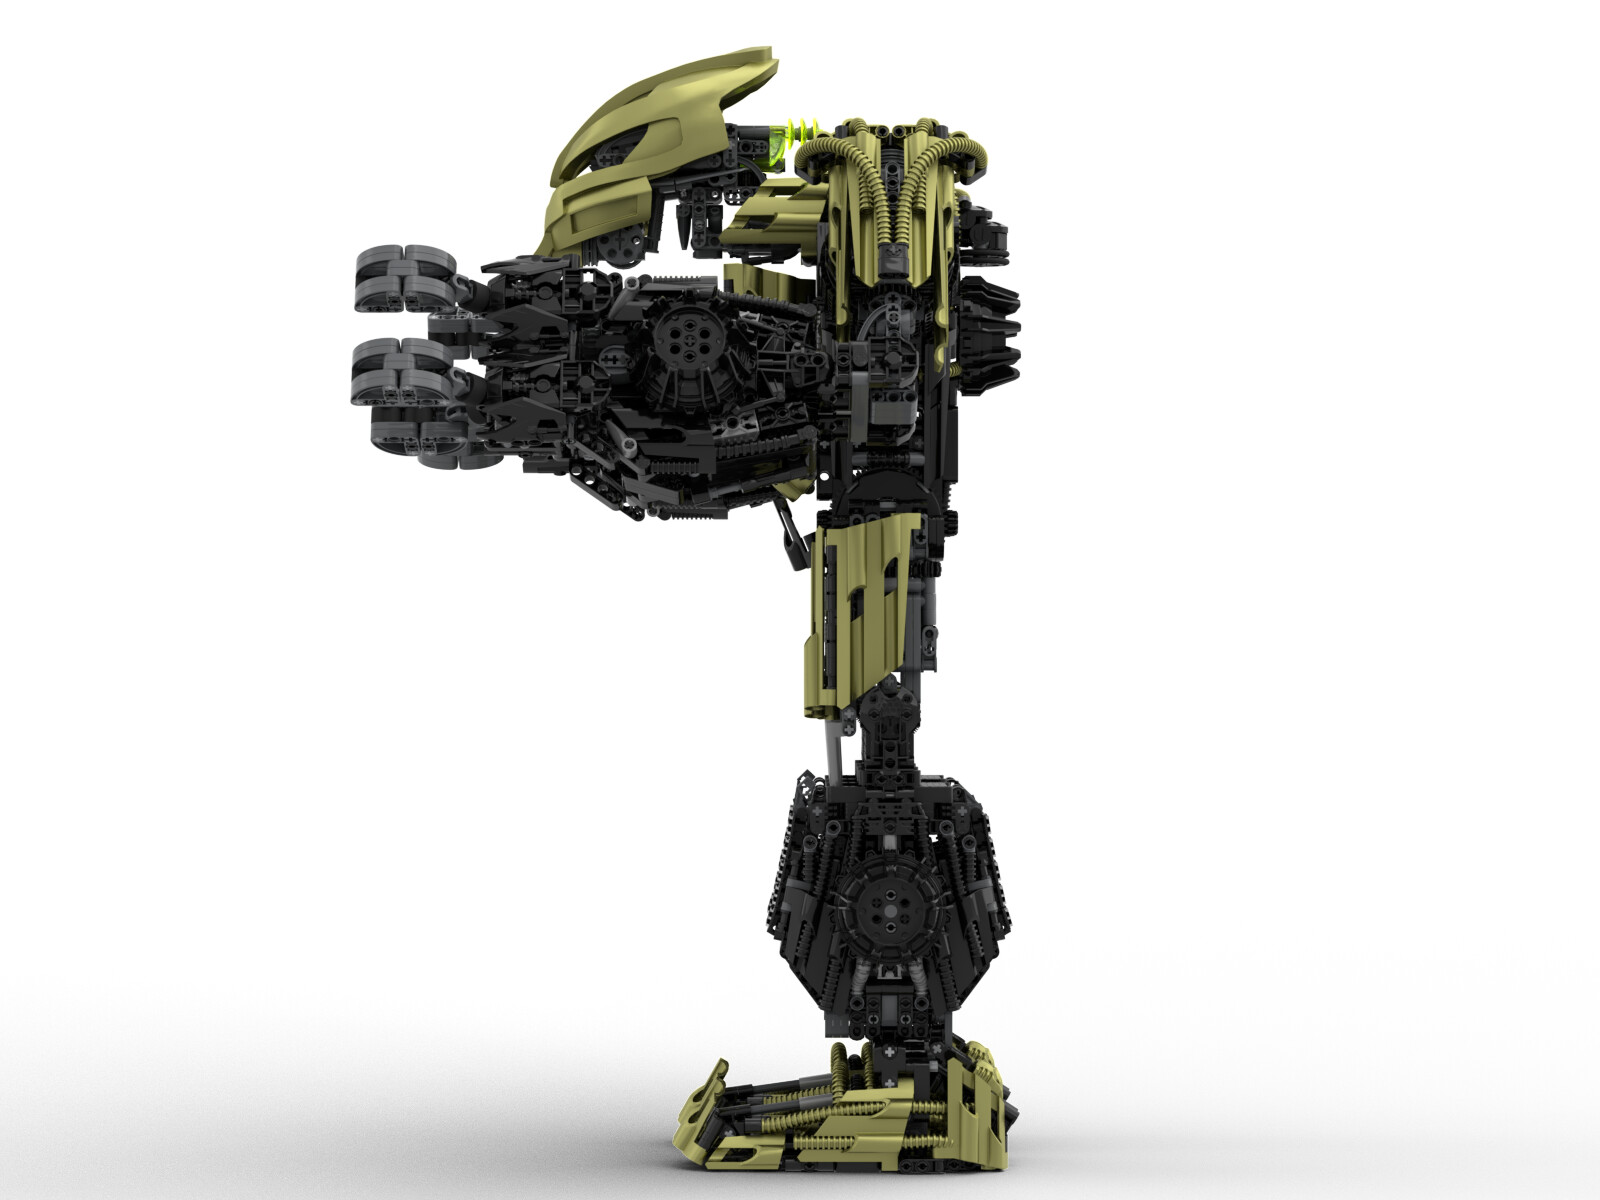
This isn’t just a display piece, either: this figure has just as many points of articulation as the original Metru Build, plus Bomonga can now swivel his wrists, and his feet can articulate as well.
It should also be noted that, due to the need to pack large amounts of stability and friction into relatively small spaces, there are two joints that are slightly less poseable than on the original. Bomonga’s feet and shoulders no longer have any internal/external rotation, though each of these is only a minor inconvenience; faux-rotation of his shoulder can be achieved through the internal/external rotation of the elbows, and the saddle joint in the ankle is suitable for the majority of natural poses.
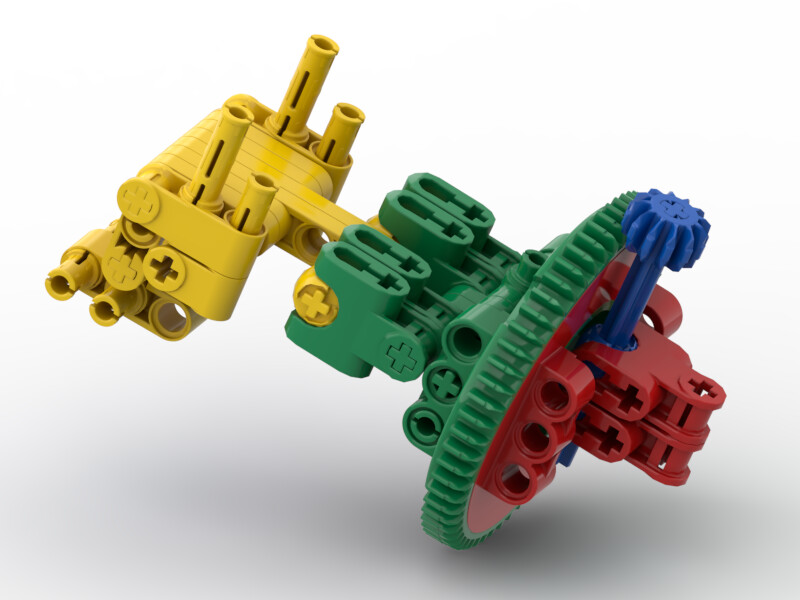
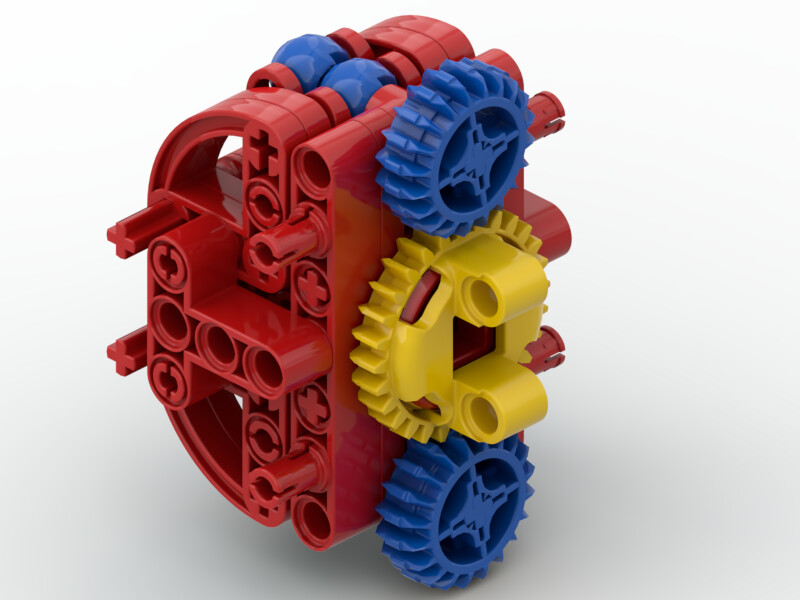
One thing that I wanted to avoid in this model was “ratchet joints”. Despite the strength offered by these parts, I elected to go with ball joints for every point of articulation, as they offer a far more continuous range of motion. This was especially important in the legs, to allow both feet to always sit flat. Of course, this meant that I had to use a ton of ball joints, with additional friction being added in some spots via gear-ratio-assisted pins (as in the G2 Bionicle sets) or, in some spots in the legs, axles sliding through Technic connectors.
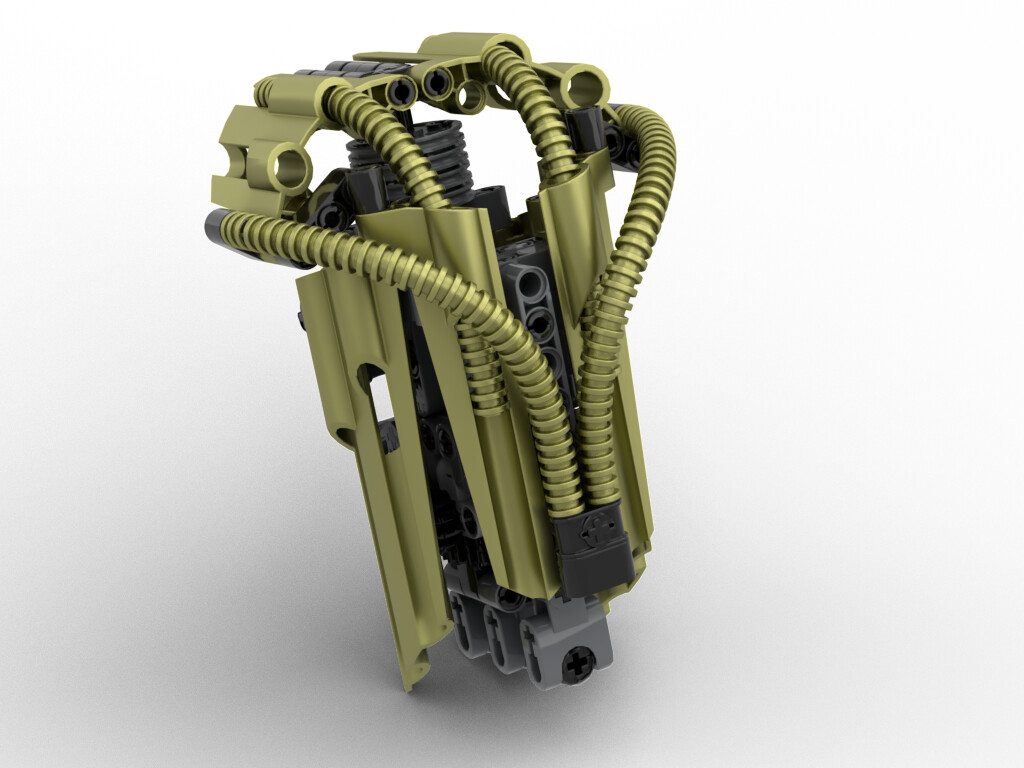
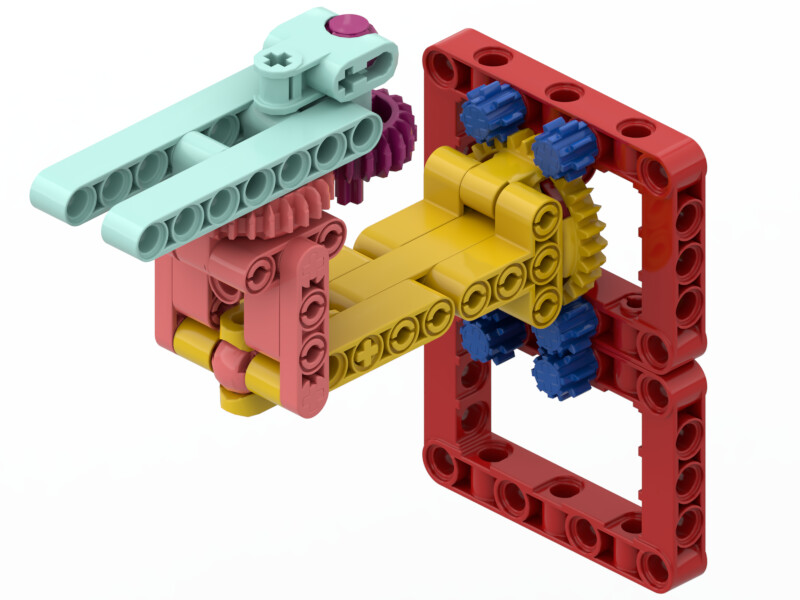
Closeup views of each joint can be seen below, as well as a summary of their strengths.
Joint Strengths
Shoulder
- Adduction/Abduction: 4x Ball Joint
- Flexion/Extension: 2x Ball Joint * 5:1 Gear Ratio = 10x Ball Joint
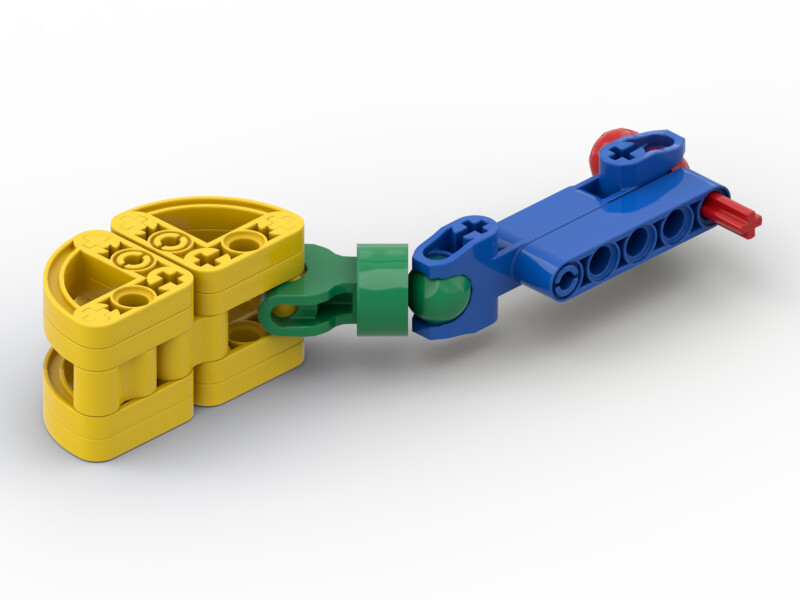
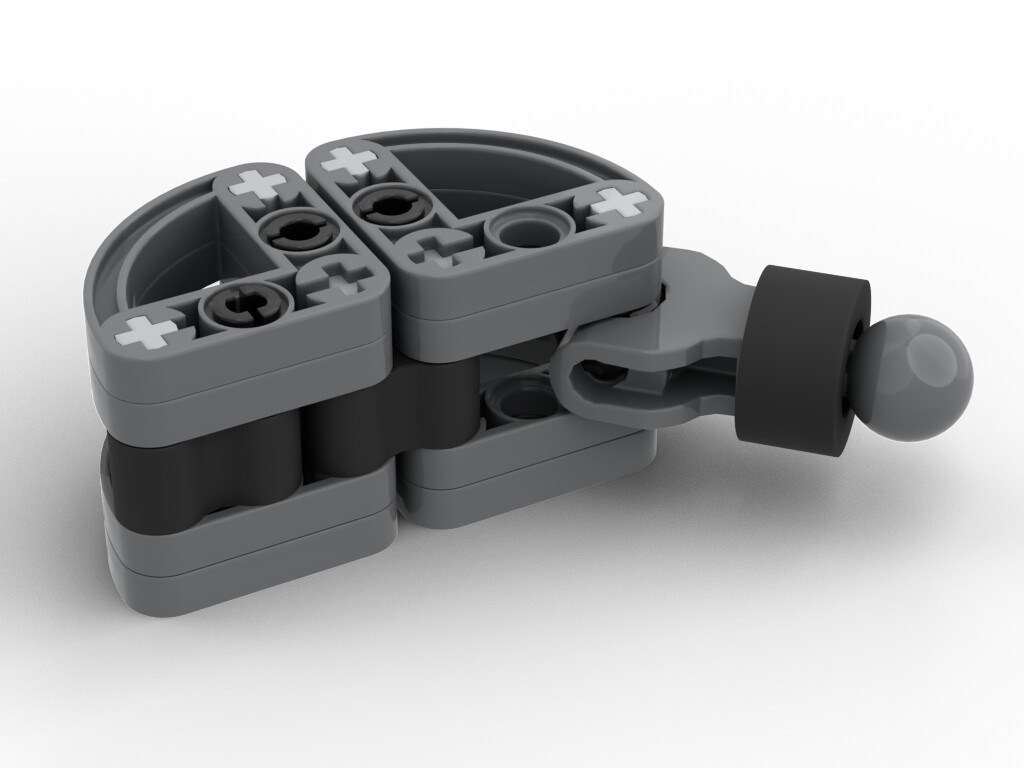
Elbow

- Flexion/Extension: 3x Ball Joint
- Internal/External Rotation: (1x Ball Joint + 4x Pin) * 7:3 Gear Ratio = 2.33x Ball Joints + 9.33x Pins
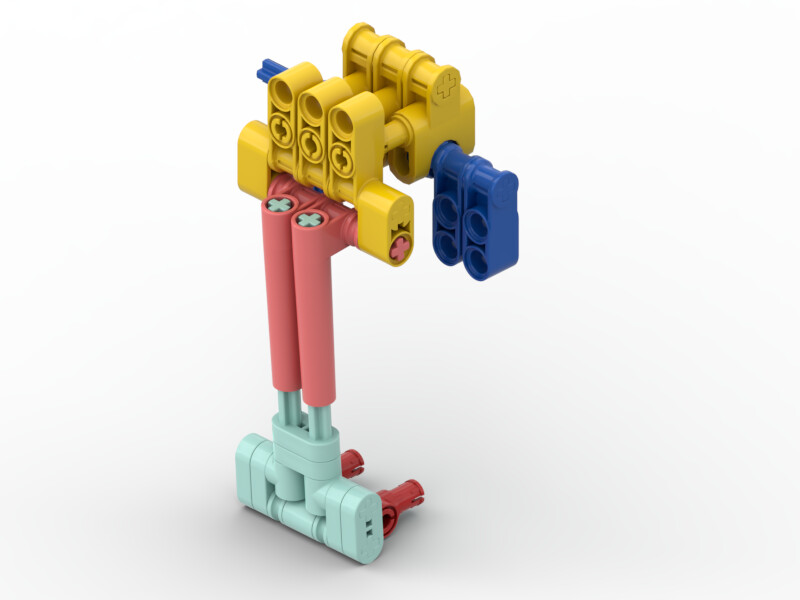
Fingers
- 1st Knuckle: 2x Ball Joints (Outer fingers only, thumb is locked)
- 2nd Knuckle: 1x Ball Joint
- 3rd Knuckle: 1x Ball Joint
Hip
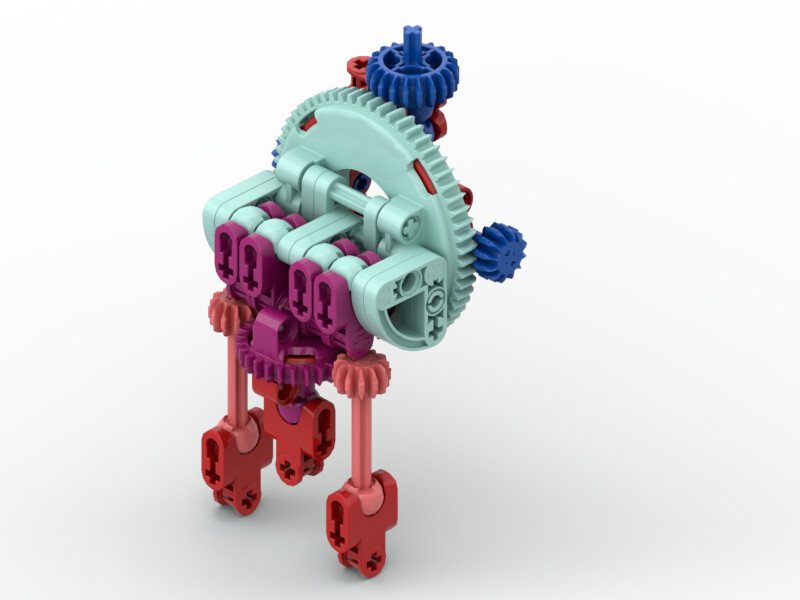
- Adduction/Abduction: 4x Ball Joints
- Flexion/Extension: (2x Ball Joints * 3:1 Gear Ratio) + (4x Pins * 5:1 Gear Ratio) = 6x Ball Joints + 20x Pins
- Internal/External Rotation: 1x Ball Joint + (2x Ball Joints * 7:3 Gear Ratio) = 5.67 Ball Joints


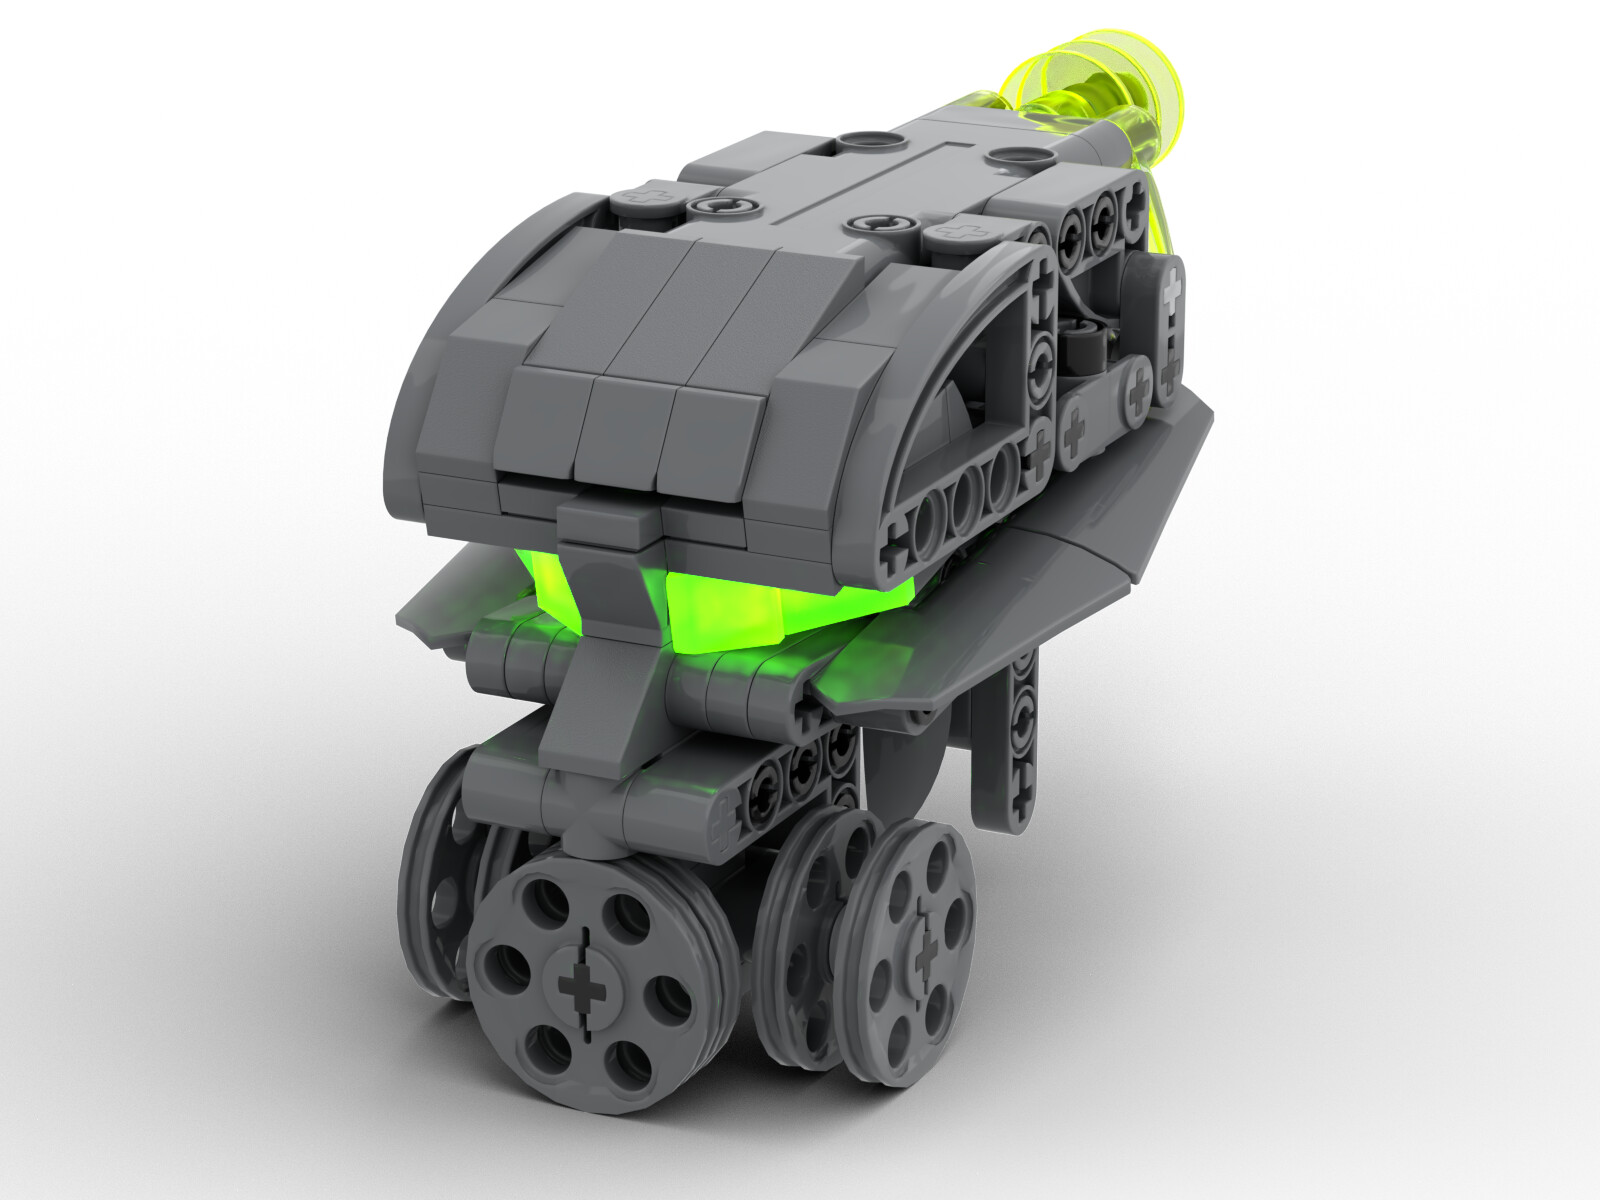
For a variety of reasons, the spear tip is probably the least accurate part of the model when compared to the original. Part of this is due to the fact that I leaned more towards the canon appearance than the Knight’s Kingdom piece, hence the shorter “blade” and wider base:
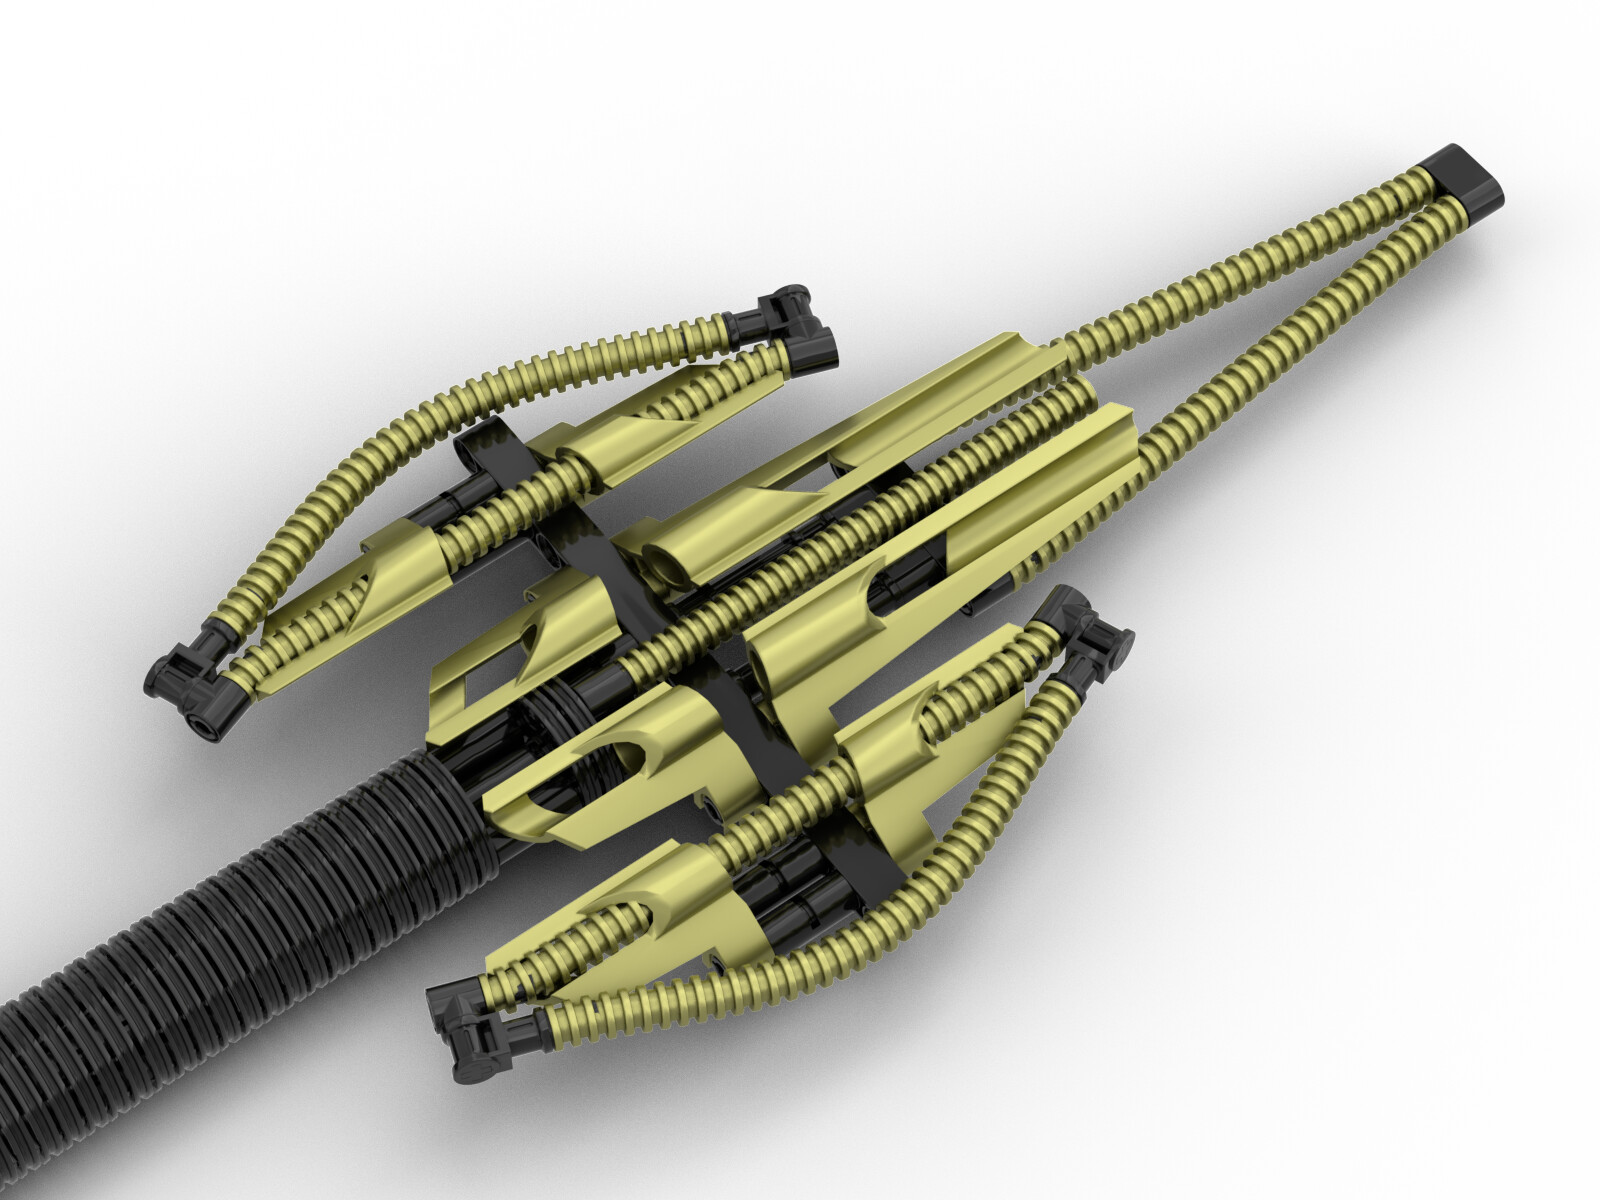
The spear itself doesn’t actually have any connection points, relying on the grip of the model for support. I maximized this grip by using as much rubber in the fingers as possible:
The fingers use the same technique as on the bottom of the foot of the Artakha model, stretching the rubber Technic connectors over towballs to ensure that they bulge above the surface of the finger. The tire also provides grip, though the use of tires was mainly to bulk up the finger.
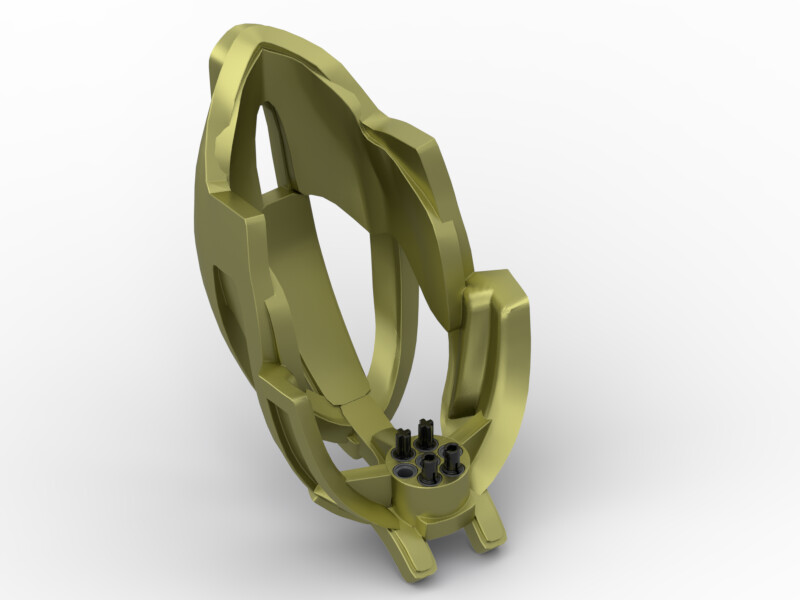
The shield provided a unique challenge when compared to the rest of the model, since it is a large, broad, chunk of metallic green, as opposed to the smaller, gappier, and more rounded metallic armour on the rest of the model. However, I’m very happy with the shaping, even if I couldn’t integrate a Rhotuka:

The mask is a modified version of the version of the Kanohi Faxon in @Galva_Nize’s Heroes Of The Lost Mask Pack. It has been scaled up 3x, and the connection point has been modified:
Then, the pins connect to the holes in Bomonga’s face:
While I was originally planning to release full pdf instructions for this model as well, I ran into an unfortunate error in stud.io just a few hours ago, so now I need to manually reformat all 900+ pages. The instructions will come eventually, though.
And then to close it out, since the whole point of this was to show Bomonga using his mask power, I went for a group shot of all the Hagah doing the same:
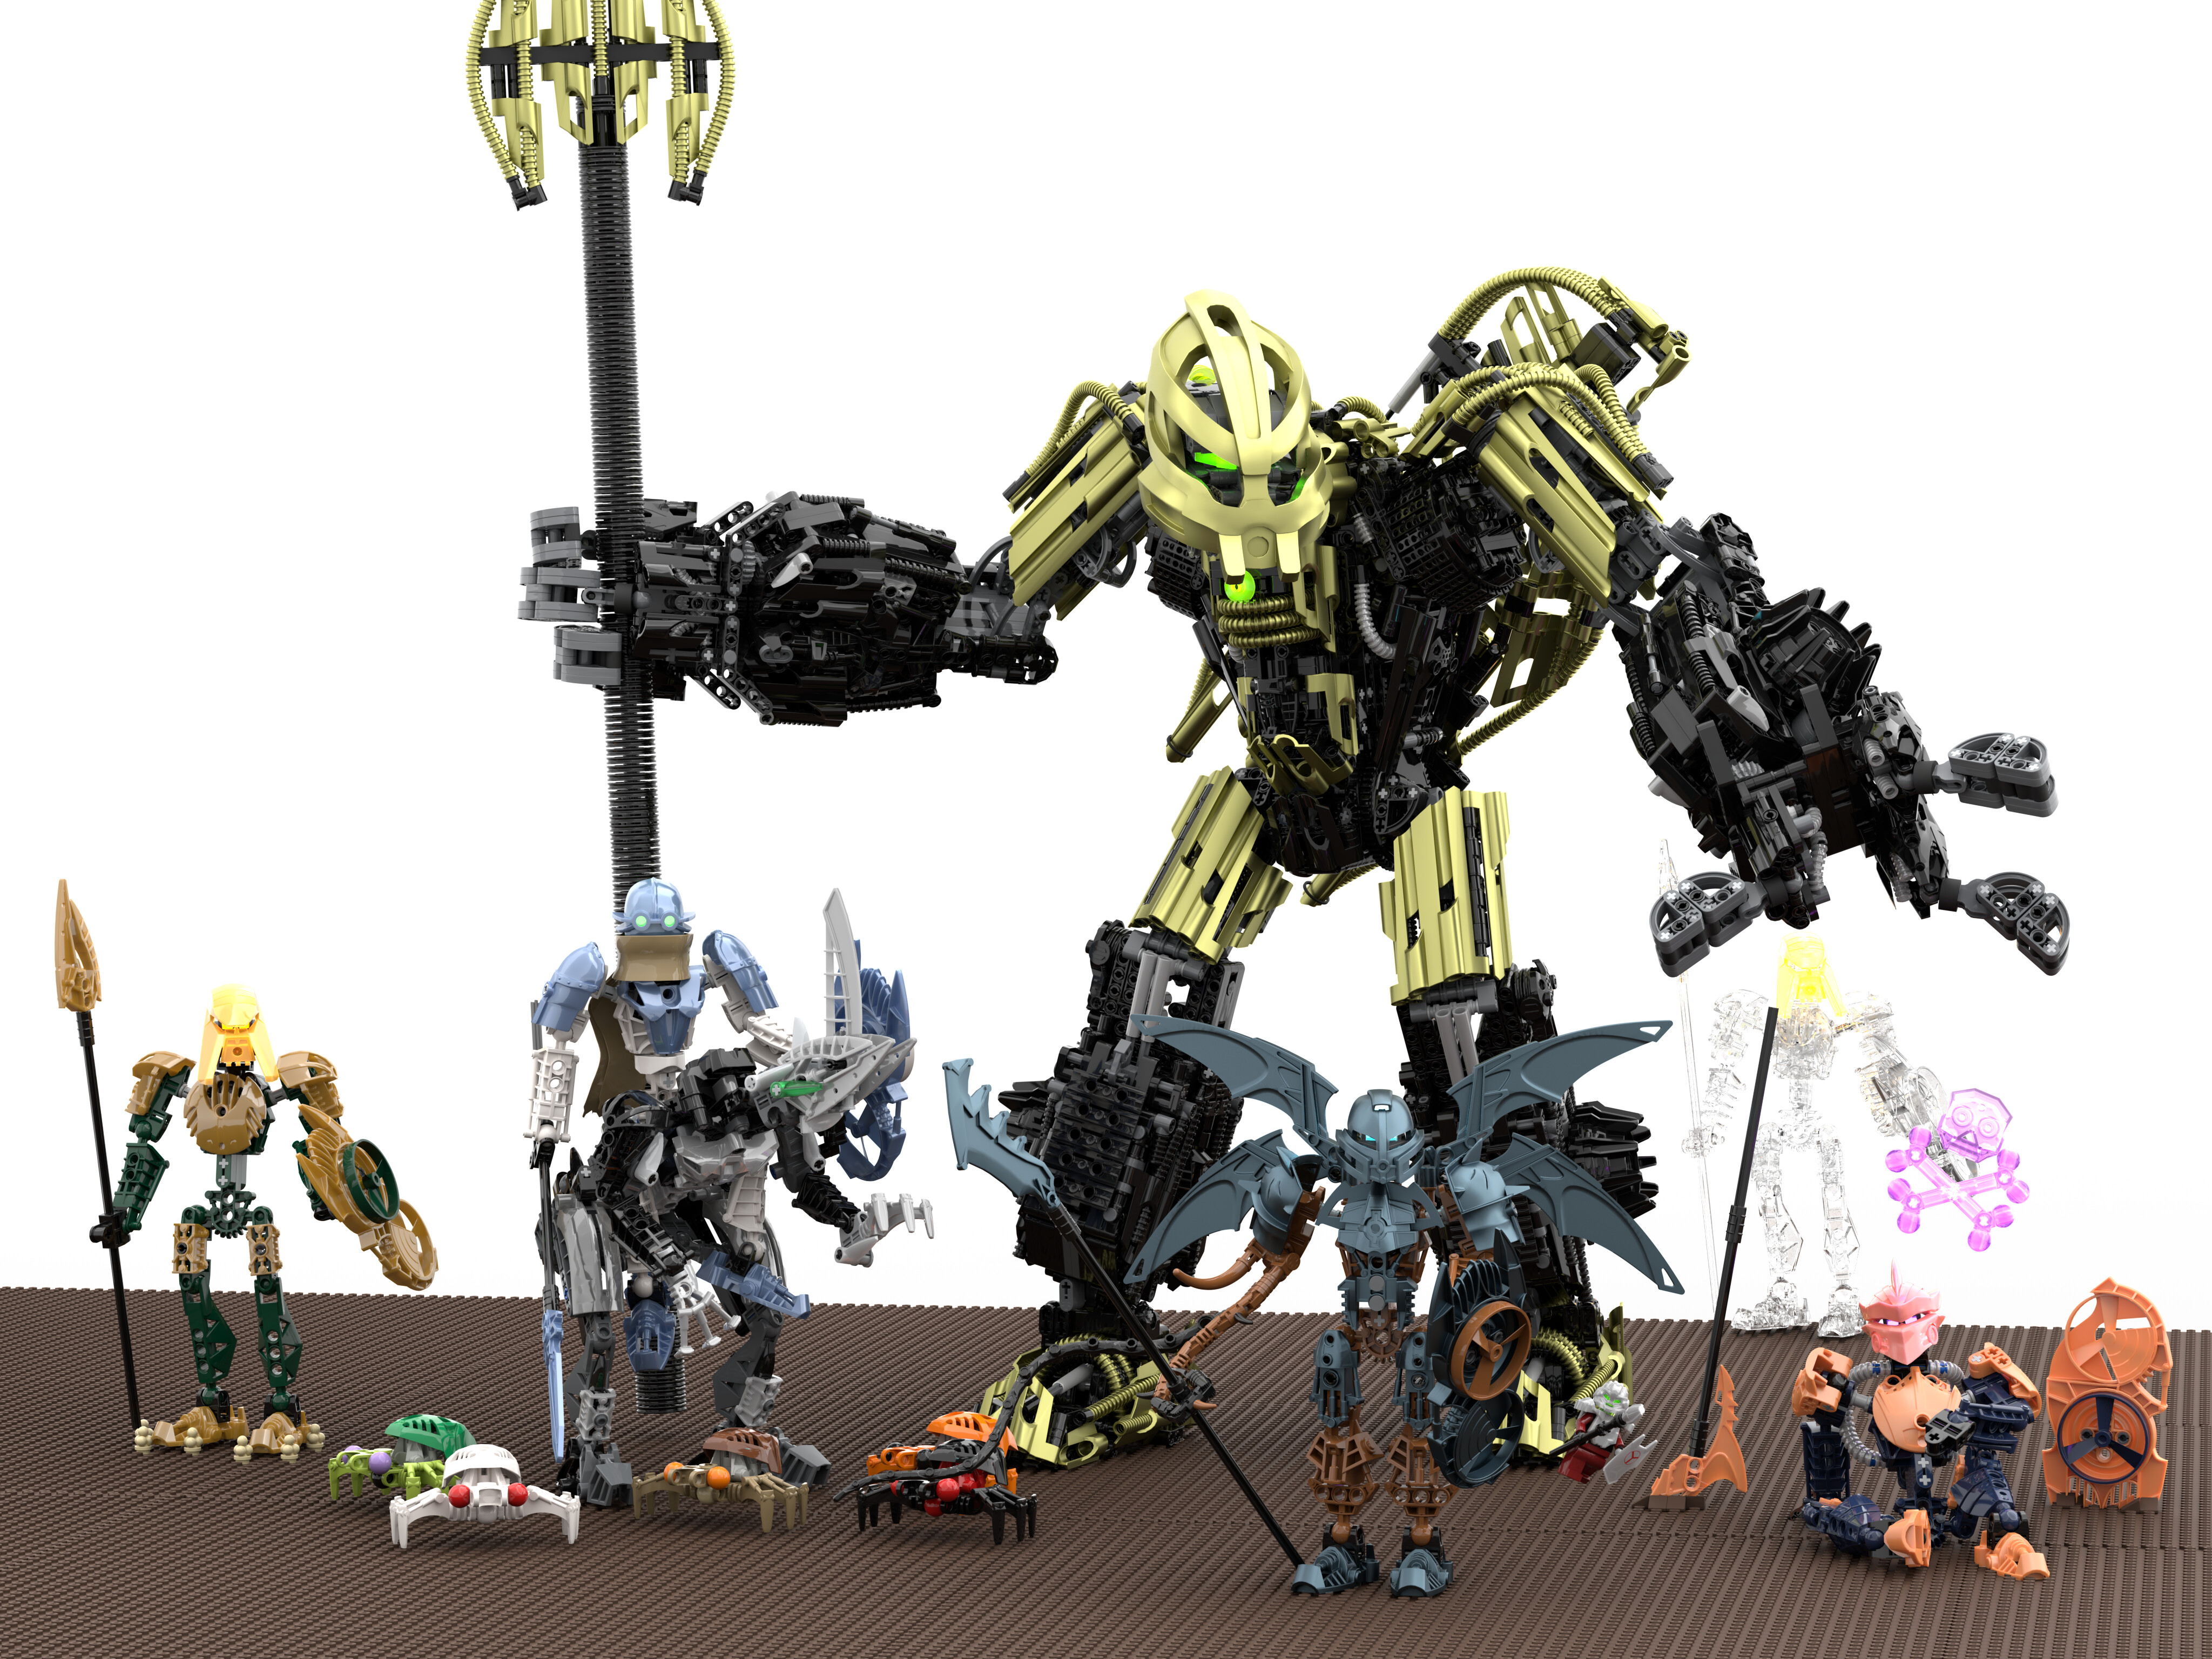
(And in the highest resolution I could make stud.io do)
If anyone has the parts and/or money to build this with physical parts, the file for the mask can be downloaded here:
If there are any angles or sections that you’d like to see closeups of, I’d be more than happy to make additional renders.
I’ve been sitting on the edge of finishing this for months now, so it’s nice to finally share it, even if I hit a roadblock with the instructions.
UPDATE: The instructions are now complete:
https://drive.google.com/drive/■■■■■■■■■■■■■■■■■■■■■■■■■■■■■■■■■■■■■■■■■■■■■■■■■■■■■■■■
 Woah this guy is massive! The sheer fact that you managed to make him this large while keeping it proportionate and having the joints have friction is amazing!!! Awesome moc, it would be really cool to see it irl.
