This is incredible, that scaled up head looks really cool.
I’m really curious about the stability, seeing this thing in real life would be amazing. how has building this irl been going?
This is incredible, that scaled up head looks really cool.
I’m really curious about the stability, seeing this thing in real life would be amazing. how has building this irl been going?
Due to many reasons (car, house and overall trying to be a responsible grown up), as of today I’ve aquired “only” 98% of the pieces needed.
When I’ll have fewer expenses I’ll get all the pieces I’m missing to complete and test the old version (in time I’ll probably get also the pieces to mod it into the new version, but one step at a time).
What’s gonna be a problem to get, will be the metallic green hoses (if anyone can help, I’m only missing 2 of them right now).
I’ll also need to find someone to commission the mask.
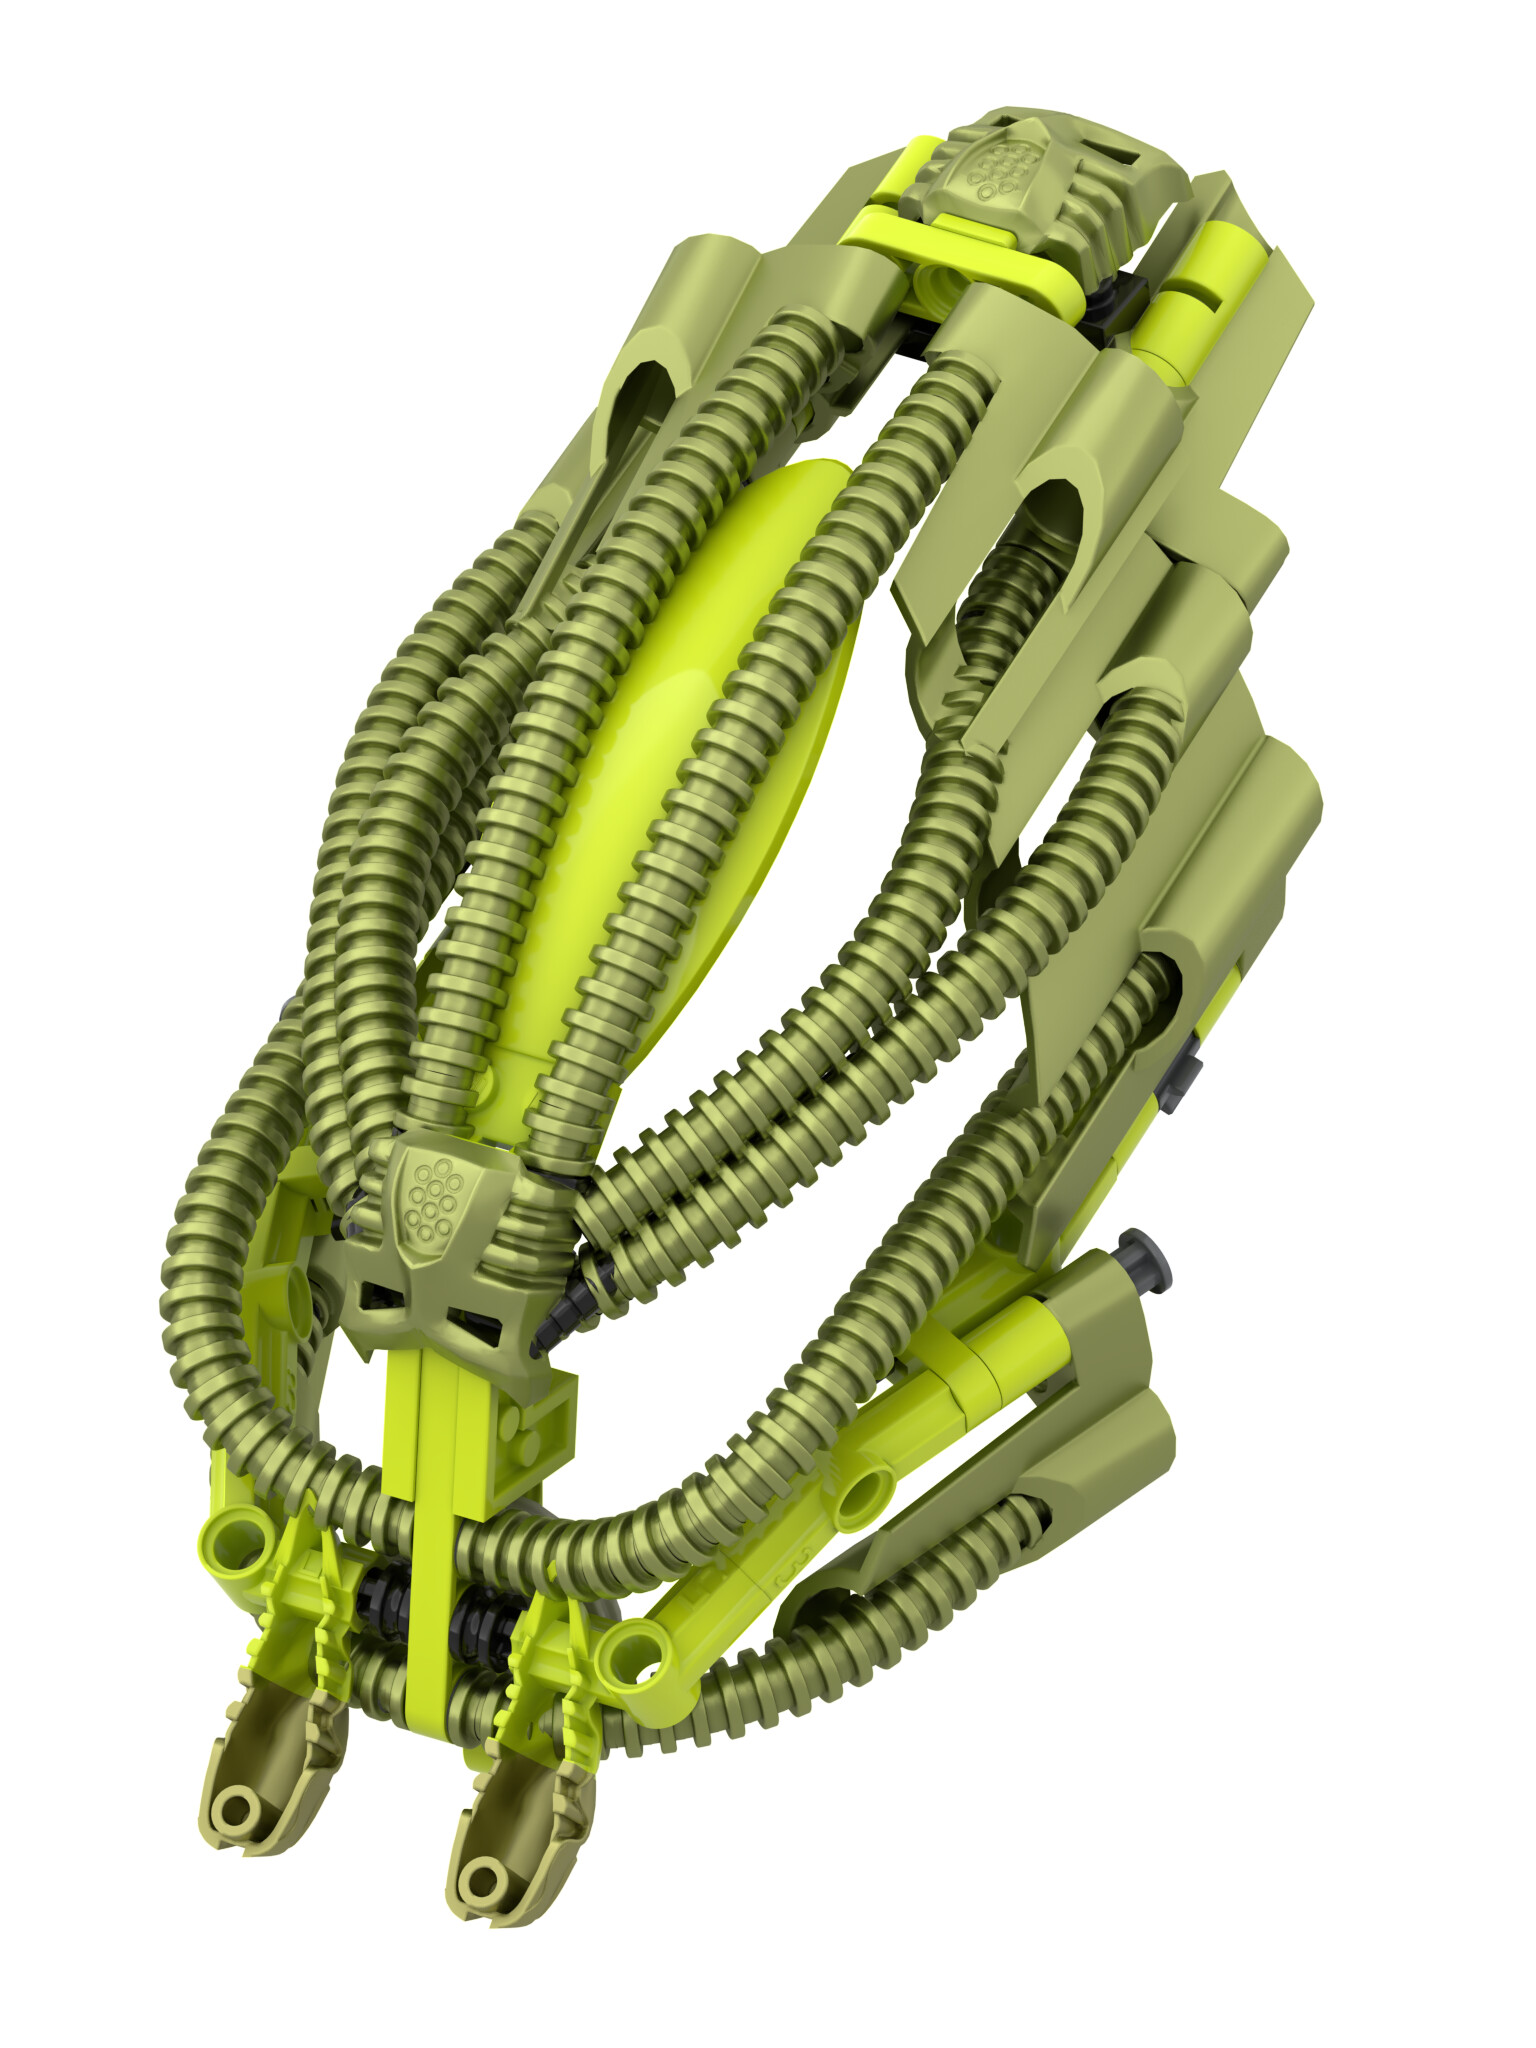
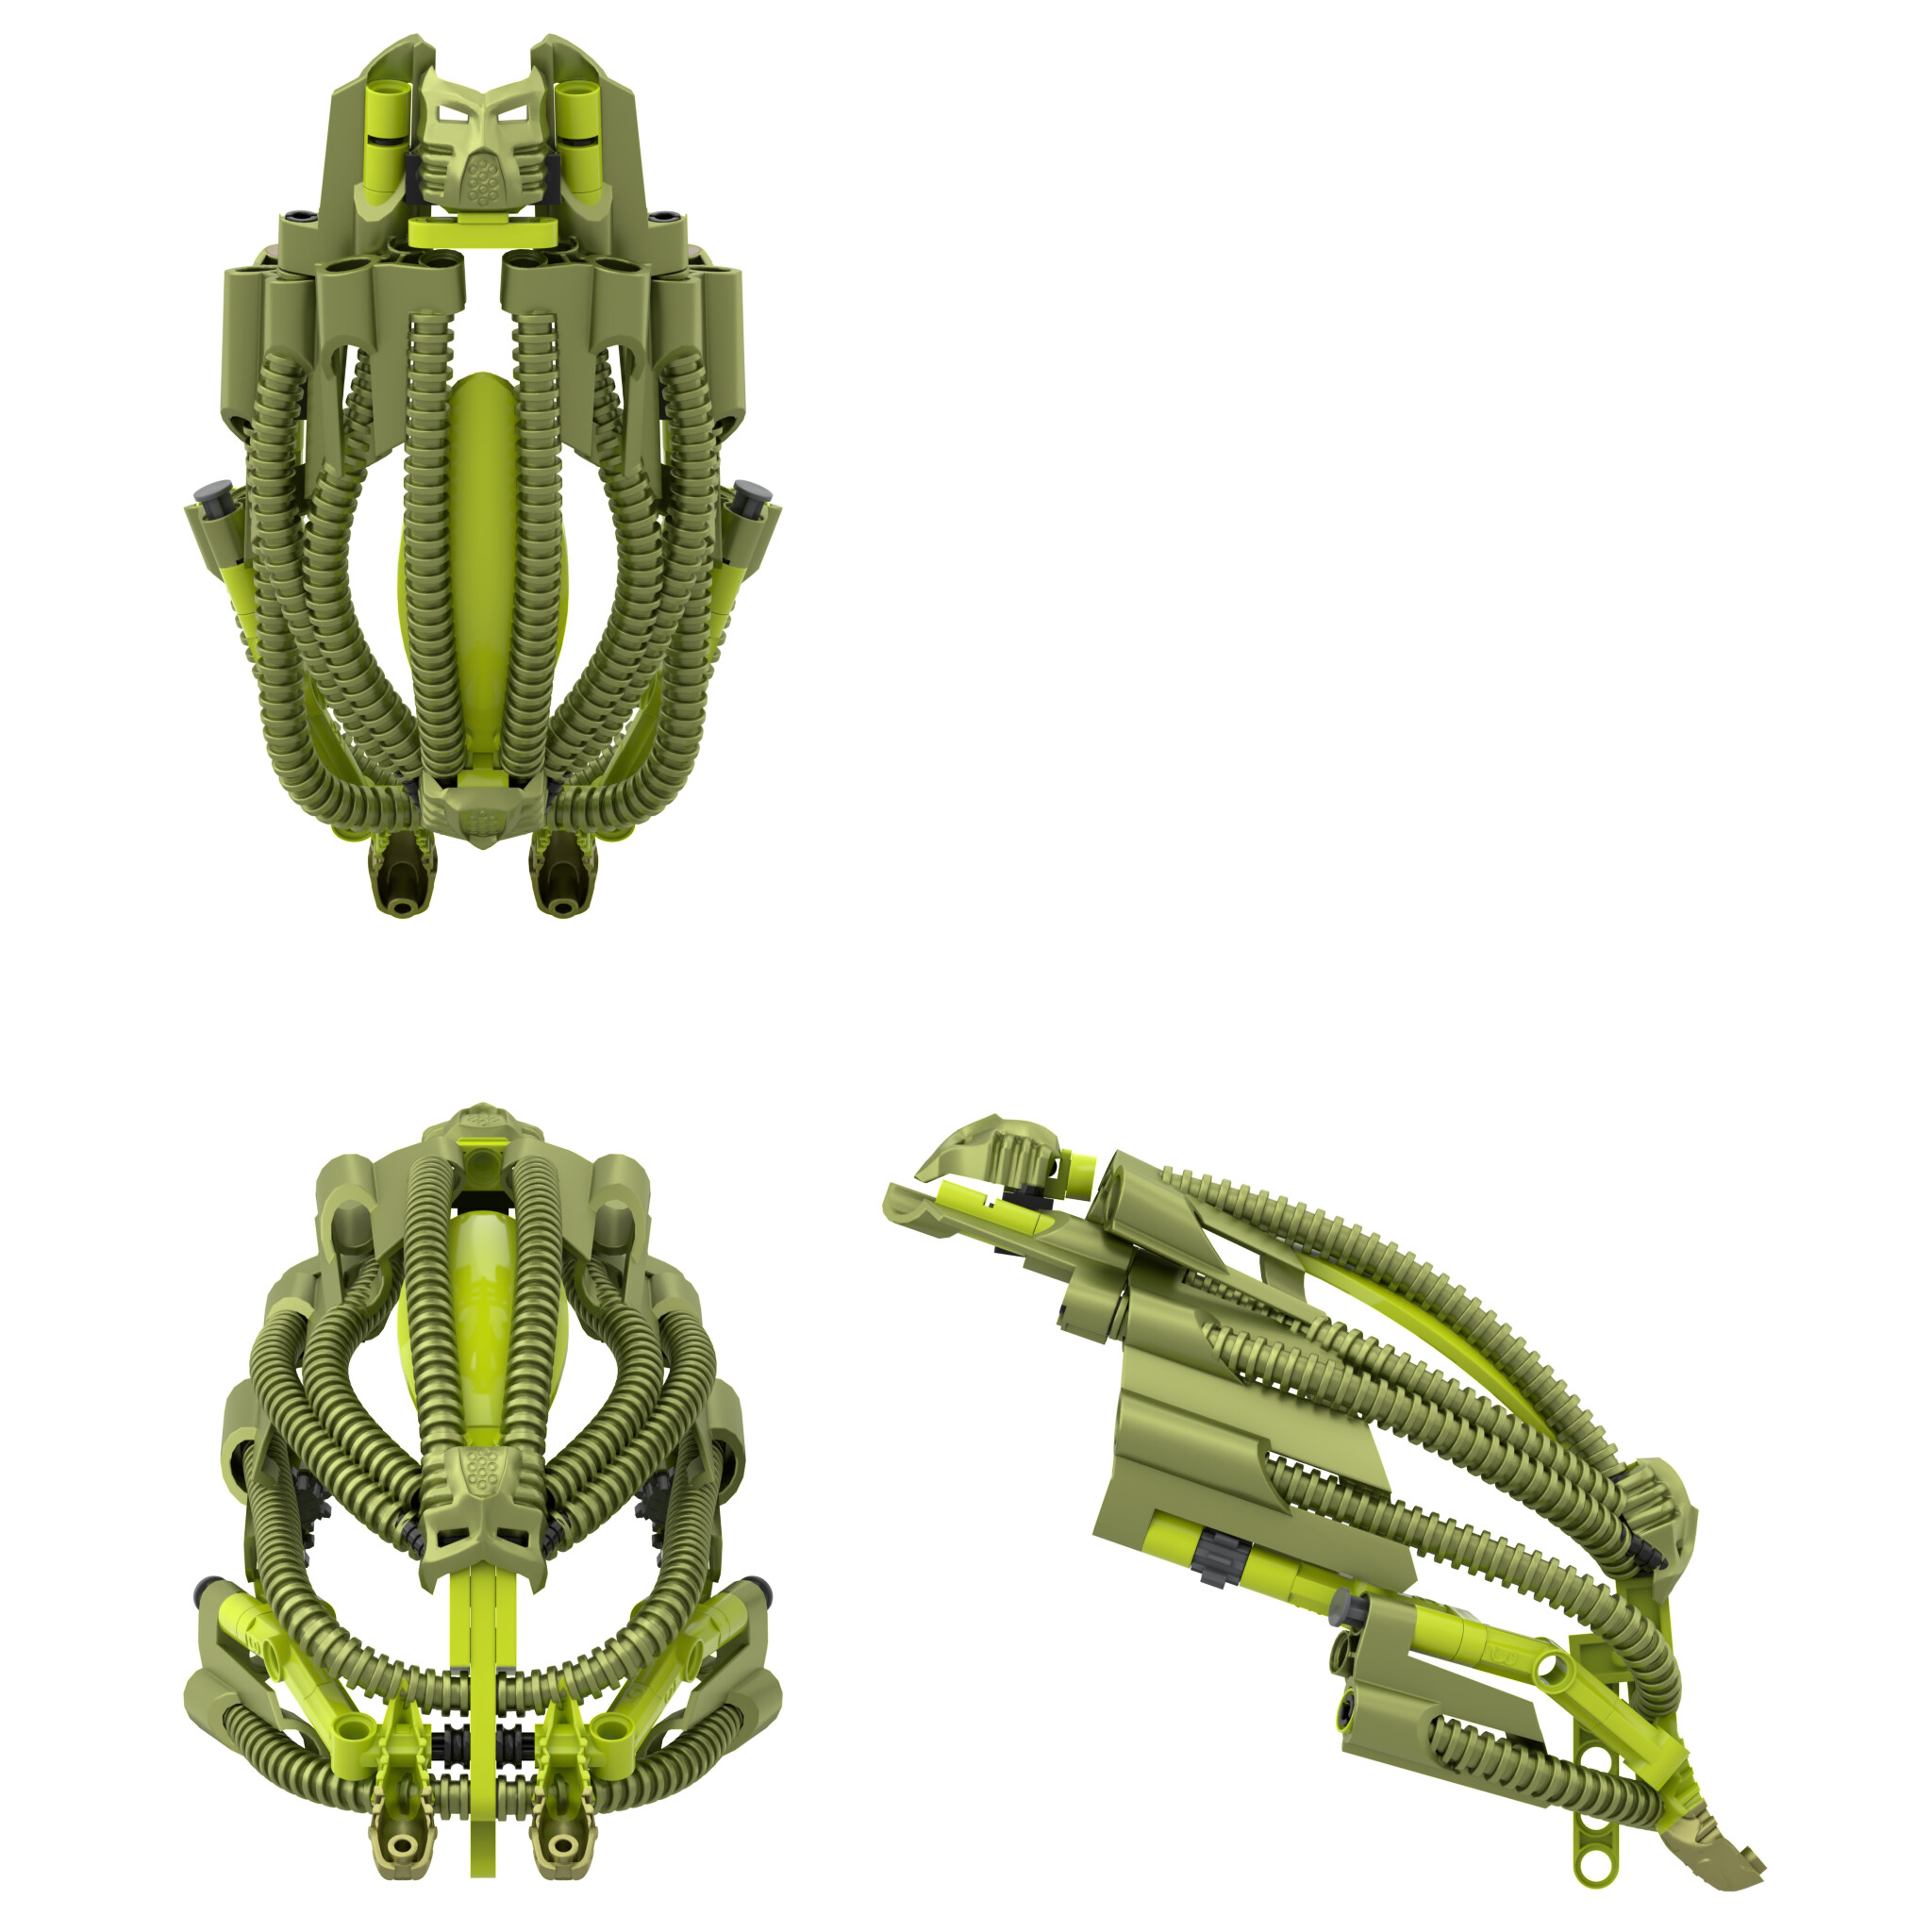
Thanks. This head was one of my first attempts at trying to match a specific shape, so I’m particularly proud of how it turned out.
For what it’s worth, a handful of them are just loosely slotted into the panels on the shield; it wouldn’t be a huge issue to skip a couple.
(Also, the new version uses one less hose; the one on his back has been replaced, and could easily be recoloured in the old version)
You got me thinking, and, although I disregarded the idea in the past, I decided to take a shot at making a purist mask over the last couple days:
Not shown is the numerous rubber bands that will be required to lock everything in place. While the mask can actually be built (i.e. I didn’t just pose a bunch of pieces next to each other in stud.io), there’s a lot of very loose connections and parts held in place by mechanical locking as opposed to actual connections between parts.
Ultimately, I suspect that this mask will be very tedious to build and pose in real life. It’s really a downgrade in every way compared to the 3d-printed mask except for the fact that this built mask is completely purist.
Finally, here’s how it looks on Bomonga:
That mask looks really cool still but it also requires a lot more of the already difficult to find hose pieces so yeah it still would be easier to to just use the original.
How are the Kraata at the front attached? They appear to be clipping through the angled connectors at the front of the mask.
I suppose the answer is
Yeah, the above comment is correct; the kraata will just be strapped to the front with rubber bands looped around the axles and tubes on the front of the mask.
They definitely are; I just forgot to reposition them after making some adjustments to the front of the mask. There’s nothing stopping them from sitting slightly farther forward.
Very minor update:
Around the time I made the purist mask above, I also started an update on Bomonga’s forearm that would replace the long G1 sockets (Part 50898) with newer CCBS style sockets, because they are stronger, more common nowadays, and less breakable.
However, I stalled out on that around three months ago, and hadn’t touched it since. Today, though, I revisted it and everything suddenly clicked, and the update is complete (with some parts removed for clarity and the sockets highlighted in pink):
I had always wanted to use CCBS-style sockets for this build for the reasons discussed above, but I had originally let it slide for the wrist friction because I figured that even broken sockets would still be strong enough for that purpose. With this update, though, the only old-style sockets left on the model are in the fingers (which I want to replace even more than the wrist ones, I just haven’t figured it out yet).
Also, on an unrelated note, I noticed that Lego just recently added 9L “flip-flop” liftarms to the repertoire:
Hopefully 5L can be next.
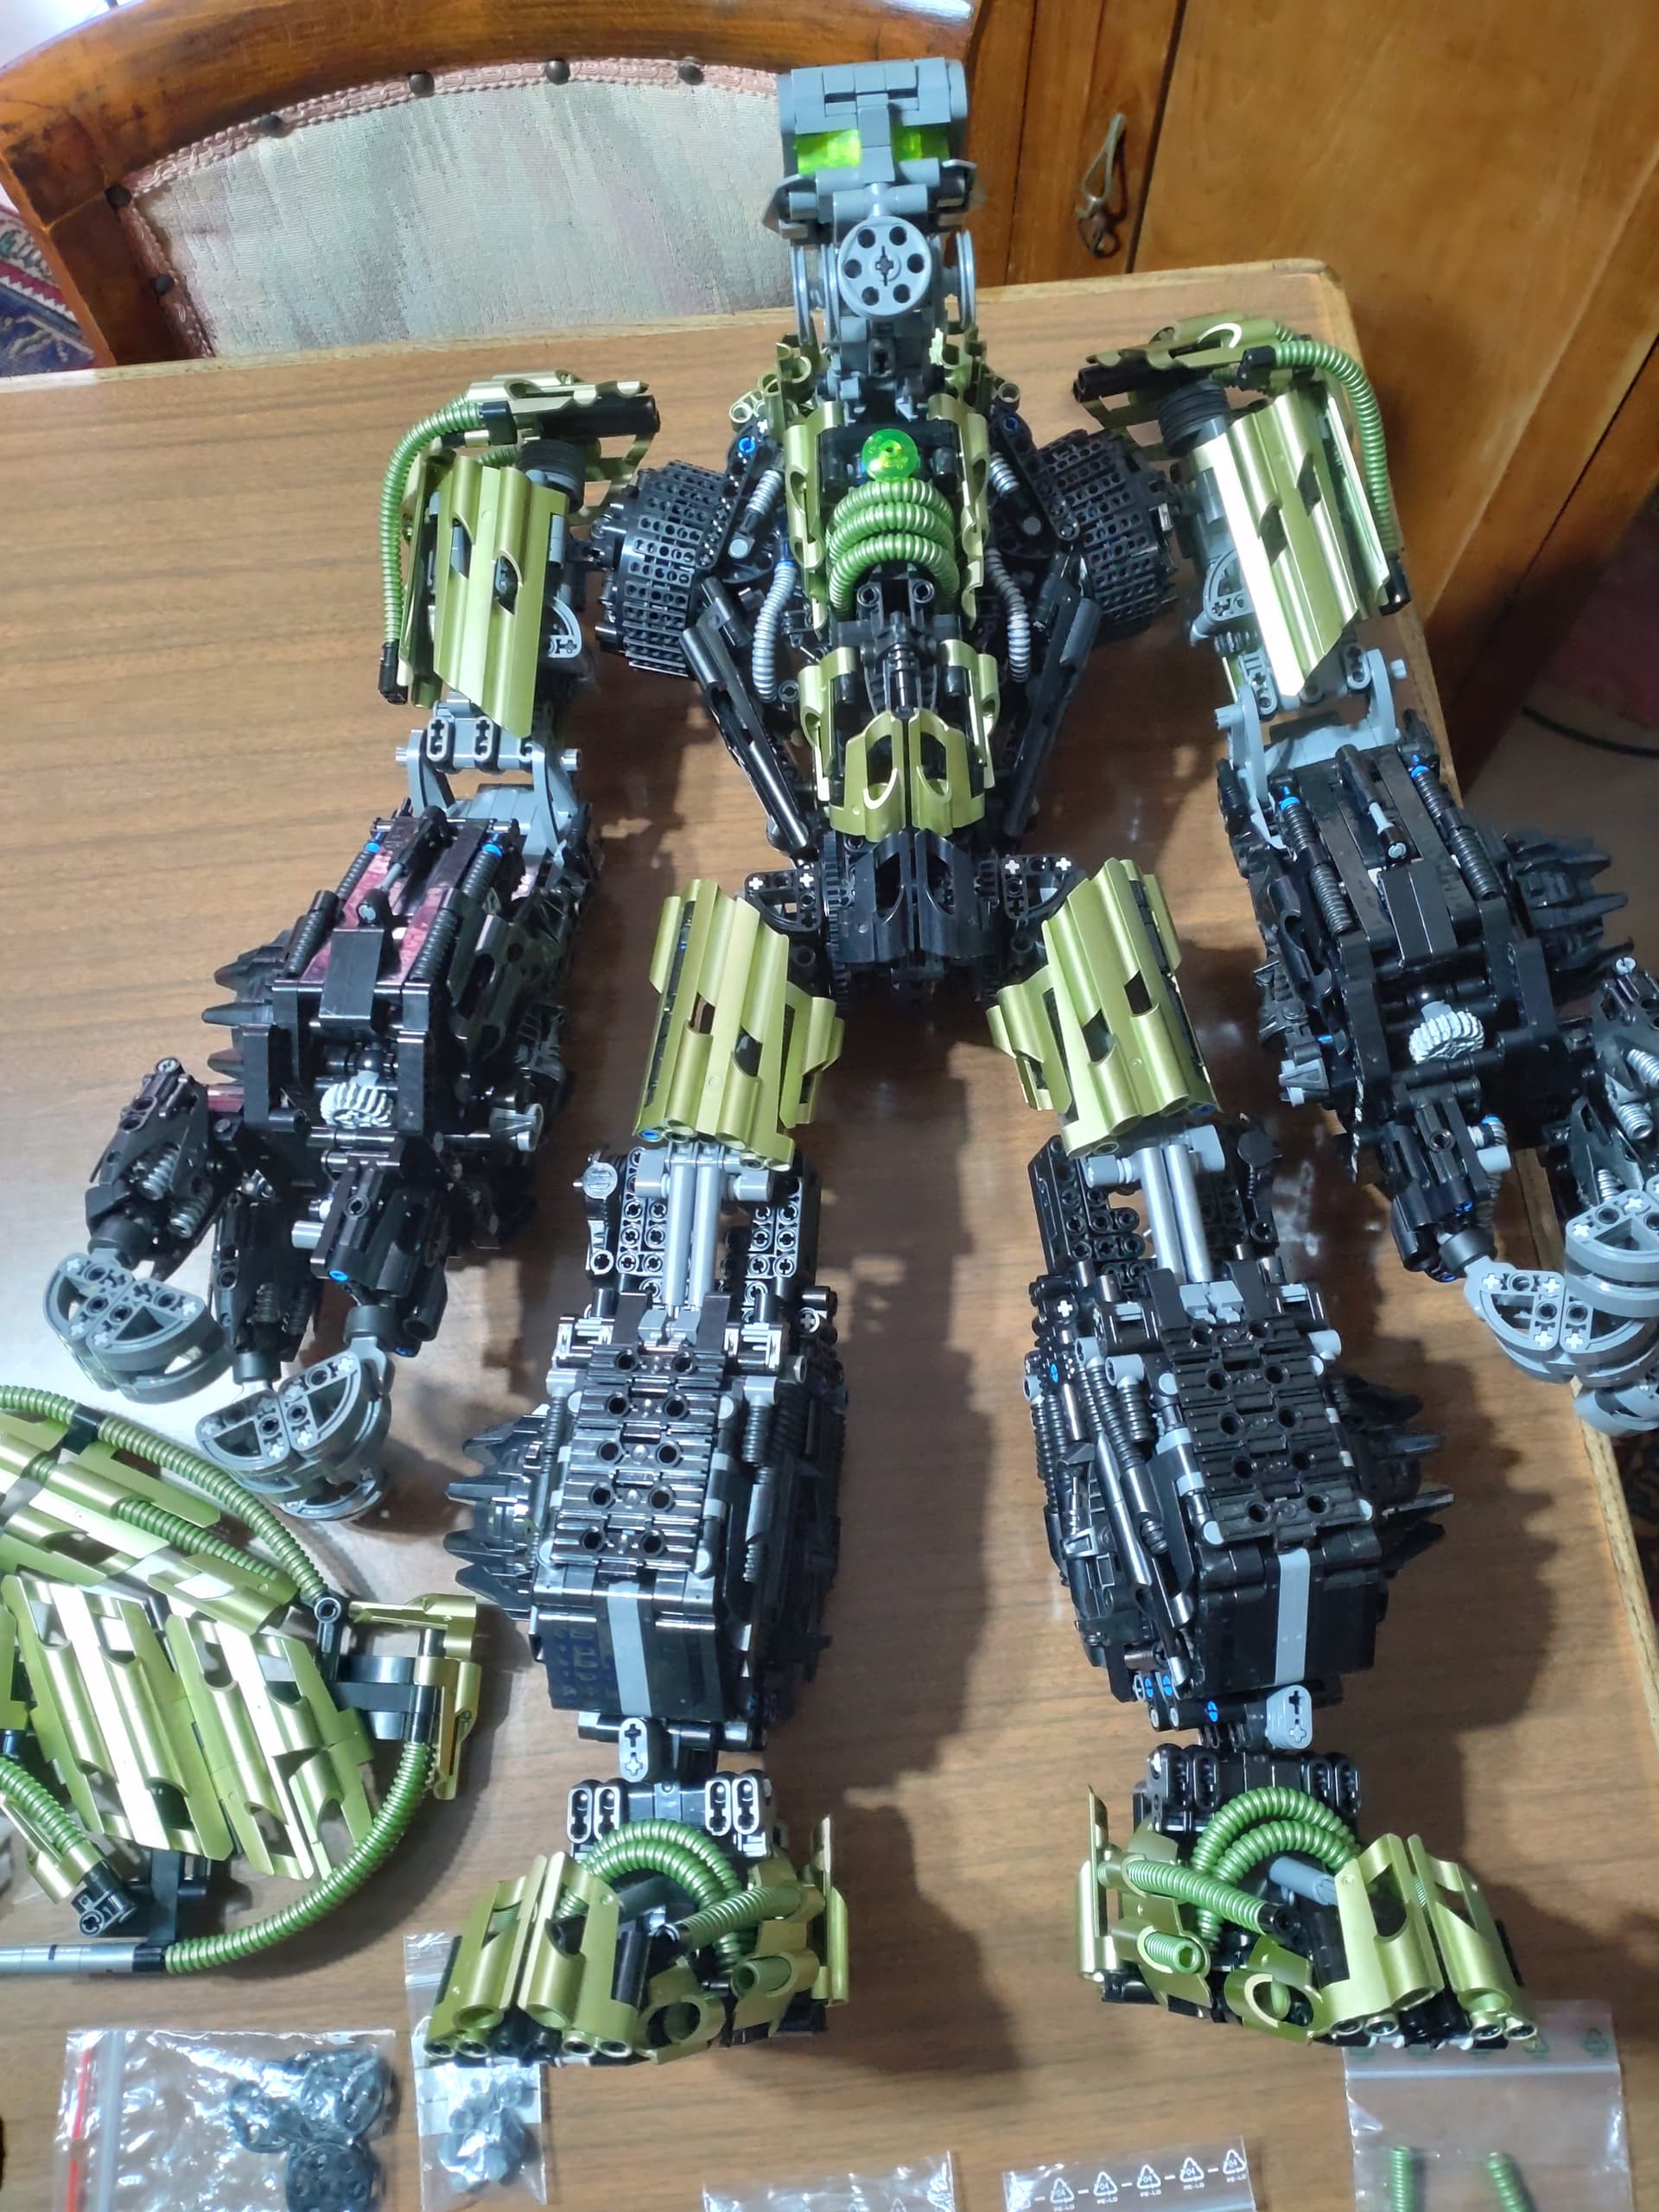
UCS Bomonga exists and can hurt your wallet
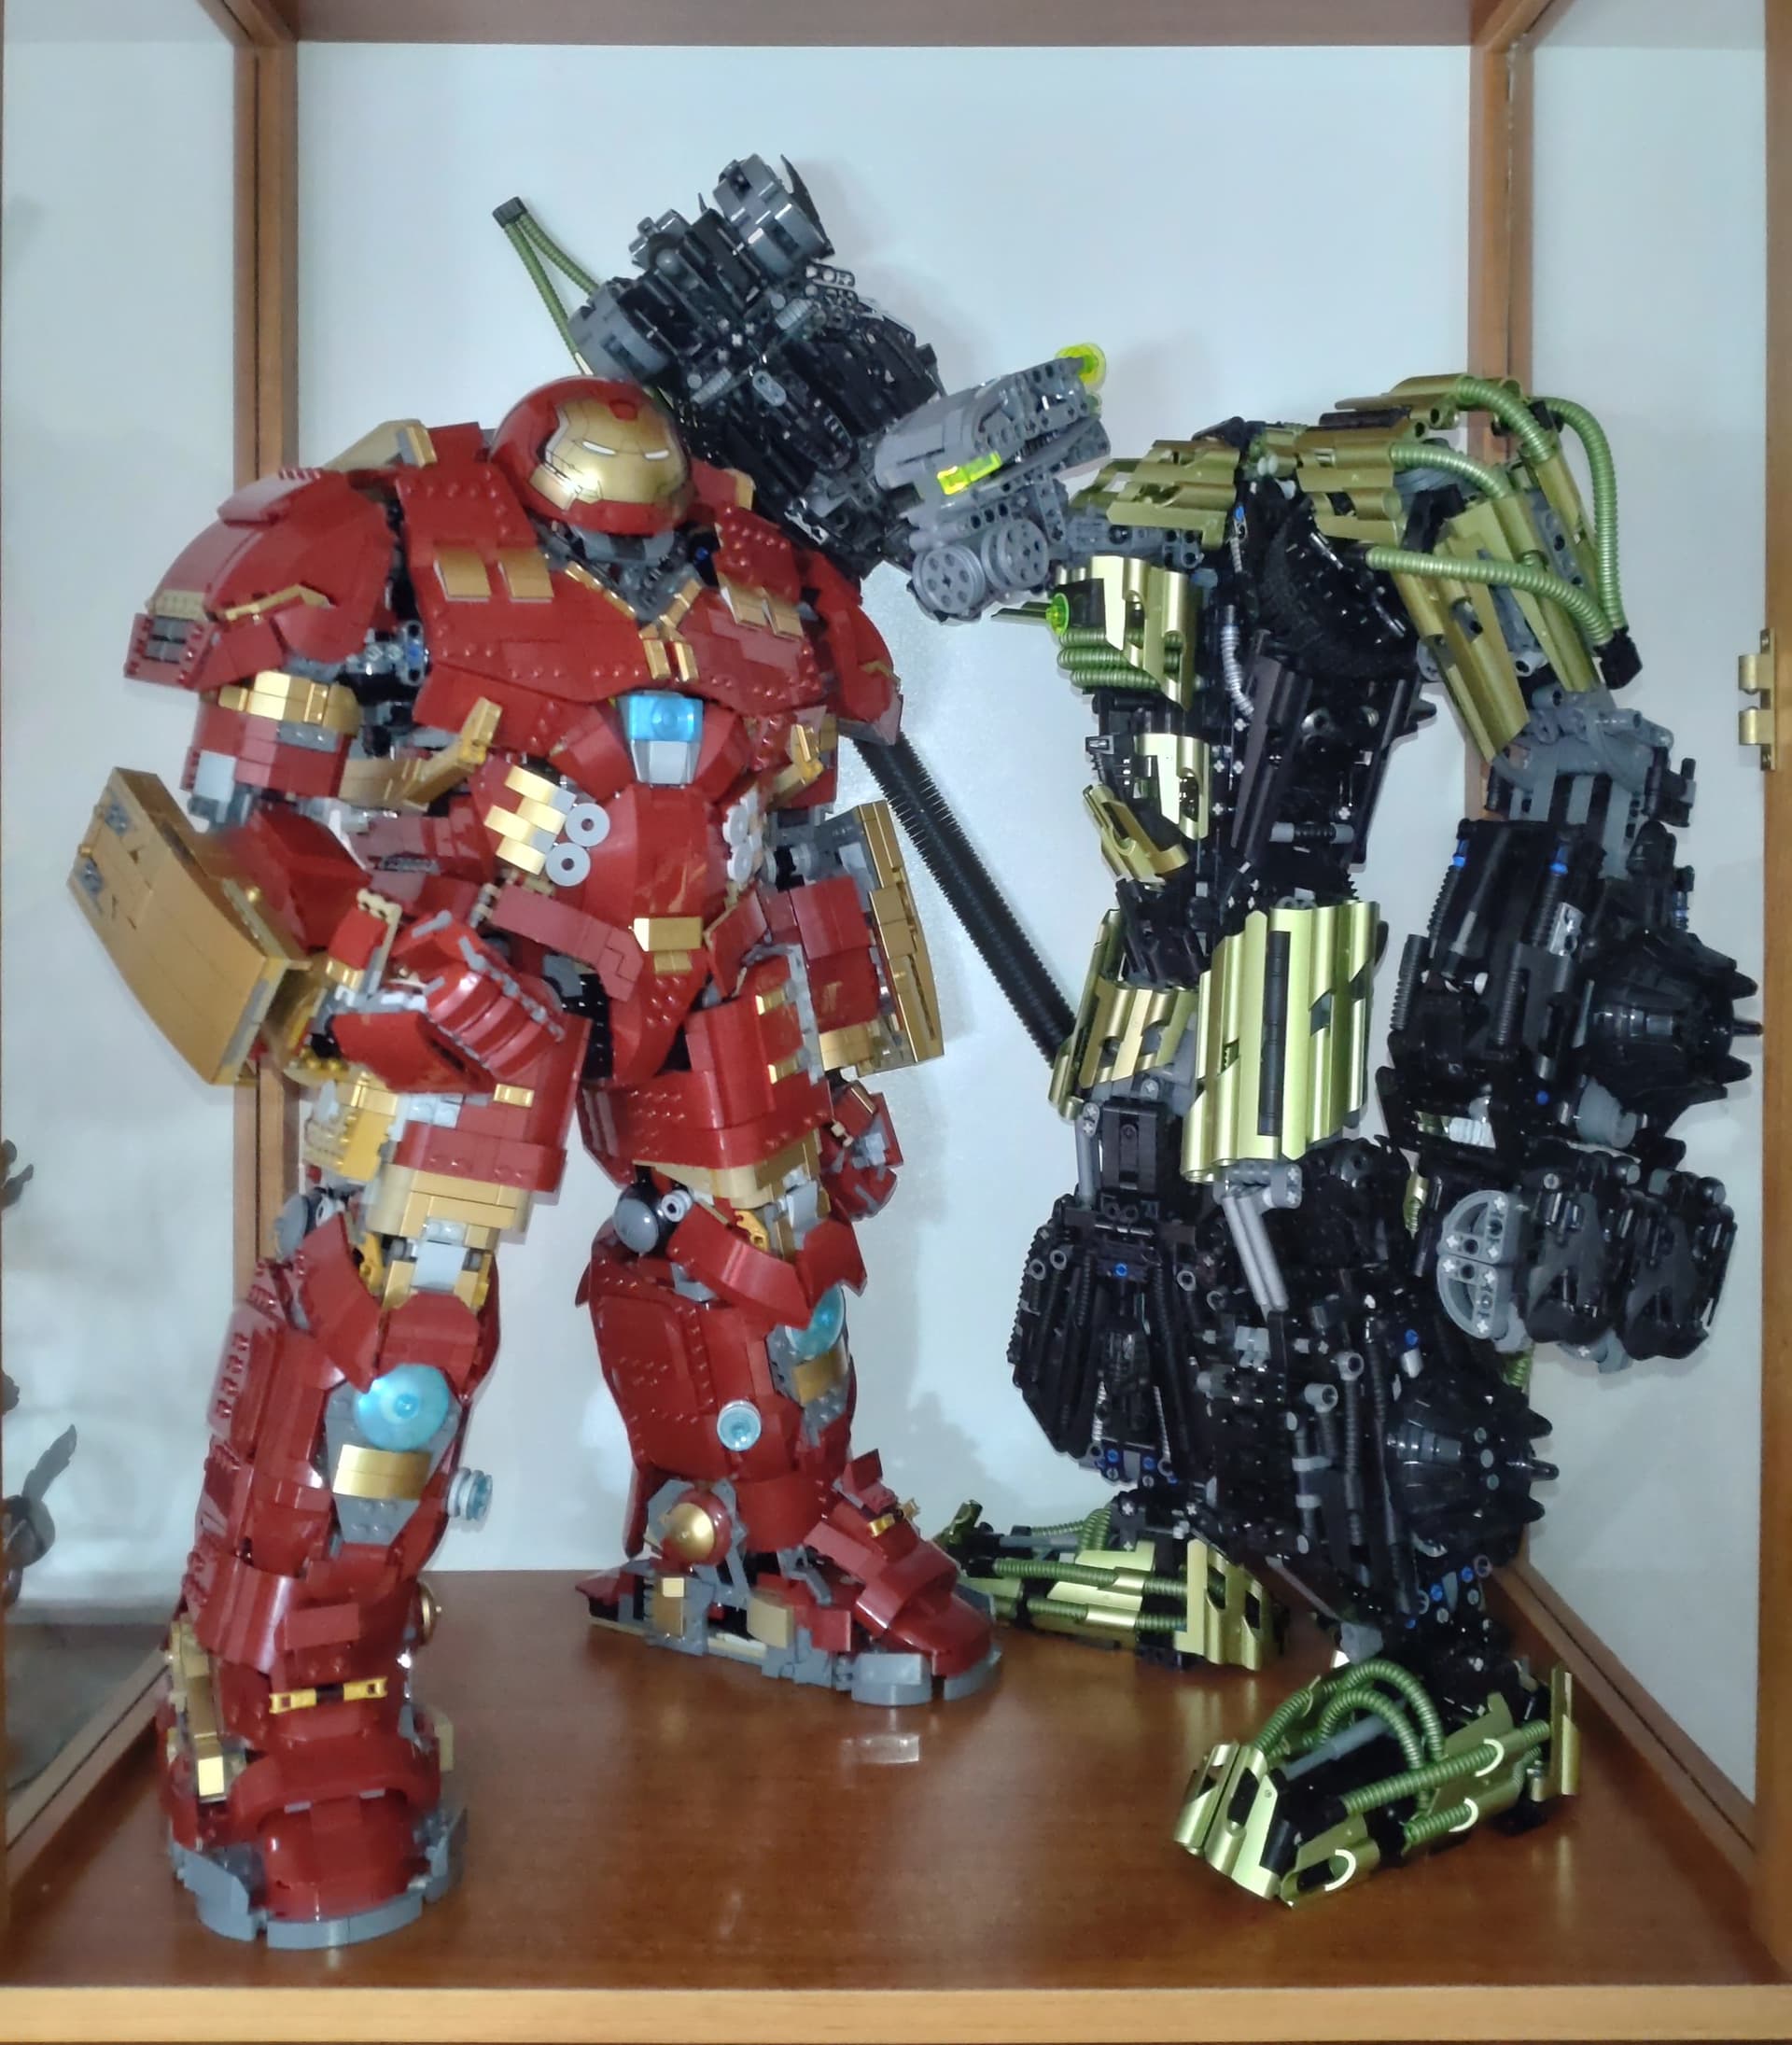
You are not kidding, that’s huge ![]() . Great job so far, can’t wait to see the moc In some poses of him crushing some rahkshi.
. Great job so far, can’t wait to see the moc In some poses of him crushing some rahkshi.
The size of this Bomonga and the relative amount of pain I feel in my wallet are directly correlated
There are portions of this that, seeing it in real life, could definitely be better, but good gravy this thing is impressive. I don’t know if it could get much more detailed with the parts selection at hand.
Fantastic work Jerminator, and for you D-E_GOISIS to have the gall to assemble this creation takes more guts that I’ve got for this sort of thing. Fortune (and metallic green it seems) favors the bold ![]()
Ransom Fern version, nice ![]()
Godzilla’s arch nemesis
![]() he could crush the hulk buster head with one hand.
he could crush the hulk buster head with one hand.
Wow.
It’s absolutely surreal seeing something in real life that, until now, only existed on my computer screen. I can’t believe how awesome this looks. Thank you for building this in real life.
Now, to address the flaws, and my plans to try to tackle them:
How about the ankles? Do those four ball joints per ankle actually hold it up?
This is definitely unexpected. I don’t have very much experience with physical turntables, so do you think this is something that could be mitigated by using fresh, unworn turntables, or picking and choosing unusually perfect turntables? Or is it something that will happen to any turntable, no matter what?
Either way, I’ll see what I can do about building the joint stronger, though it’ll be trickier since the issue derives from imperfections that only exist with physical parts. At first glance, my two basic angles of attack are to either reinforce the turntable itself, or switch over to spur gear meshing (since the bevel meshing currently being employed on those joints is far more prone to skipping).
I might actually be able to get my hands on a physical turntable in the coming days, though I don’t have a ton of access to other parts.
(Just to be clear, you’re only referring to the large 60T turntable skipping, right? Not the 28T turntables in the newer version of the arm?)
Unlike the turntables, I absolutely anticipated this as a problem. This is another thing that’s basically impossible to fix in stud.io, but my rough idea is just make tiny adjustments to the tube attachment points where necessary, either by adding spacers under the tube or simply using black tubes of different lengths (when appropriate).
Luckily, the hand (and the thumb-side of the hand in particular) were already next on the chopping block to be redesigned.
I had been vaguely wondering if this would end up being an issue, and my planned fix was the same as yours, to just use an obnoxious amount of pins (on top of the already-obnoxious amount of pulley wheels).
All that being said, there was actually one more potential problem area I was hoping for feedback on: the tread links around his shoulders. Do they snag on any of the surrounding parts? Do they obstruct the shoulder rotation in any way?
What portions did you have in mind? I’m already looking at a number of redesigns, so I can see what I can do about the things you noticed as well.
This isn’t surprising. Last time I checked the parts list against BrickLink, it required more Metallic Green tubes than were on all of BrickLink.
In closing, I want to thank you again so much for taking the time (and spending the money) to build this in real life, not only because it looks awesome, but because it also gives me feedback for improving on the design. I don’t know how realistic this is, but it’s my end goal that, with enough feedback and improvement, this model will be able to stand and hold a pose on its own just as easily as any official Bionicle set.
Well, biggest one (no pun intended) is one that’s going to be just a little more trouble than it’s worth to solve, that being the proportions are just slightly off compared to the original. The other is what was mentioned already, that being the turntables not holding the weight, which unfortunately I know from experience with these turntables.
The easiest solution is to make some kind of secure (technic) connection to the inside of the hip (or outside of the shoulder) that attaches further inside the torso and holds it up per se, to keep the weight of the joint from grinding the turntable - depending on the age of the piece, it can permanently damage it if left unaddressed. The other solution is to so thoroughly bulk up the inside of the turntable that the turntable is more of less cosmetic, but just glancing at the model I don’t think that’s gonna be an option.
maybe it would help if I actually looked at the stud.io file at some point ![]()
That’s interesting, because my top priority when designing Bomonga was to ensure that all of his joints were spaced exactly 3x further apart. At one point, I even completely redesigned the ankle (including half of the foot and half of the shin) just to shorten his legs by a single stud. To my knowledge, the only objective joint discrepancies in the model are the shoulder angle (24.19 degrees instead of the 22.5 degrees of the Metru torso) and the finger length.
Or did you just mean the shaping in general? I will admit that there are some areas that “ballooned” ever so slightly past the volumes of the original design, most notably in the thighs.
I haven’t even looked at the model yet, but this is one of my basic ideas right now, yeah. Another thing I’m considering is making some kind of “clamp” to really force the turntable to stay together. Maybe I can combine the two ideas by adding an additional “axle” of sorts through the middle of the turntable that can take some radial load and apply axial compression to the turntable?
The problem I’m going to encounter with any of these solutions is that there is basically no space inside the model to work with. The original version that @D-E_GOISIS built did have some tiny open areas in the torso, but the newest version of the stud.io model (which I may not have shared yet) filled in all these gaps with additional joint friction and some mechanical detail, to the tune of 1200 additional parts between the two versions.
The ankles of v1 are fine exept for the heel pistons, which were connected with an illegal technique: the 3l smooth pin has a stopper inside preventing a bar been inserted all the way. So it was just a matter of securing the pistons’ base to the foot.
I believe it will happen no matter how new or perfect the turntables are. I should also add that due to the way you designed the gears that link to the turntables, they pack really a lot of friction, so much so that if you do not push the turntables together while articulating, they’ll just add to the forces that try to separate them, making the turntable jump over the gears’ teeth instead of cogging.
Yes, the problem is just with the big ones.
While they look cool, they’re a pain when it comes to articulating the shoulder: using the amount of treads you put in your model will result in the tread been loose and hanging/flopping around. Using 1 piece less (as I did) will result in having the tread be very tightly wrapped around the shoulder, but then you’ll have to hold the tread in place when articulating the shoulder. This will still not guarantee that the tread won’t come undone while rotating the shoulder.