I know it’s possible to make lego pieces in blender and then export them into either Stud.io or 3D-Printing software, but how would you go about extracting 3D-models of LEGO pieces from Stud.io in order to export them into 3D-Printing software, and doing so without corrupting or losing said pieces from your Stud.io parts inventory?
How would you be sure that the parts you were 3D-Printing would come out in the same scale as the real LEGO pieces they were replicating (particularly in the realm of axles, pins, holes, and ball/cup joints)?
Is this process different depending on whether you use filament printing or resin printing?
P.S. Public Service Announcement:
Concerning custom parts made by the 3D-Modeling Community: if at all possible, please purchase these pieces from the designers instead of using this method to bootleg these pieces for free, so that support will be given where it is due.
Stud.io models can be opened in Part Designer, and exported as .obj
You CAN 3D print them, but almost all of them are not made for 3D printing and will not be compatible with official parts. All of my parts are made specifically for 3D printing, and have separate STL files
To get the right size I put a piece that is for Printing next to it and scale it to fit the other pieces size. I only did this with a Kakama so I could take a different mask and scale it in a way that the Stud fits with the axle of the other mask.
It worked on the Kakama. IDK about other pieces.
I just remembered: I tried Lhikans swords. They don’t work with printing.
3D Printed sockets can explode due to extra material not being cleaned from the socket properly, the size of the socket being incorrect, or the socket being modeled incorrectly
interesting that you’d bring this up, I recently went on the exact same tangent, and arrived at the same results people are talking about here. My personal objective was based on a youtube video I can’t seem to find where someone printed an upscaled bohrok.
When it would come to making them D.I.Y., have you found any instances in which the process is different for constraction pieces than it is for other 3D-Printed models?
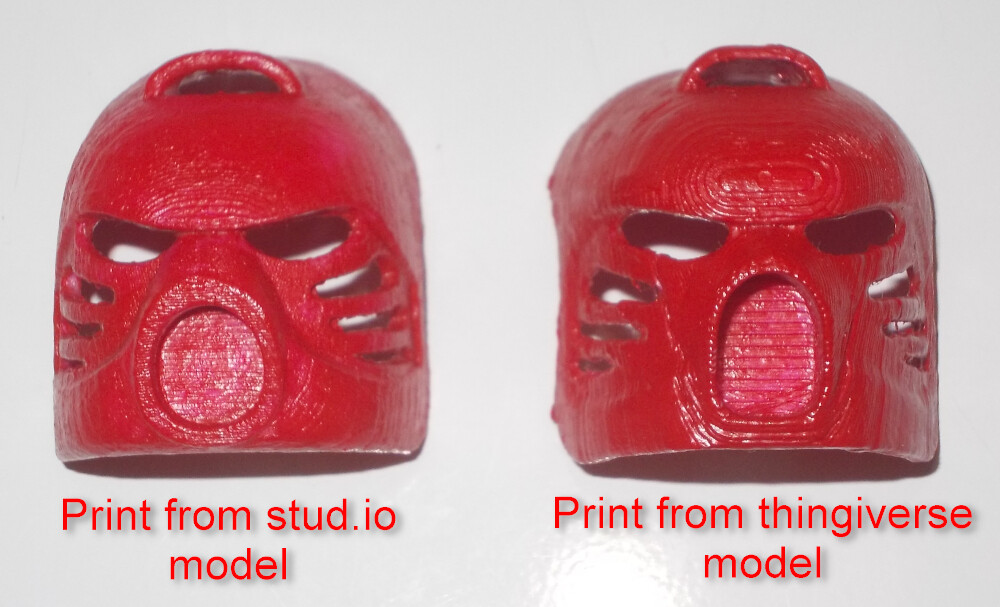
I tried printing a hau from studio once and it worked pretty well but I struggled to get it to the right scale, I think I ended up printing it very slightly too small but it looks a lot better than the weird inaccurate one on thingiverse partially because I printed it at a higher resolution and it cleaned up better
it fits ok on a mata head and a metru head, but it’s wobbly on both, moreso on the metru head.
I think that’s just because (like I said before) I printed it too small.
I actually had to coat the stud in a few thin layers of superglue so there would be enough friction to hold it in place.
Models are different if people aren’t using the same way to model
Almost all printers, and 3D slicers can also be blamed for differences in the printed model. Even printers of the same type can have different results, due to the print settings or how well the printer has been taken care of
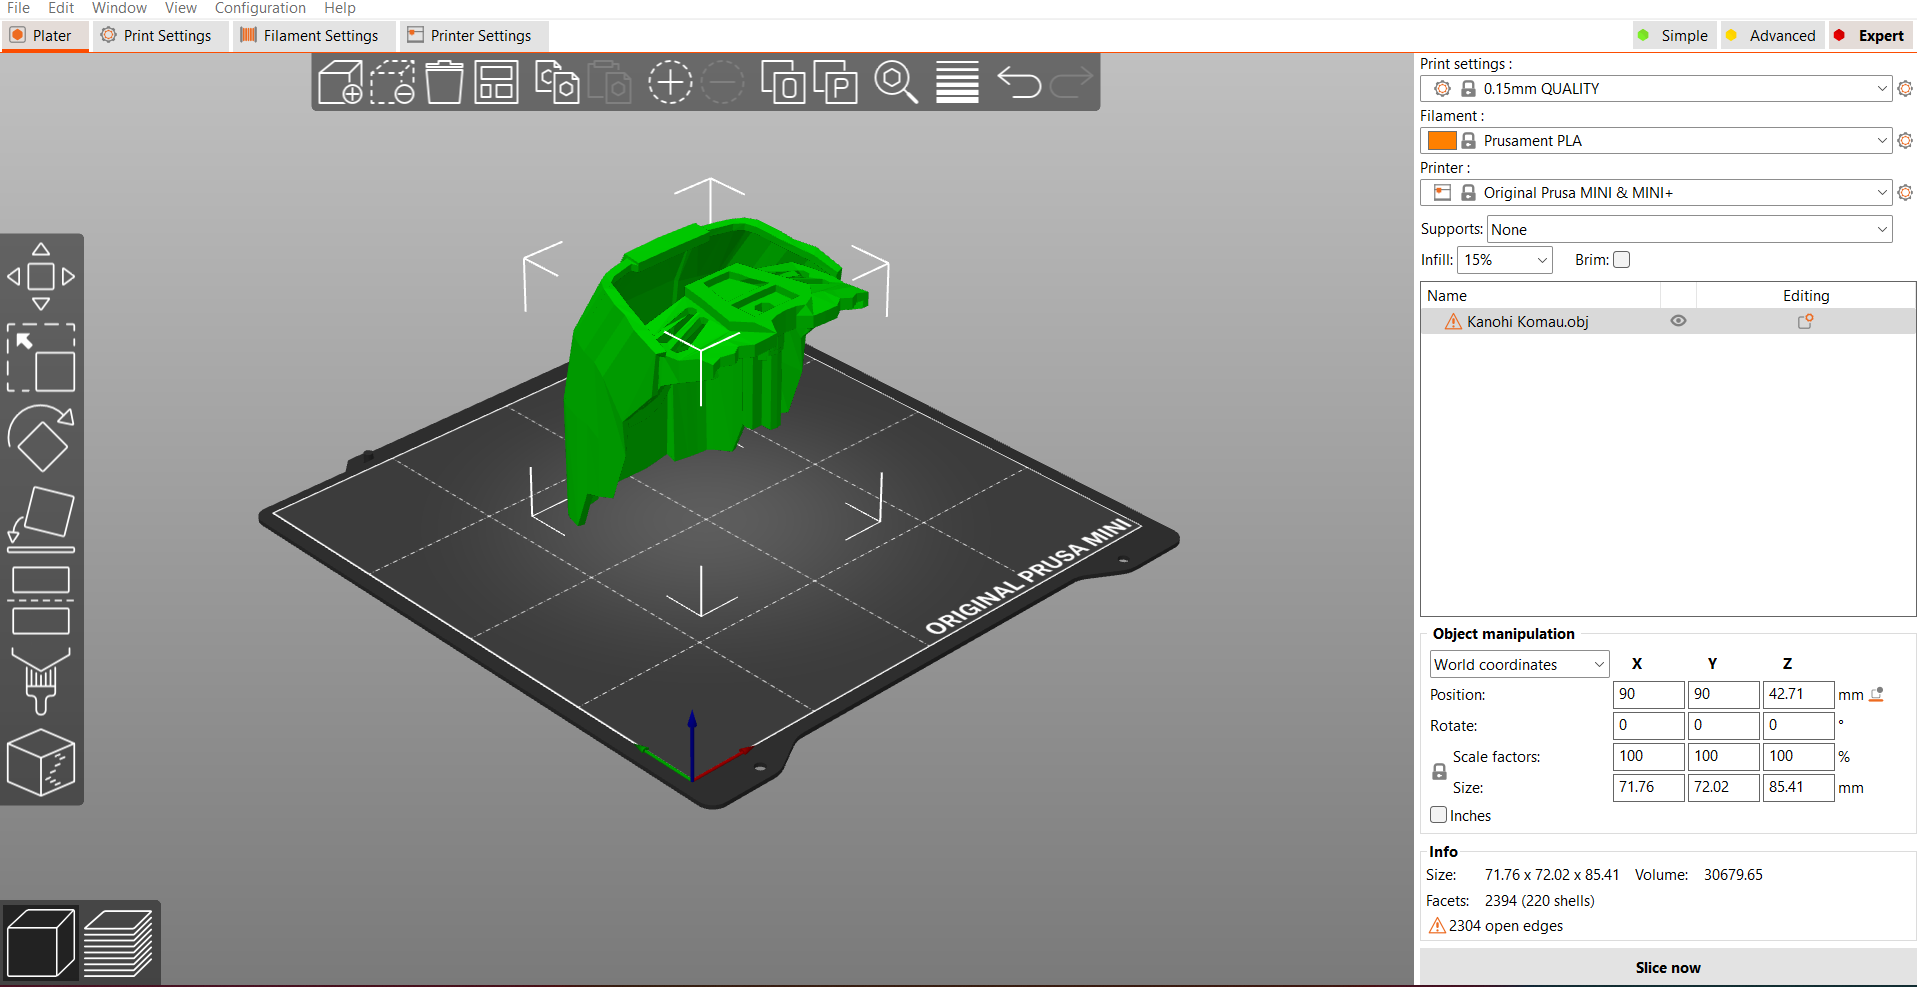
Thanks to this conversation, I successfully exported a 3d model from Parts Designer into Prusaslicer for 3d printing! Only problem is that the models show up in Prusaslicer much bigger than they should be. Does anybody know how to accurately resize the models? Even better if anybody knows where to find already properly sized STL models of official Bionicle pieces. I found a few on Thingverse, but not a lot.
I’ve experienced issue before with PartDesigner sometimes scaling models up 2.5x. Try dividing the scale by 2.5, or multiplying by 0.4.
It could also be an issue with conversions between units, in which case the scaling factor would be 2.54, or possibly 25.4 if it’s scaling between inches and millimeters.
If these scaling factors don’t work, could you post an image of how much bigger the part is?
Thanks for the fast reply!
Here’s a photo for reference. I took the Great Komau model from Studio (Biopack) and exported it as an OBJ file through Part Designer. When I imported it into Prusaslicer, it looked like this: