Interesting idea, but I don’t know if physically it’s possible though, the 4L sounds a bit too long imo.
I’m leaning towards a 3L black axle or a 3L old dark gray hose like this:
BrickLink - Part 75c03 : LEGO Hose, Rigid 3mm D. 3L / 2.4cm [Hose, Rigid 3mm D.] - BrickLink Reference Catalog
The 4L rigid hose fits in the disk slot in the back of the head. I tried it with real pieces and it works better than a 3L one.
1 Like
Wow, lots of improvements in the recent IO models. I’ll update my IRL build once I get my parts back out in a couple weeks (I’m moving so need to get everything reset up). Thank you all for trying to get this model finished!
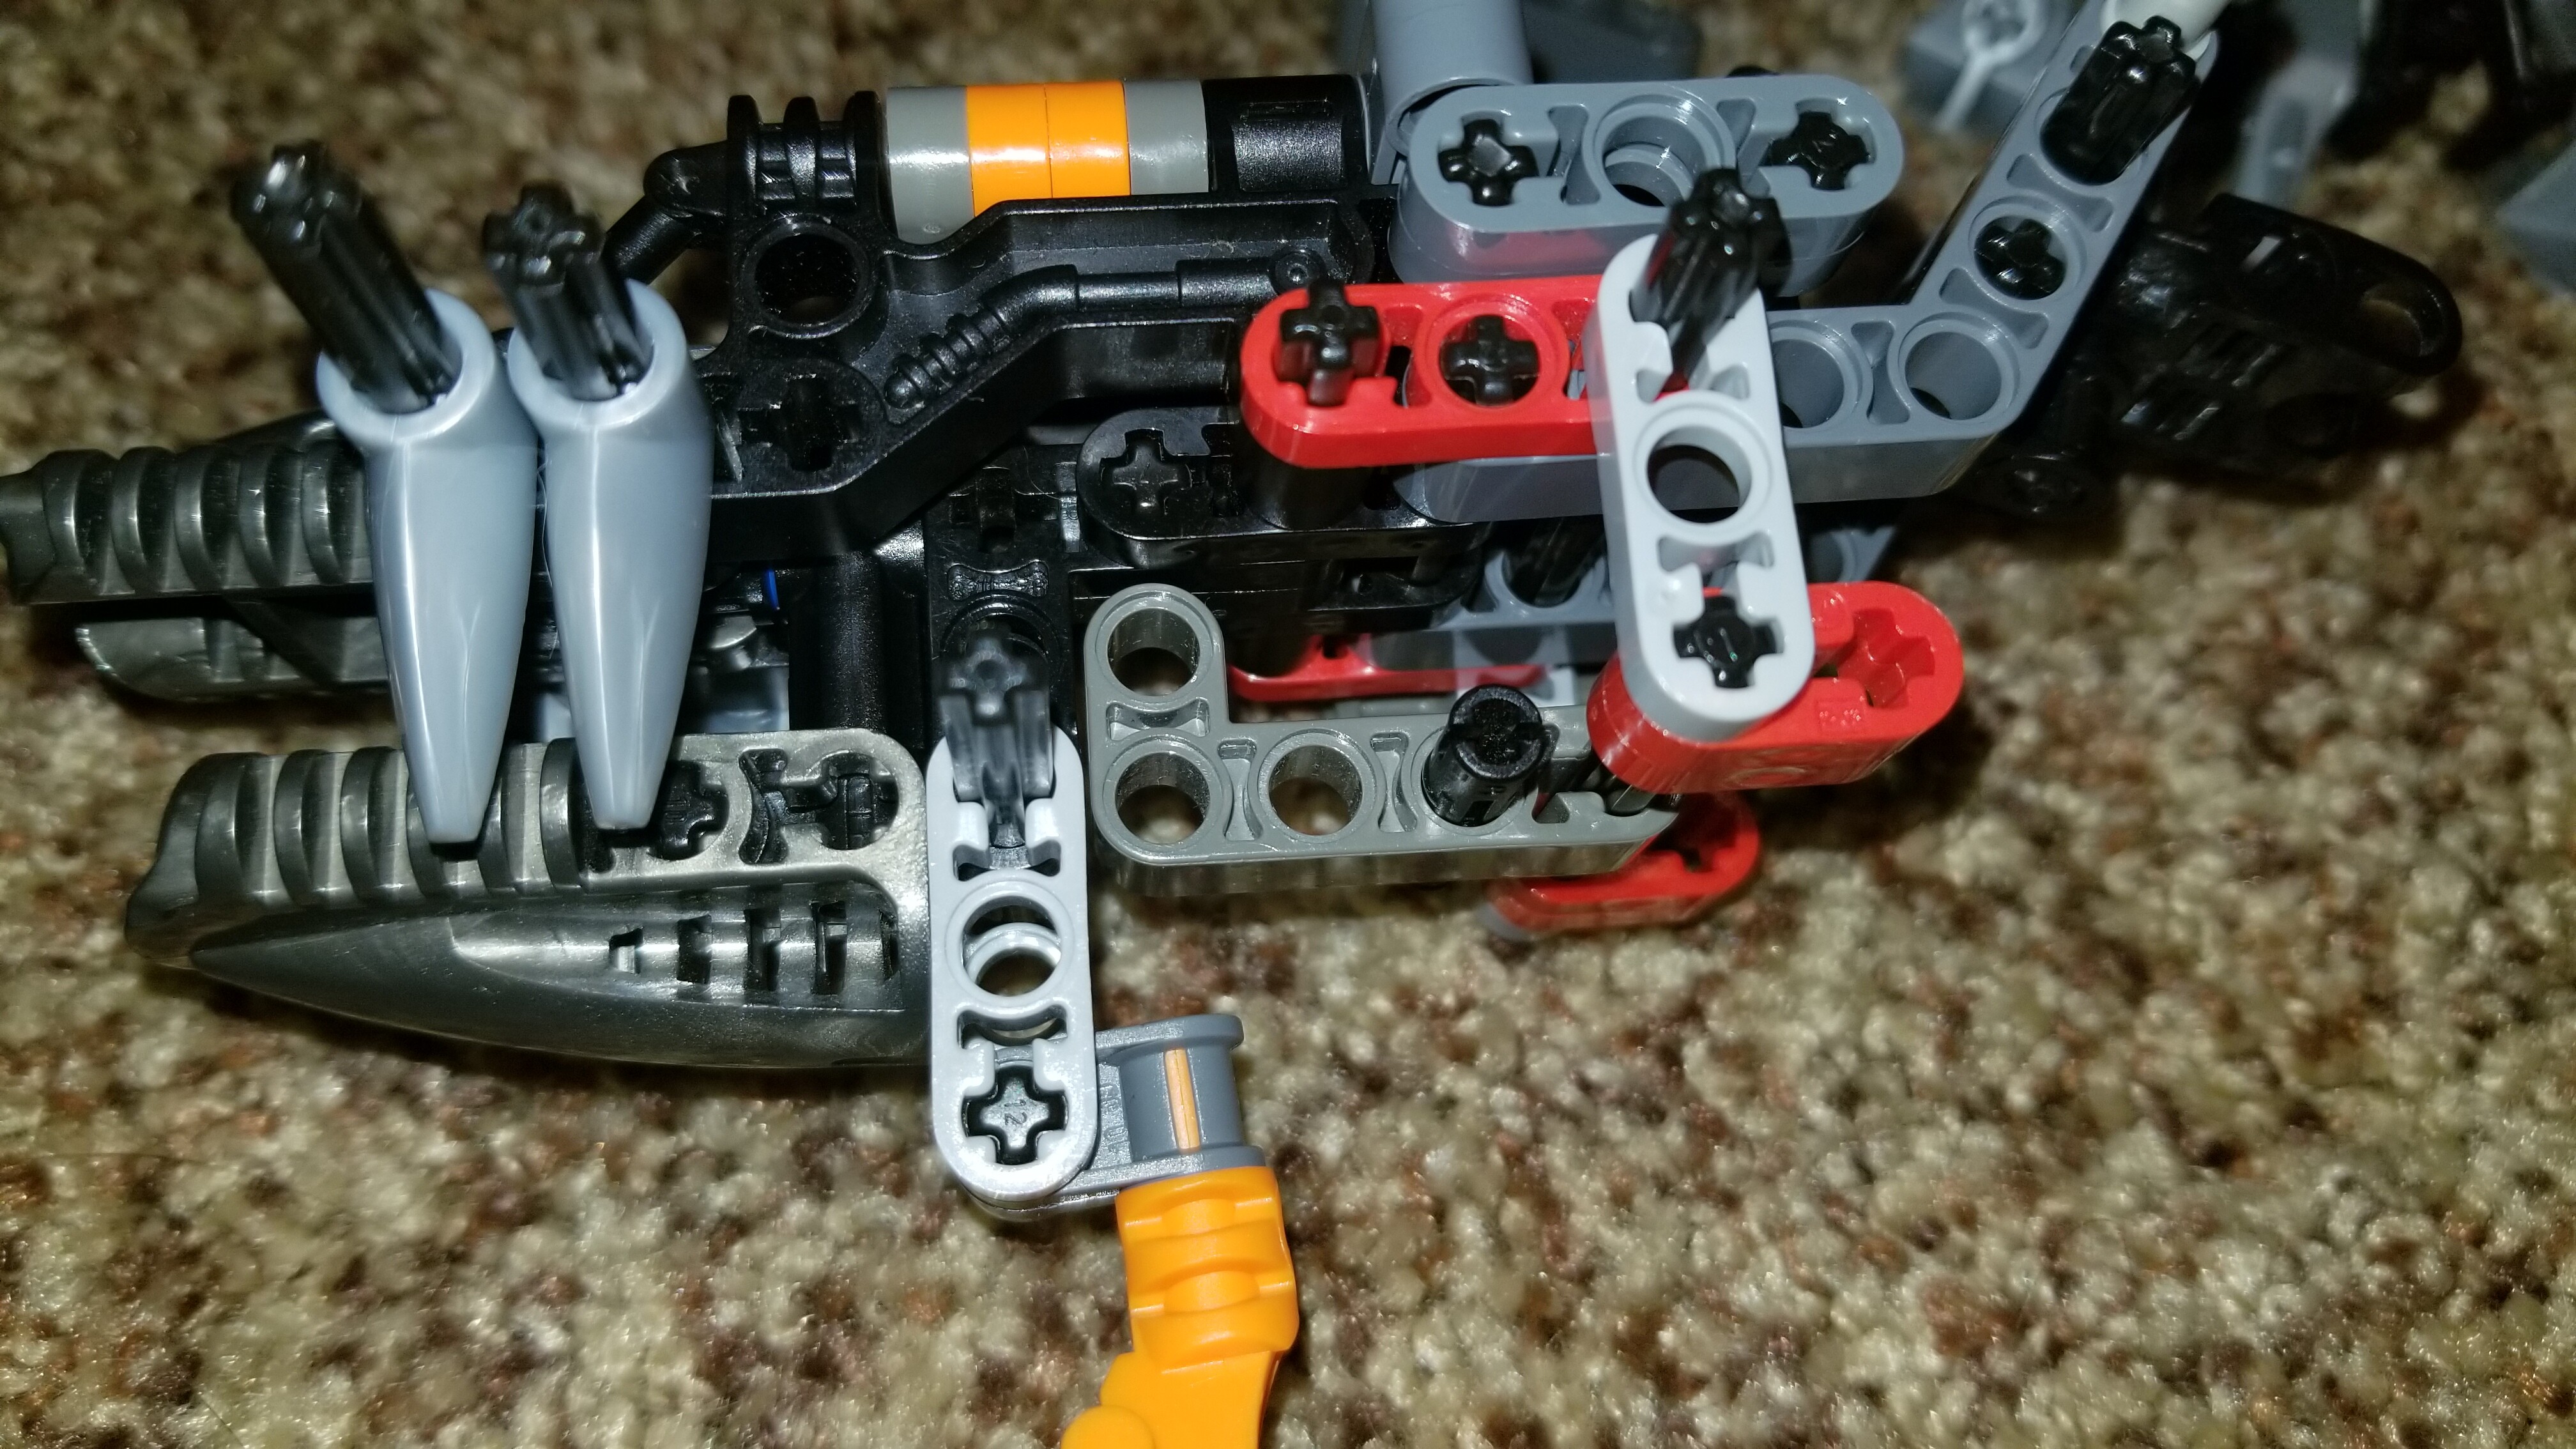
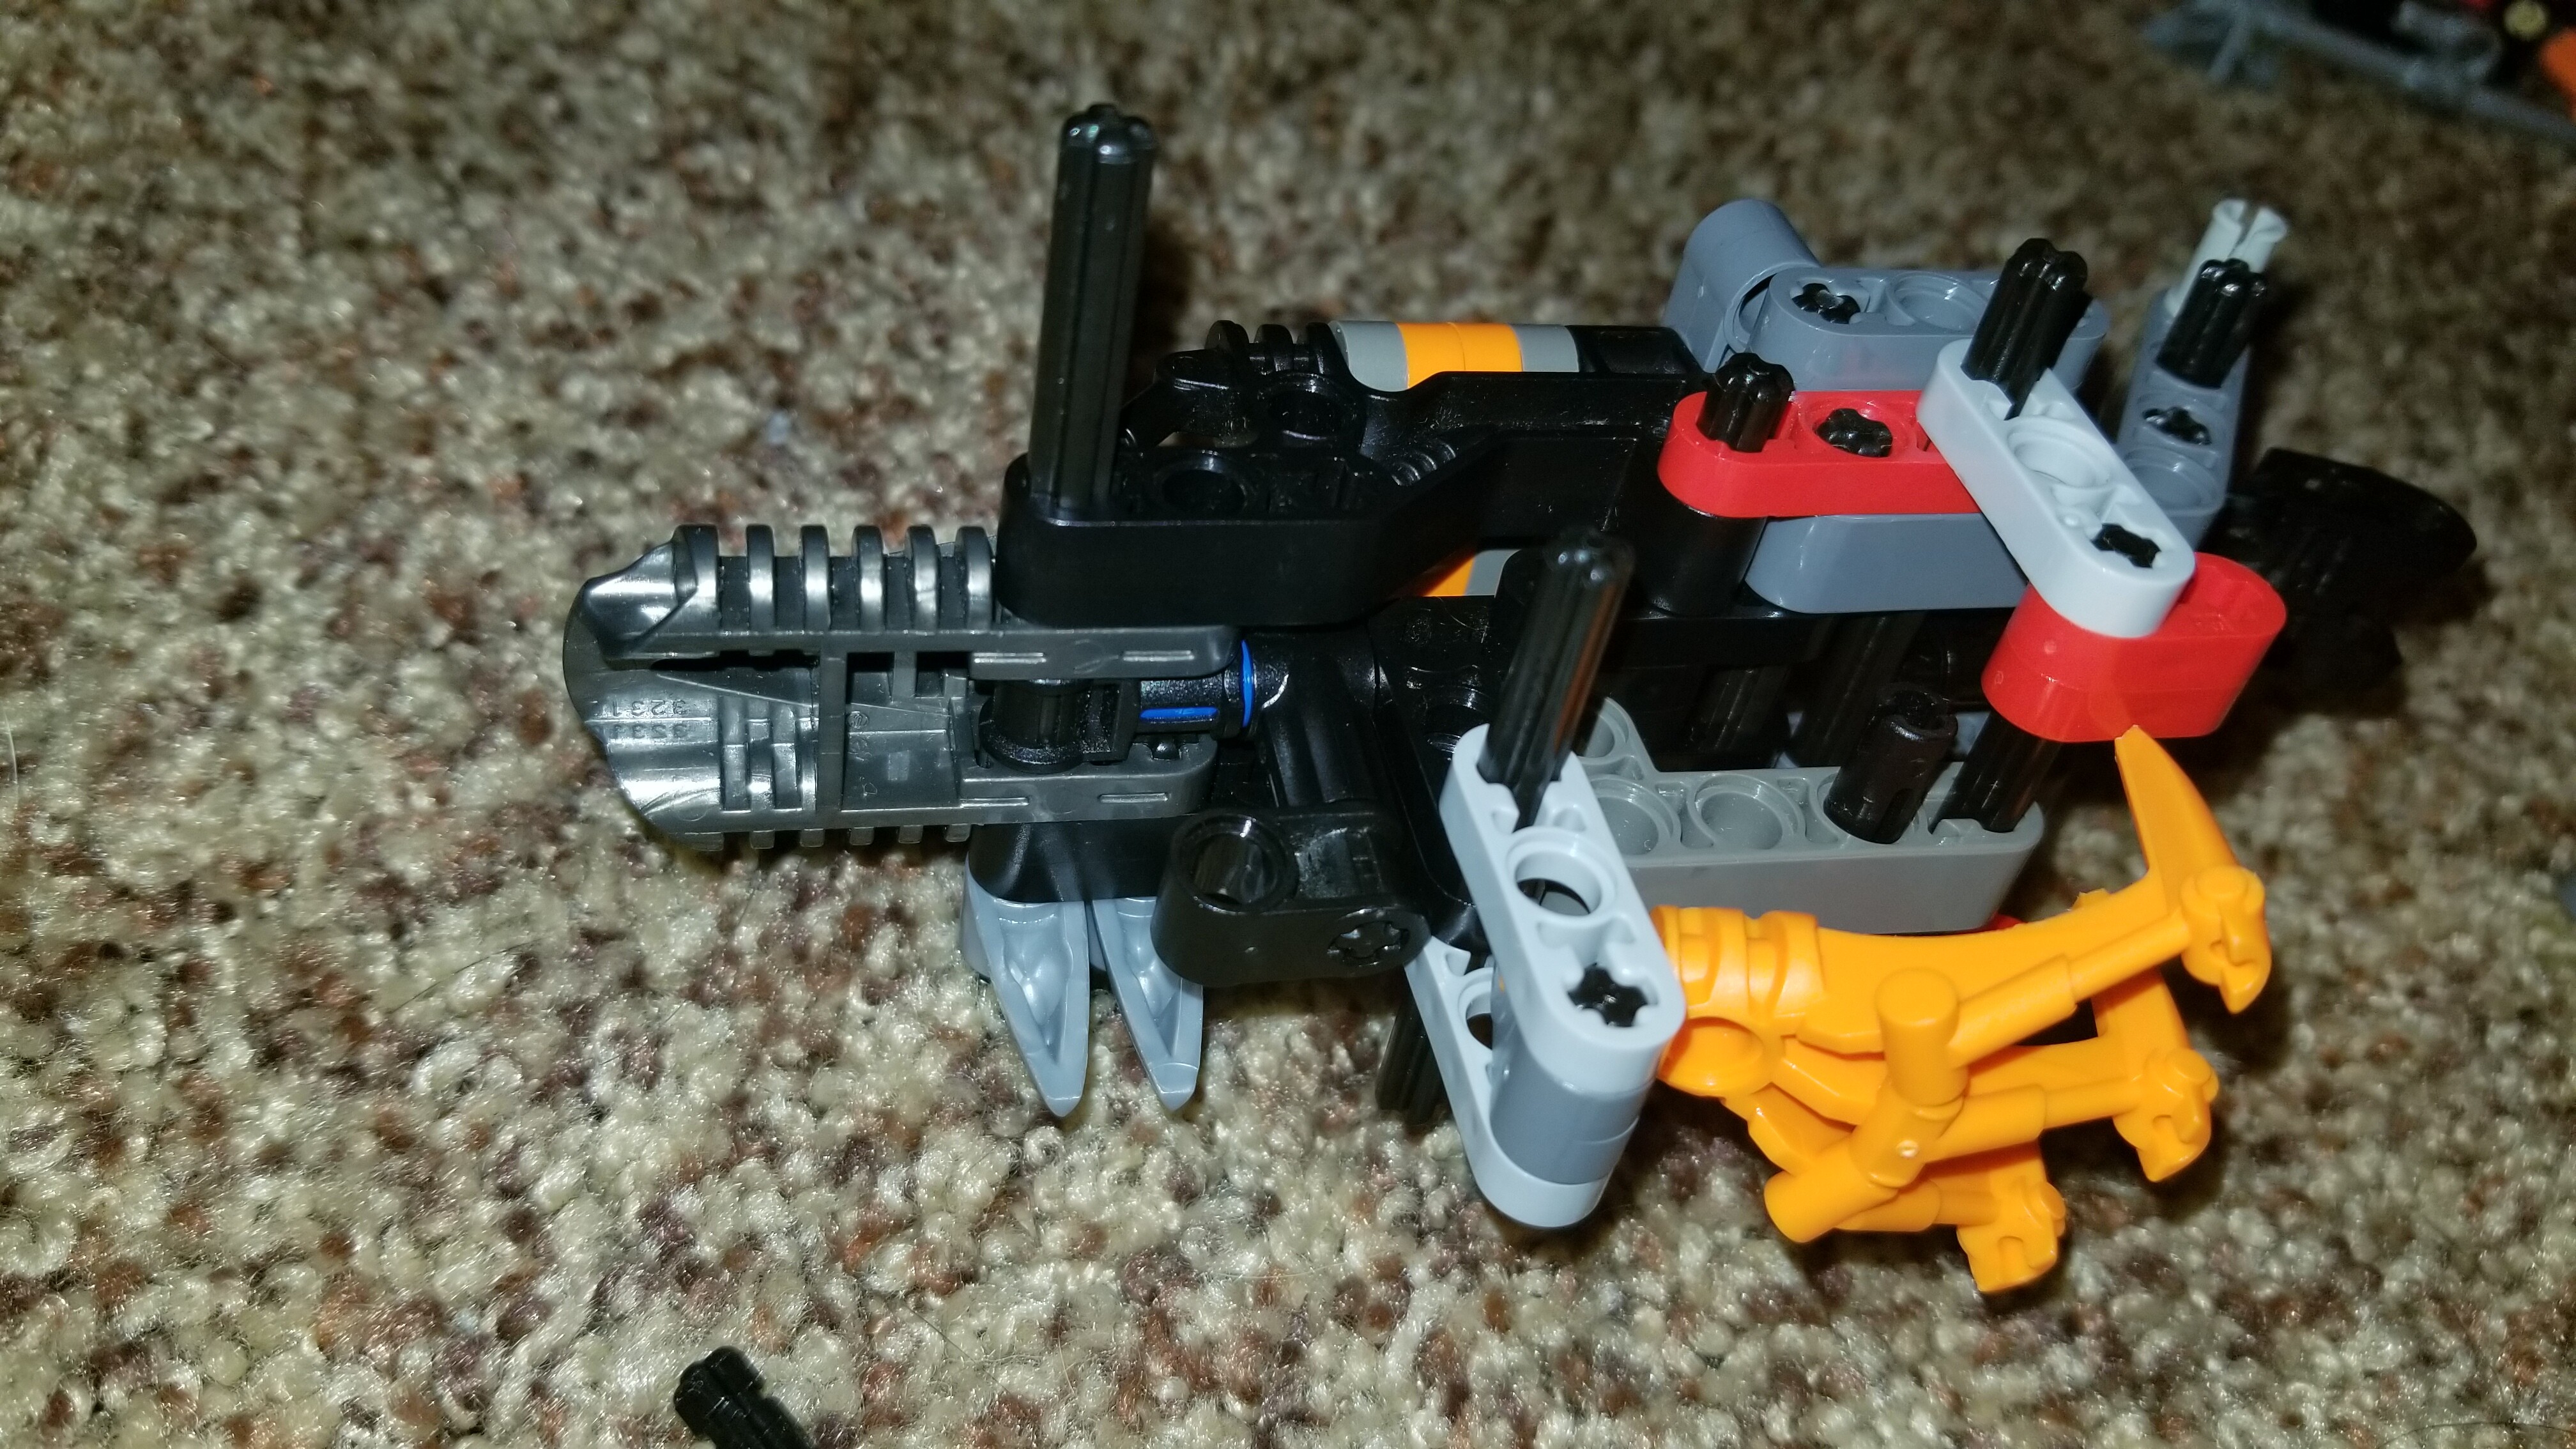
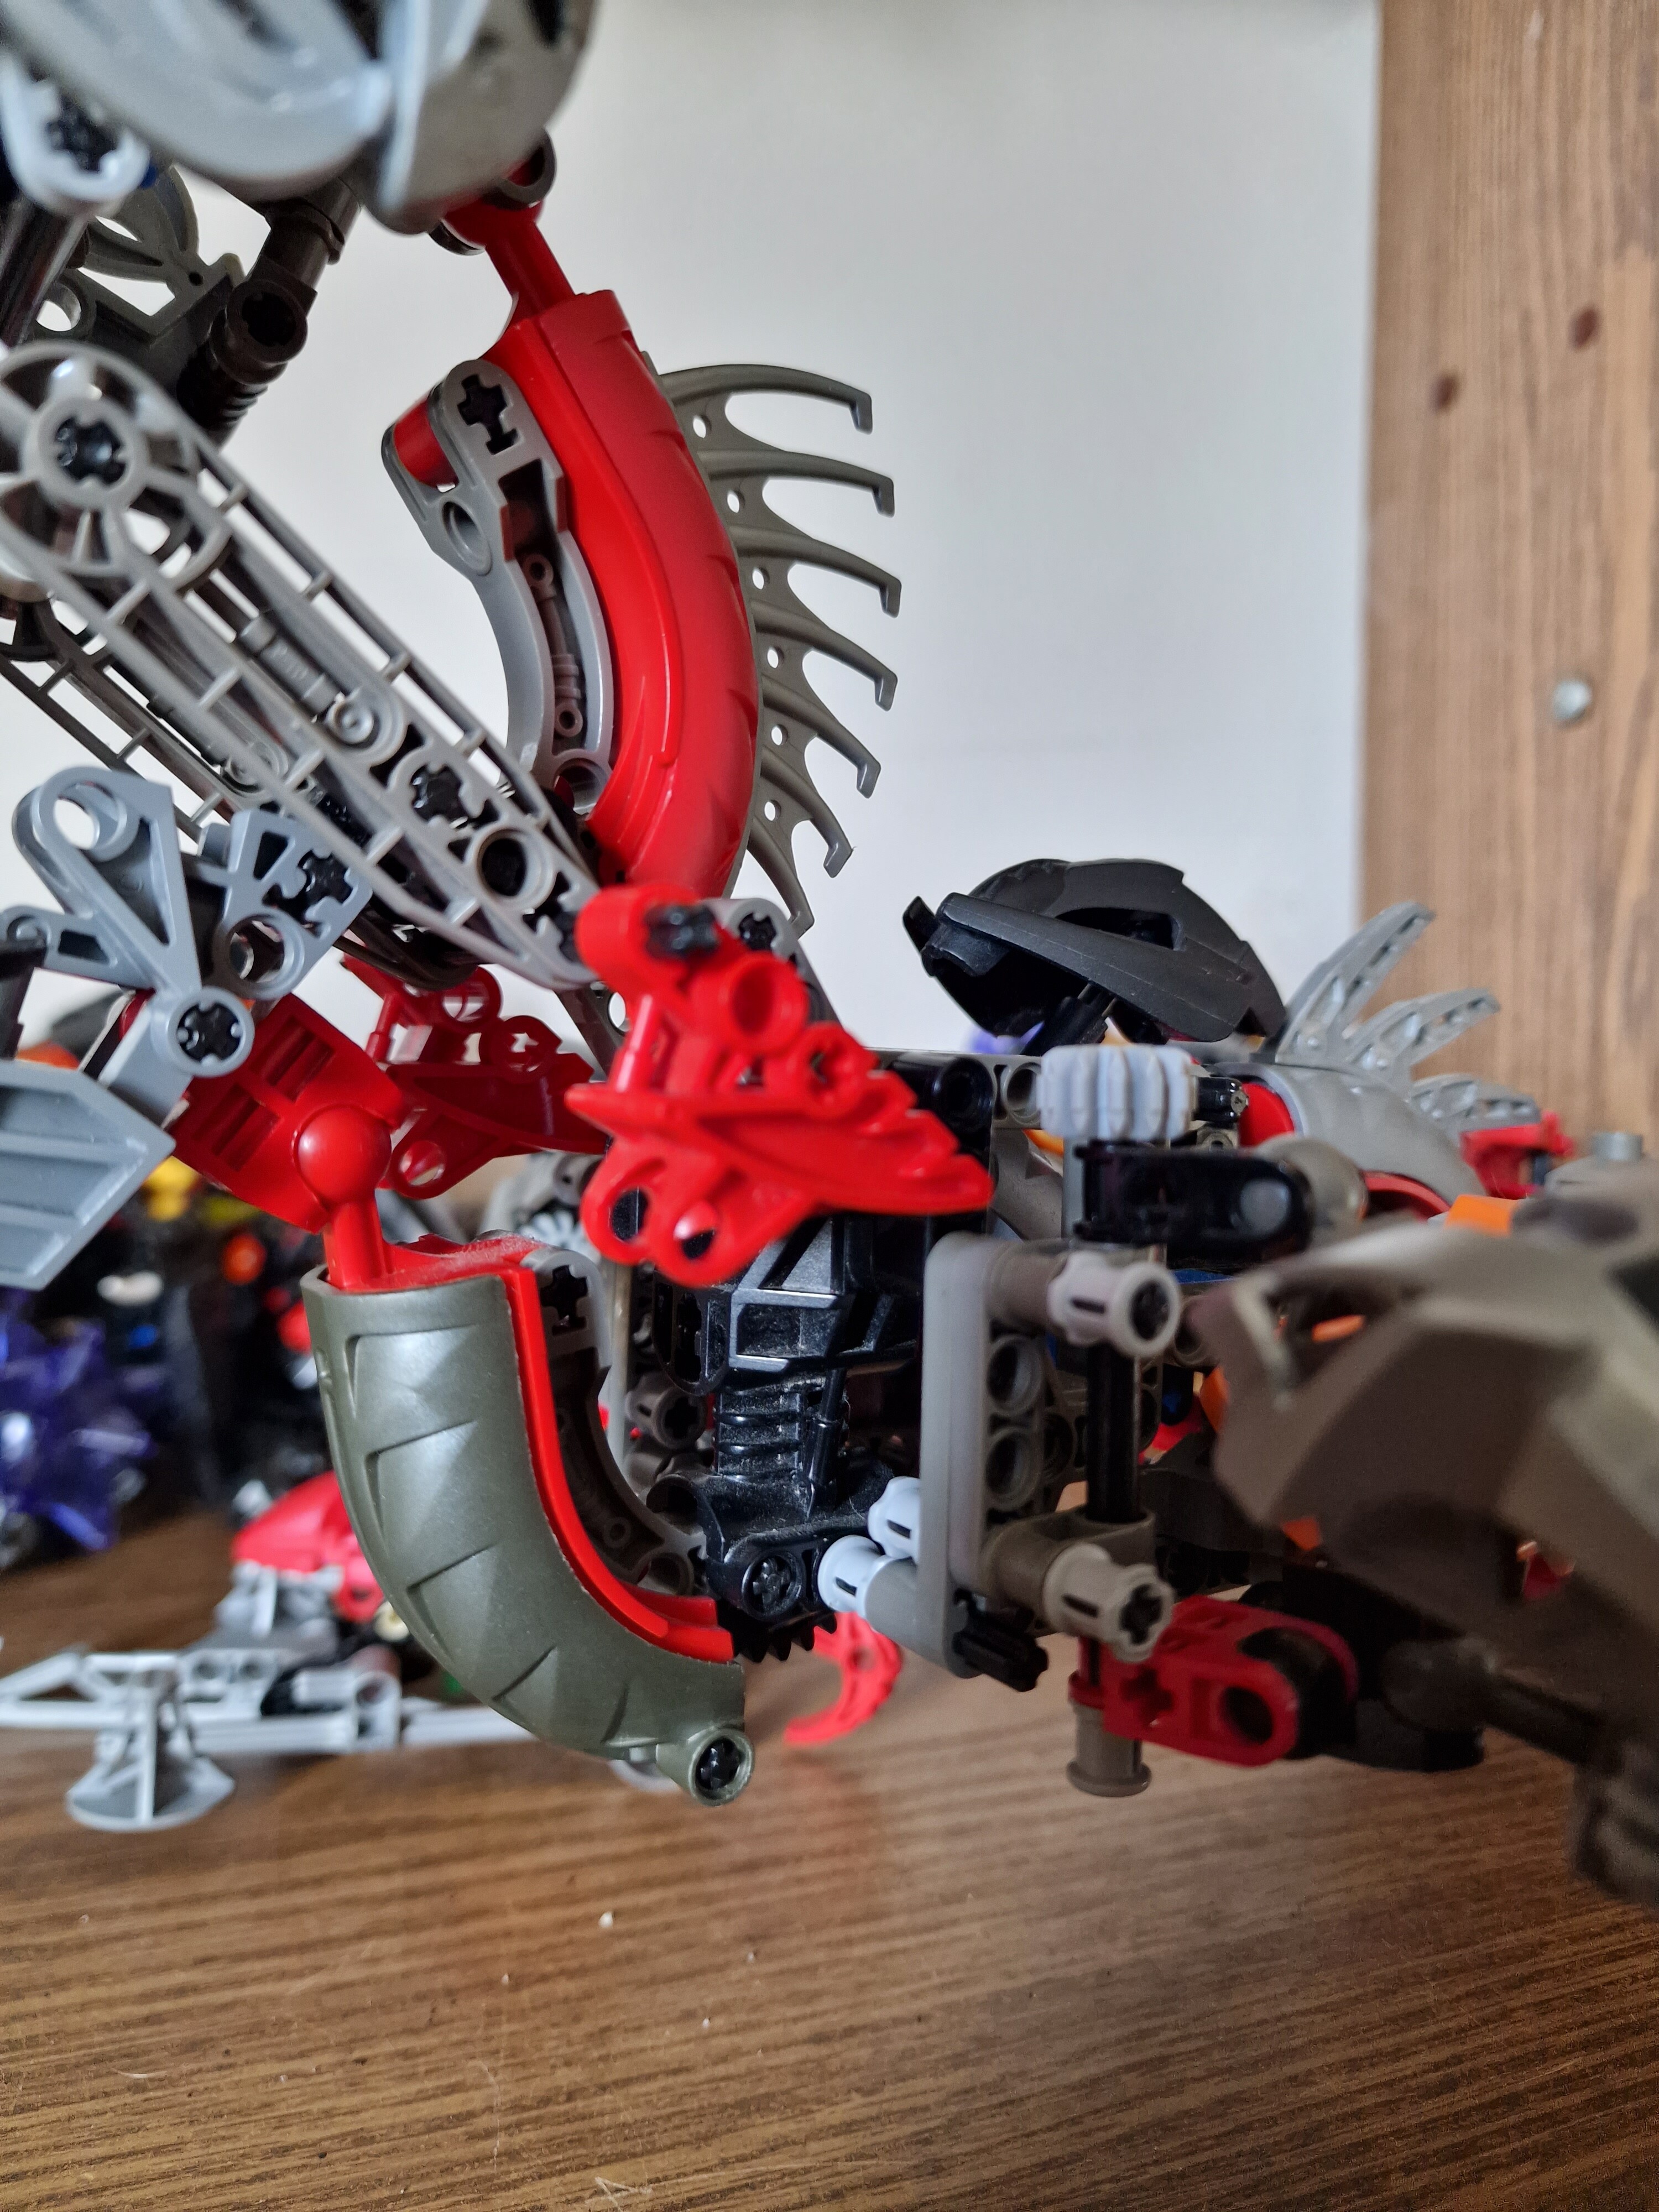
The double joint on the hind legs seems to be too stiff irl. I think this is a more accurate build for the joint, as on the image, the black ball joint socket seems to be on an angle, and this allows it to be on the same way.
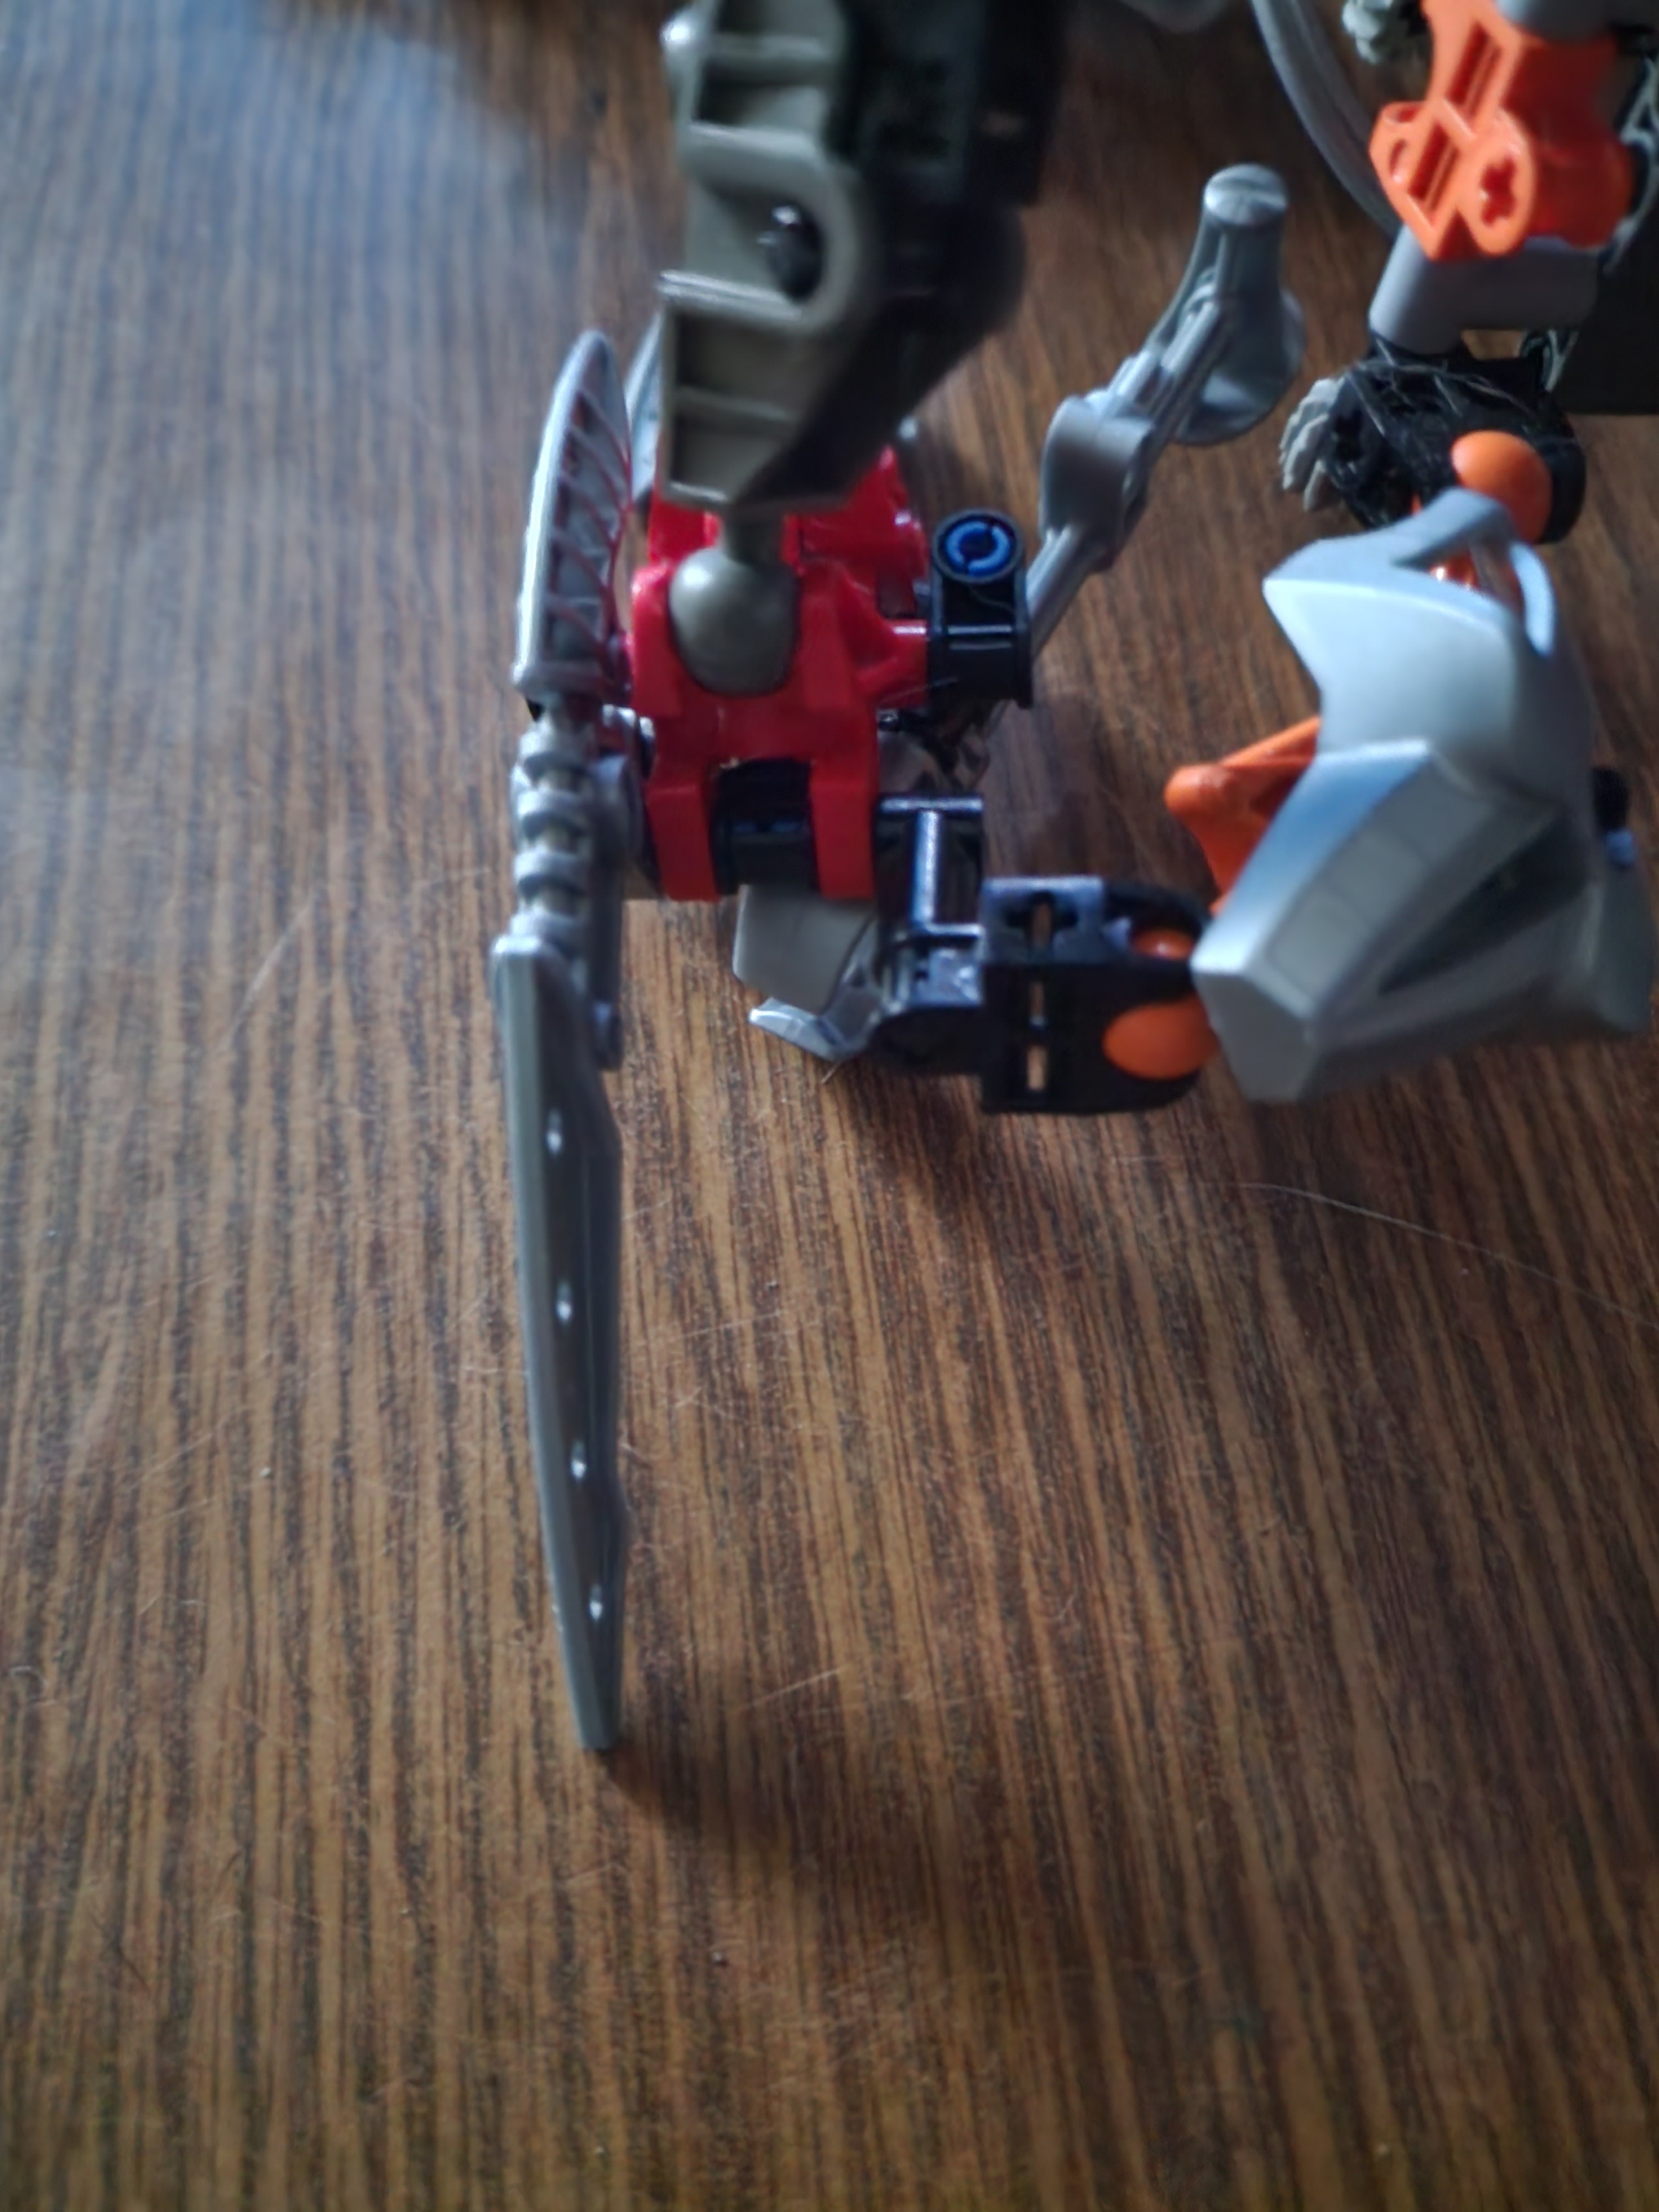
sorry for the cat hair, I have six and they were all around the place, as always
3 Likes
Has anyone made any furthur progress on the dragon? (Sorry for the double post, but I didn’t know how to revive the topic without doing that.)
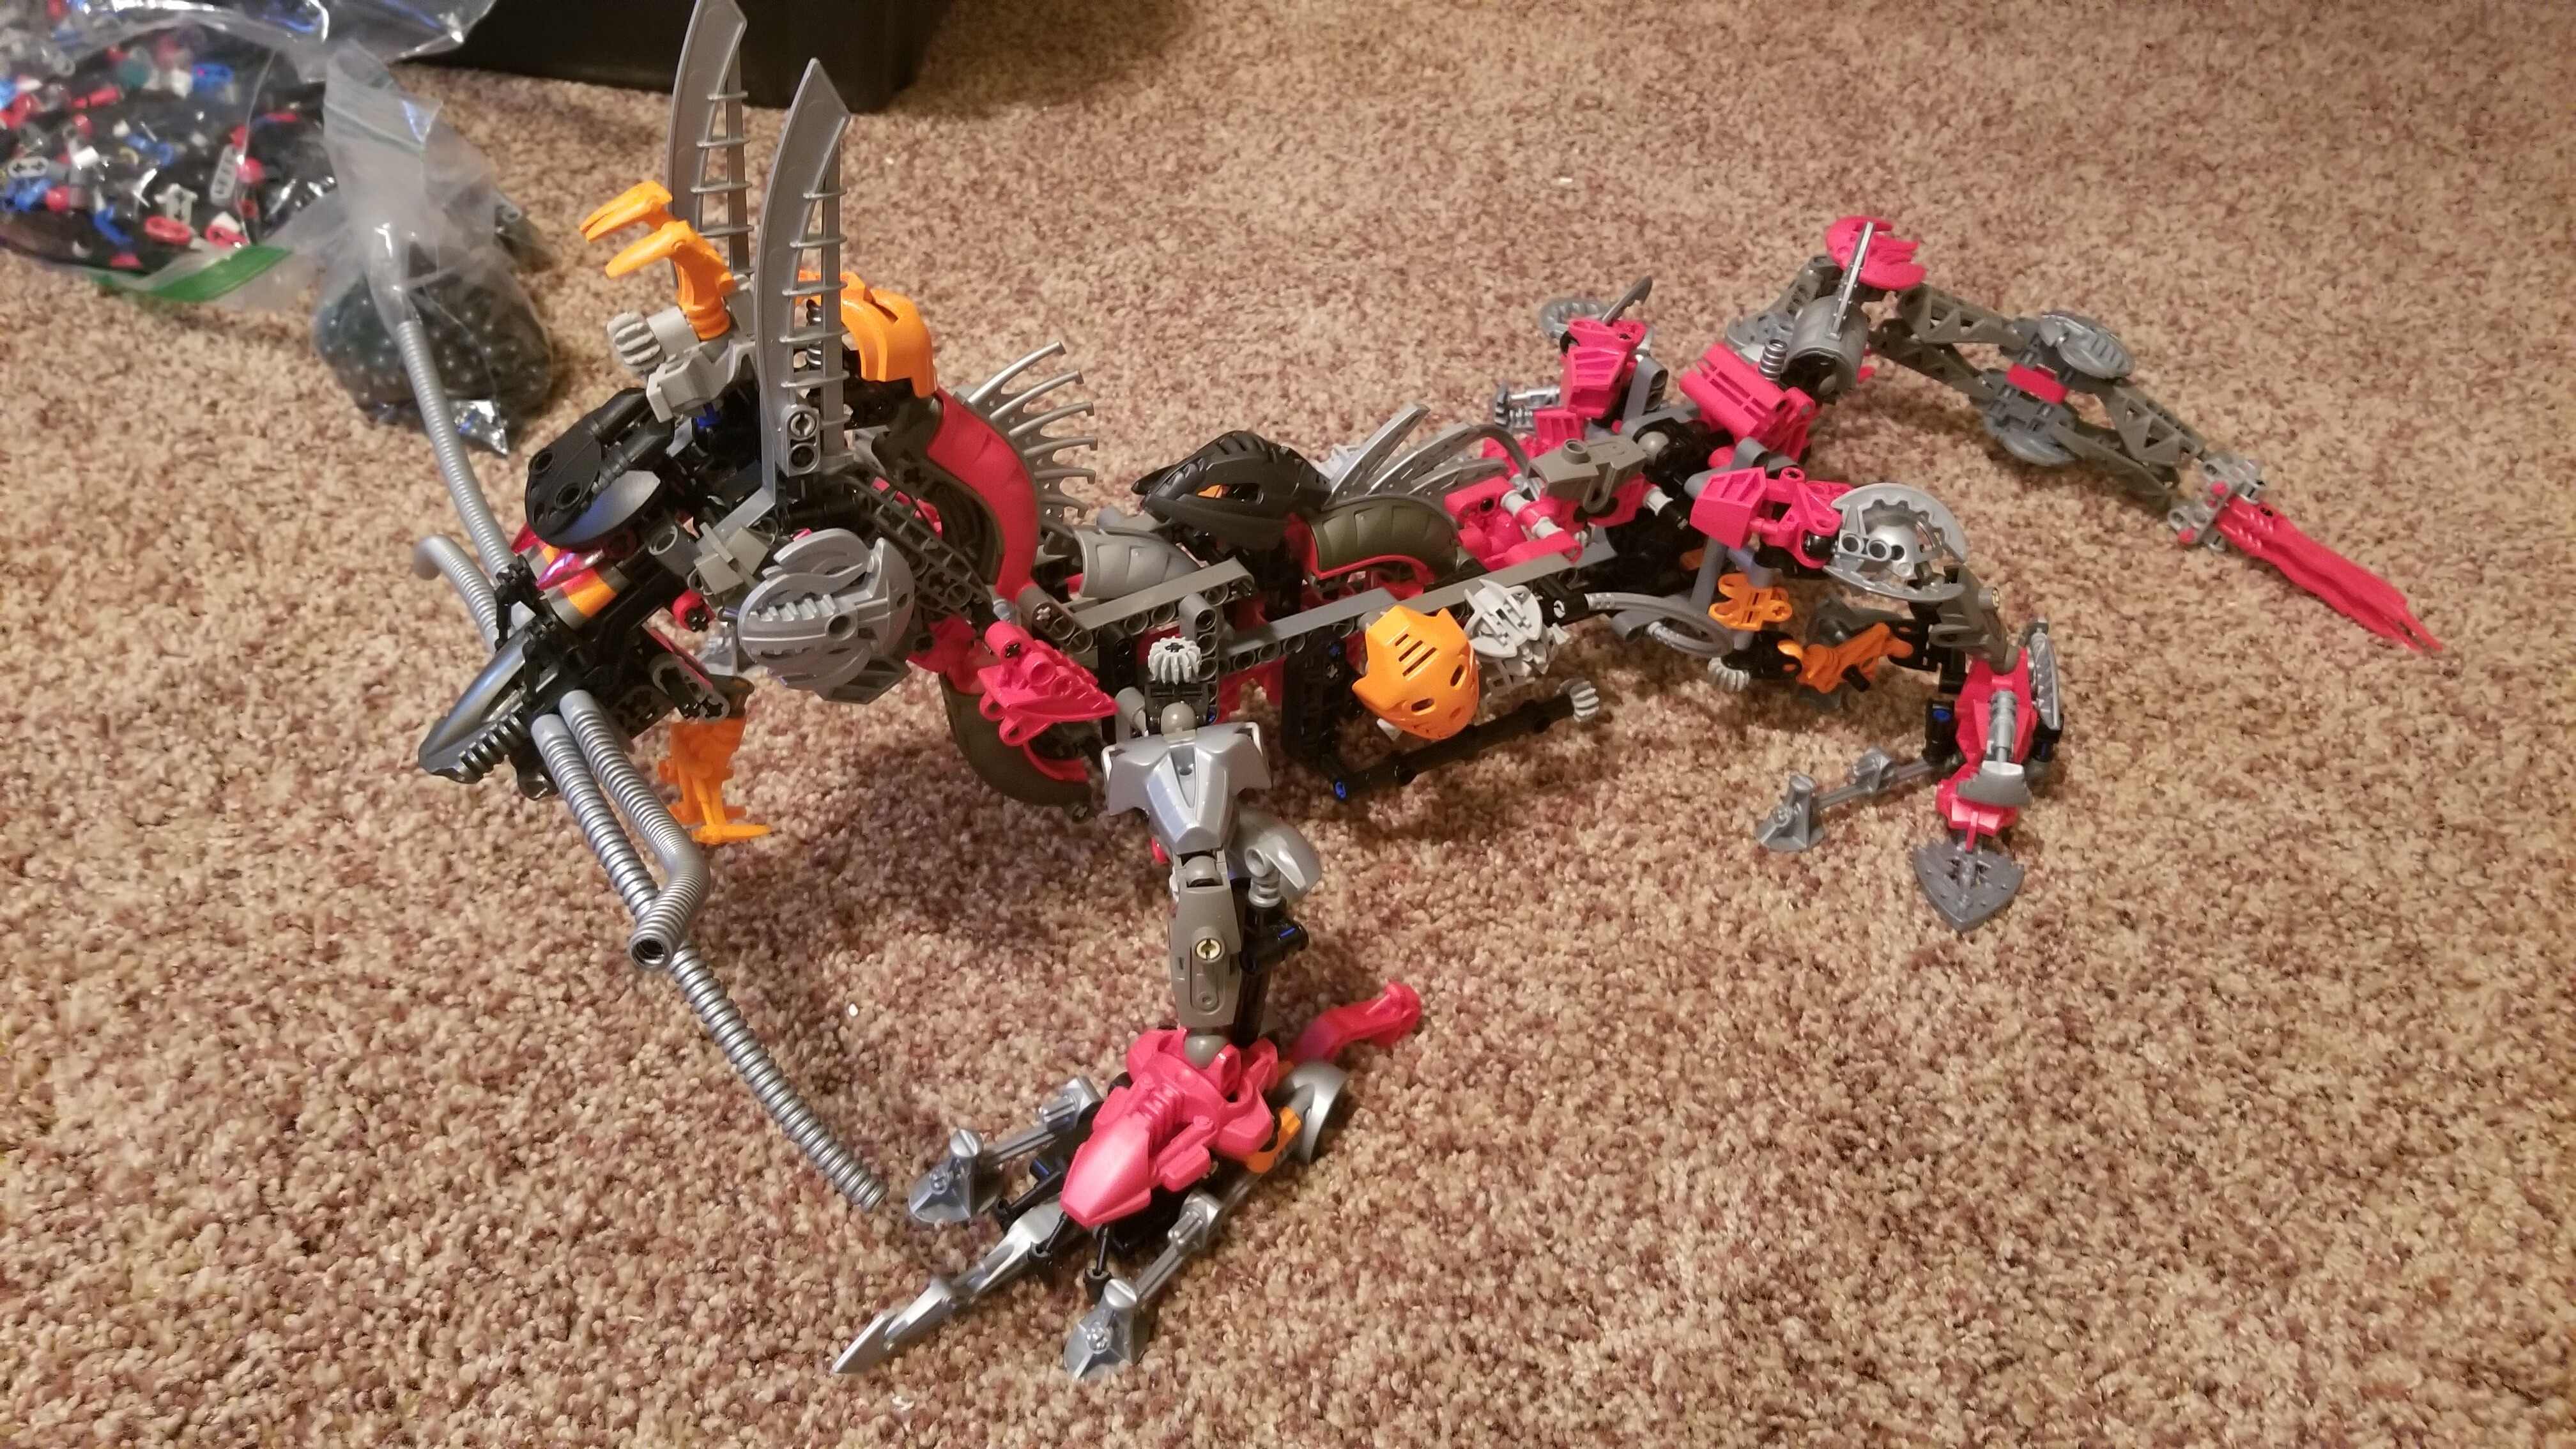
Funny you should say that! I was going to post these tonight, but here we go. I spend the weekend tinkering again finally (kind of got my parts set back up). I went off the studio model 2.0 and it feels a lot better than the first. I did do some changes to the butt, like move the black mata torso back since you can see a second red hand connecting like the first there. Also tried the neck and got it to fit together, but still need to work on the upper connection. Very happy with it still. Will update again in the future once the neck is done.

6 Likes
Great progress. I updated my Kanohi Dragon to move the black mata torso where it should be, though I think the way the Bohrok butt connects with it should be more simple. By the way, I still have doubts with the lower neck, because the grey Slizer arms are not parallel with the Rahkshi spine, there is an angle between them. It is clearer when you see the mata foot sticking from the neck. I used a hose just because I thought that, since Master Builder was used in the set, then the 3L red hose could appear somewhere.
2 Likes
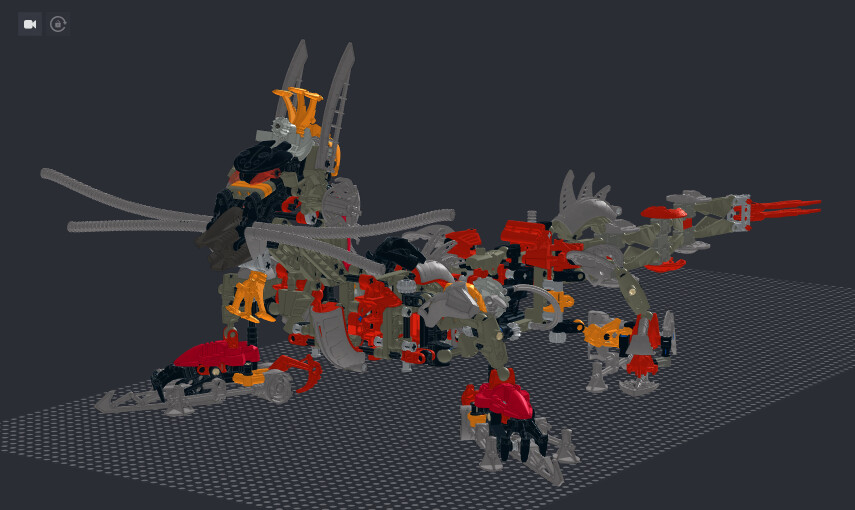
Well. this is my most recent update on the Kanohi Dragon studio file. For real, I don’t know what could be missing in this bad boy by now. Most improvements were made on the head, the neck and the bottom. Also, I gave up on the Rahkshi chest and decided it most likely doesn’t connect with anything. By the way, last minute change, there’s no upper axle in the chest. In the picture there seems to be a black piece there but I can’t really tell what it is, I think it is the only thing I’m having trouble with.
EDIT:
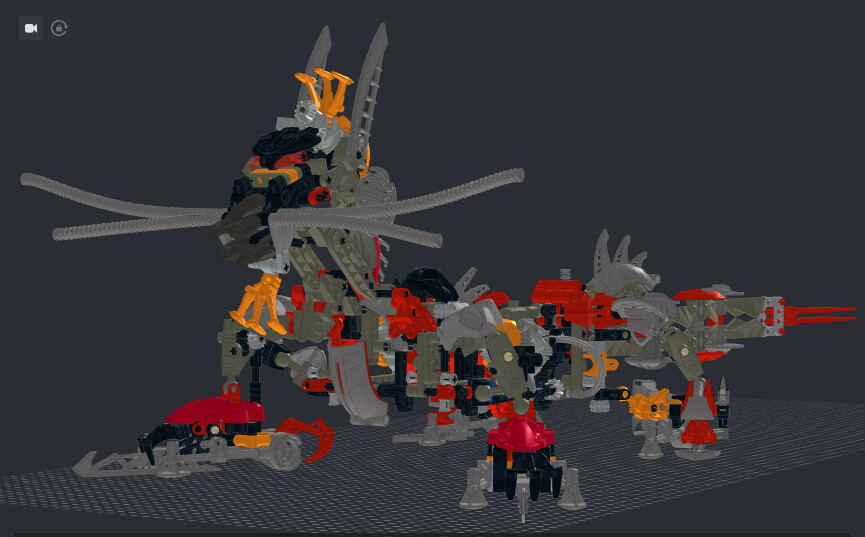
New model. I modified the chest, the neck and the lower jaw. I think this is definitely as far as I can go. I removed the frontmost mata torso, for I found out it can’t be there, so I’d like to know if the mods I made there actually work.
The file includes the Pit Brutaka because this is the same file I shared with Tammy C for the Constraction Collection.
https://www.mediafire.com/file/y52ohui50t7er08/Kanohi+Dragon+Updated.rar/file
3 Likes
Would you mind posting the file as a .io like your previous ones? I can’t get the .rar to open up in studio.
2 Likes
https://www.mediafire.com/file/m24u4ut3vdclmzy/Kanohi+dragon.io/file
Here it is. I’m away for work right now, so I don’t have the pieces to test for myself if the front torso is solid enough or if there’s anything wrong. Also, there seems to be something orange behind the left arm. An orange ruru maybe? I don’t know.
2 Likes
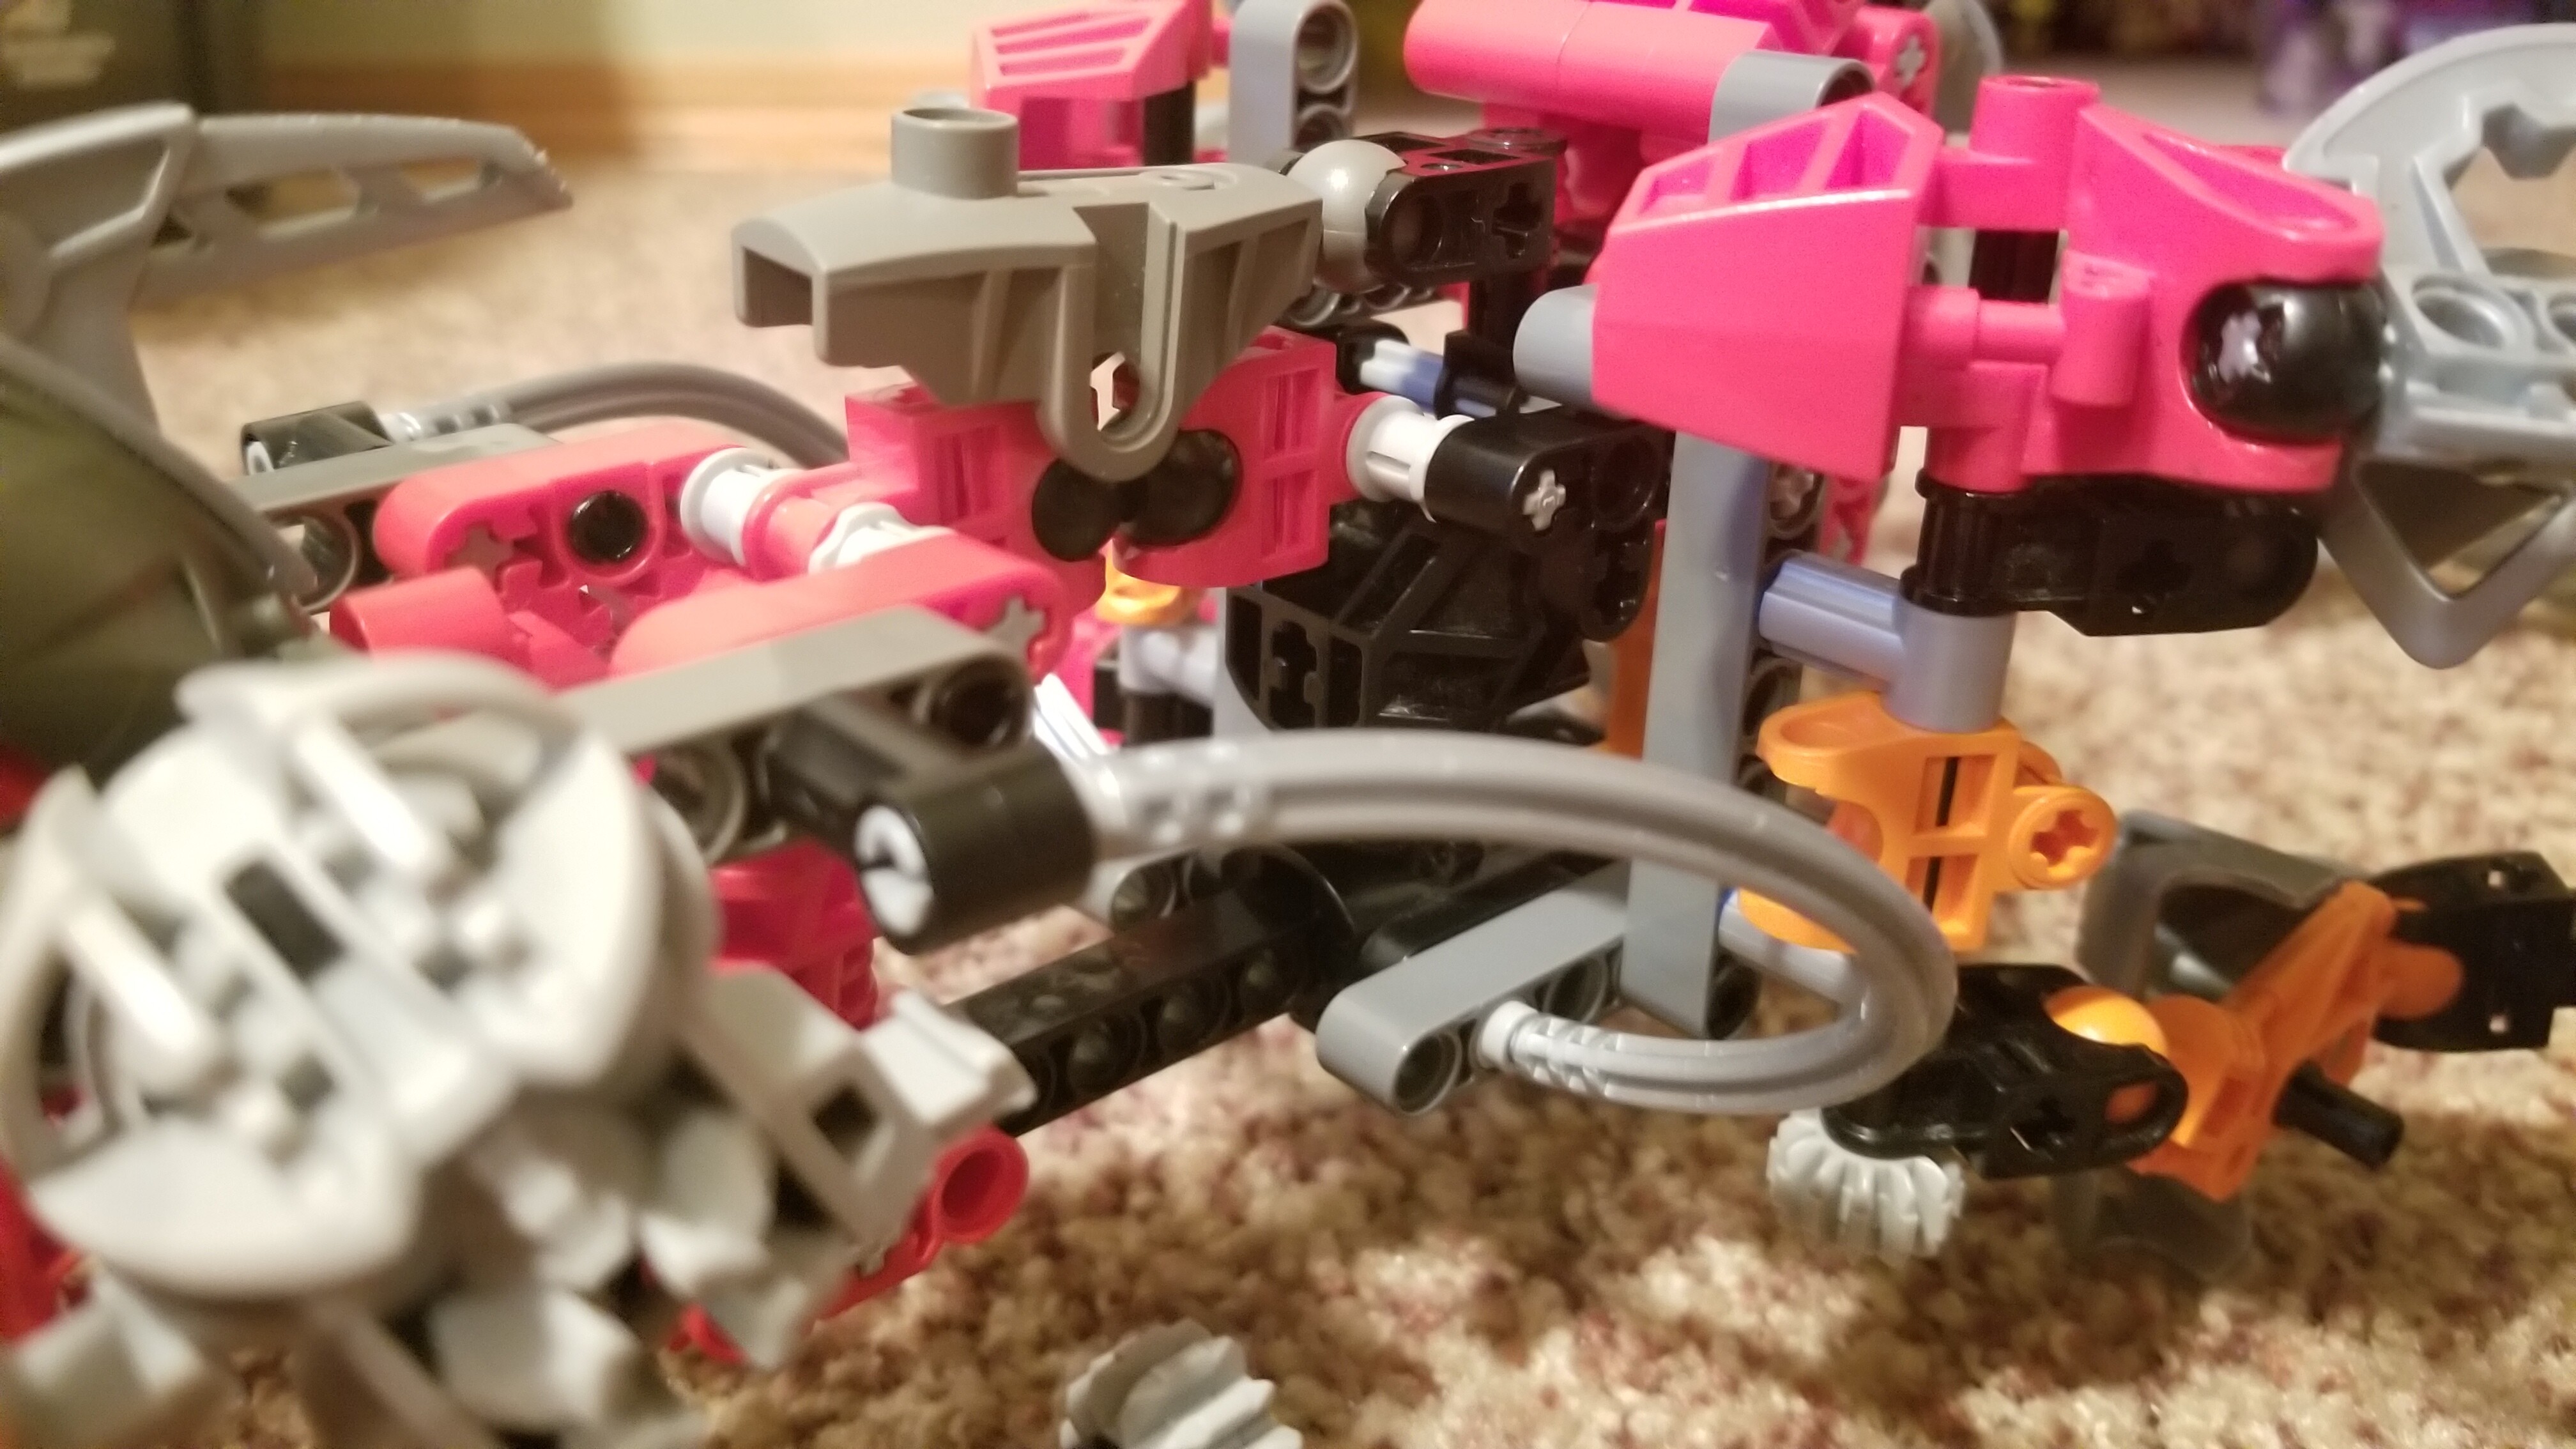
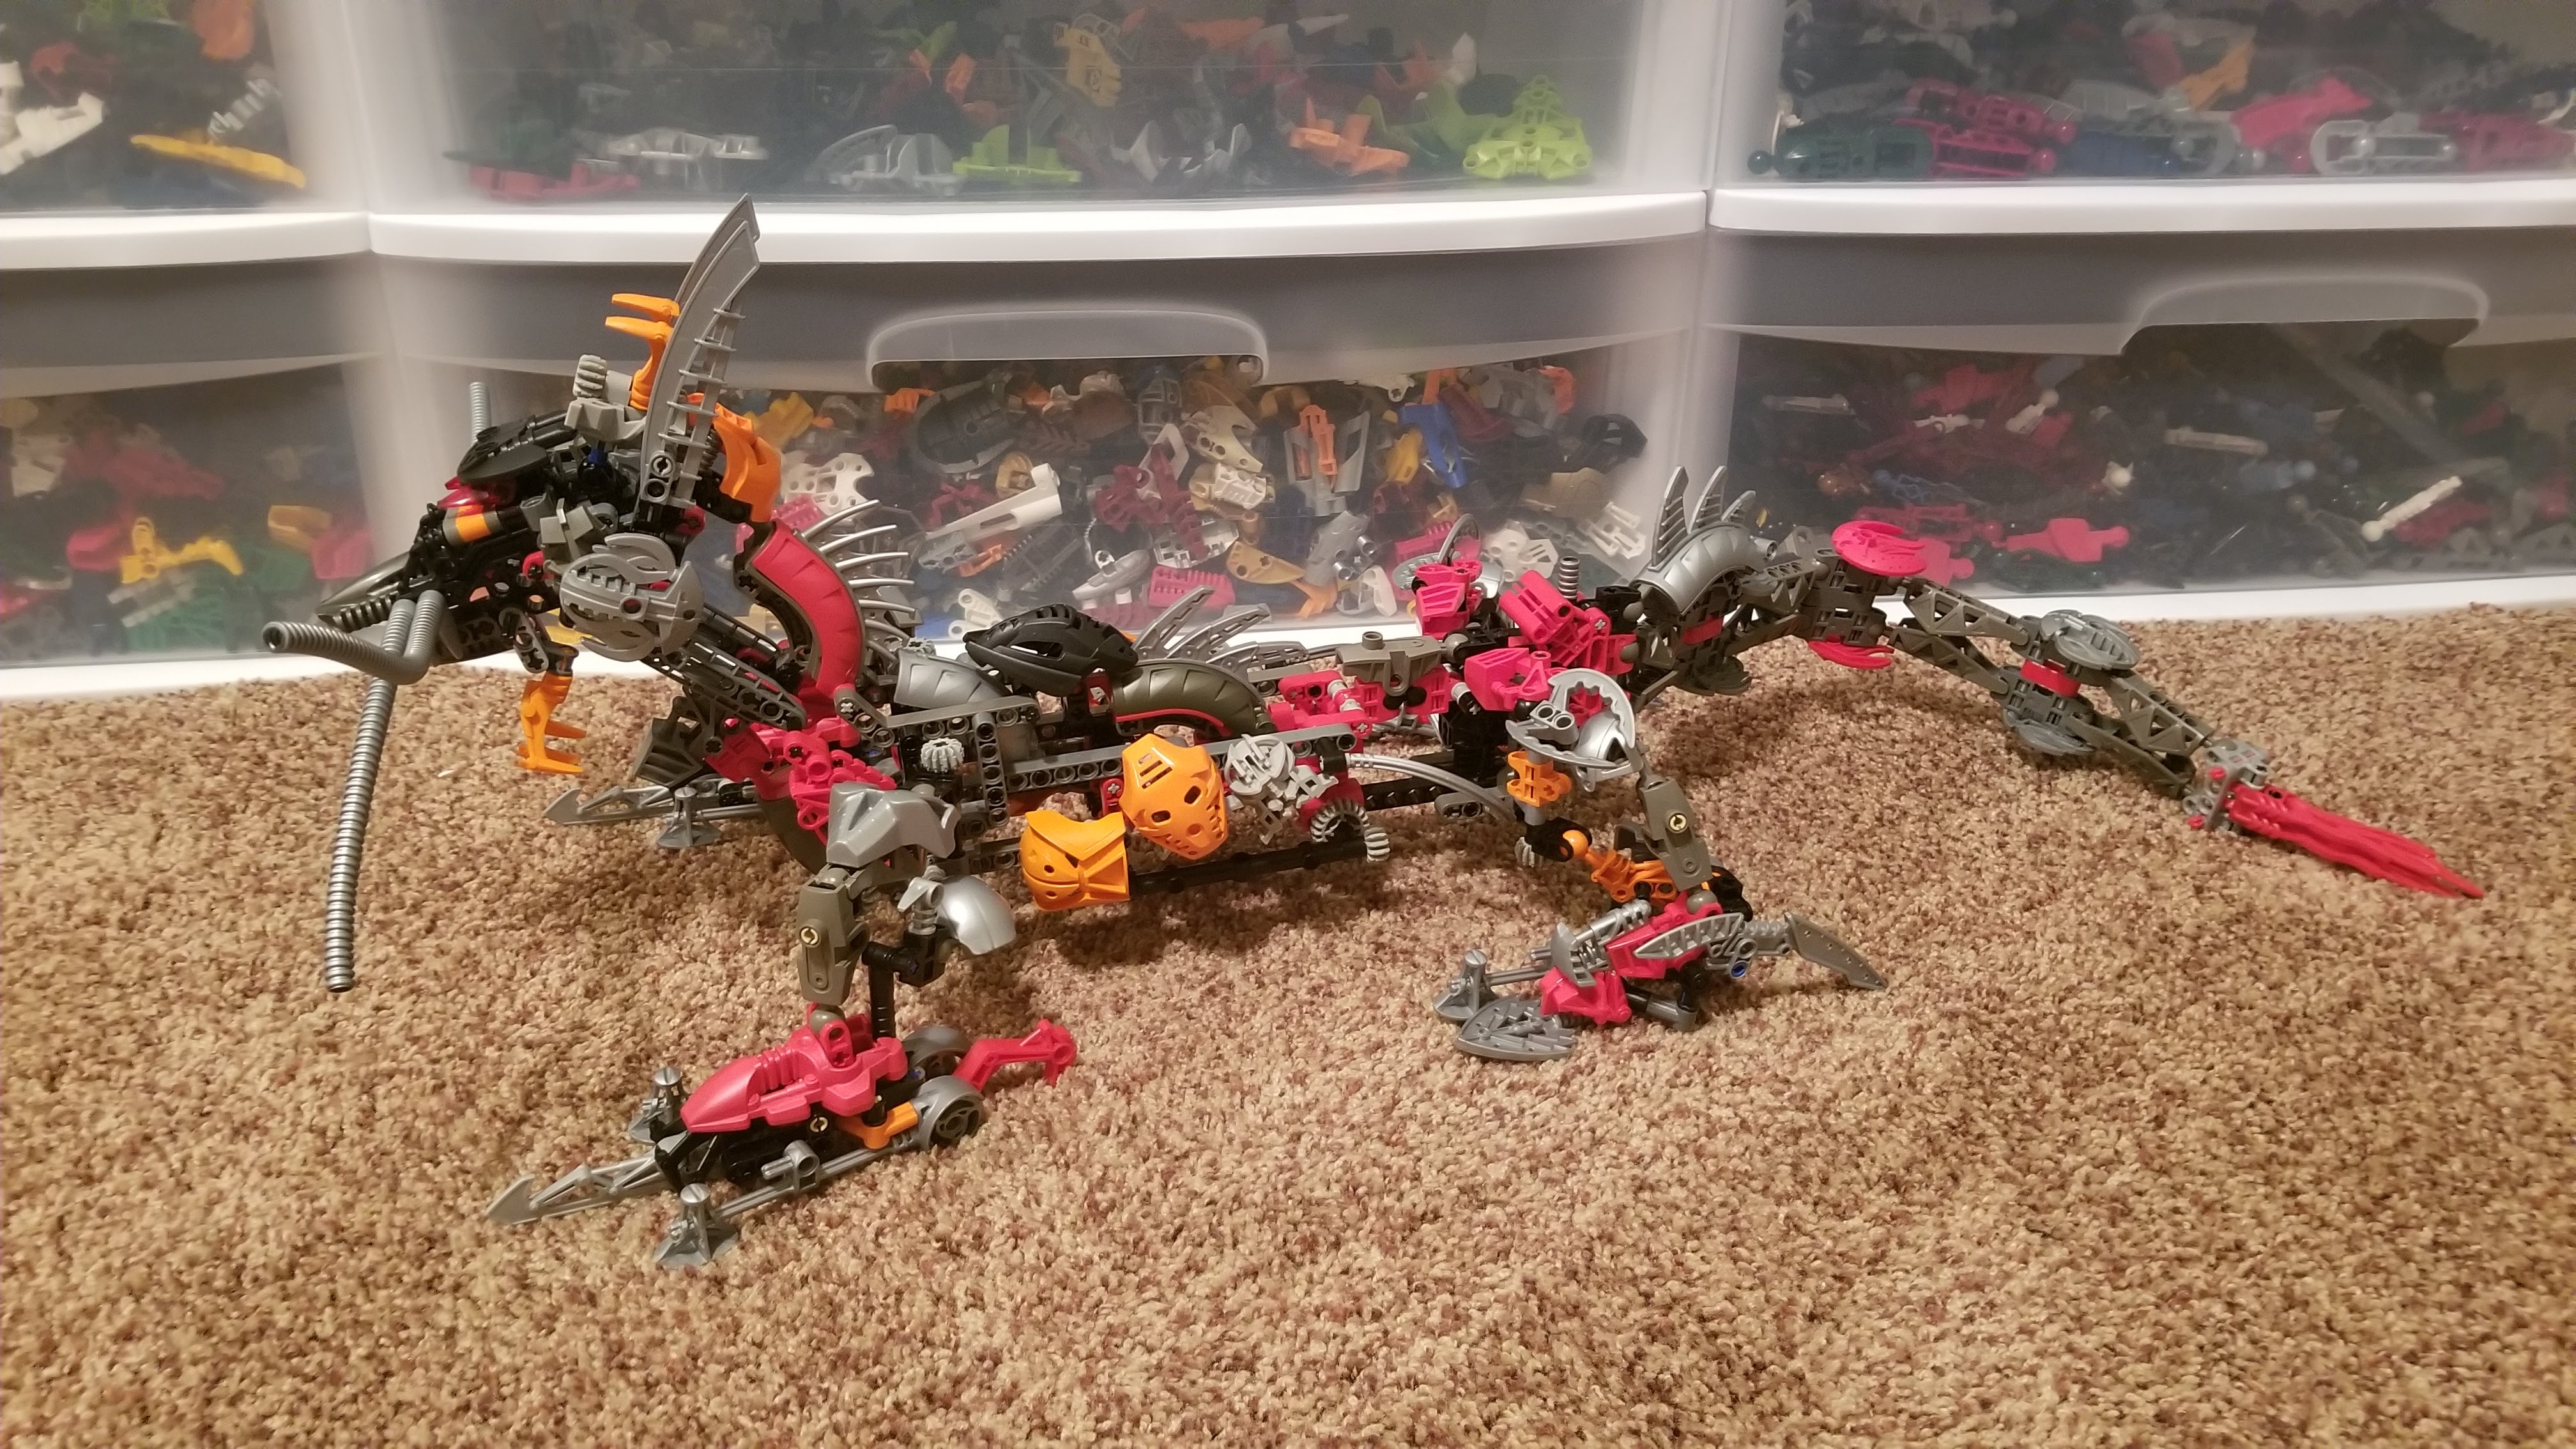
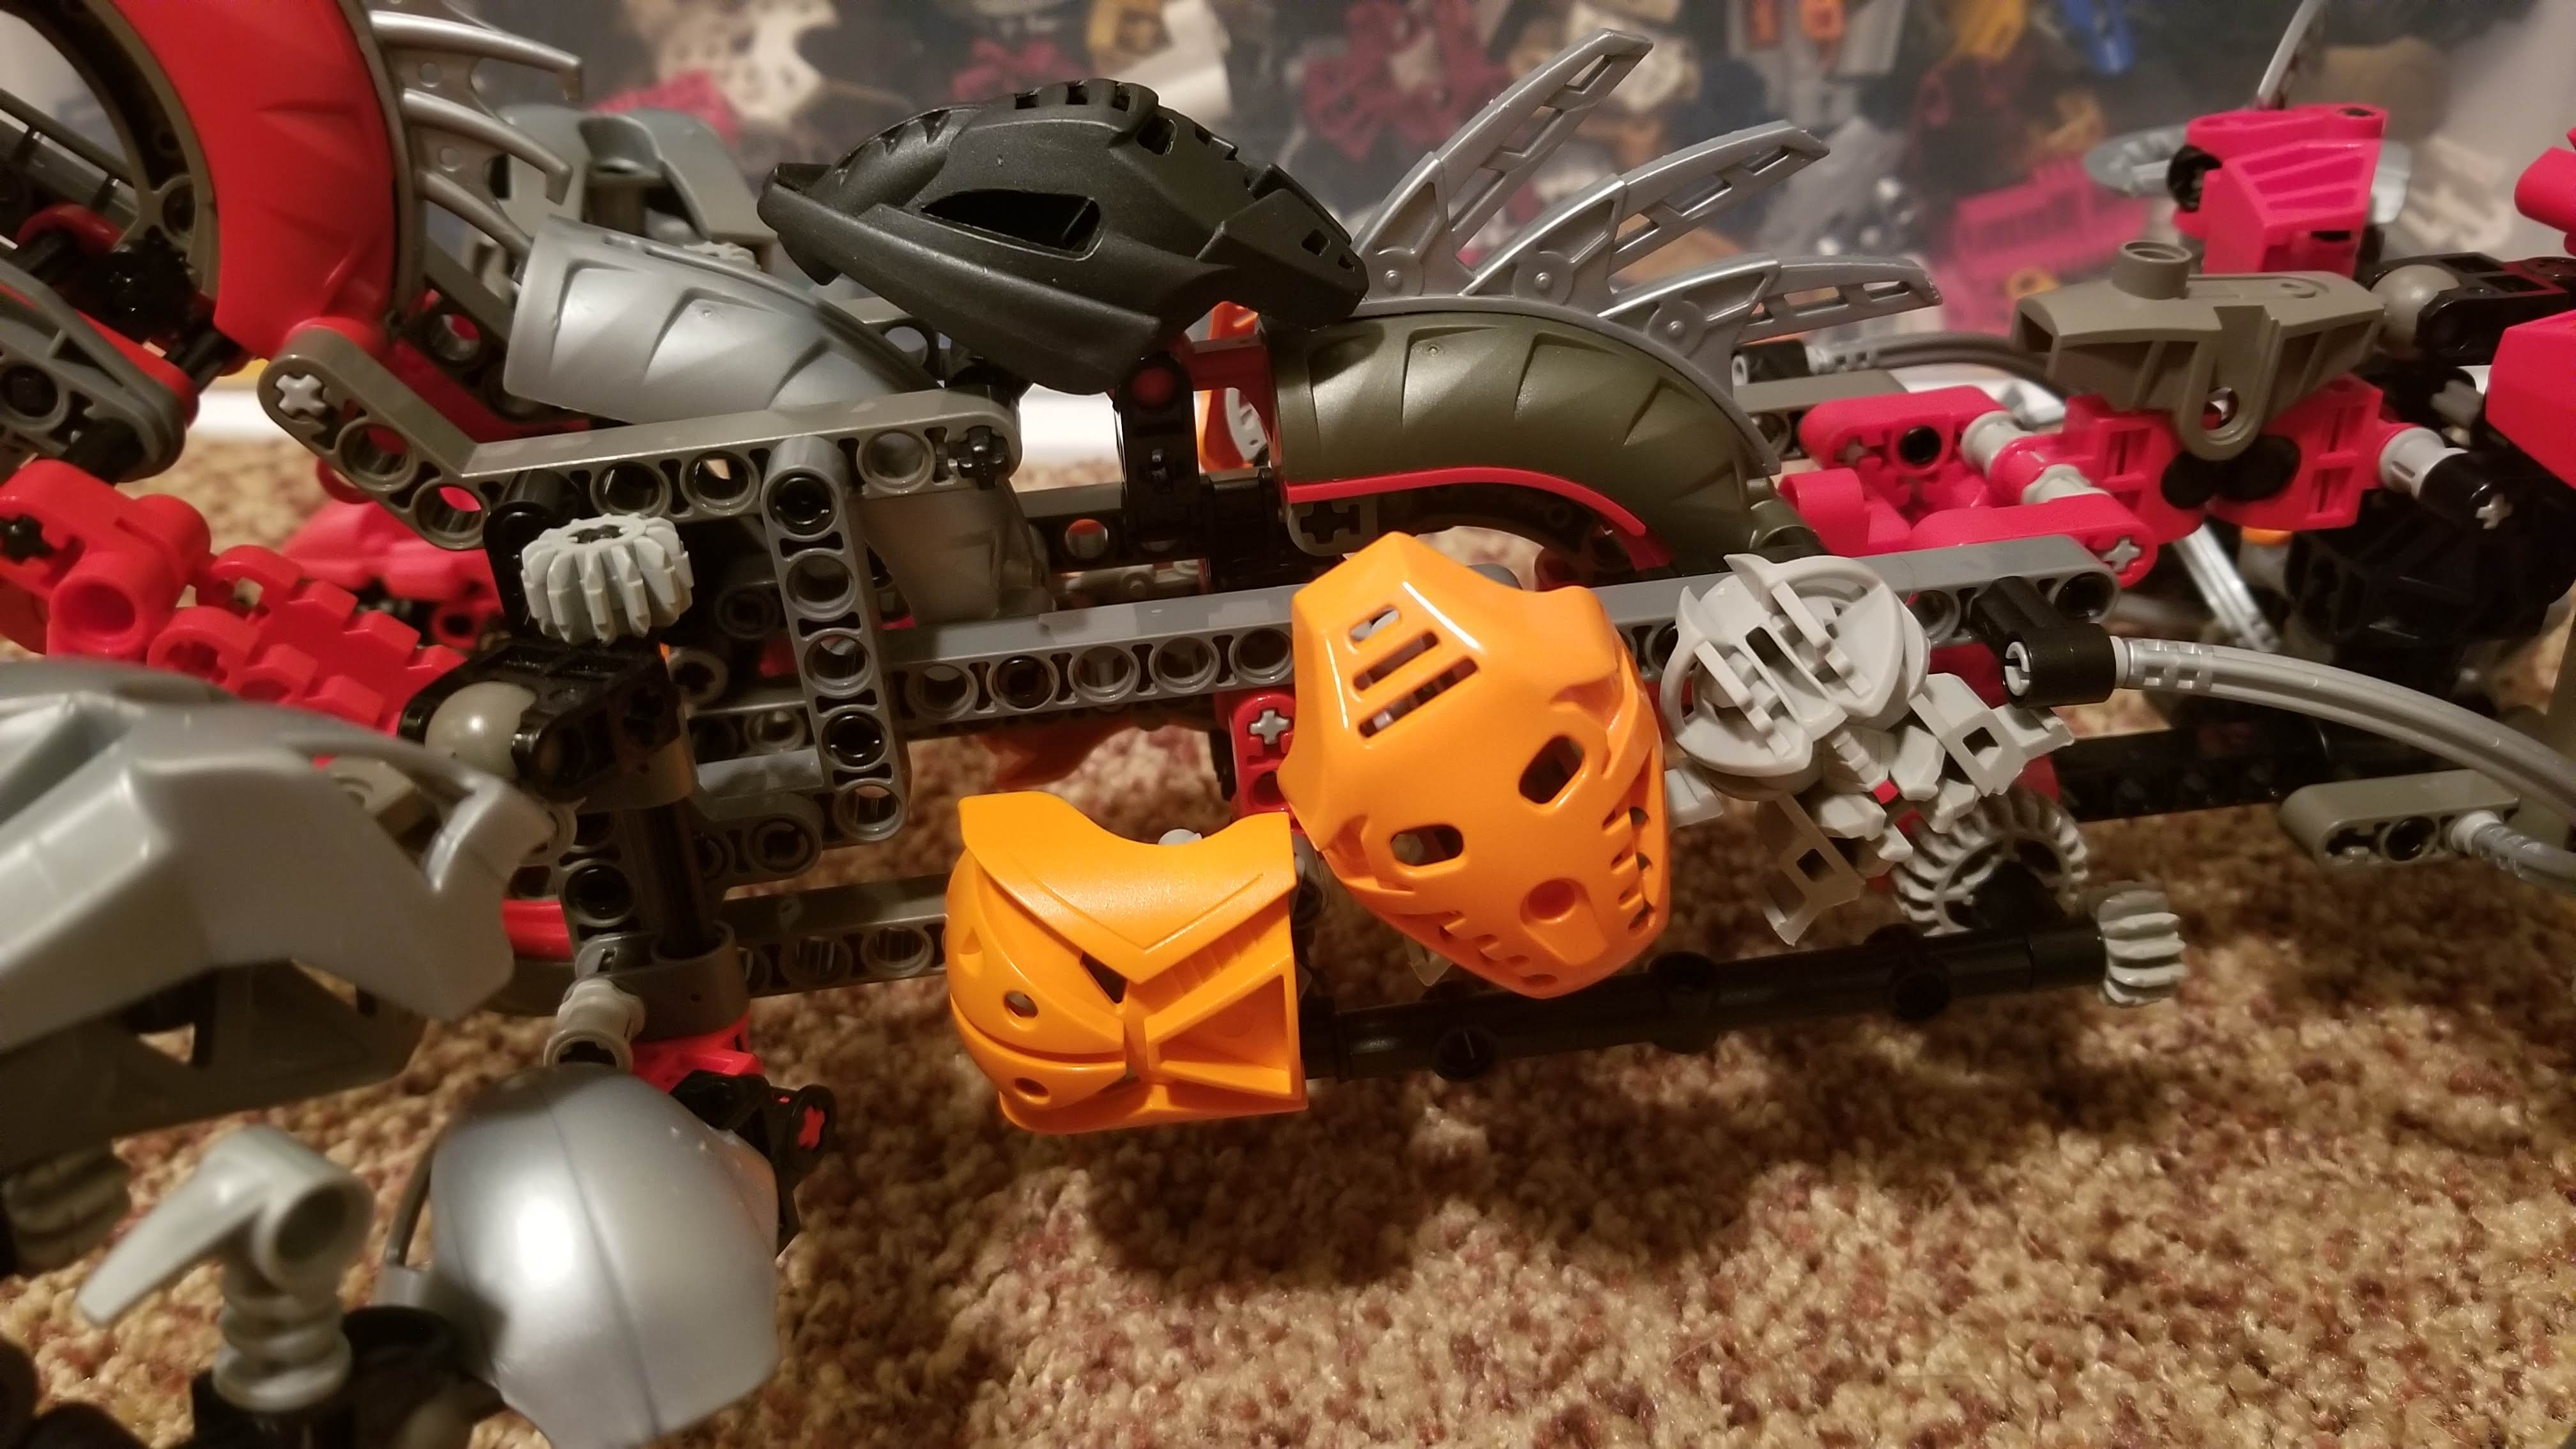
So with your latest updates, I do believe that we are slowly getting closer to a final model. I did make changes from your model in trying to get it closer to the pic. I tried to take some closer shots to show what I did. I am not sure what mask is behind the front arms, but I had 2 of the orange Matatu that look good there.


4 Likes
That’s great, though the lower jaw is different. The claw is placed one space before and it seems due to the weird angle of the jaw that it should be able to rotate.
Here they are the updated .io file and a pdf with the instructions to build the model respectively.
https://www.mediafire.com/file/5ddiysssm9sav2c/Kanohi_dragon.io/file
https://www.mediafire.com/file/lblzma38x77eu2v/kanohi+dragon.pdf/file
2 Likes
Very nice that there is instructions now, but I do still disagree with a few spots.
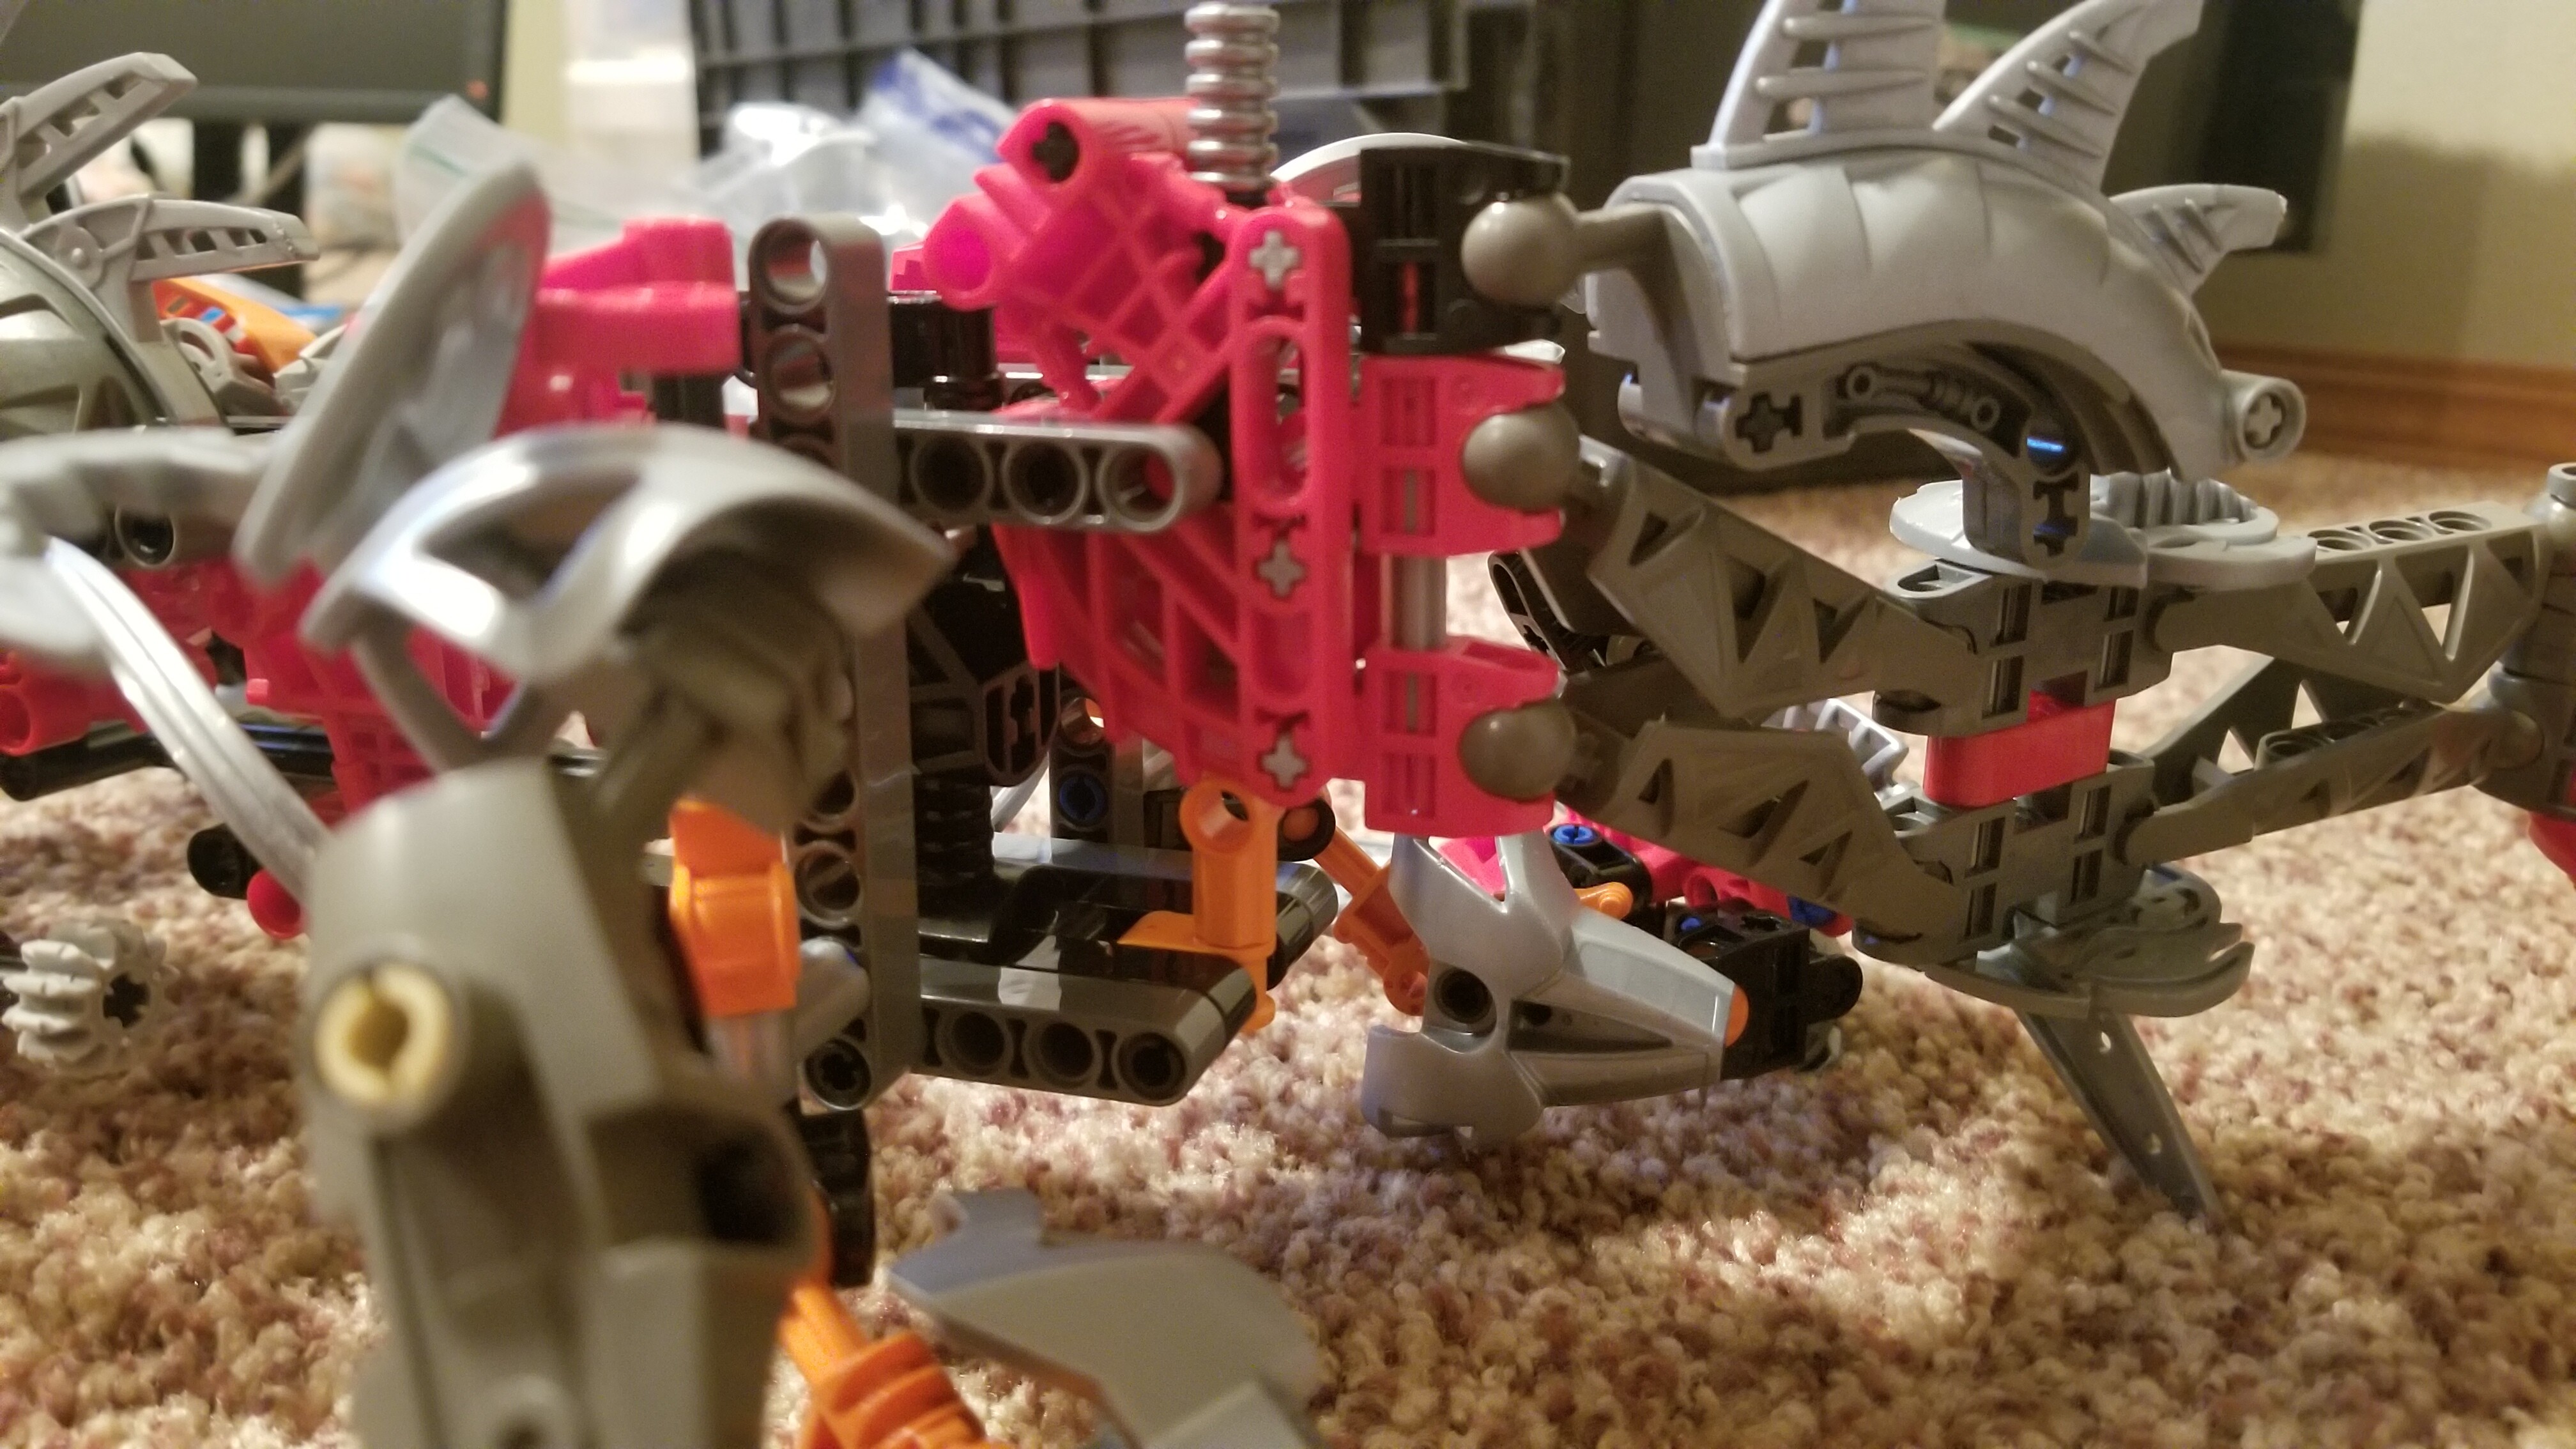
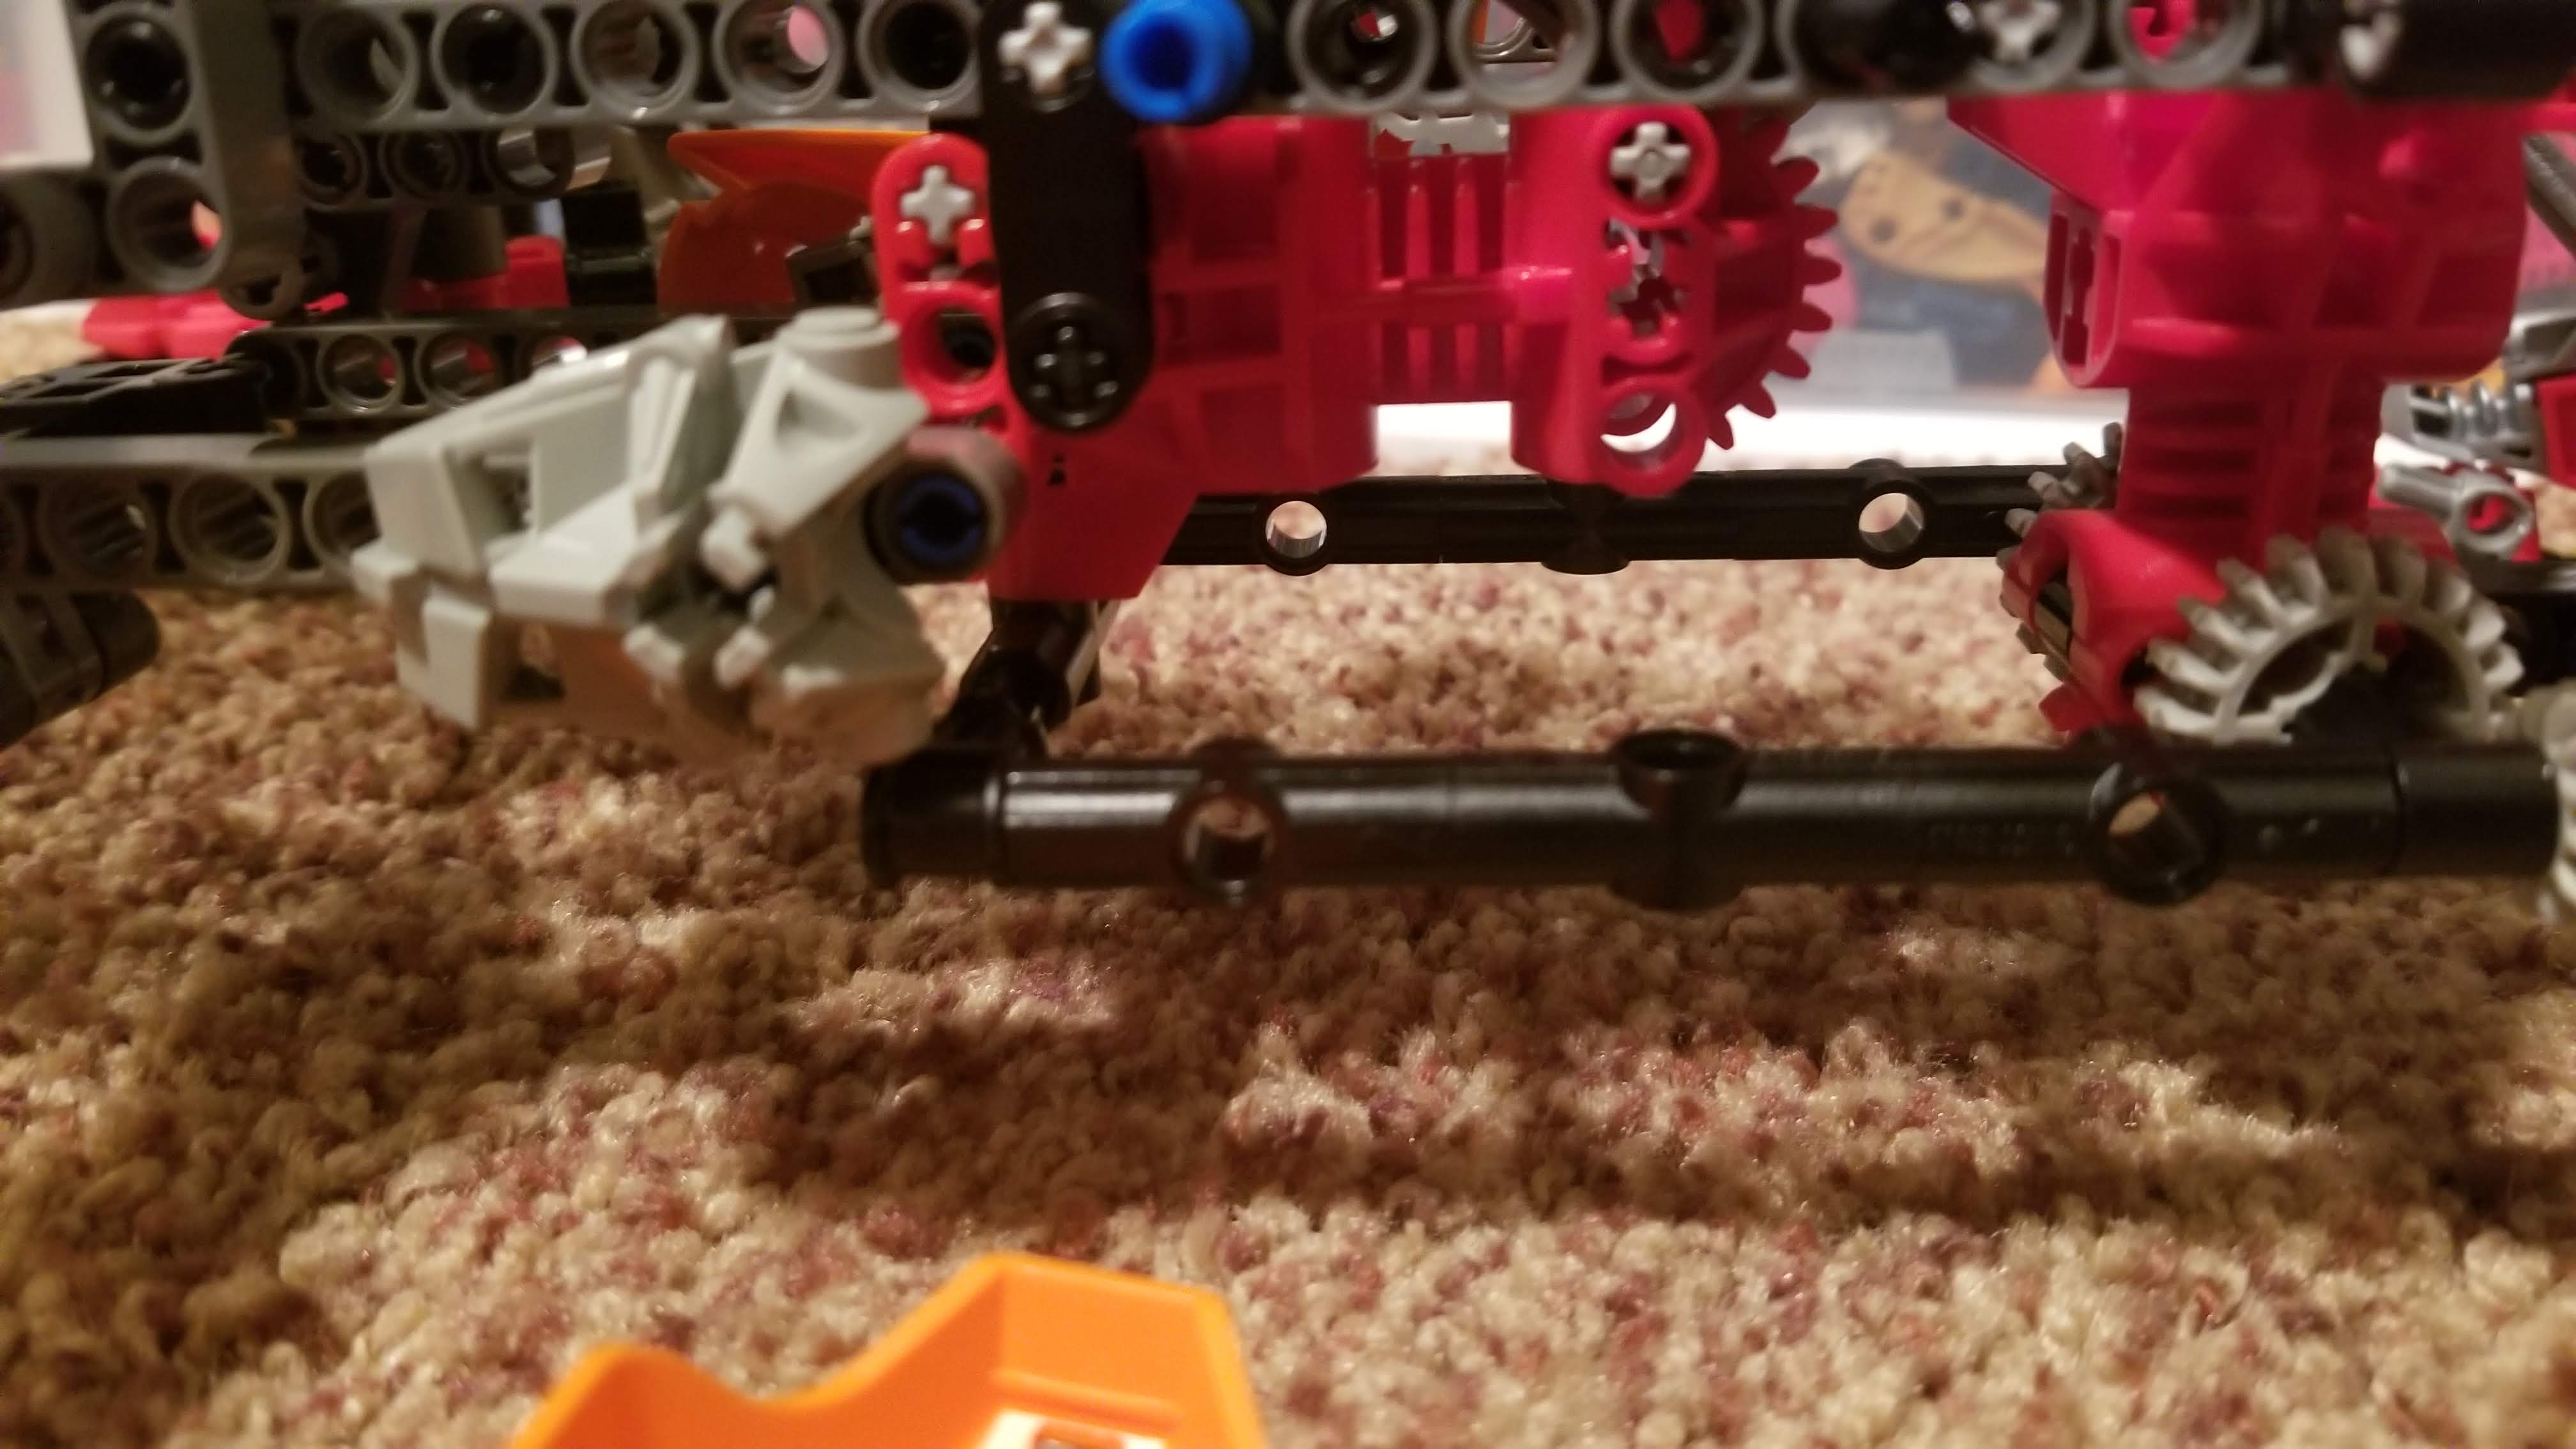
The beam that has the heads does not go straight across, it is 2 shorter ones like I did on my pics from 9/20. If you look by the pakari, you can see a black piece that shows were the beams transition.
I also redid the lower jaw part since yes it looks like it is able swing. From what I can tell, the orange claw is only 2 studs wide not 3 like your model.
2 Likes
https://www.mediafire.com/file/lyft2n59noda68u/kanohi+dragon+instructions.pdf/file
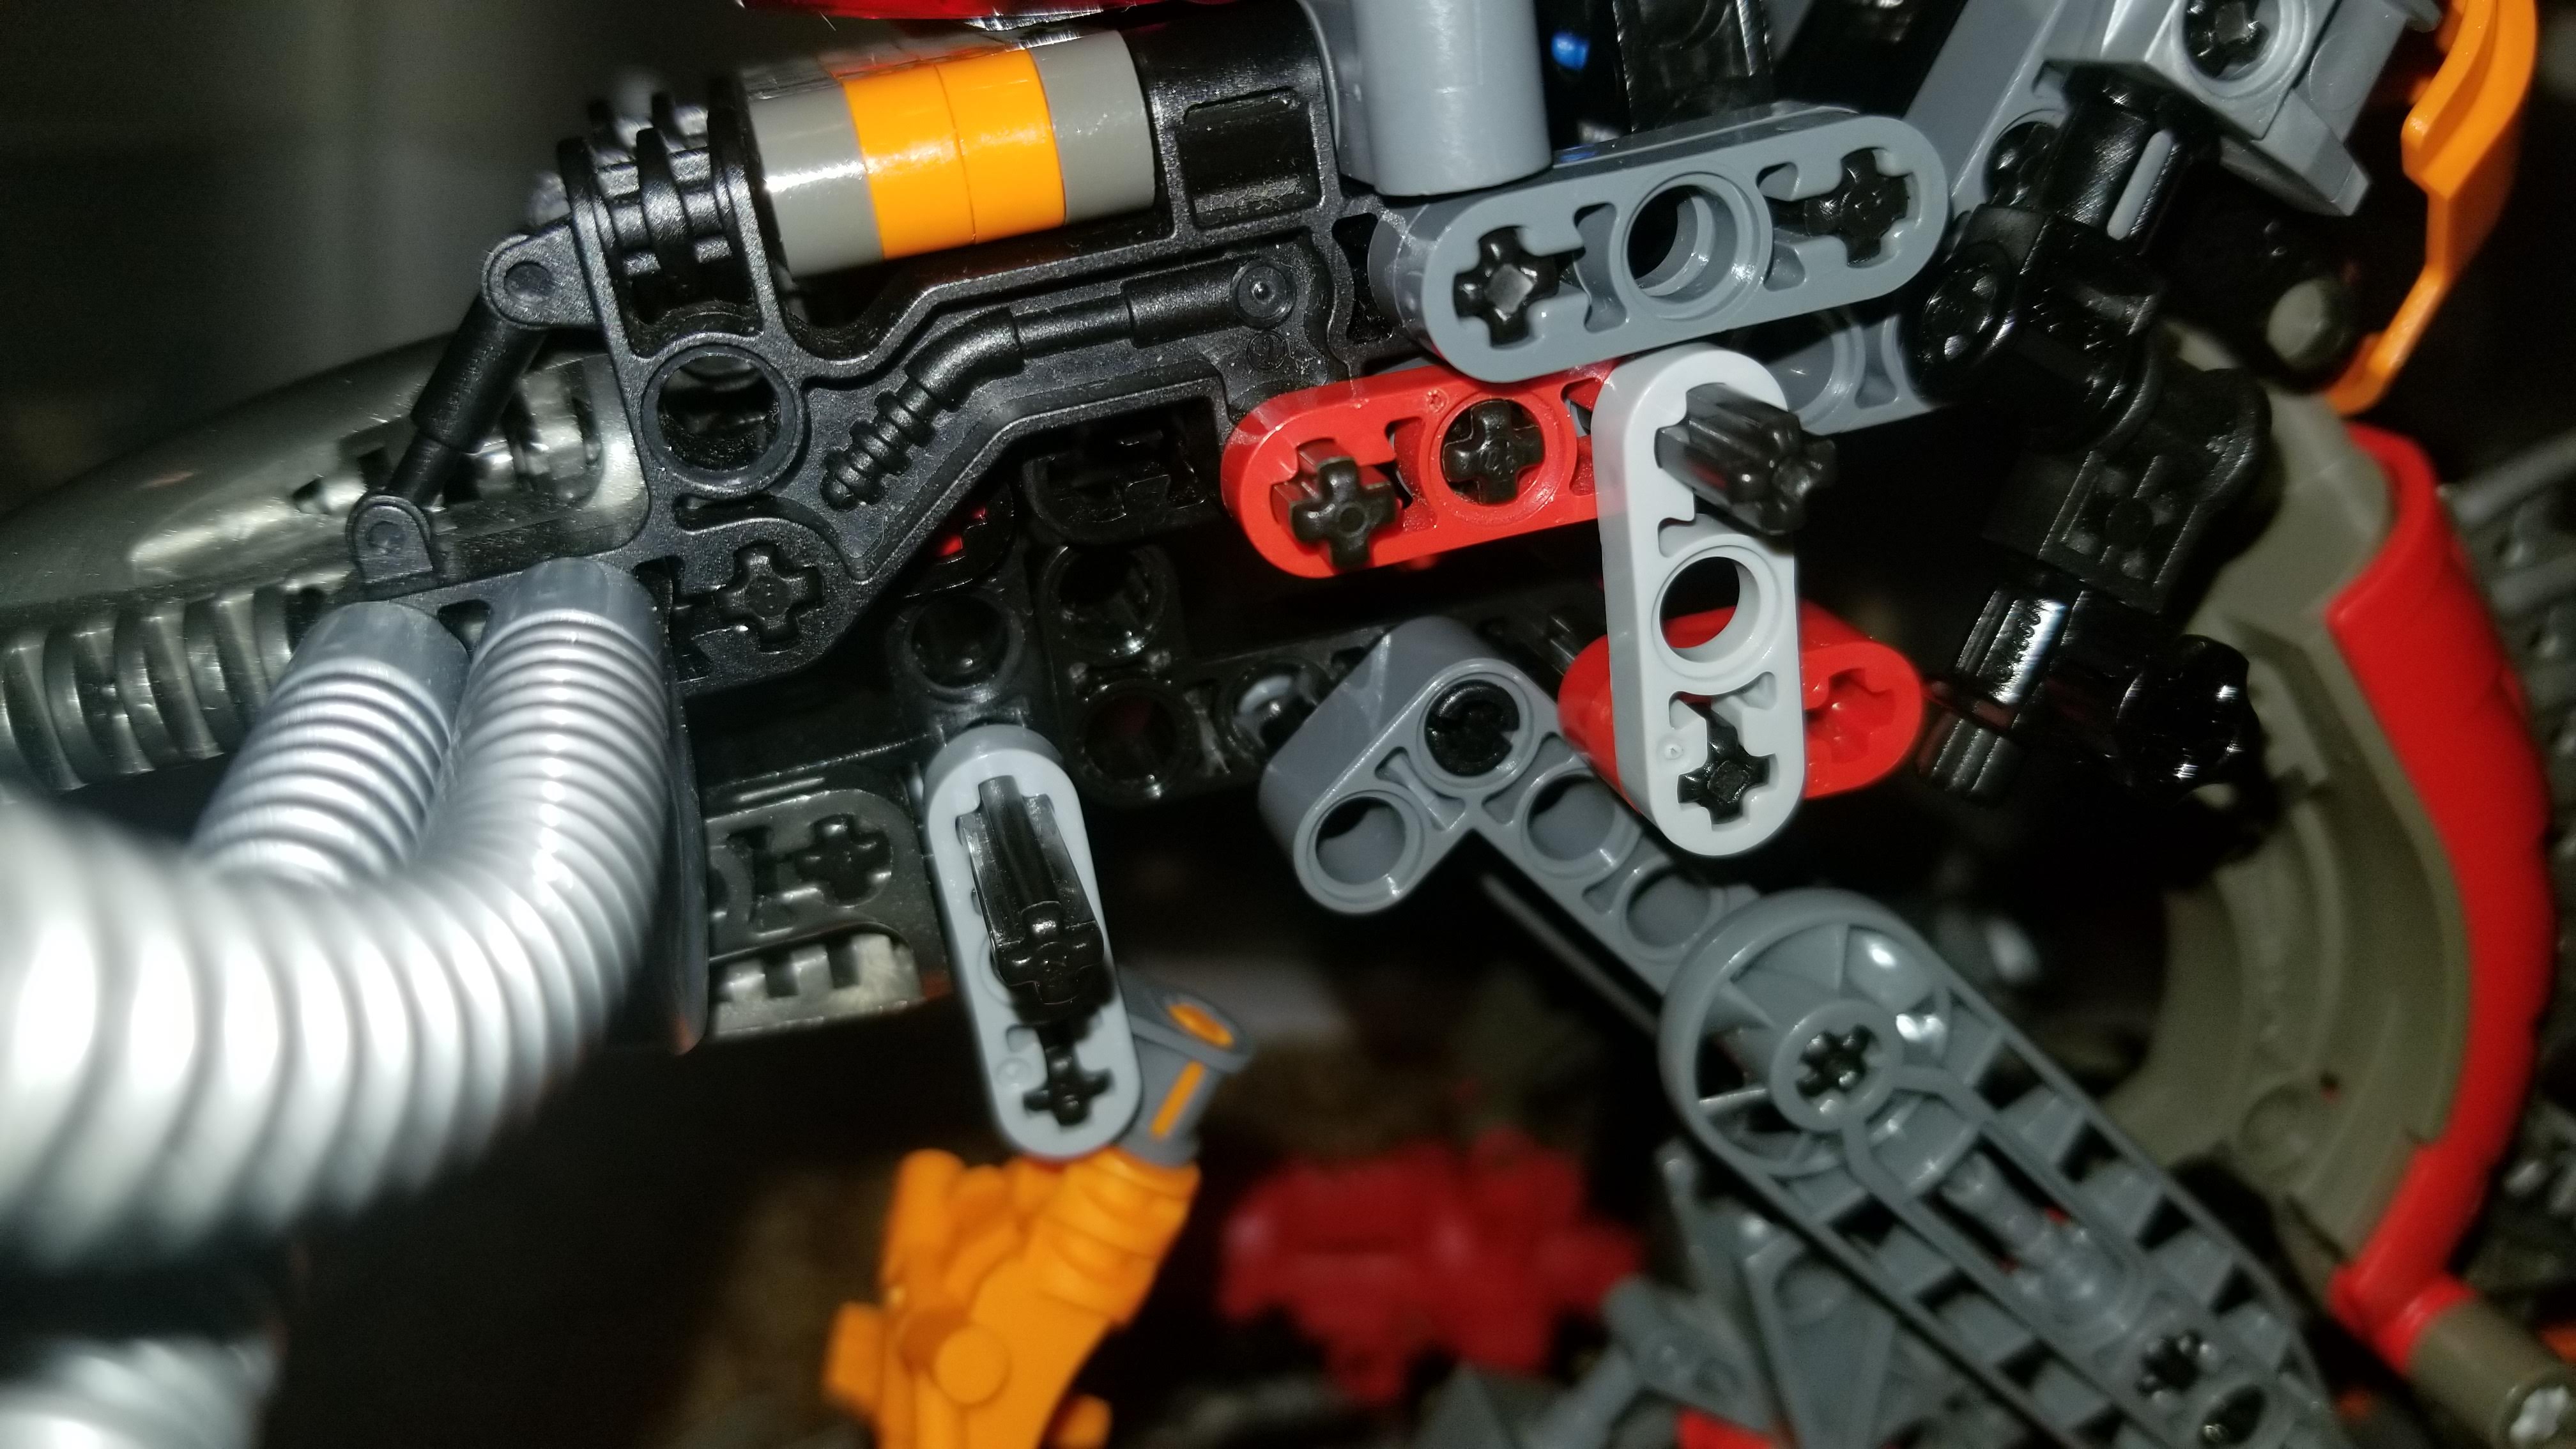
Hi, these are the most updated instructions. The new instructions have some minor mods. First, I changed the color of the connector that holds the claw/beard from light to dark grey. Also, I changed a 3L axle for a 2L one in the back of the front foot, because I realized that the blue pin behind the elbow is in a lower position that I initially thought, and also it makes the back of the arm rest in a more natural angle (in step 113, page 72). Finally, I added a step I forgot before (in step 40, page 26) where you should raise the frontmost silver rahkshi back after placing the angled liftarm, so it fits right between the first and the second rahkshi spine of the neck (step 44, page 28).
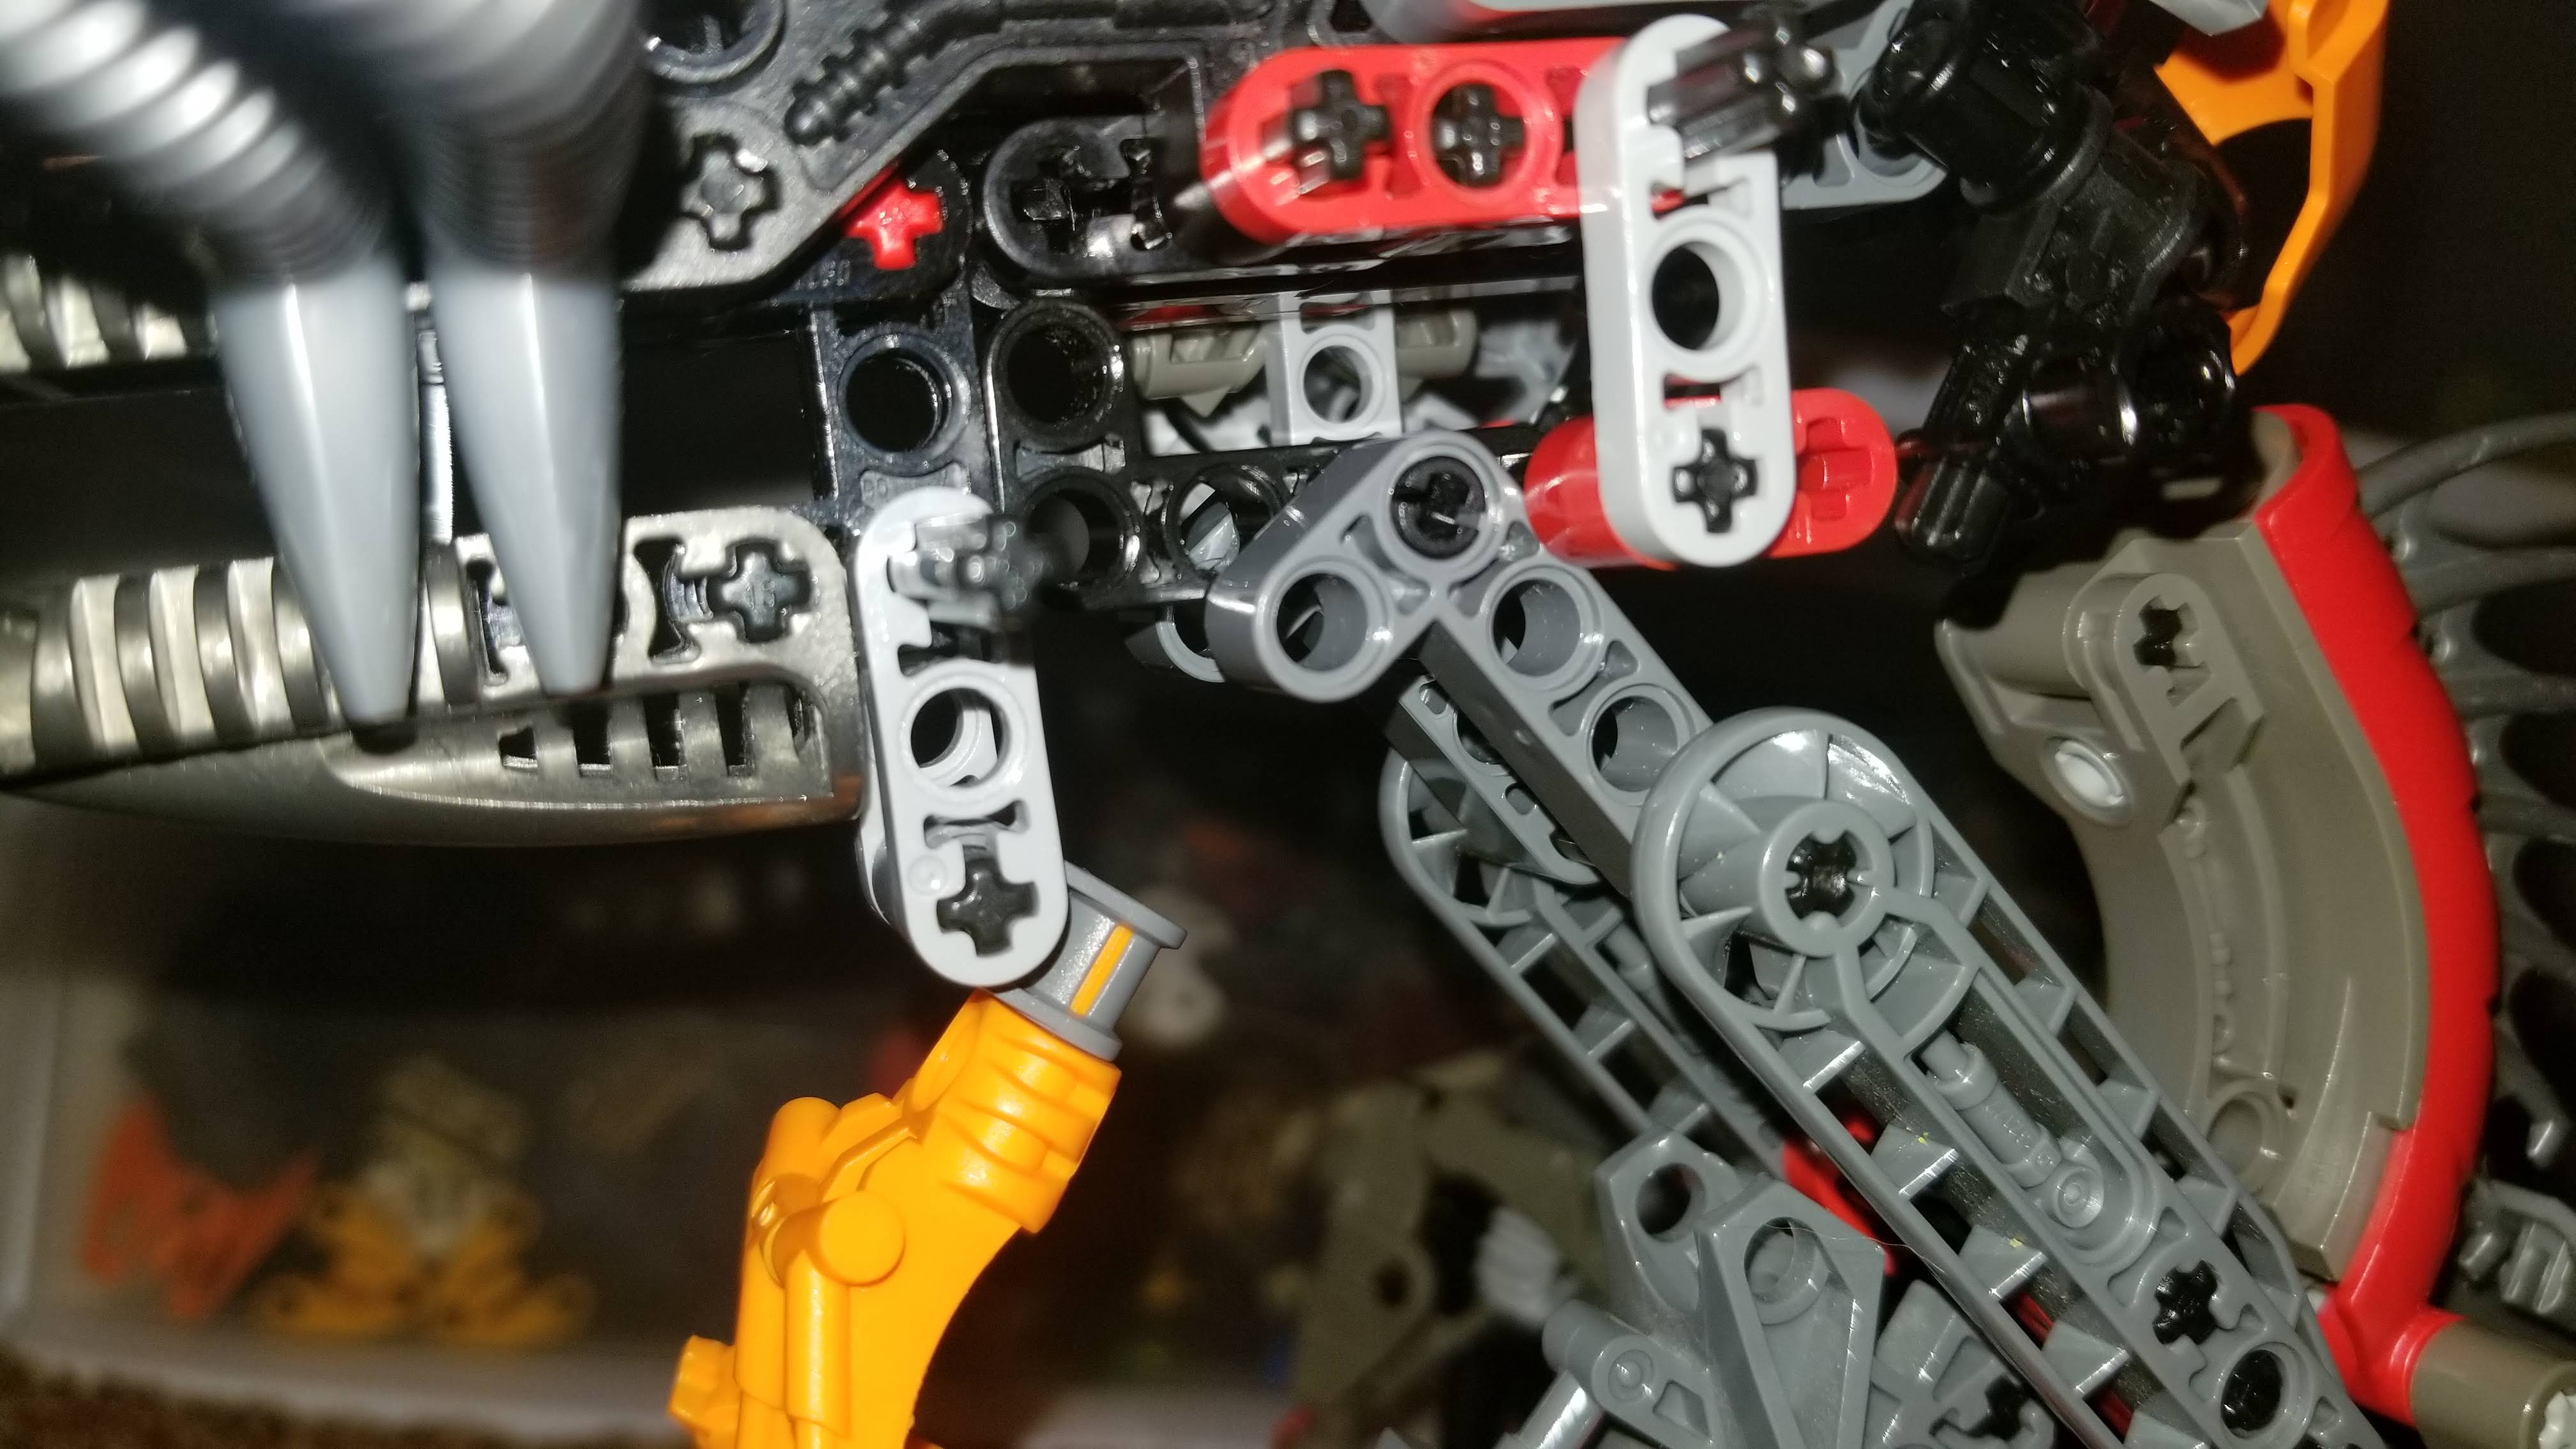
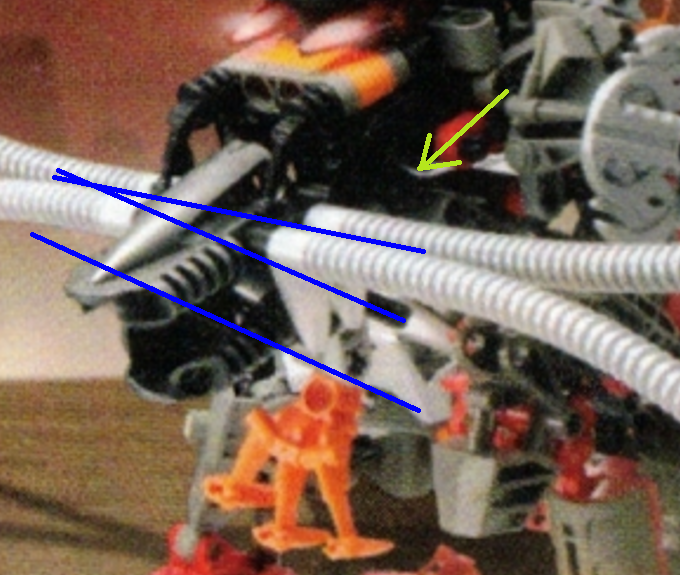
About the decisions regarding the placement of the beard and the liftarms that hold the heads, those were based mostly on the viewpoint. When looking the model in Studio from an angle similar to the one where the official picture was taken, these positions are the ones that match it the best. It is likely that the builder didn’t use 1/2 bushes in the beard as I did to keep it in place, so it slid to the bottom due to the tilt of the jaw. Also, the beard and the thin liftarms that hold it seem to be rotated in the same way the jaw is. If you look closely, the axle in the beard is not in parallel with the width direction of the rest of the head, but it is in parallel with the width direction of the jaw (blue lines), so they must be part of the same block. Additionally, there seems to be an angled beam that dips towards the neck (green arrow), that’s why I used a 3L liftarm to attach it.
PD: Sorry for the misspelling in the last page
2 Likes
I still find the extra black mata torso in the chest, behind the front rahkshki spine, to be more stable while I modified my version though, and the second joint in the hind legs to be enable the dragon to be more poseable, how I showed it before. Otherwise, I love all the improvements here, they clean up the torso pretty nicely. I originally thought that the neck and the waist would be more poseable, and my model could rotate the neck side to side, but I changed them out to mach the instructions here, it’s less stressful to move him around.
Edit:
And I mean it, the black mata torso perfectly fits inside the chest of the dragon, and hold it together quite nicely. Much better then the socket joint, and provides and extra pin connection, to completely lock the 3 long technic beam in place.

2 Likes
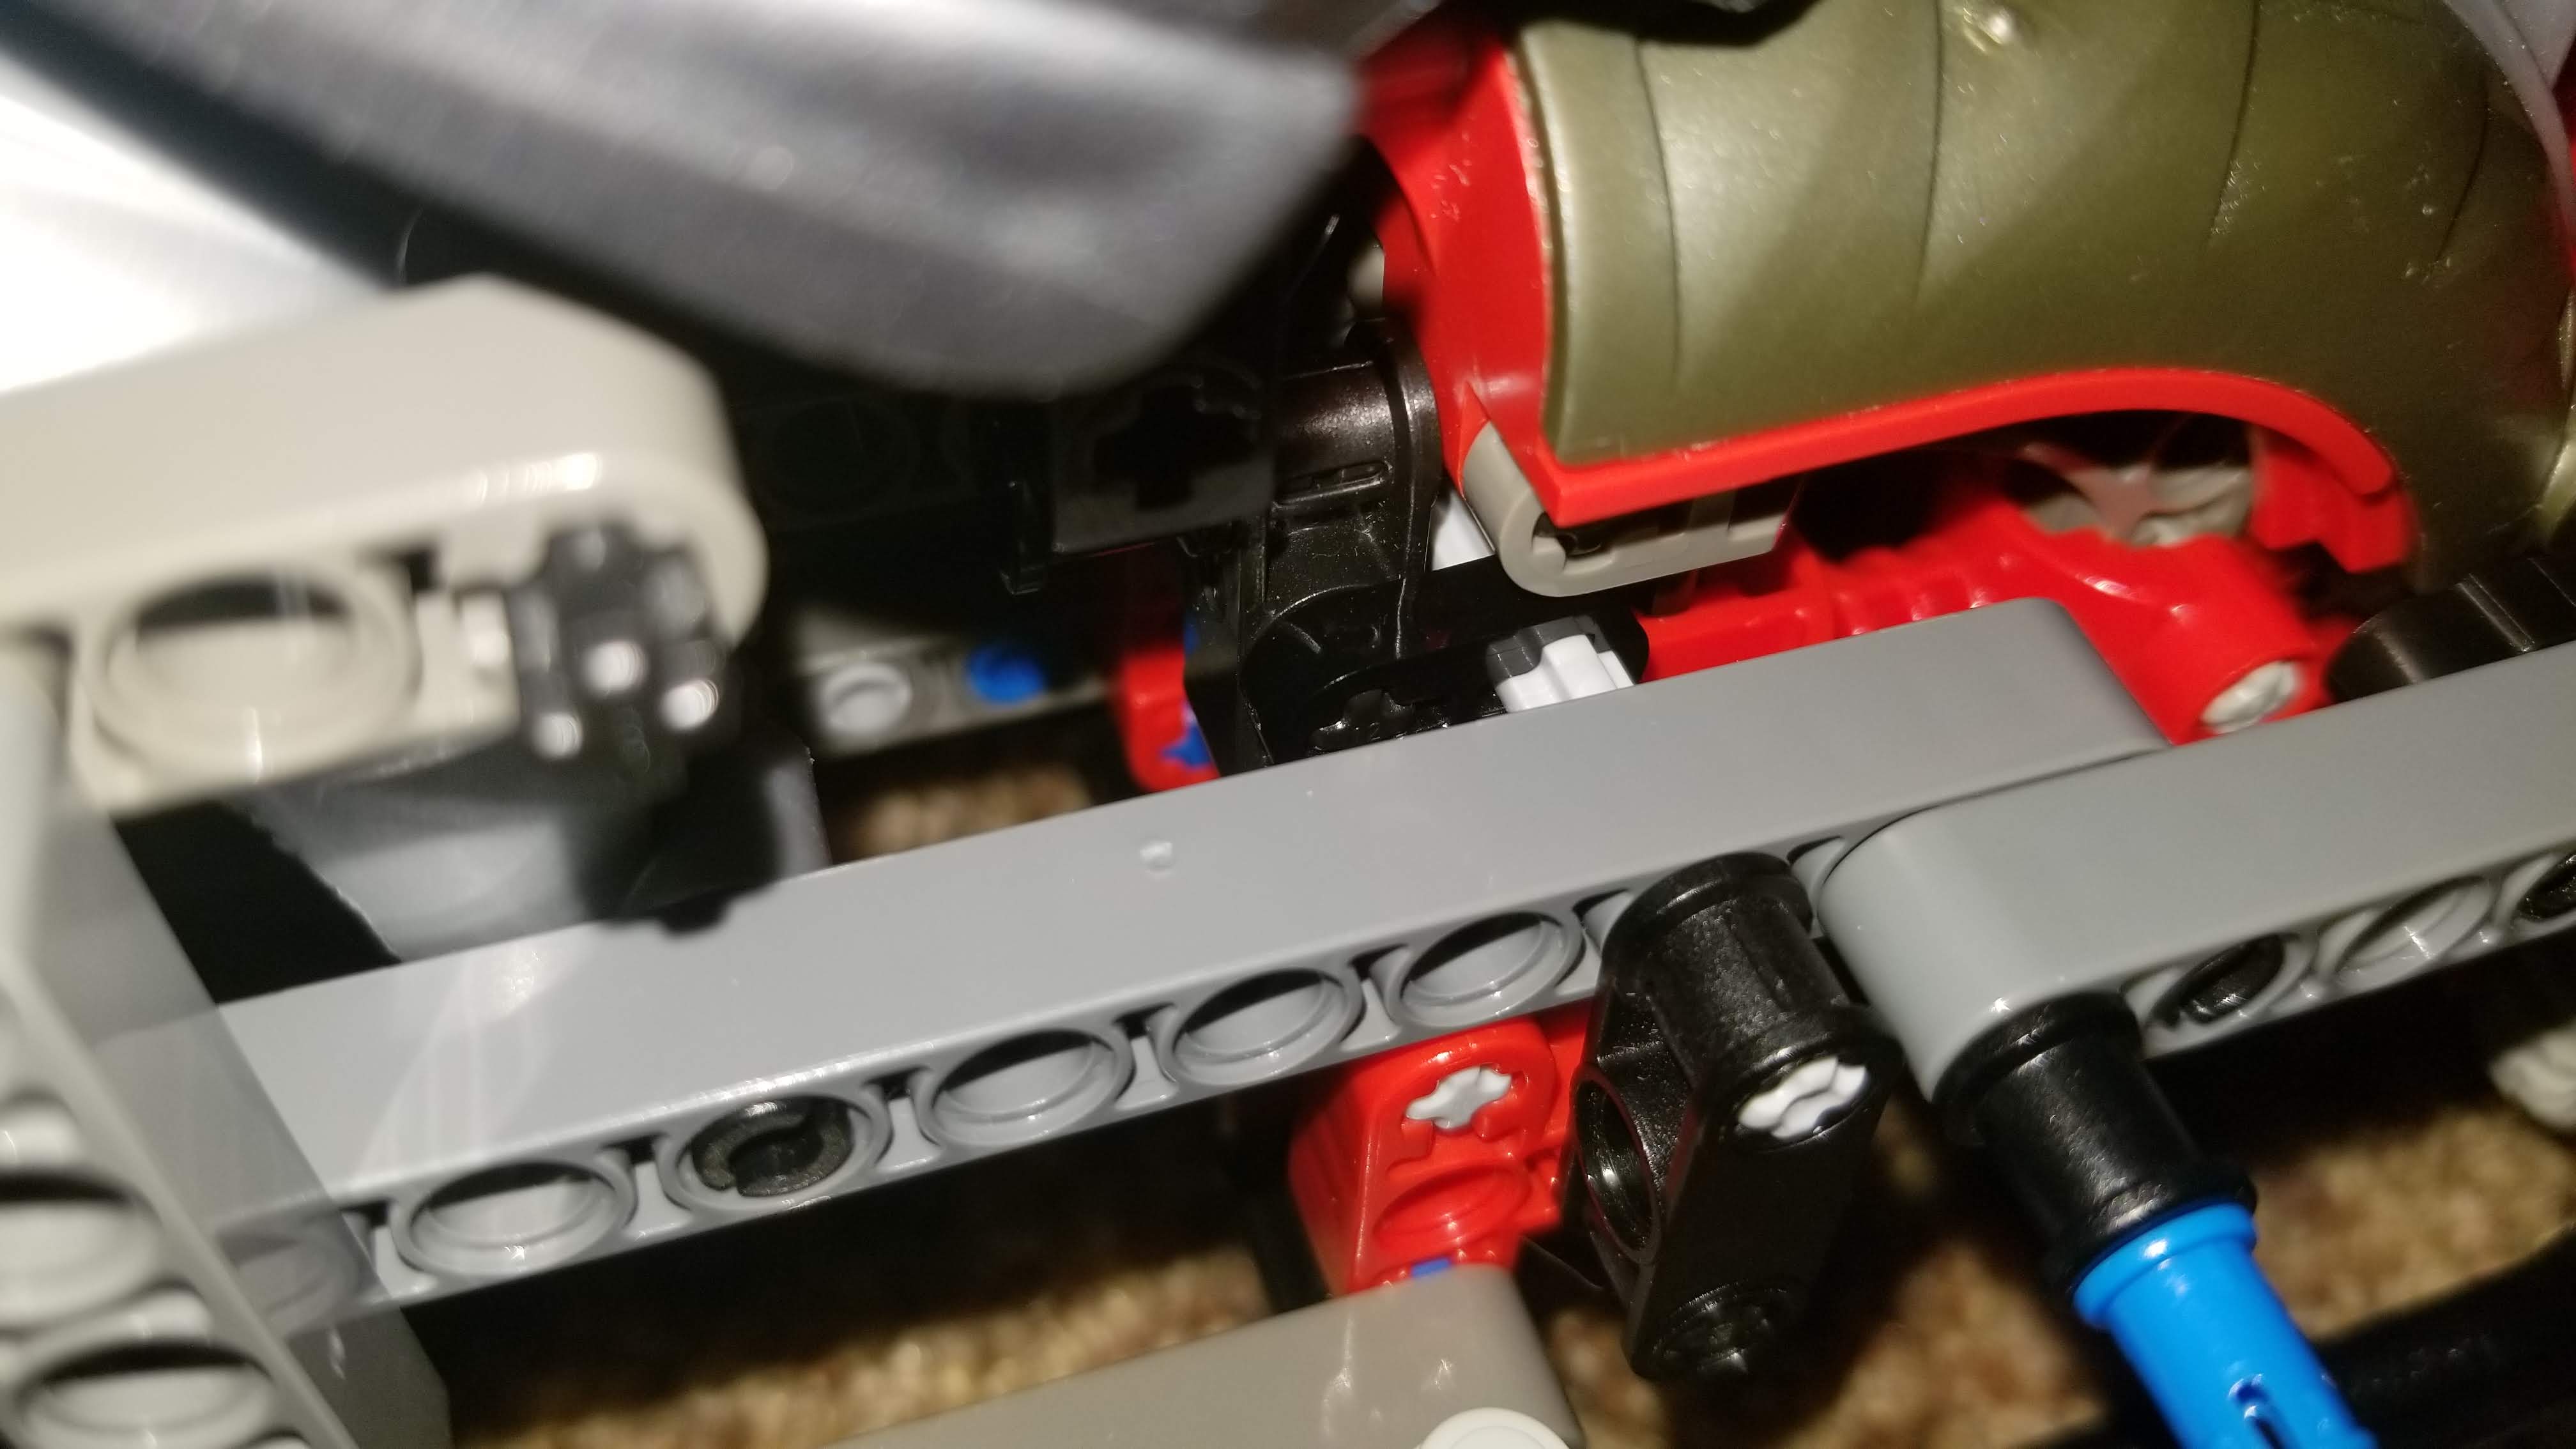
Sorry for the wait. The black mata torso in the chest fits very good, also I think that is the way it is supposed to go, because there is this thing that for very long I didn’t know what piece could be, but now I can see it is clearly the back part of a black mata torso, where the gear is attached. At first I didn’t think it was right because below it the chest seemed hollow to me, I guess it is just the effect of the “steam” under the dragon that blurries the chest.

EDIT: I noted the orange thing behind the arms is actually below the arms, because it goes in front of the black hand that supports the back arm. So, no more orange ruru in there. Instead I placed an orange #5 connector (the same ones that come in the Nui Rama) below the upper arm. Sure it doesn’t look as good, but seems more accurate.
I’m uploading the updated .io file and the pdf instructions.
4 Likes
Hey, I just wanted to respond here and say thanks for the marvelous work you and others have done to get this model figured out. It’s extremely impressive! I’ve thought about wanting to construct a Kanohi Dragon since I read Rahi Beasts back in the day, and so I’ve been following these instructions and part lists for a bit to collect parts. In doing so, I noticed something small and just wanted to share.
The instructions posted last call for 2 Black Technic Axle 7L, used in steps 8 and 19. I wasn’t sure how exact you’re trying to recreate - but I think they very likely did not use Black 7L axles. Only one set has had that piece in black (somehow), and it was a Technic Ferrari model from 2005, released about a year after the contest submission. Given that these axles seem to be well within the model and not very visible in outside pictures, I’m guessing it’s far more likely to be Light Gray (or I guess potentially Light Bluish Gray, since the change had been made in 2004). It was used in a few Technic and Star Wars sets, as well as Takua and Pewku.
This is also why those axles are between $20-45 each right now on Bricklink, if purchased within the US. Just figured I’d say something since I came across this info!
8 Likes
Welcome to the boards, PaladinRosie
5 Likes
Yeah, my bad. Just use regular light gray ones.
3 Likes