Perfect for whistling.
6 Likes
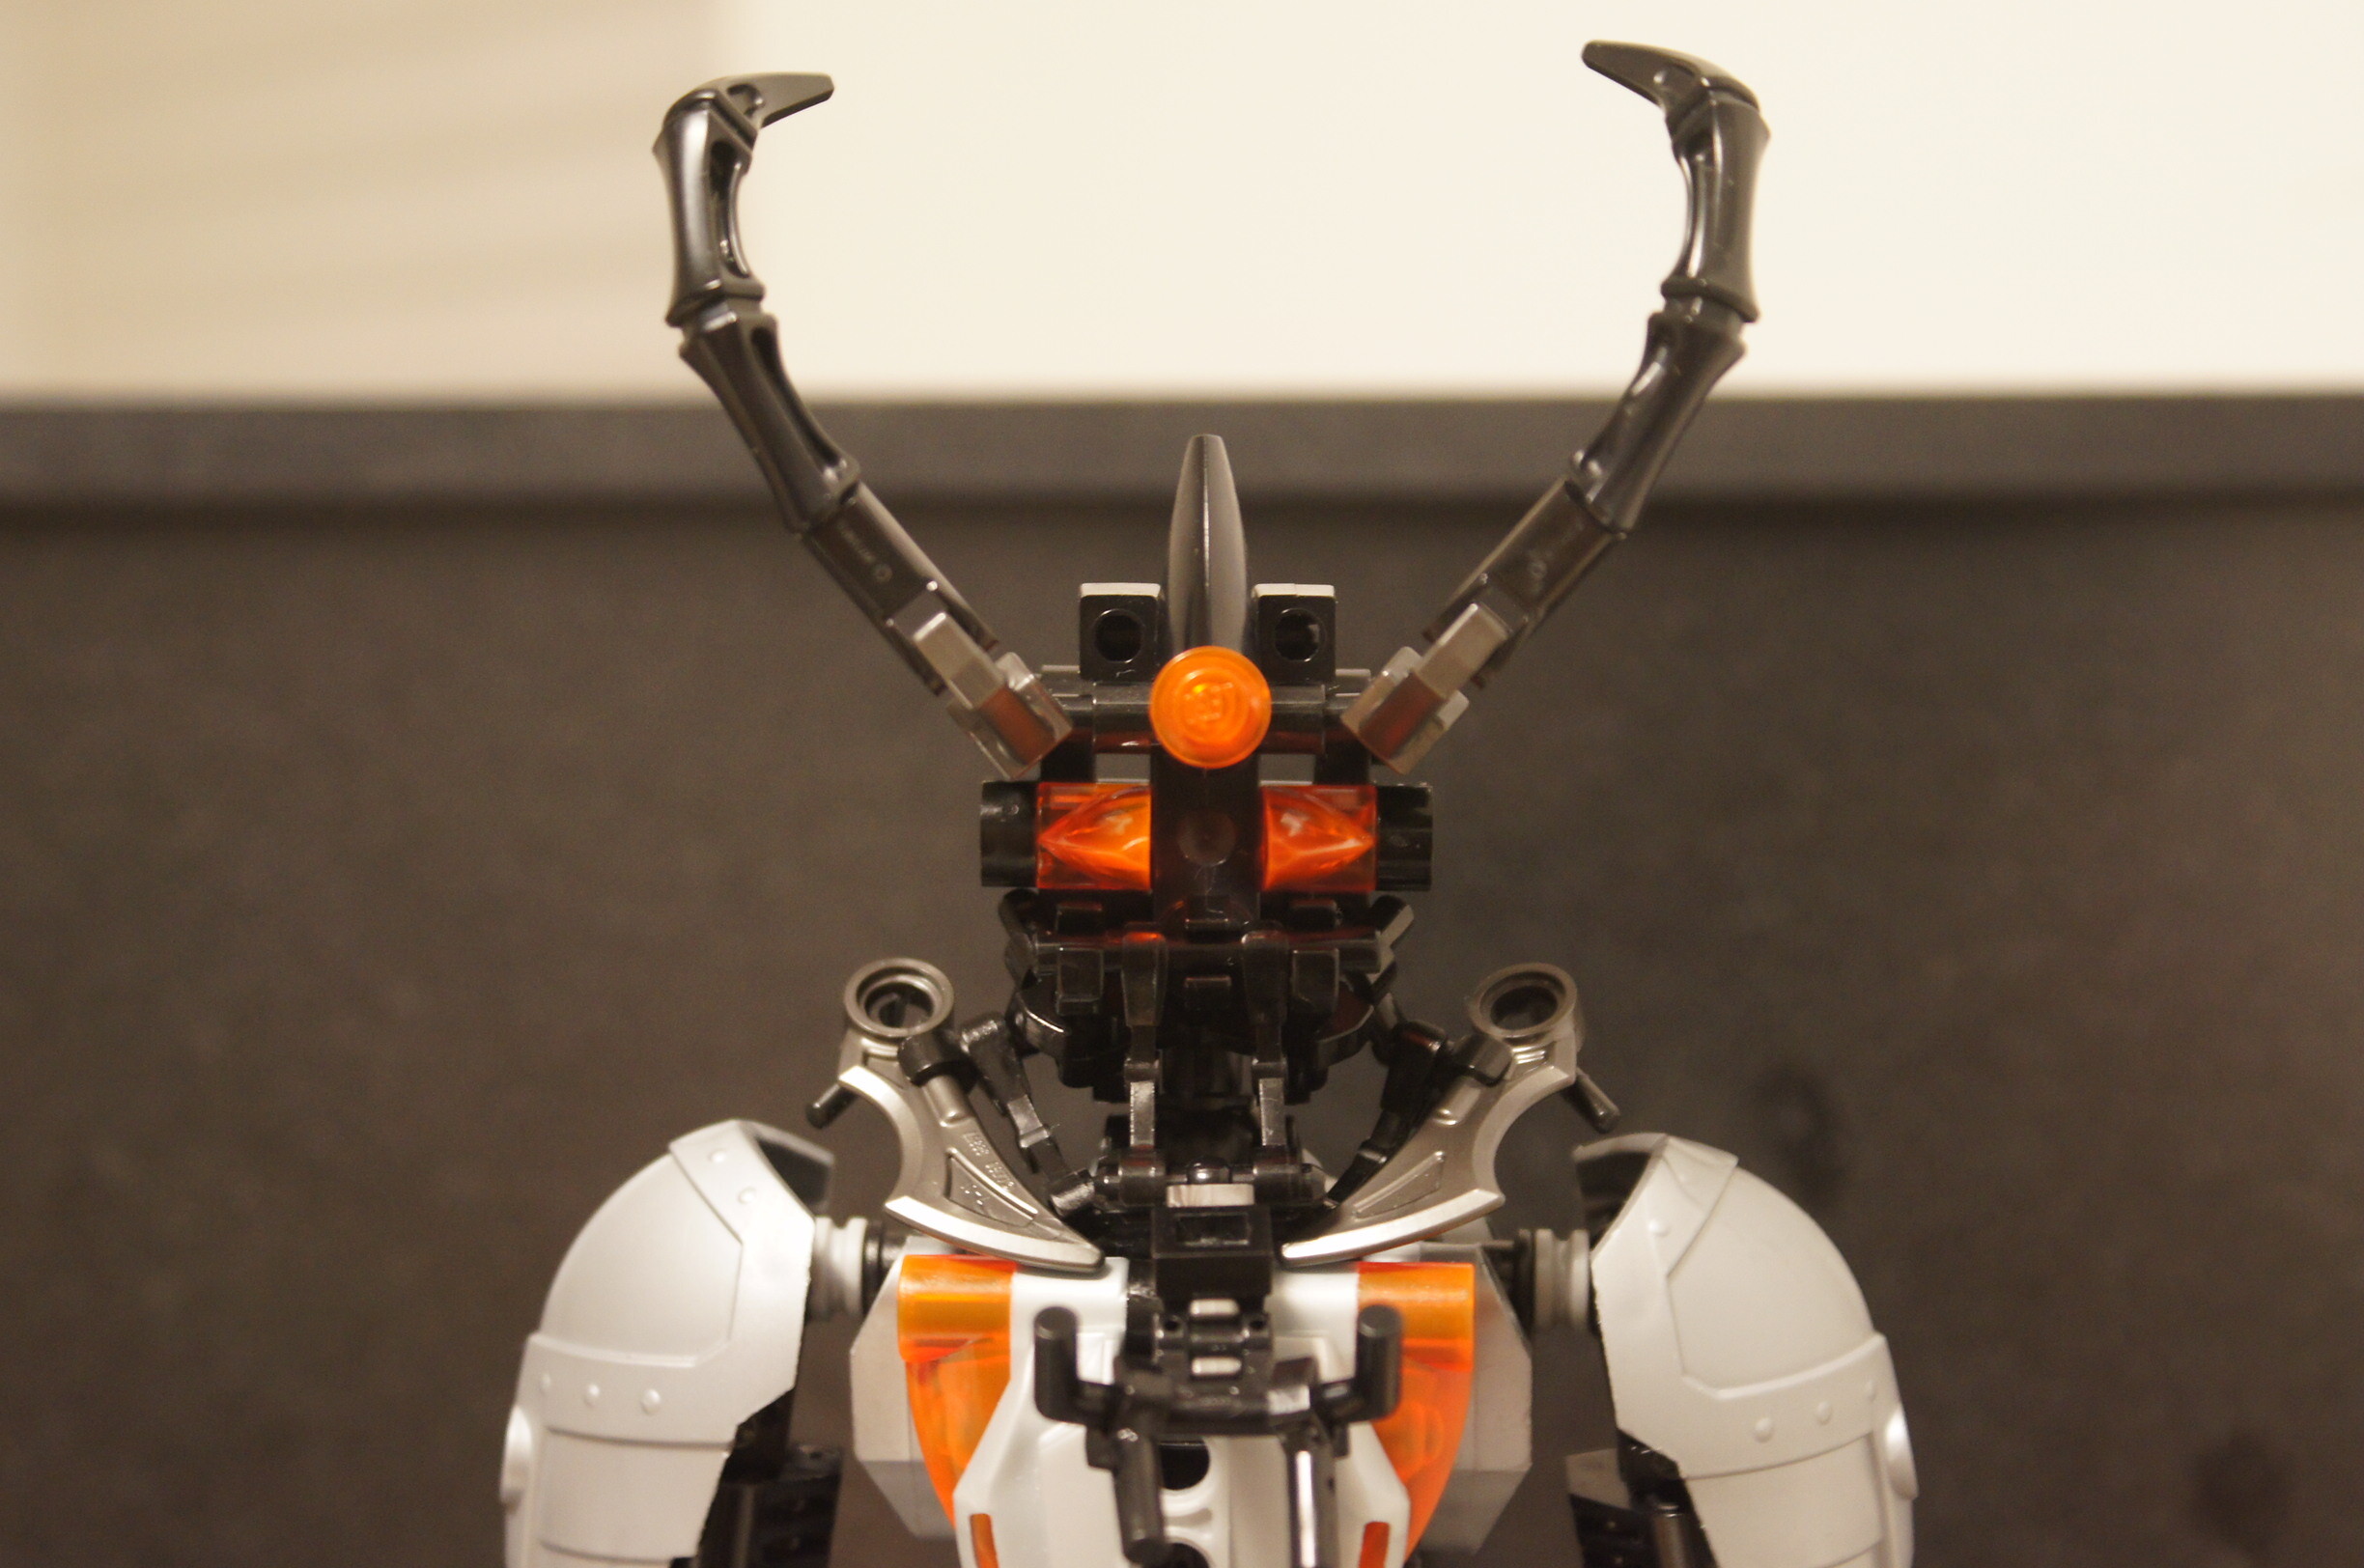
To be honest, I’m not 100% sure on the “mouth” myself. On the one hand, that is something most masks have, on the other hand I don’t know if I like this particular design.
Reason why the Exoforce arm isn’t an option, though, is that it’s at the same time too short to serve as a chin and too long to attach anything onto that wouldn’t stick out too far. And with the current cheek design it also wouldn’t fill the gap.
But maybe something else comes to mind in time. Not really a fan of how the entire middle section is just wedged in place, either. Like, it’s secure, but it’s not actually attached.
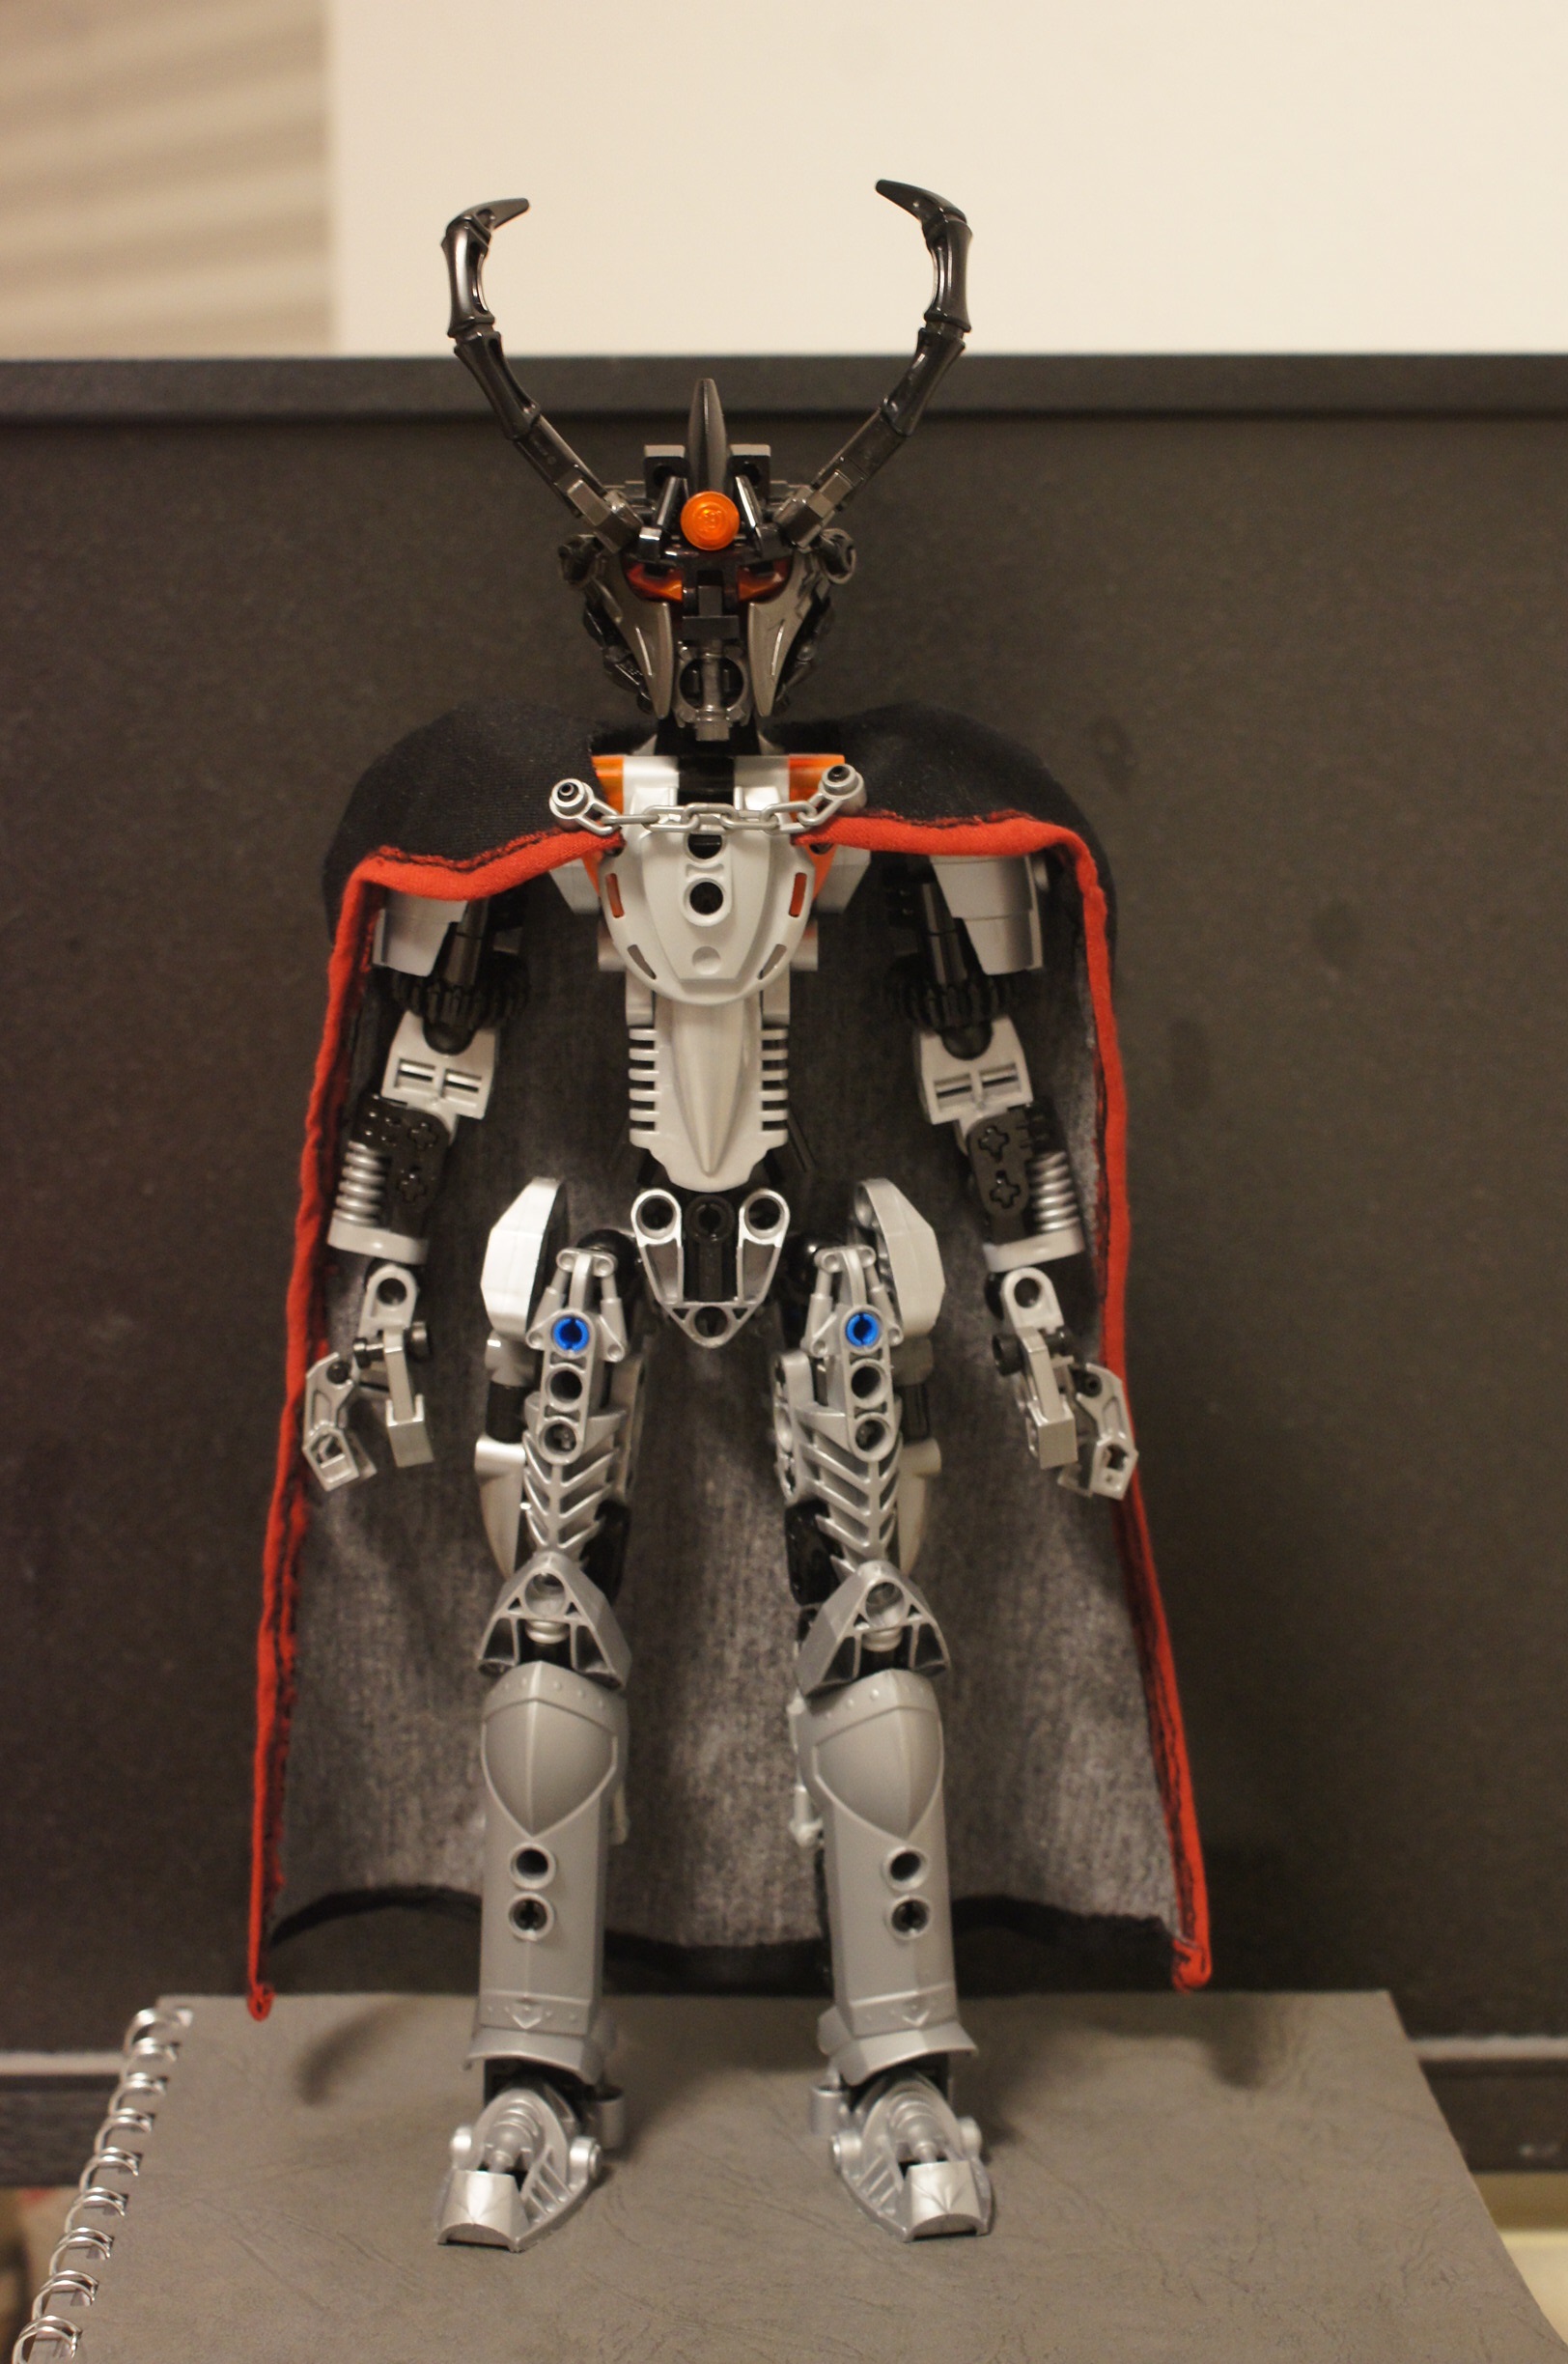
On a completely different note - I finally updated the “group shot” in the first post. Long overdue, though weird that since 2019 I only managed to finish 4 more Makuta. I suppose on top of that there’s the updates on Krika and Ornek, as well as the practically finished Belgahn (still need to acquire some more Carapar armor for him, though…), but still. I suppose I have to build some more Makuta again.
6 Likes
For adding more trans-orange, would studs in the empty pinholes on the shins stick out too much?
4 Likes
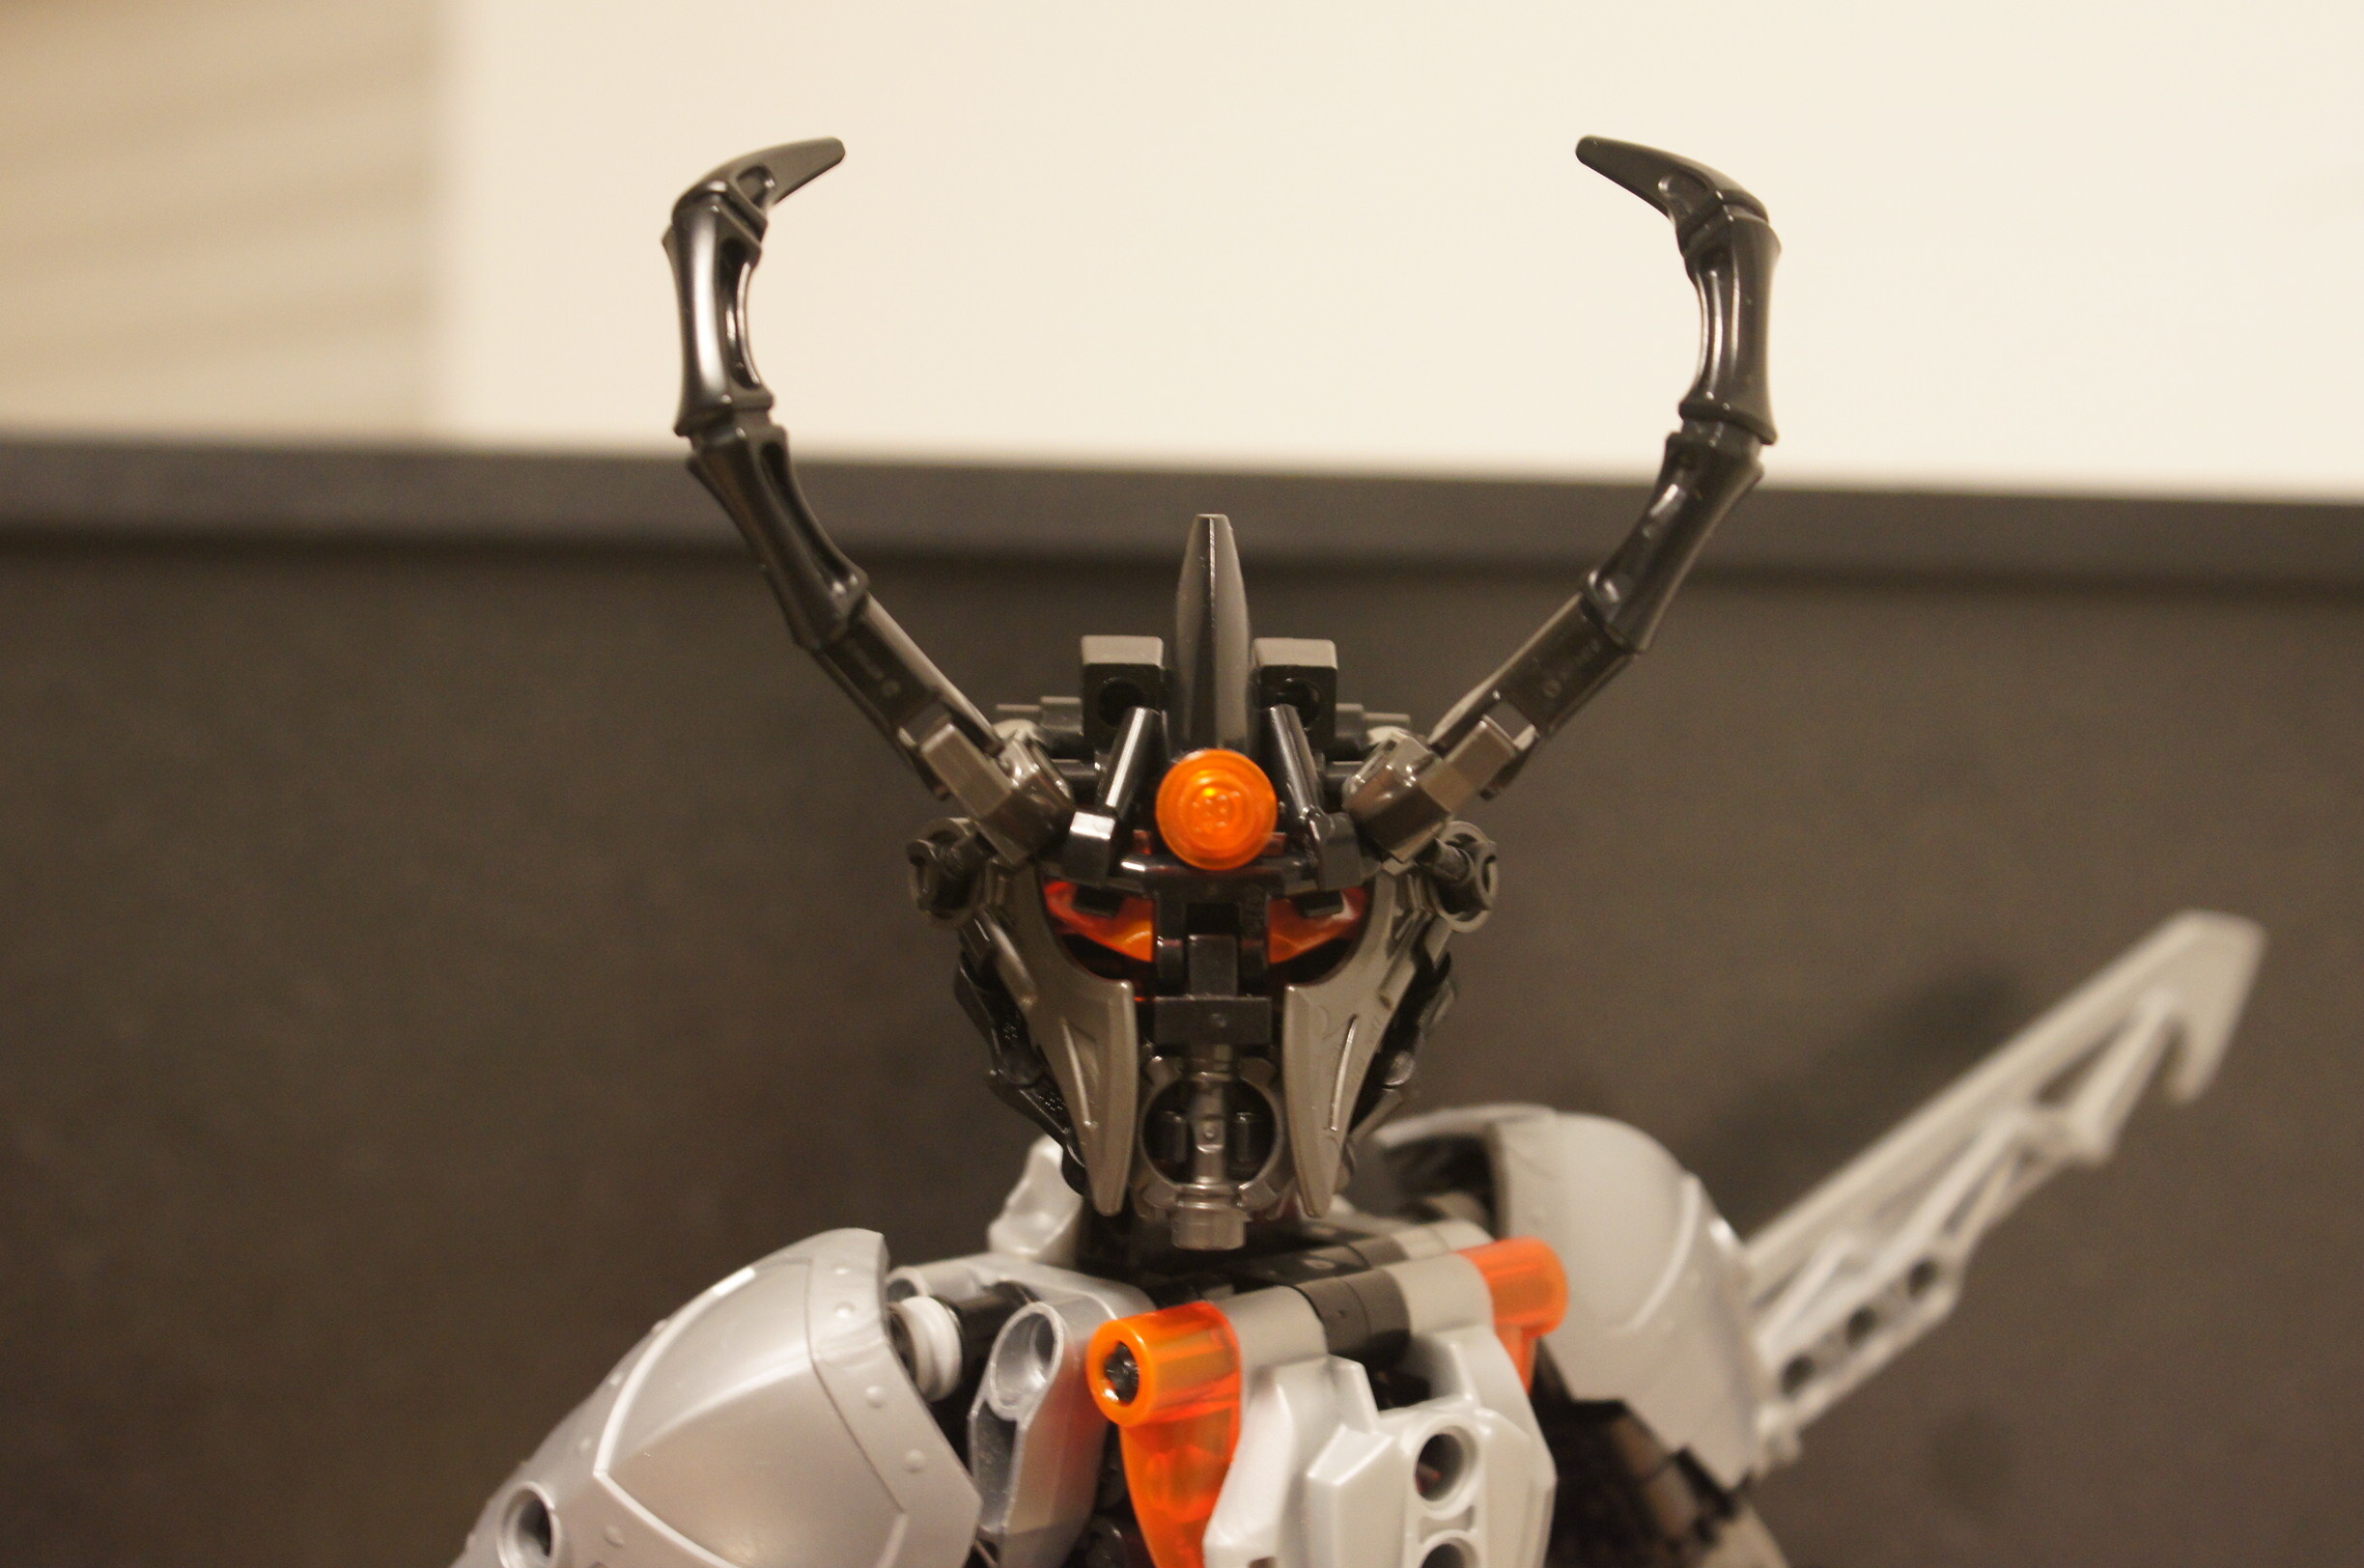
I tried it out. Managed to fill the gap at the “nose” somewhat, and also managed some kind of chin that actually attaches the whole middle section now.
And for the glory of the construction:
So which one do you prefer? Though I guess mainly it’s up to @MysteryMuffin

That’s definitely one of the first things I’ll try. But I’ll only touch accents once the cloak is done.
11 Likes
I think I’m more a fan of the second design, with the lightsaber hilt.
7 Likes
While the lightsaber hilt build is definitely a NPU, and even gives off a classic Bionicle “mouth” look, I think the Exo-Force arm is just a far cleaner look, and blends perfectly with the blades on the cheeks.
8 Likes
Wow this head is looking great, I’d probably go with the second design personally
6 Likes
Cloak design, I suppose. Hopefully this works out as intended. Designing the cloaks is always such a tough task…

(the one on checkered paper is the front part, and will of course be mirrored)
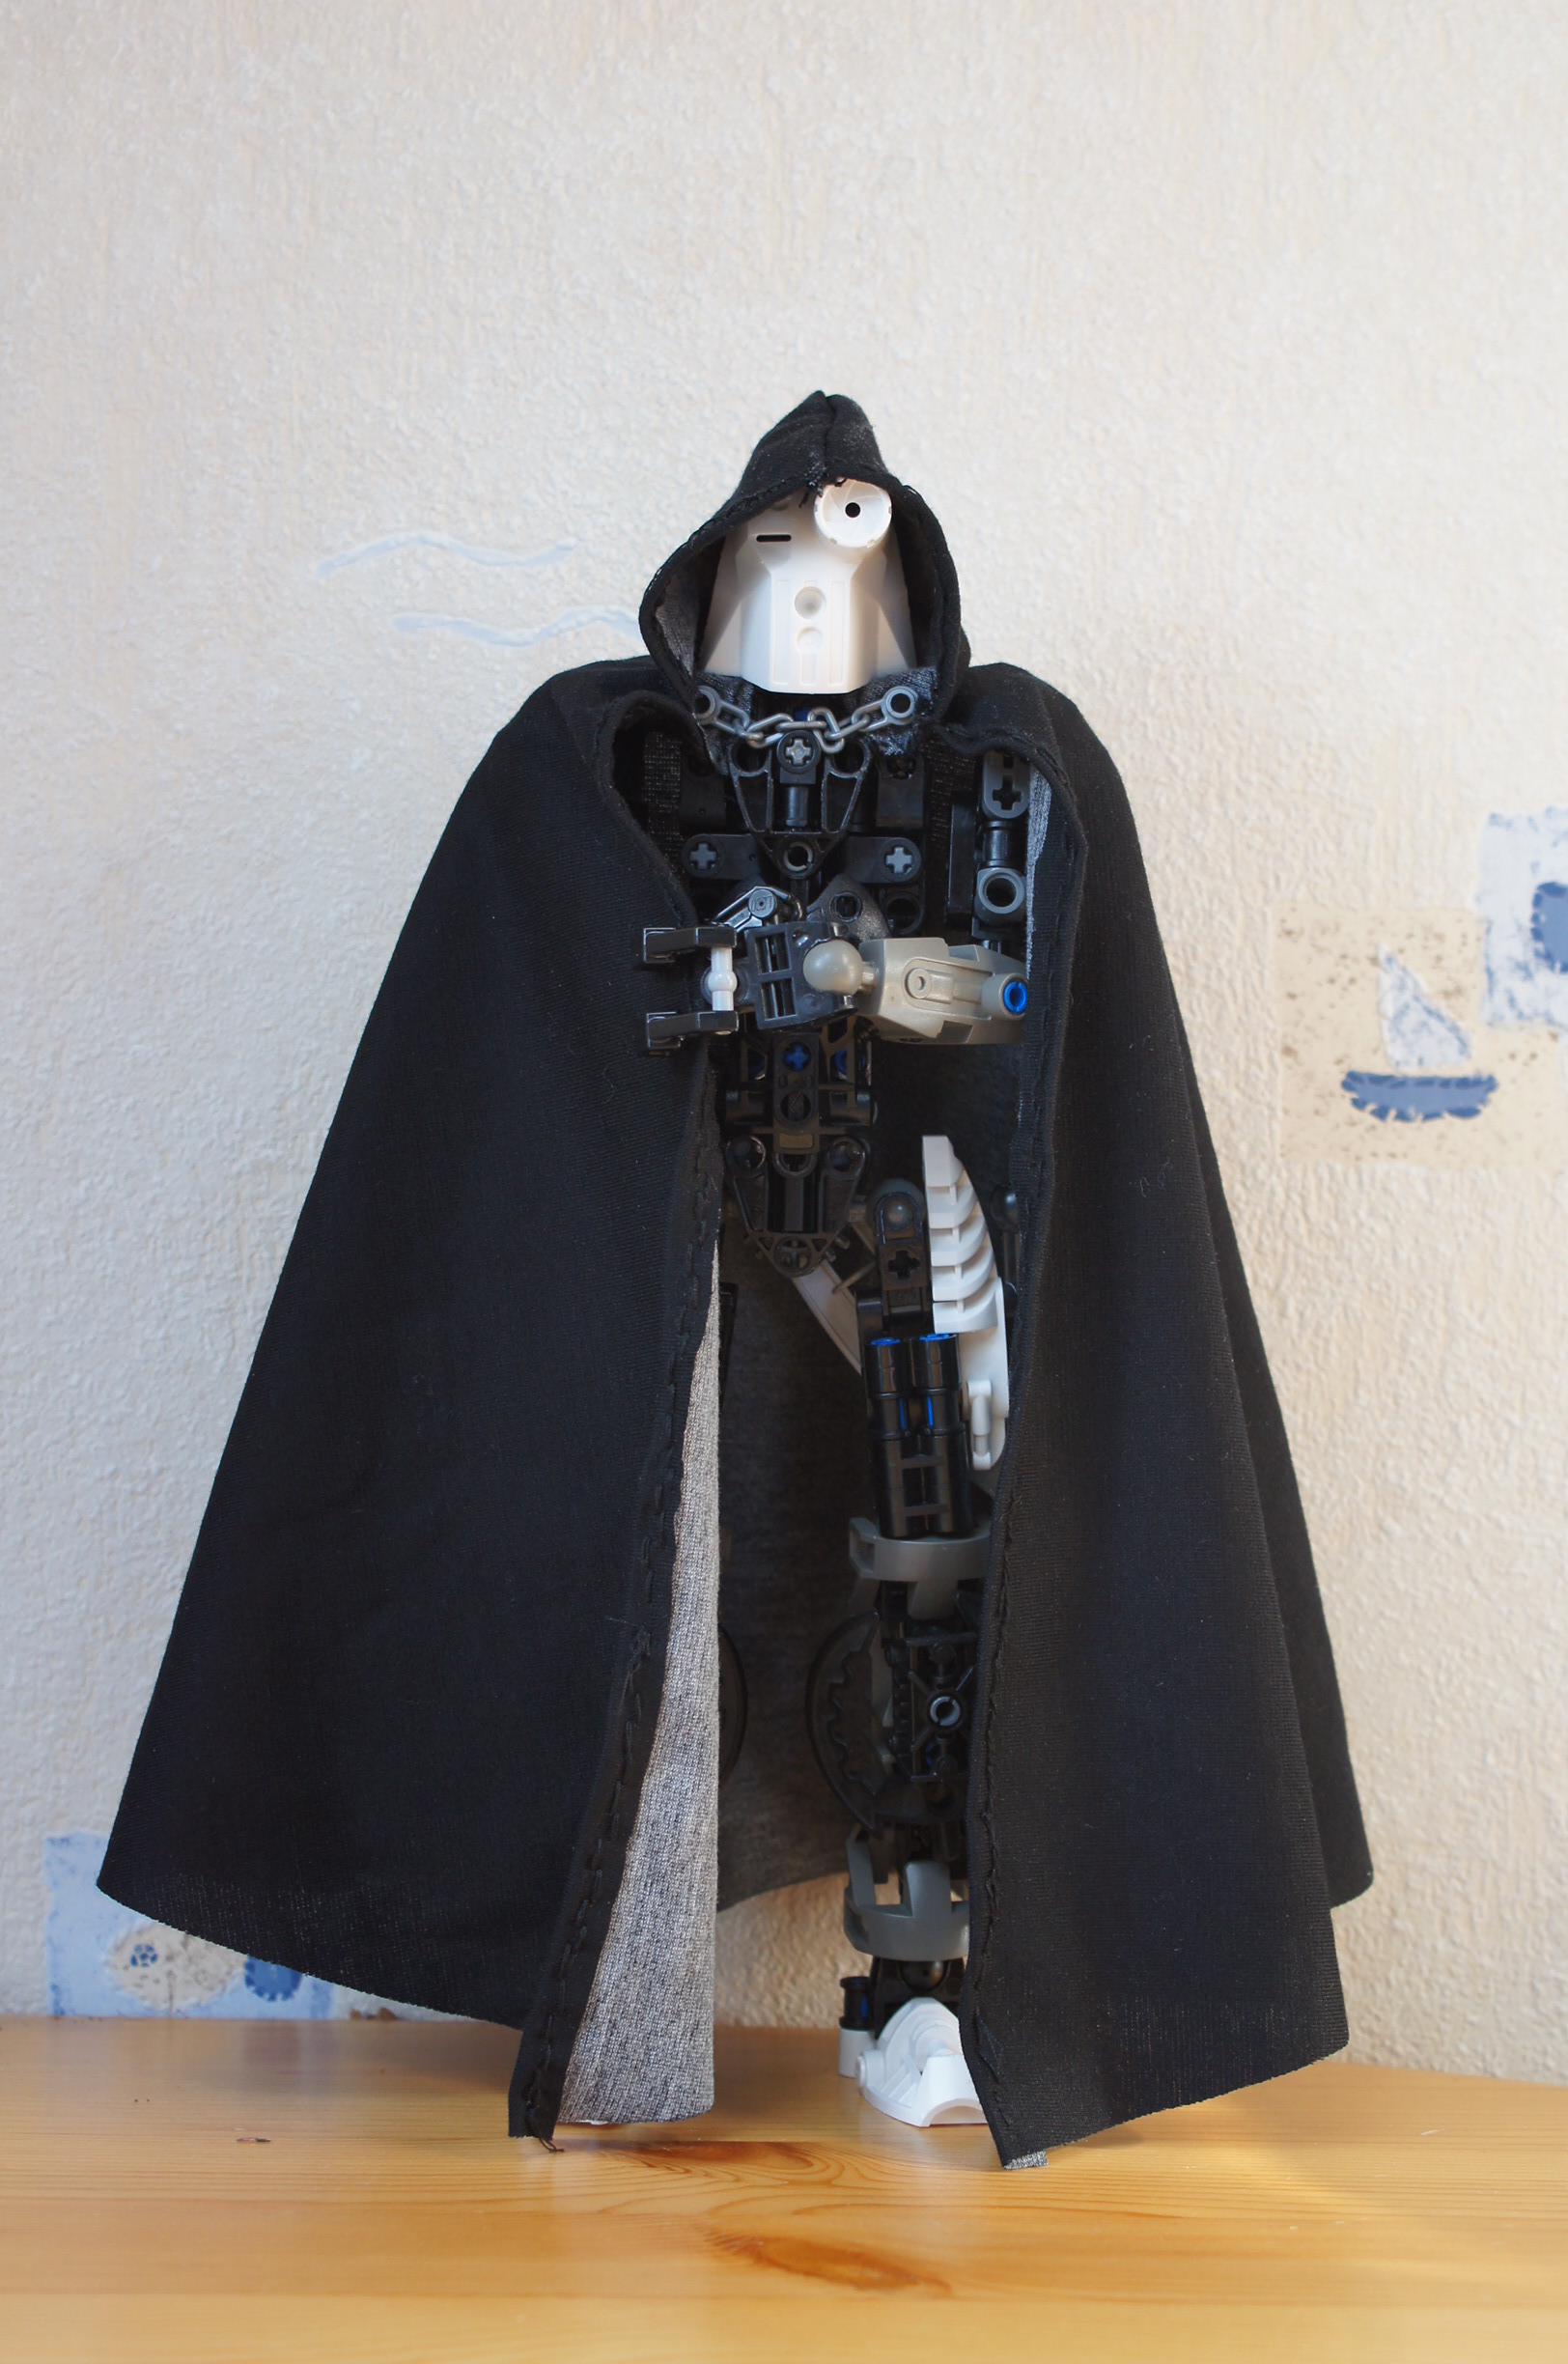
Also thinking of maybe adding a hood…
5 Likes
Would a hood even work with the horns?
6 Likes
The middle “horn” is my main concern.
I’m currently thinking that either a hood will look really good or it will look awful because it can’t be pulled far enough forward.
One of the two. Gonna have to see.
4 Likes
You could always just poke a hole in that part of the hood, and have the middle horn stick out. And as someone who just recently put a hood on a horned MOC, the two side horns will look great with a hood
6 Likes
Always wondered how you put a hood on a cloak
6 Likes
Well, basically a hood is made from two pieces which are sewn together at the top and back and then the bottom attaches to the collar of the cloak.
Based on that approach this is possibly a little more complicated than it seems:
Though I agree with the general idea. I can’t poke a hole in the middle since that’s where both hood halves will be sewn together, so what I’d have to do is calculate the exact spot where I want that horn to stick out and leave a hole there preemptively.
8 Likes
I don’t think that would be too difficult, you probably wouldn’t even have to cut anything. Since the two pieces meet in the middle, you could sew a few points together (Both ends, and one in between) put the hood on to see where things line up. Mark where the horn sticks through, and just don’t see that spot shut
5 Likes
Decided to add red to the edges of the cloak. One side done so far. A lengthy process and there’s much room for improvement in the stitching… Gonna have to see if I can get the other side to look better. Though if not looking too closely, it gets the job done, I think.

12 Likes
Love it!
6 Likes
Lookin’ shnazzy
6 Likes
all your custom heads are really cool, I feel your torsos are bit t-shaped at times. I used to tinker around with a bunch of heads in the past but then fell into the custom masks trap now I have many wips, now I want to try again, you inspired me. Also keep the rakhshi head and spike for you krika’s upper arms, it adds a nice tapering effect, although please make his shoulders about 2l wider on each side to accommodate for the larger custom head and to adhere to the broad shouldered yet lanky look of the set.
5 Likes
Thank you, glad to inspire!
For Krika you are a few months too late, unfortunately. ![]()
The trouble with wide shoulders, which is why I rarely even go for Inika-build width is twofold:
a) unless doing custom hips (which I am myself not fond of), it will make torsos look either even more T-shaped or triangular.
b) designing a chest piece becomes more difficult the more area you have to cover. I usually prefer single-piece chestplates, and those tend to not be super broad.
There’s a third point, too, which I guess hinges on personal taste - very braod shoulders tend to look a bit freaky on humanoid builds in my eyes. But these are of course not humans but Bionicle characters, so making them look “freaky” is absolutely valid if one desires.
As to the T-shaped torsos you addressed - I think there’s only so much to be done for humanoid builds in my building style which doesn’t incorporate a lot of system pieces and places value on secure attachment.
The problem I see more and more is rather “flat top syndrome” which is created by the angular nature of technic pieces combined with narrow shoulders. There’s simply no room most of the time to have some shoulder-neck gradient. I’m trying to mask it as well as possible, but if I’d want to fix it, I’d have to consider differnt ways to attach shoulder joints. Possibly at an angle. Which then becomes also a question of poseability and stability, especially on the scale I’m normally working at.
And if you want to try building custom heads yourself, maybe three tips I can give:
- Keep in mind that as with everything, designing custom heads is a process of learning/training. Looking back at my first custom heads, they hardly did more than get the job done.
- If you are building with physical pieces, make sure to accumlate a large variety of small pieces in various colours. Helps with experimenting with differnt options.
- For me it usually works best to pick a piece/a build made from a few pieces for which I have an idea where to place it on the head. Starting from that, one can then construct the rest of the head around it.
6 Likes